Sourdough Sandwich Bread
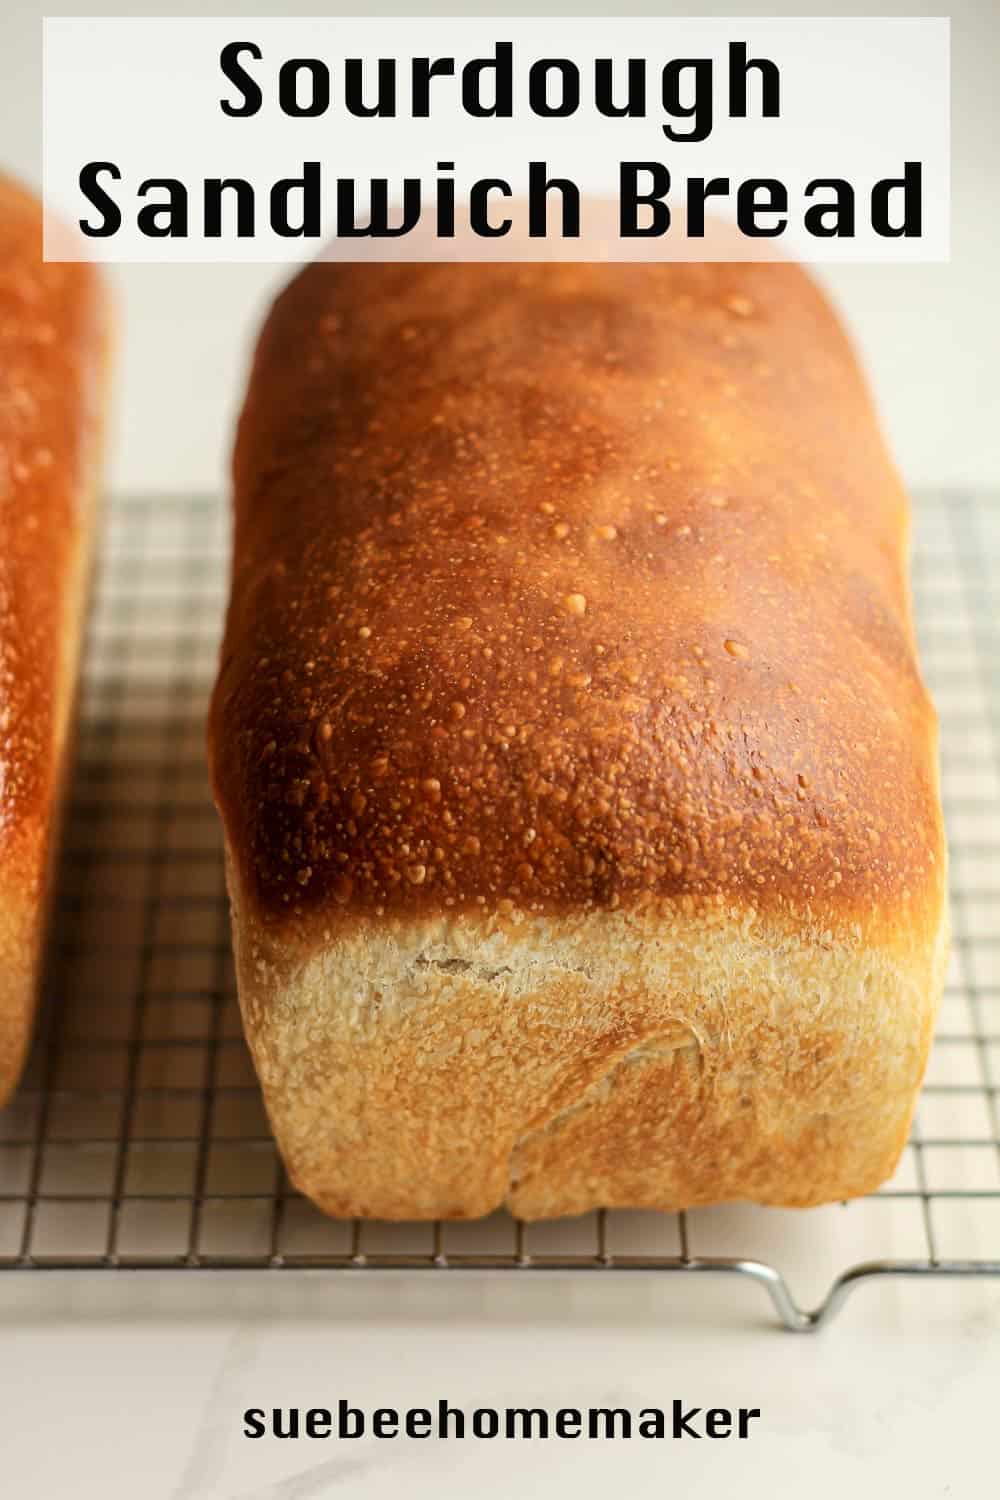
Sourdough Sandwich Bread uses a bubbly sourdough starter to create the best everyday sandwich bread. After reading my sourdough baking tips, you’ll soon be on your way to amazing avocado toast, sandwiches, paninis, or just plain bread with butter!
Best Sourdough Bread
It’s true. They hype is real and sourdough REALLY IS the best. I’ve been making it for a year and a half now, and we always have some in the freezer. At this very moment, I have two whole loafs, one loaf sliced in half, and two freezer bags of sliced sourdough in my freezer.
Not to be dramatic here, but my sourdough journey started in May 2020. It all began with my son who came home from college with his own starter. I quickly decided to join him in the adventure and started my own. When I began baking with mine, he let his go. And the rest is history!
In case you didn’t know, my starter is named Gertie after a naming contest I held. She’s a lovely starter, and has been alive and well for well over a year!
Make your own sourdough starter at home with just a few simple ingredients using Sourdough Starter Basics. In just over a week’s time and a little bit of patience, you’ll be ready to use your active starter to make the best sourdough bread!
Ingredients Used
- Bubbly Starter – The starter is THE most important part of sourdough bread making. It takes a little time, but you will be rewarded over and over again.
- Filtered Water – Use filtered water, either out of your refrigerator filter system or use bottled water. The water should either be at room temperature or slightly warmed before adding it to the sourdough process.
- Sugar – Use granulated sugar for a little sweetness to this type of bread.
- Oil – I recommend a vegetable or canola oil.
- Flour (Unbleached) – For this recipe, use a combo of unbleached bread flour and all-purpose flour. Organic is normally unbleached, btw.
- Salt – I use fine sea salt.
How to make Overnight Sourdough Bread
Step 1
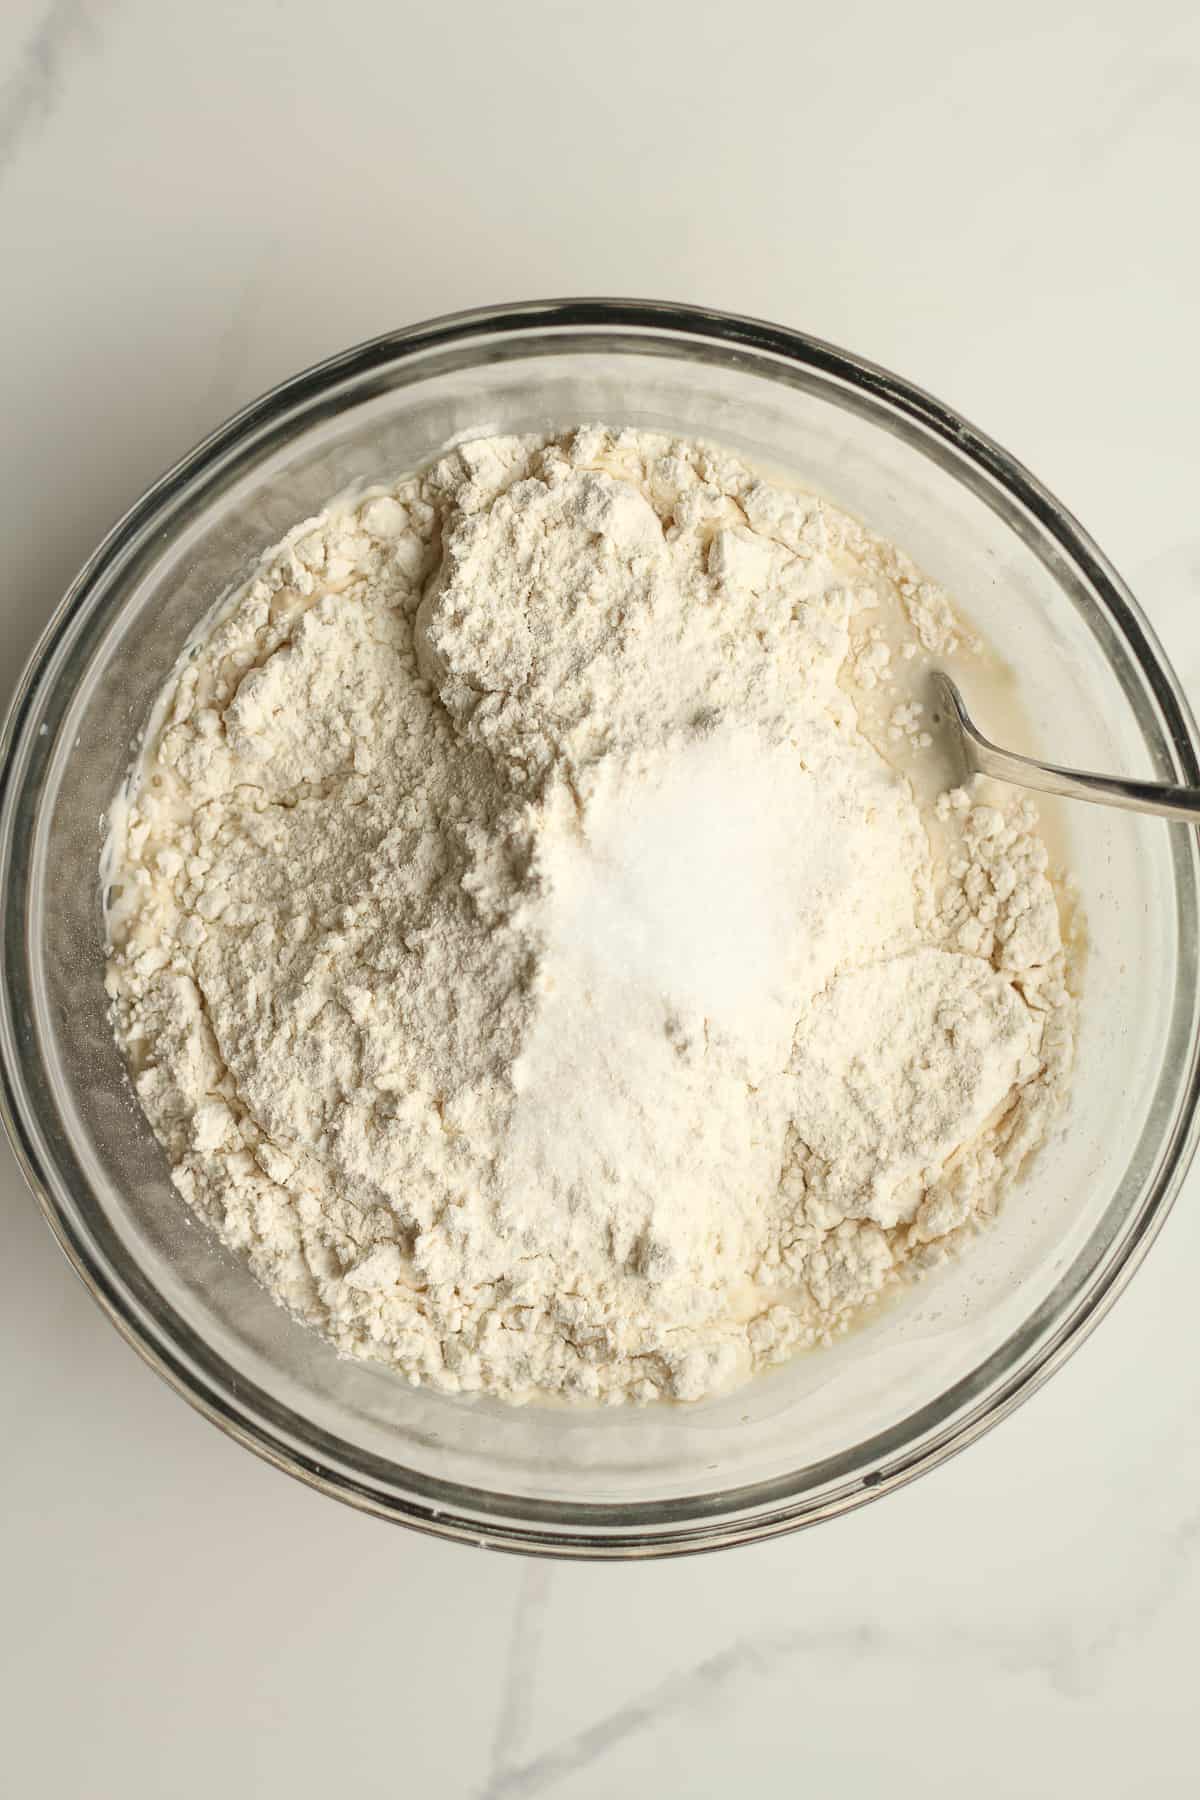
Carefully measure out all the ingredients and combine in a mixing bowl. Use a fork and stir.
Step 2
Then use your hands to bring the ingredients together. It will look shaggy. Cover with a damp towel and let it sit for 30 minutes. (Be sure to set a timer.) This is the AUTOLYSE.

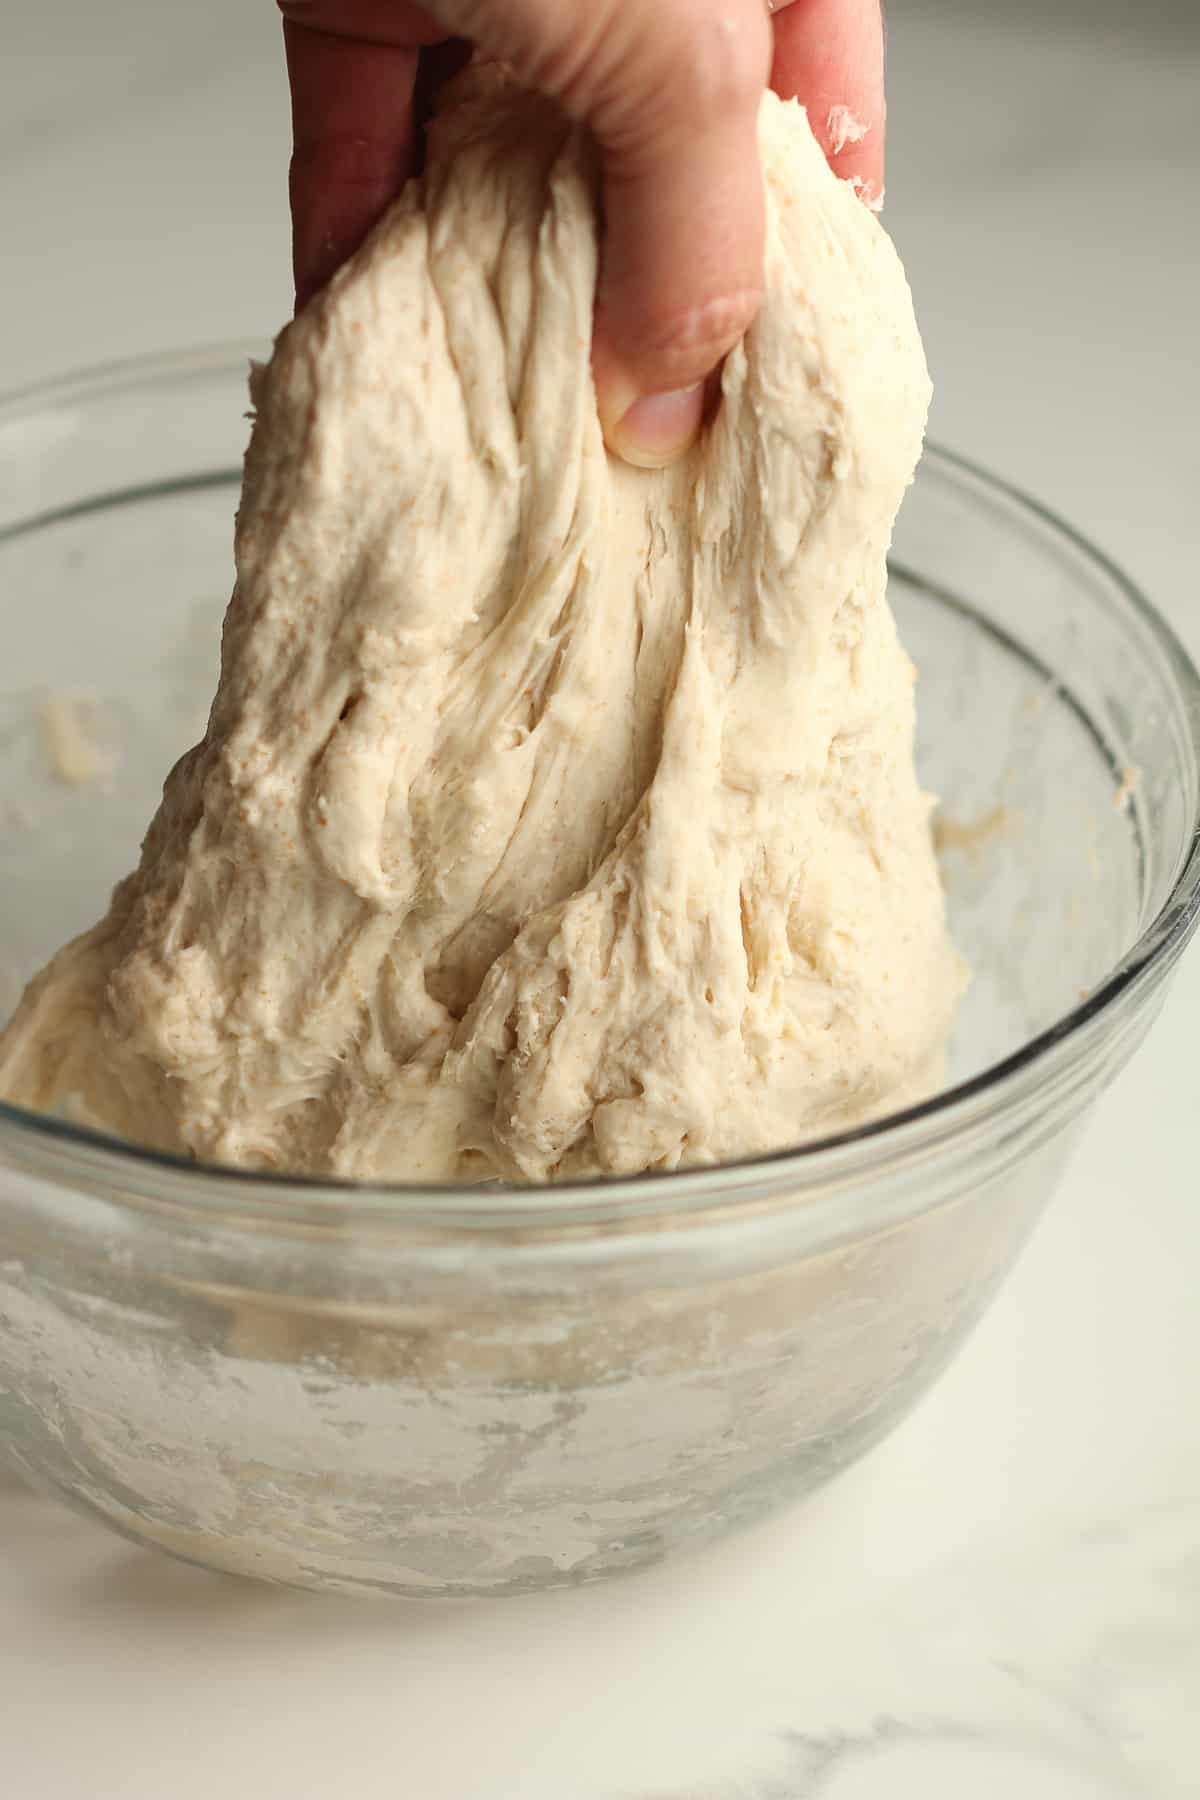
Step 3
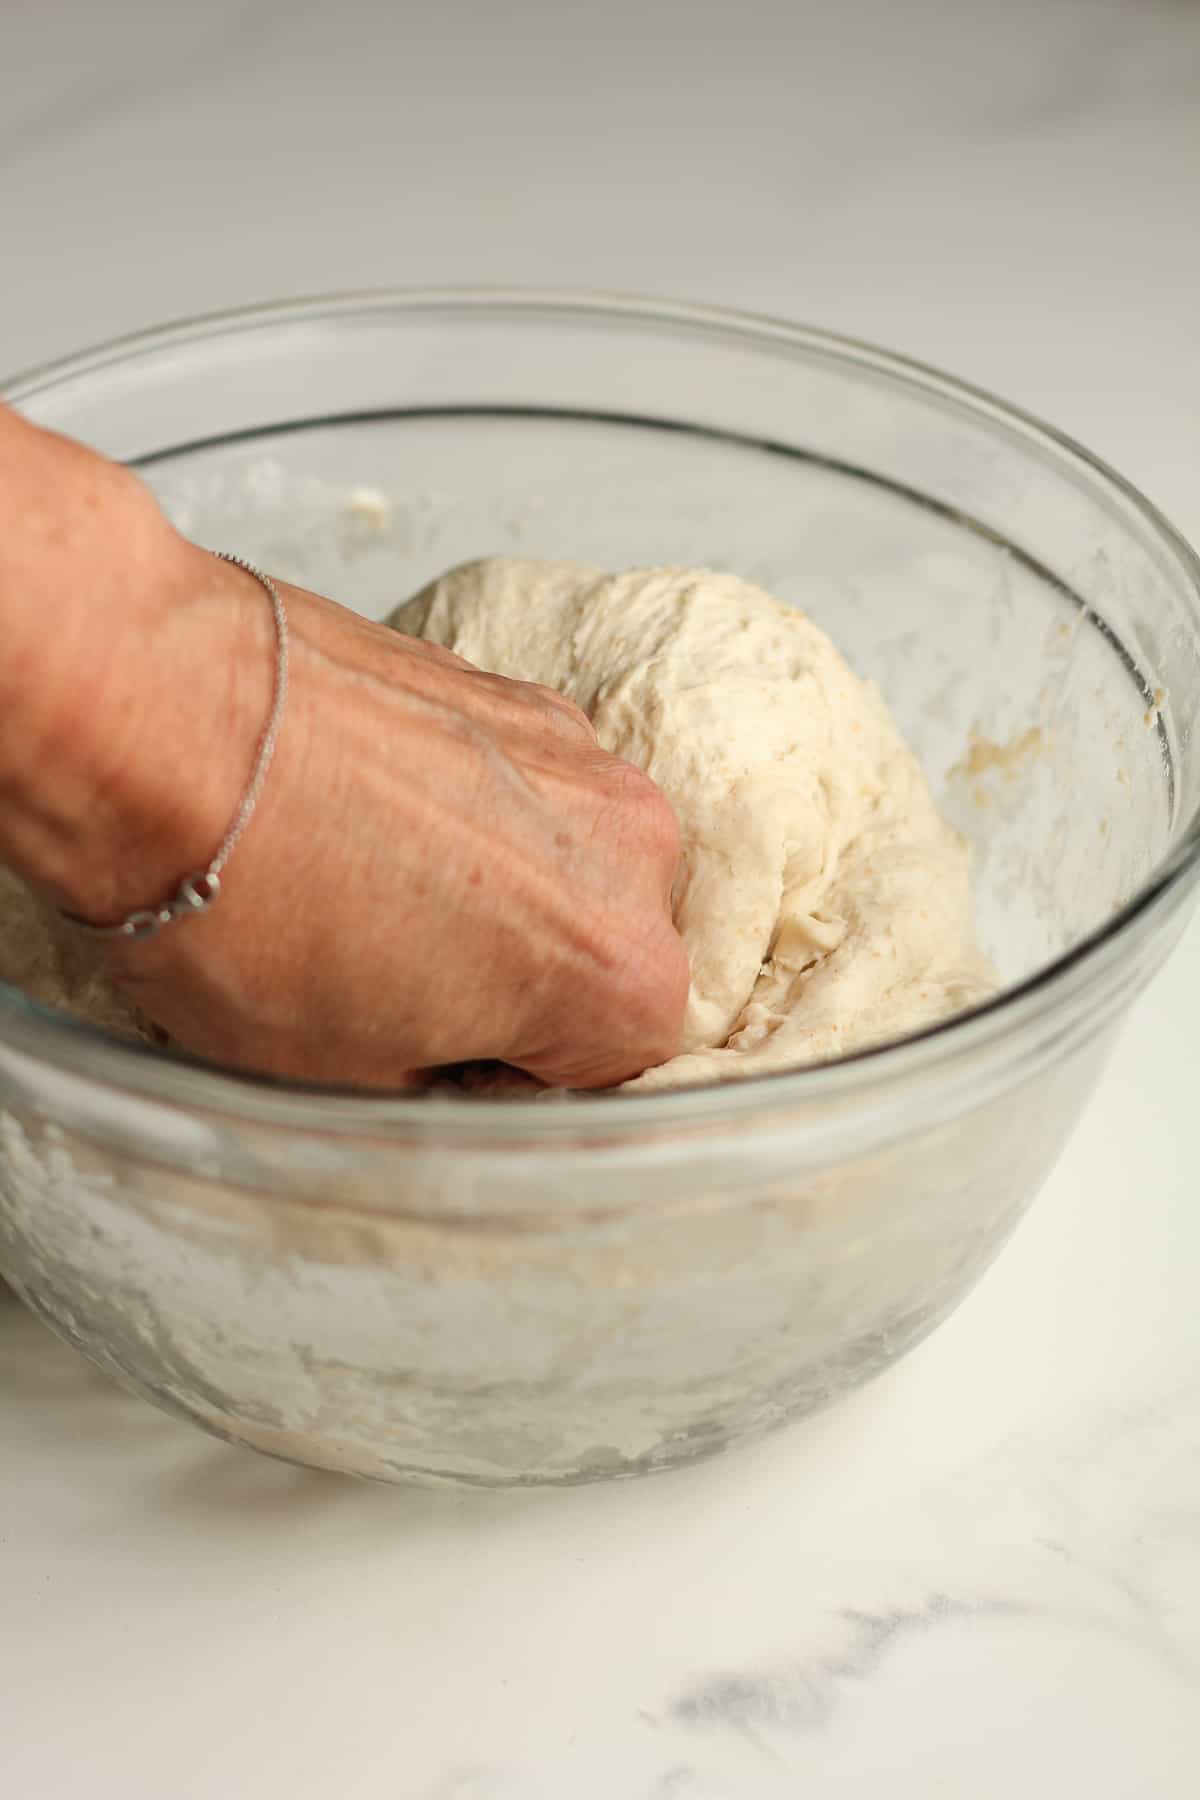
After 30 minutes, start the stretch and folds. Use your hand and lift the dough up on one side, stretching it upward, and then punch it into the center of the dough. Turn the dough and repeat. Continue this process for about one minute. This is the STRETCH AND FOLDS. Form the dough into a smooth ball, and place the towel back on the bowl.
ADDITIONAL STRETCH AND FOLDS: I recommend doing additional stretch and folds if time permits. Do these every 30 minutes for 3-4 more times to further develop the gluten structure.
Step 4
Let the dough rise for 6-8 hours. It should almost double in size and appear soft on top. Small air bubbles may appear as well. This is the BULK RISE. (During this bulk rise, I often do additional stretch and folds during the first hour.)
To avoid getting a crusty layer on the dough during the bulk rise, make sure the bowl is large and the towel is damp. You can also add a light coating of oil over the top of the dough, especially if you are letting it sit out overnight.
Depending on the time of day, you can prepare the bread for baking. I normally place the dough into my refrigerator overnight, however. (The bulk rise is very flexible. You can adjust the time to work with YOUR schedule!)

Step 5
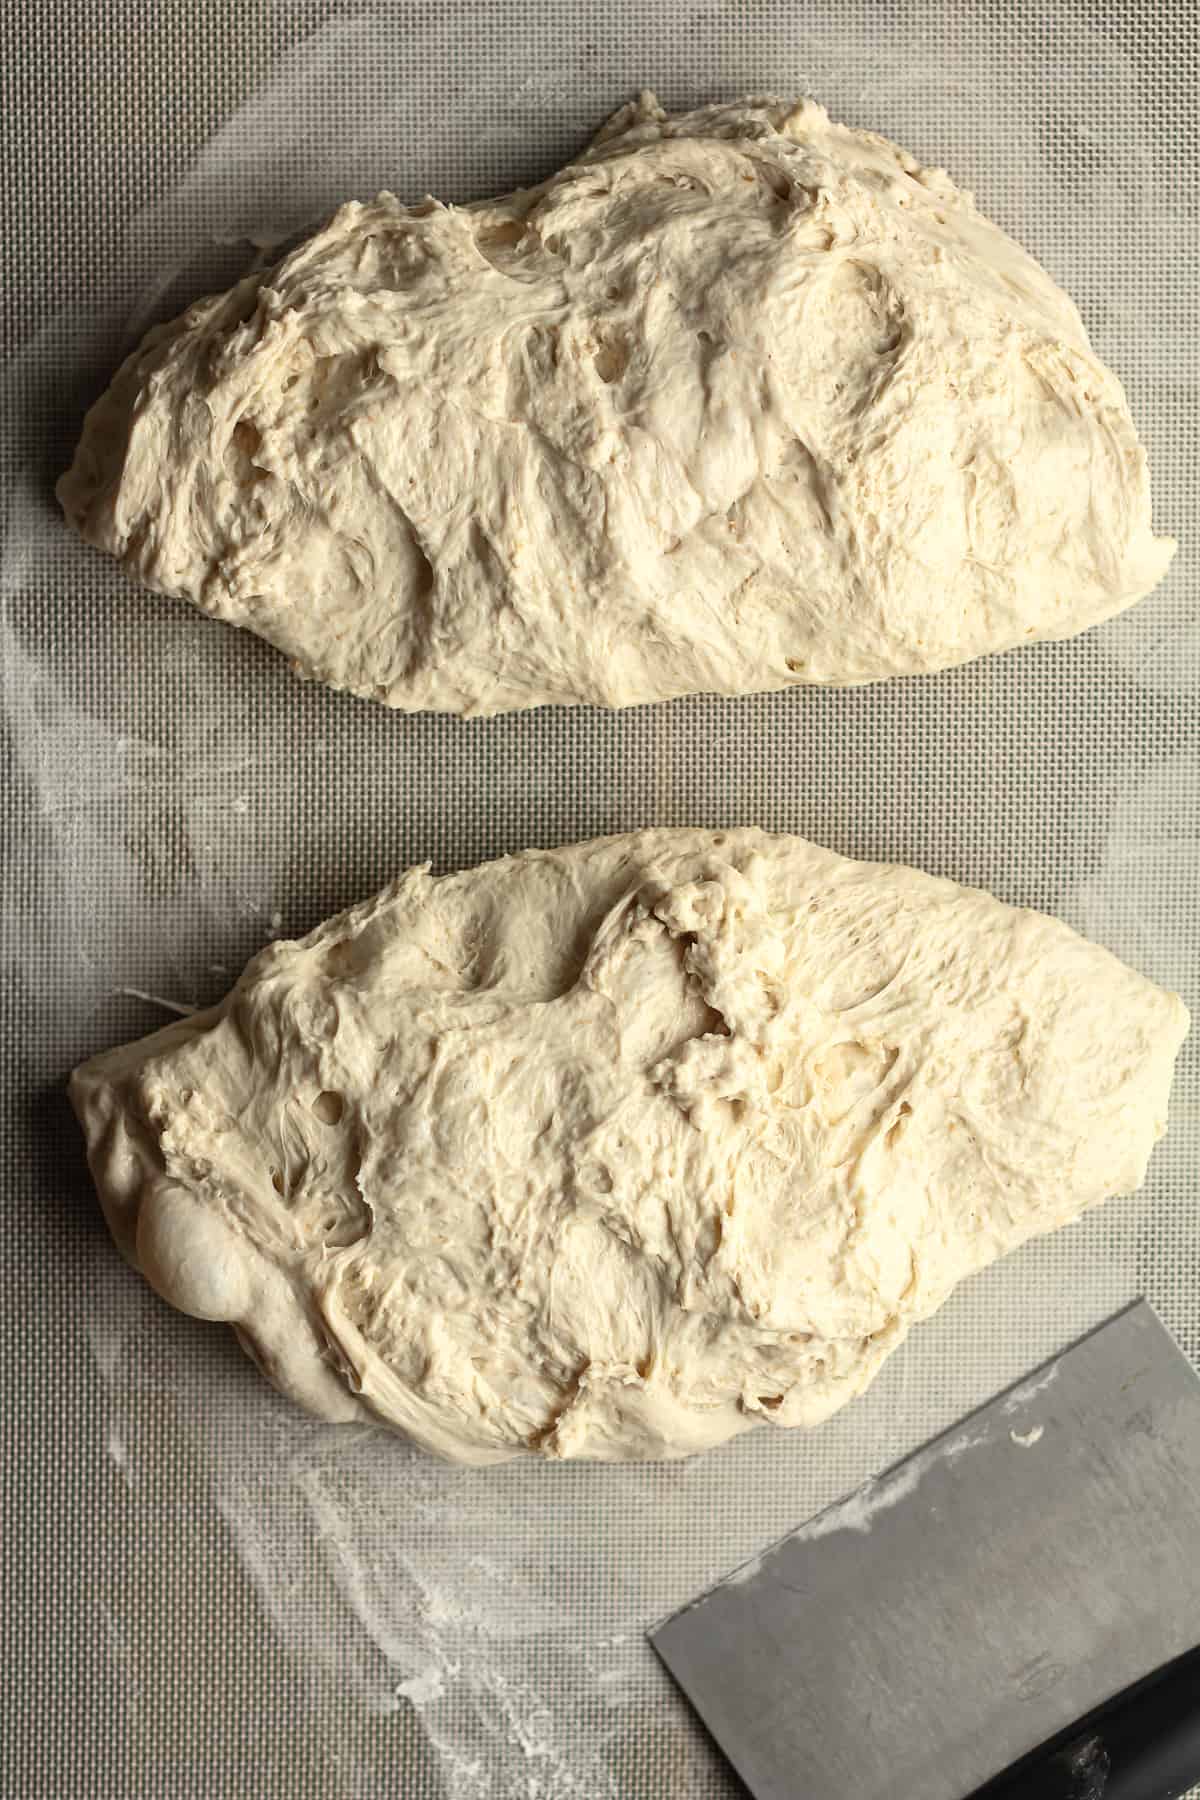
Add a light dusting of flour to a baking mat or clean surface. Remove the dough to the flour and gently form into two oblong shapes for loafs. Don’t punch the dough down because you don’t want to remove all the air. Let dough sit for five minutes.
After five minutes, use your hands to pull the dough toward you, dragging it along the mat to tighten it up. Repeat in the other directions to tighten.
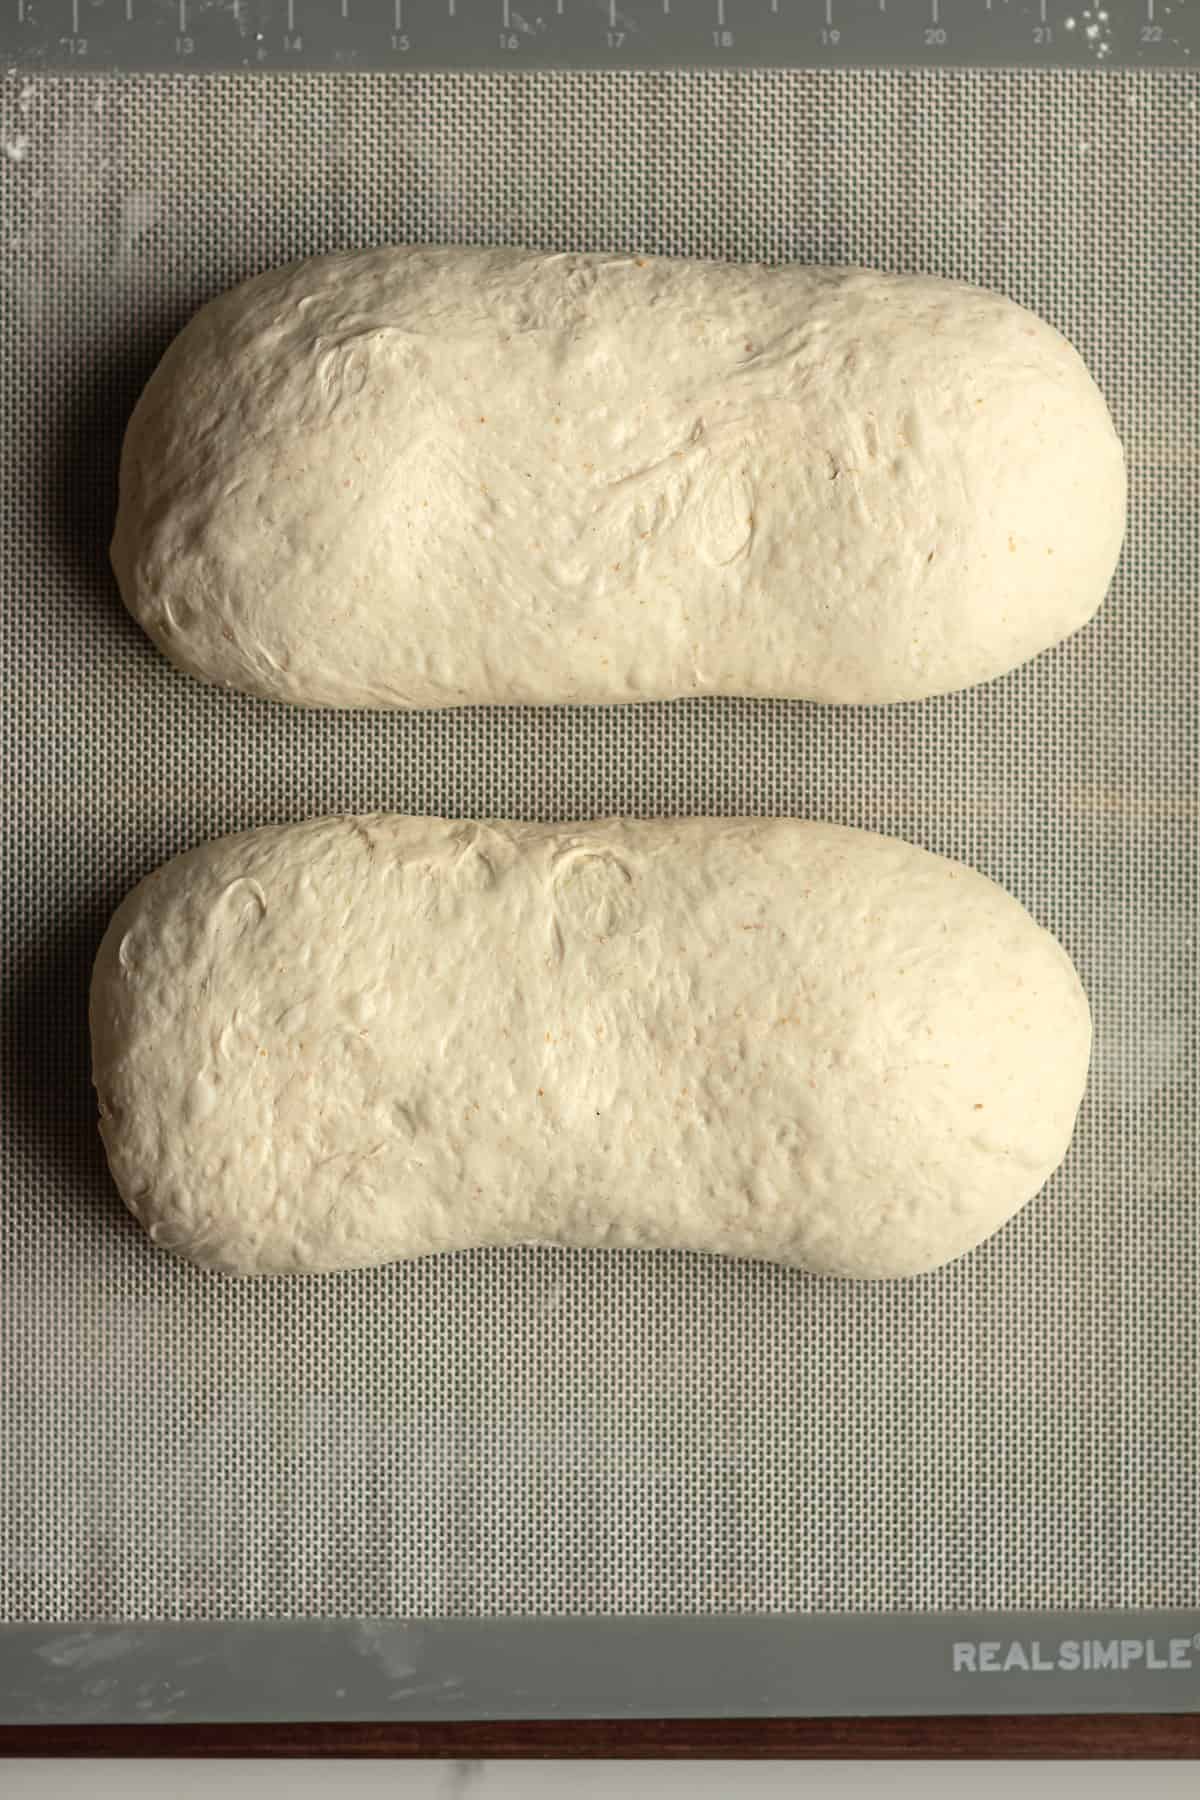
Step 6
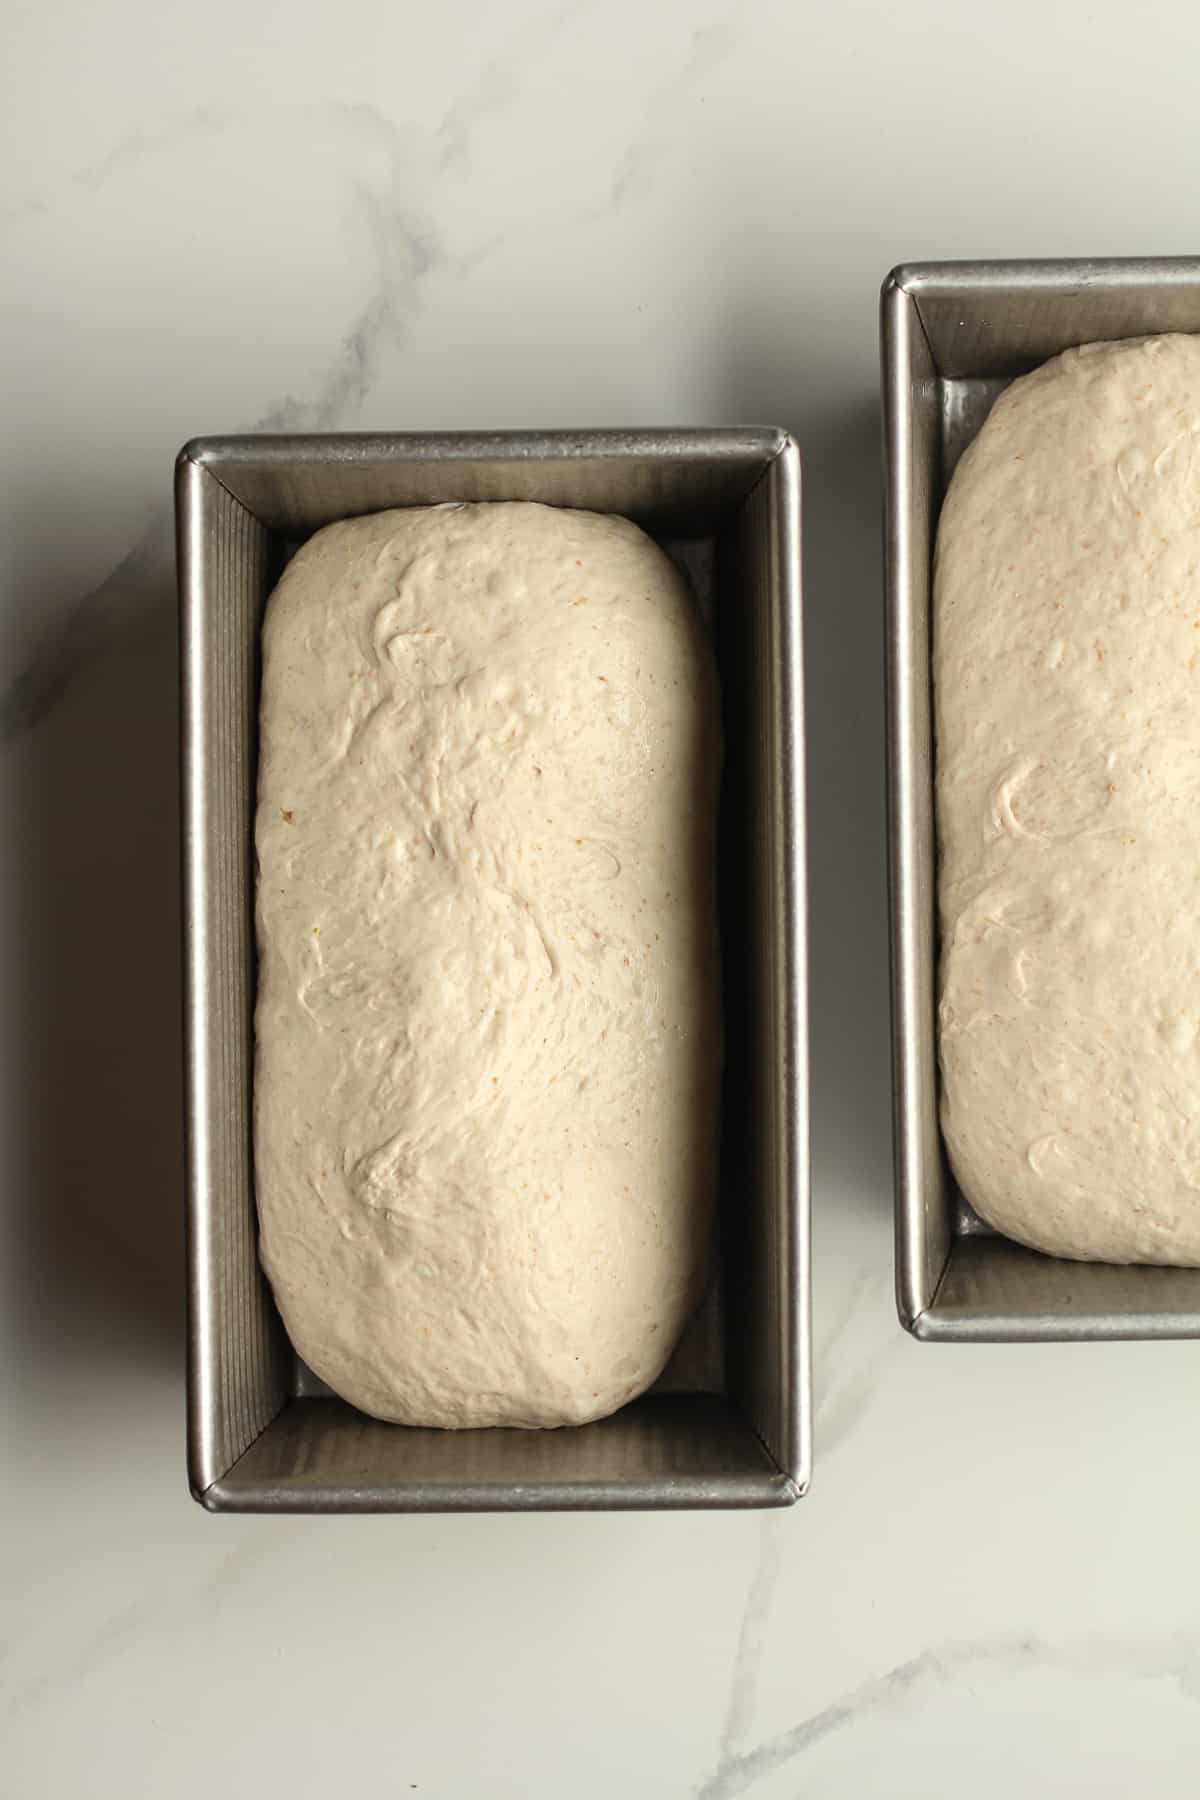
Spray two loaf pans with baking spray. Place the dough inside the pans. Cover with a damp towel and let it rise until doubled again, or so that the bread is just starting to rise above the rim of the pan. This may take 4-10 hours or so, depending on many factors. This is the SECOND RISE.

Step 7
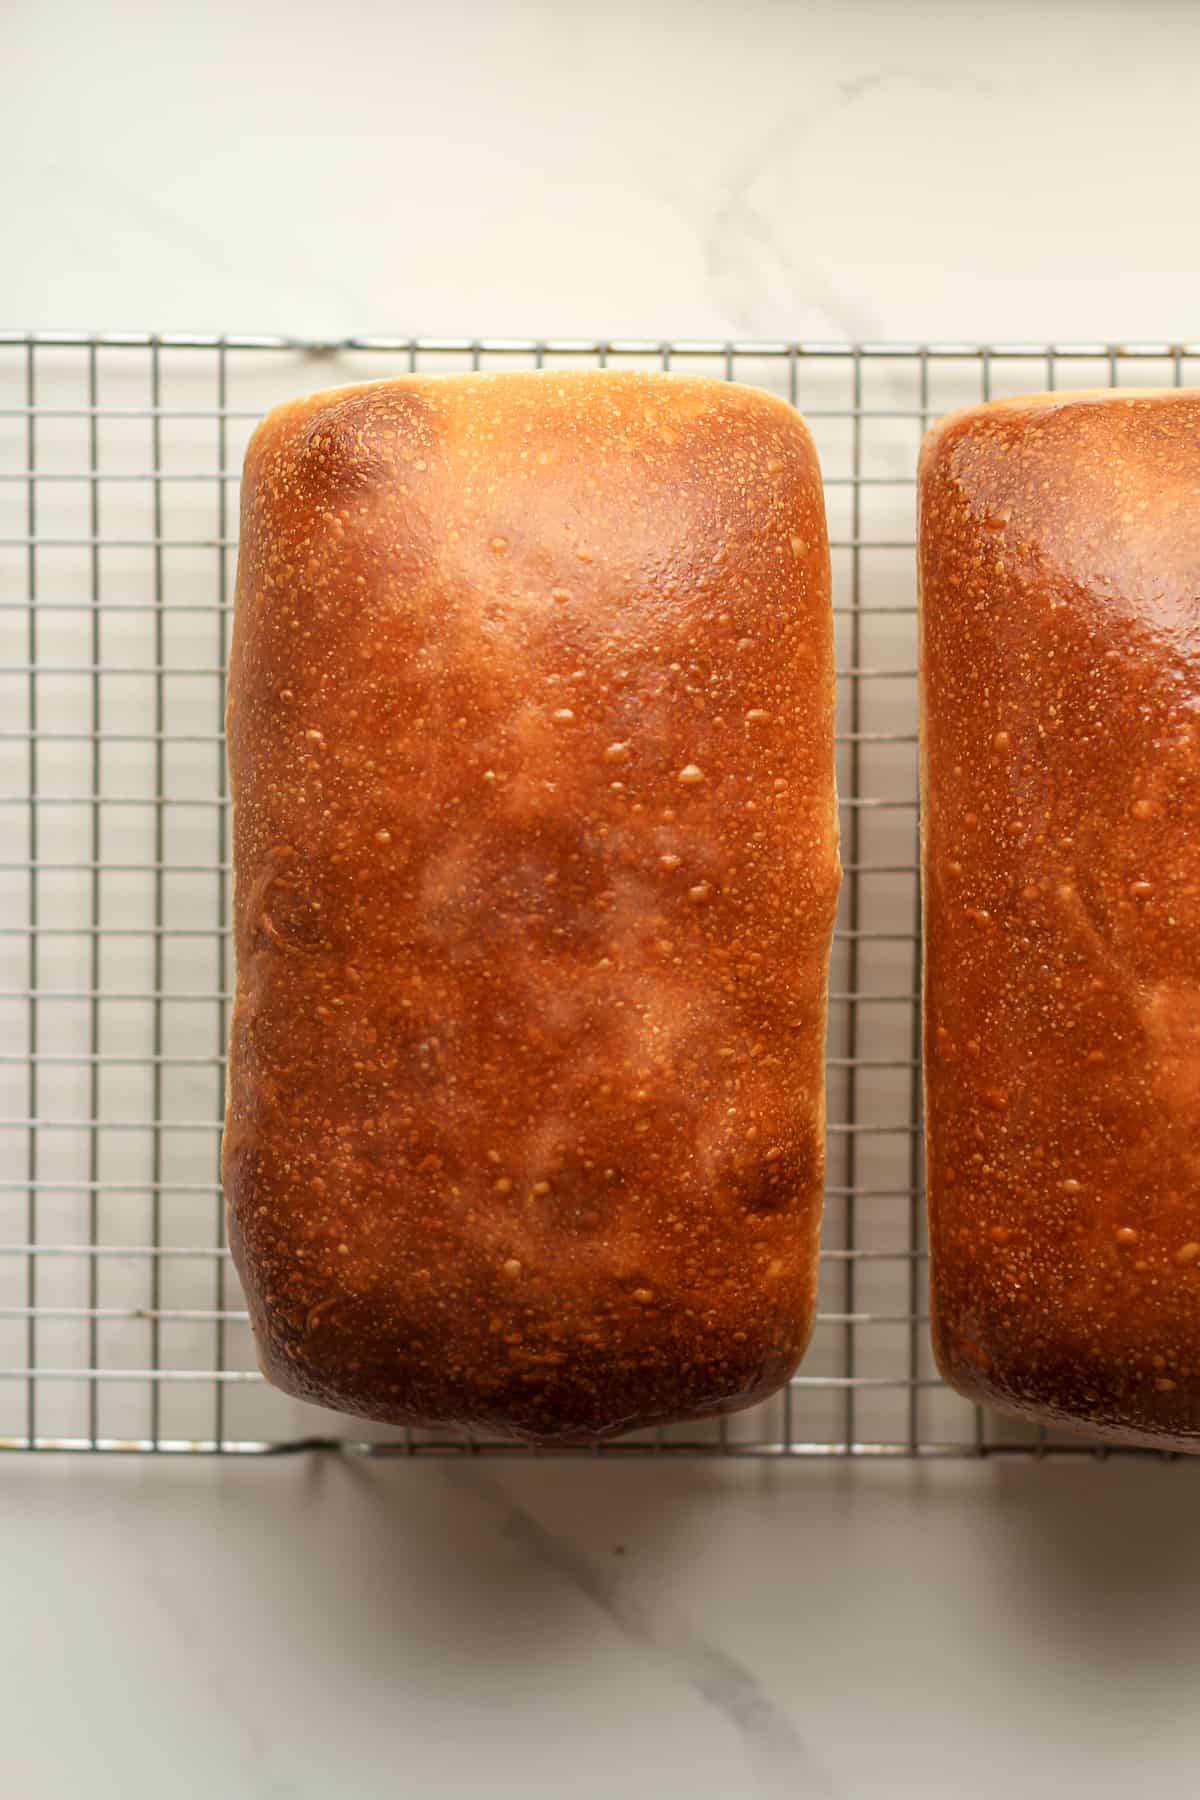
Bake. Preheat oven to 400 degrees. Place pans in the oven and bake for 40-45 minutes. If the bread is getting too dark on top, you can cover them in foil for part of the time.
Step 8
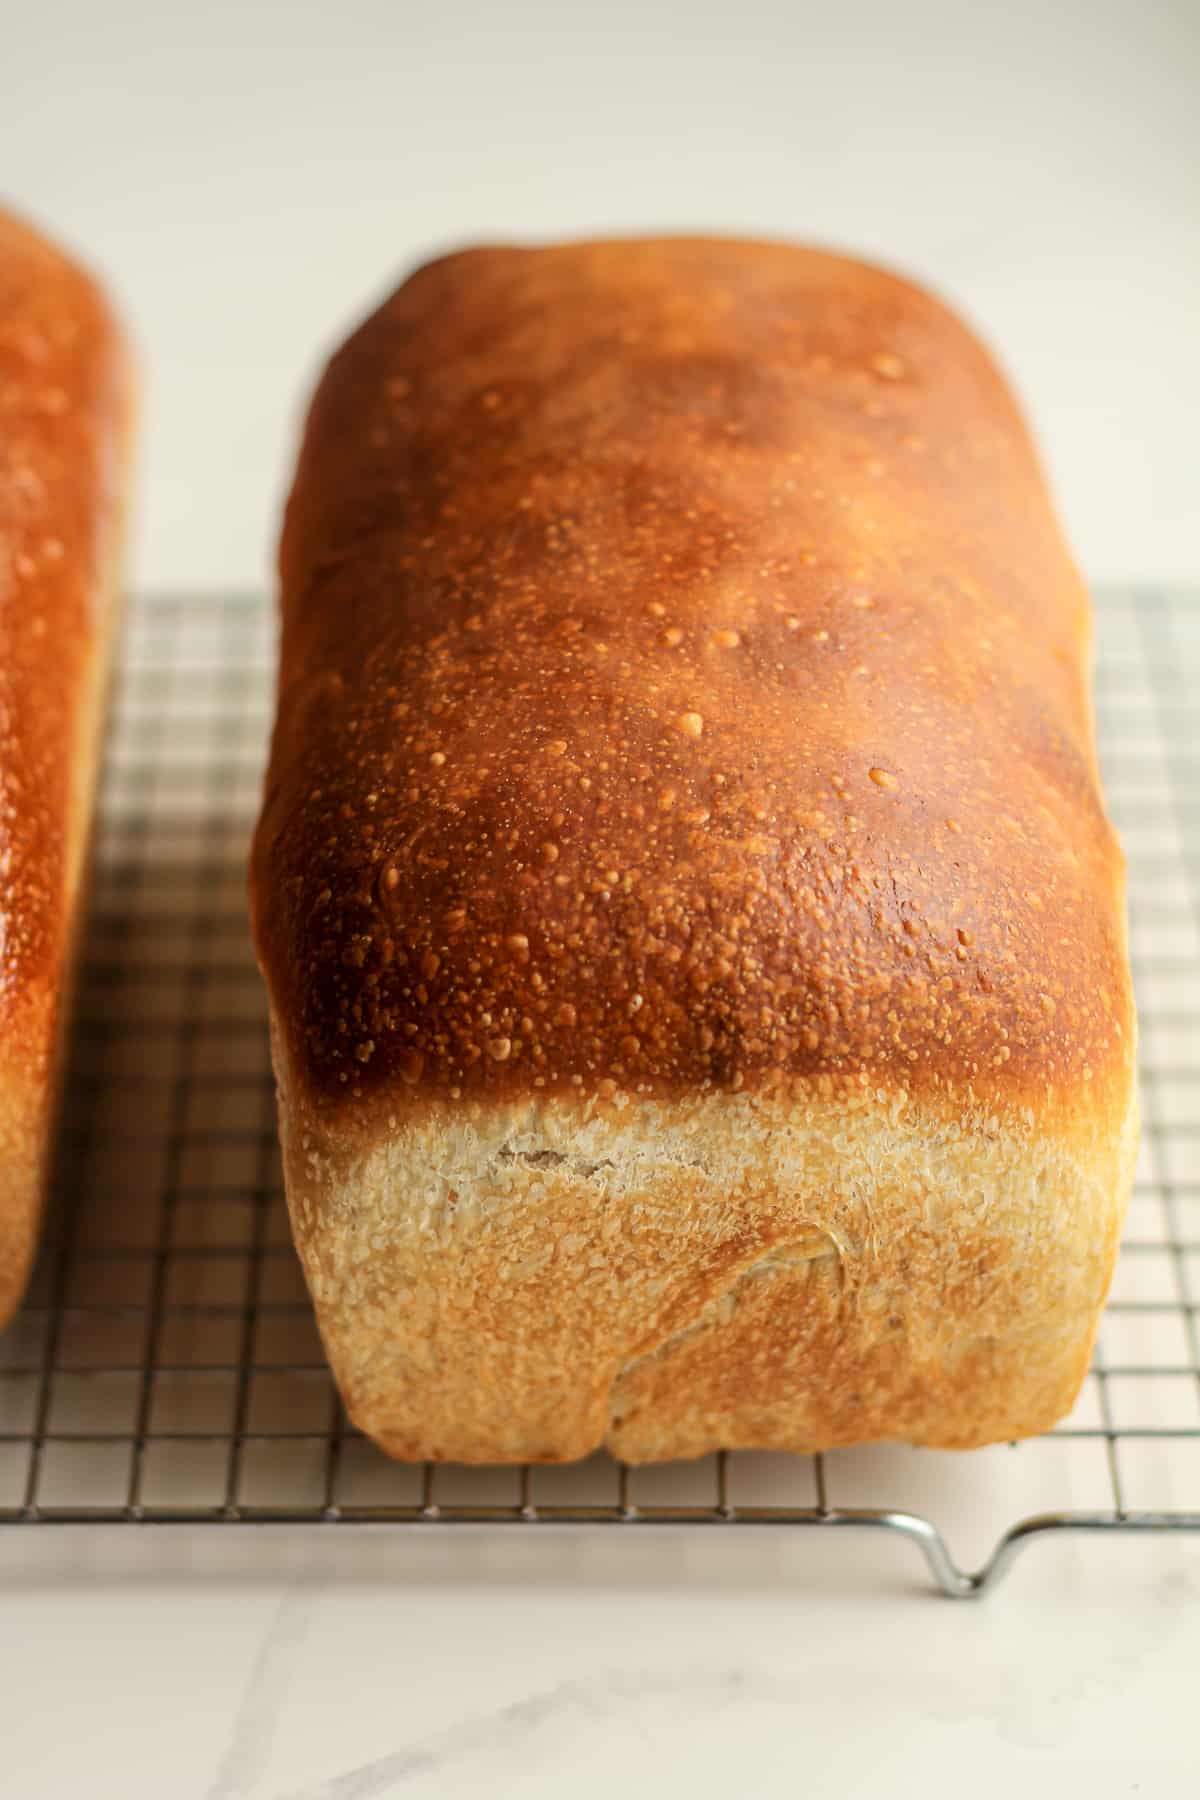
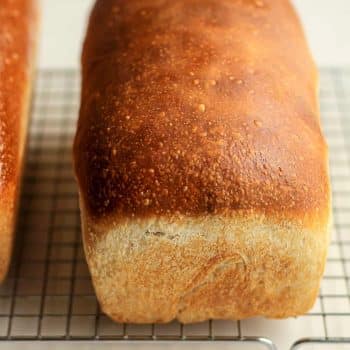
Remove pans and place bread on a cooling rack. Brush some butter on top of the loafs to create a shiny exterior.
Step 9
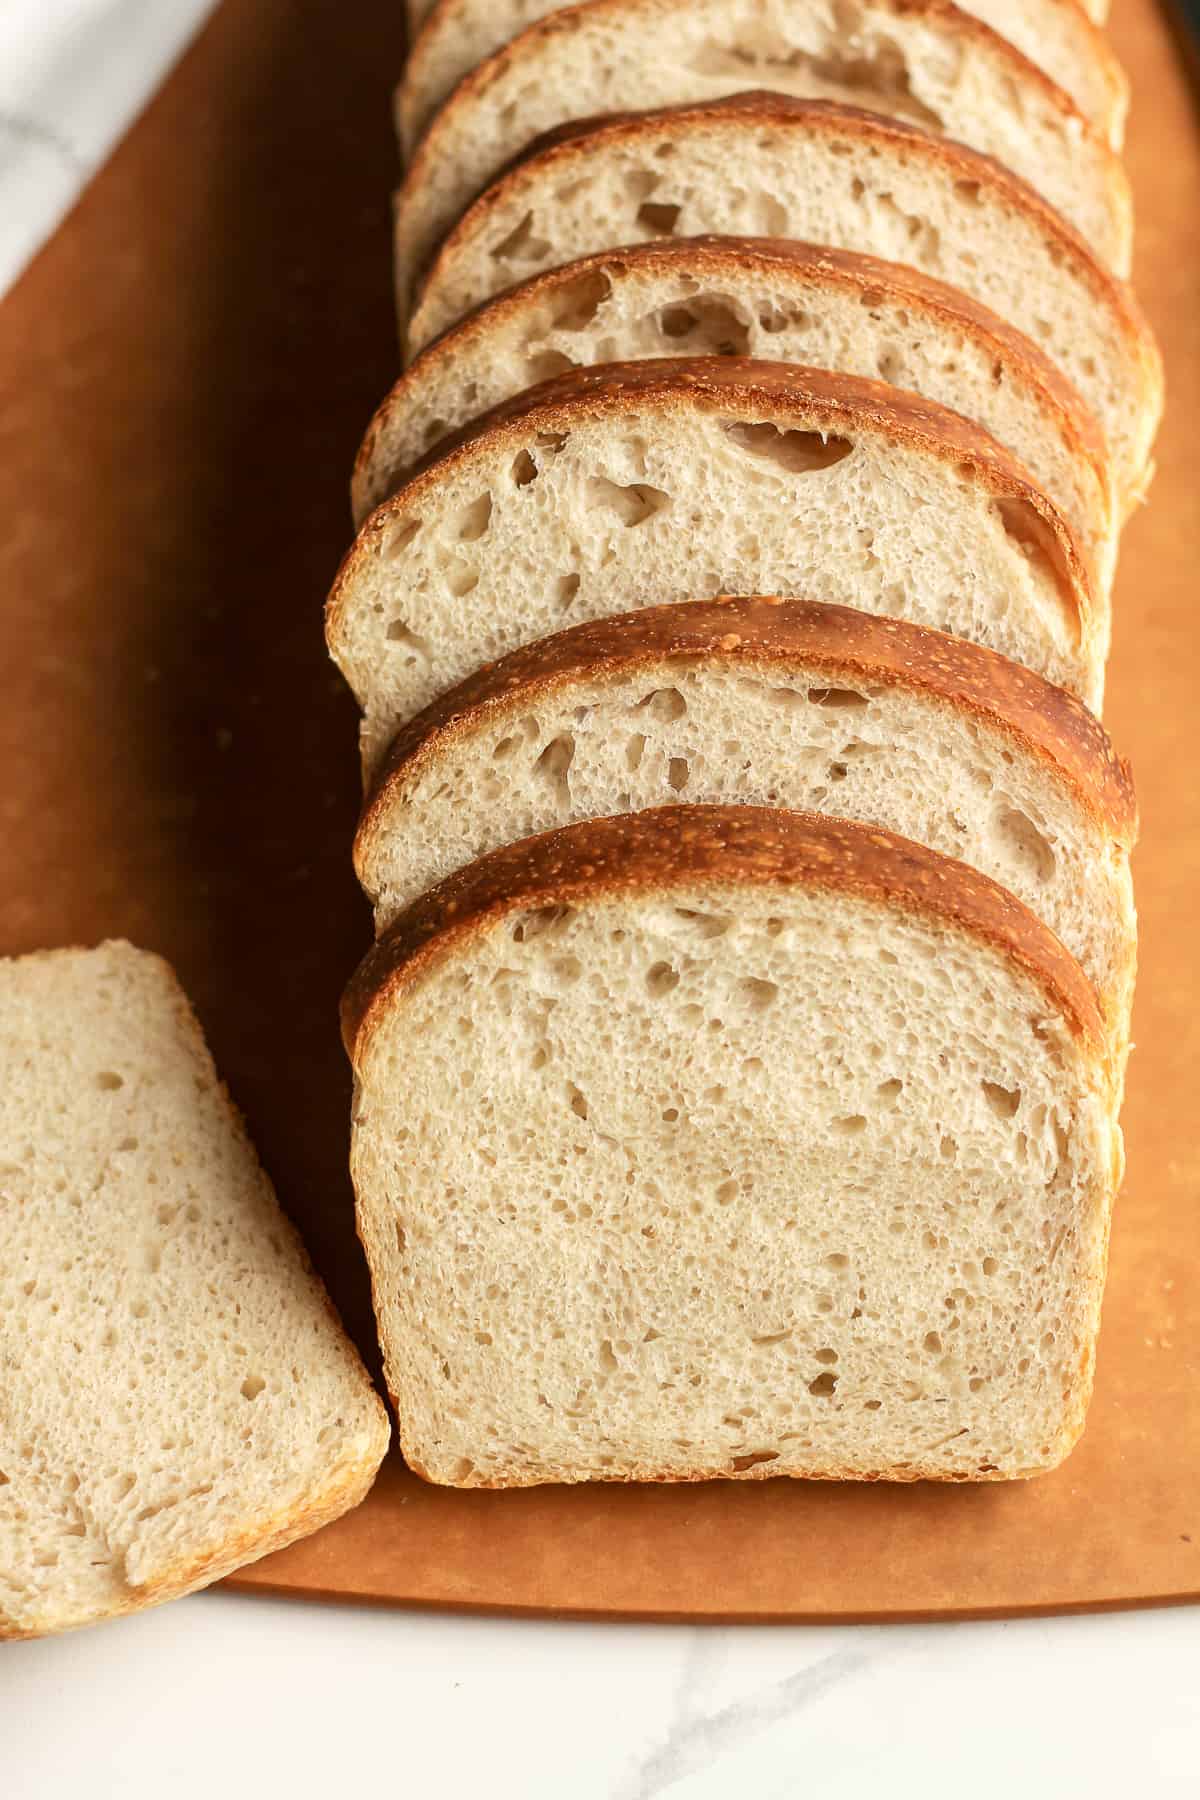
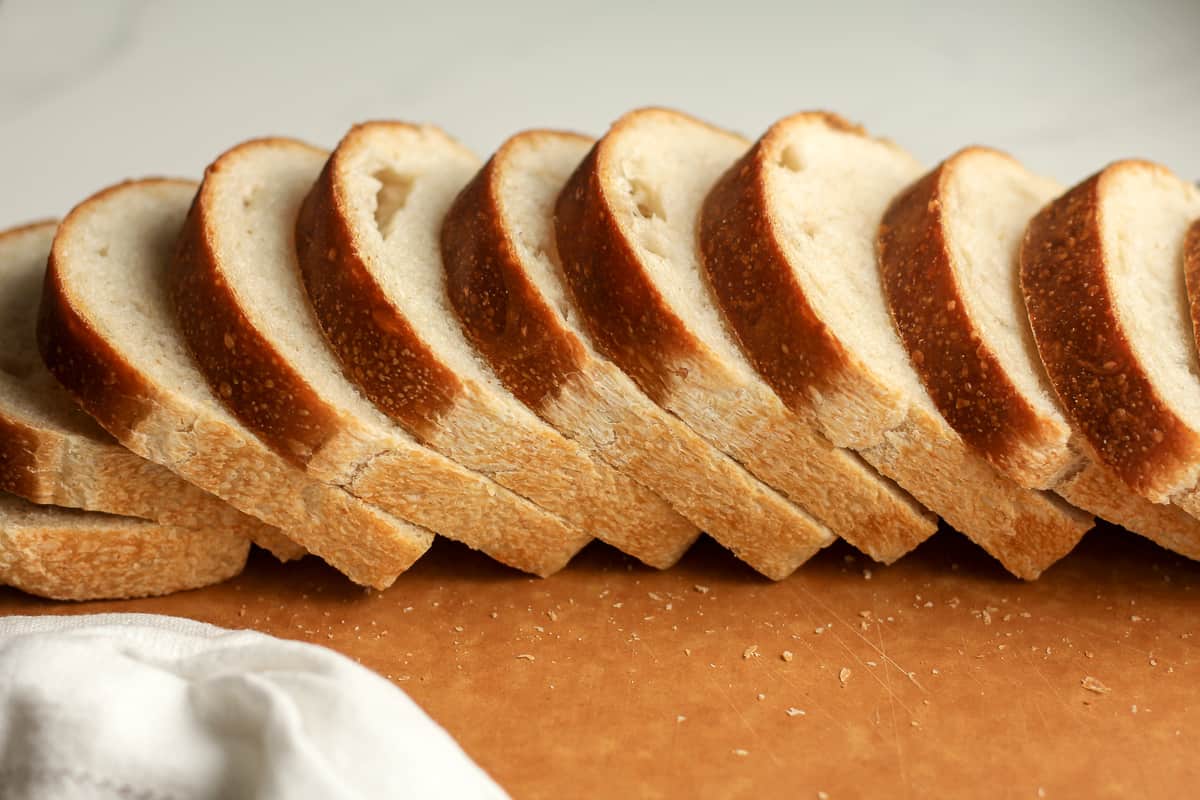
Let the bread COMPLETELY COOL before slicing.
Frequently Asked Questions
- What is sourdough? Sourdough is a slow-fermented bread that doesn’t require store-bought yeast to make it rise. It’s a LIVE fermented culture which creates a natural leavening agent. A starter is required to make sourdough.
- What is a starter? A starter is a live culture made over a series of days, consisting of flour and water. It can be kept alive for years with periodic feeding.
- How do you make a starter? A starter can be created in less than a week with a simple combo of unbleached flour and filtered water. It’s a process of removing half of the starter and then “feeding” it every day, storing in a jar on your countertop, and getting it to a bubbly, sour point where it floats in water. More on this later.
- Is sourdough bread healthy? Sourdough bread is NOT gluten-free, as it contains flour, but its long fermentation helps break down this gluten. It’s easier on the gut because it’s more digestible and easier for the body to absorb. It’s also DELISH!
If y’all would rather make a yeast bread that takes less time, try my delicious Whole Wheat Honey Bread, blog-fav Multi-Grain Seeded Bread, or my mom’s Chewy French Bread.
Expert Tips
- Make sure your starter is ready. If you store your starter in the refrigerator between use, make sure it’s active and ready to go before baking with it. I often feed it 2-3 times before using it after resting (i.e. sleeping in the refrigerator).
- Be flexible. If you’re bulk rise is taking longer than normal, or the starter isn’t as bubbly as you’d like it, be flexible. You can add time to either of these, and still make delicious bread. Many factors will come in to play as to when your sourdough is ready. In the summer months, the humidity and heat will make the process shorter. In the winter months, the process may be longer.
- Measure carefully and then adjust as needed. Make sure you use a digital scale to measure your ingredients in grams. This is important. Even with measuring carefully, you MAY need to adjust slightly. When your hands are on the dough doing stretches and folds, you will come to feel if more water/more flour is needed to make the dough pliable and soft. This comes with practice.
- Practice. Like I said above, as you practice making this bread and enjoying the bounties, you’ll learn all the little nuances to the sourdough process. Practice makes perfect!
- Let the bread cool. One of the biggest mistakes you can make is to slice the bread immediately after coming out of the oven. If you do this, it will be doughy tasting. Let the bread completely cool before slicing!
Try some other delicious sourdough recipes, including Overnight Sourdough Bread, Sourdough Focaccia, Sourdough Bagels, and Chocolate Sourdough Bread.
See my post on how to store sourdough bread for maximum freshness! Let’s not let our hard work go to waste and savor every single morsel of sourdough.
Kitchen Tools Used: (affiliate links)
xoxo ~Sue
Sourdough Sandwich Bread
Ingredients
- 200 grams active bubbly sourdough starter
- 600 grams warm filtered water
- 30 grams granulated sugar
- 40 grams oil
- 800 grams bread flour
- 200 grams all-purpose flour
- 20 grams fine sea salt
Instructions
- ** It's important to measure the ingredients for this recipe in grams. The kitchen scale I use is linked in the recipe. **
- Use a kitchen scale to measure the water and sourdough starter and add to a large bowl. Stir well with a fork. Add the remaining ingredients in the order listed – sugar, oil, bread flour, all-purpose flour, and sea salt. Stir again.600 grams warm filtered water, 200 grams active bubbly sourdough starter, 30 grams granulated sugar, 40 grams oil, 800 grams bread flour, 200 grams all-purpose flour, 20 grams fine sea salt
- Then use your hands to bring everything together. The dough will look scraggy. Cover with a damp towel, and set a timer for 30 minutes. This is the AUTOLYSE.
- Do a stretch and folding of the dough for about one minute, rotating the bowl as you do the folds. Place the dough seam-side down in the bowl, and cover with the towel again.
- ADDITIONAL STRETCH AND FOLDS: I recommend doing additional stretch and folds if time permits. Do these every 30 minutes for 3-4 more times to further develop the gluten structure.
- Leave the dough set on the counter-top for 6-8 hours, or overnight depending on several factors. The dough should double in size. This is the BULK RISE (or bulk fermentation).
- If you'd like, set the dough in the refrigerator for up to 24 hours. This will add to the "sour" taste of the dough.
- To avoid getting a crusty layer on the dough during the bulk rise, make sure the bowl is large and the towel is damp. You can also add a light coating of oil over the top of the dough, especially if you are letting it sit out overnight.
- Dust your counter or a baking mat with a light amount of flour. Move your dough from the bowl to the counter and form into your desired shape. Don't punch down, but pull the outsides inward to form shape. Let the dough sit for five minutes.
- Pull the dough towards you and away, trying to get the dough to be as tight as possible.
- Place the dough into two bread loafs, and cover with a damp towel. Let the dough rise until nearly doubled in size. The time this takes may vary greatly. This is the SECOND RISE (or final rise).
- Bake. When the dough is risen, preheat the oven to 400 degrees. Bake on the center rack for 40 – 45 minutes. If the top is getting too dark, cover with foil. Transfer bread to a wire rack to cool completely before slicing.
Notes
Expert Tips
- Make sure your starter is ready. If you store your starter in the refrigerator between use, make sure it’s active and ready to go before baking with it. I often feed it 2-3 times before using it after resting (i.e. sleeping in the refrigerator). You can test this with a float test. (See definition below.)
- Be flexible. If you’re bulk rise is taking longer than normal, or the starter isn’t as bubbly as you’d like it, be flexible. You can add time to either of these, and still make delicious bread. Many factors will come in to play as to when your sourdough is ready. In the summer months, the humidity and heat will make the process shorter. In the winter months, the process may be longer.
- Measure carefully and then adjust as needed. Make sure you use a digital scale to measure your ingredients in grams. This is important. Even with measuring carefully, you MAY need to adjust slightly. When your hands are on the dough doing stretches and folds, you will come to feel if more water/more flour is needed to make the dough pliable and soft. This comes with practice.
- Practice. Like I said above, as you practice making this bread and enjoying the bounties, you’ll learn all the little nuances to the sourdough process. Practice makes perfect!
- Let the bread cool. One of the biggest mistakes you can make is to slice the bread immediately after coming out of the oven. If you do this, it will be doughy tasting. Let the bread completely cool before slicing!
Love this recipe, I’ve been making it for several months and it always turns out so yummy. It’s easy to follow
Thanks for letting me know, Jenny!
Hi Sue, this bread looks lovely. I only have one 1 lb (8.5 by 4.5″) loaf pan; I’m wondering if I could divide the gram measurements in half and just make 1 loaf? Thank you in advance!
Yes, of course! Just divide in half and let me know how it turns out for you!
What size loaf pan did you use ?
I use 1.25 pound USA loaf pans (linked in the post).
This bread recipe is great and ended up being pretty easy. Sourdough seems complicated but I followed all the directions, and measured my ingredients very carefully, and my loaves came out beautiful and perfect. The thing I’ve had to get used to is that there is no instant gratification – I can’t make it up and eat bread right away. But it’s definitely worth the wait and I’m getting better at planning. The bread has a good flavor and an excellent texture – it is actually perfect for sandwiches. I gave some away and froze some, but this is going to be a regular recipe for me.
All of your bread recipes are fantastic, but this one is quickly becoming my favorite!