Overnight Sourdough Bread
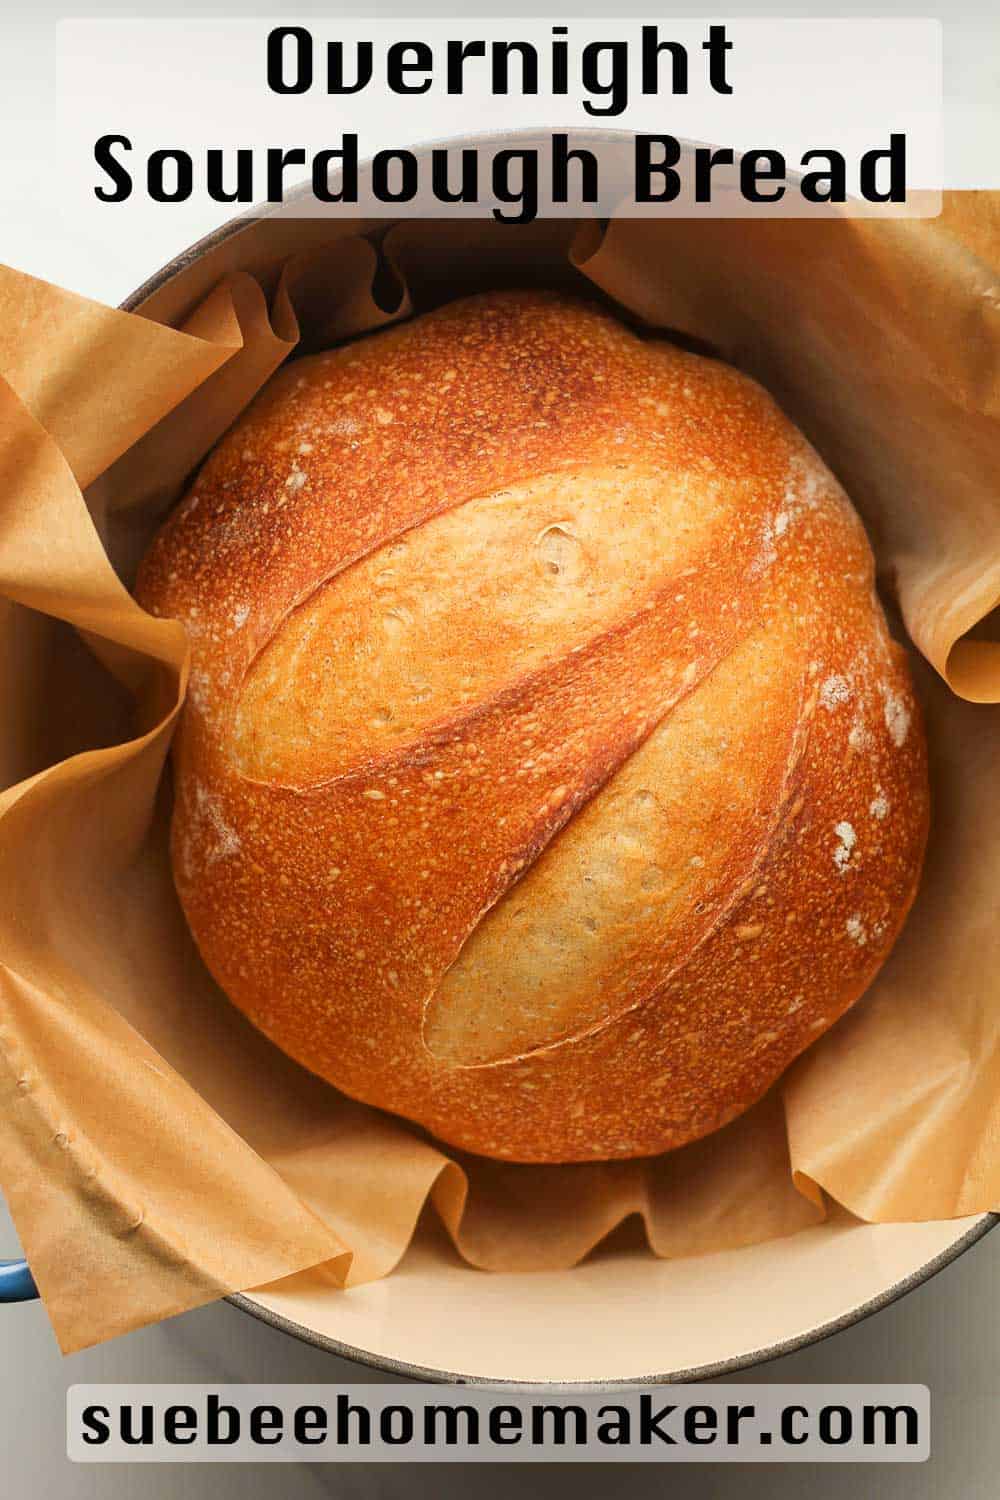
Learn how to make Overnight Sourdough Bread with step-by-step directions. This simple bread has amazing flavor and is the perfect recipe for both beginner and advanced sourdough bakers!
Sourdough takes time, but really is a simple process. For regular yeast-based breads that are quicker to make, try my fan-favorite Chewy French Bread or a nutty Cracked Wheat Bread. Both recipes originated with my mom, Norma Jean herself!
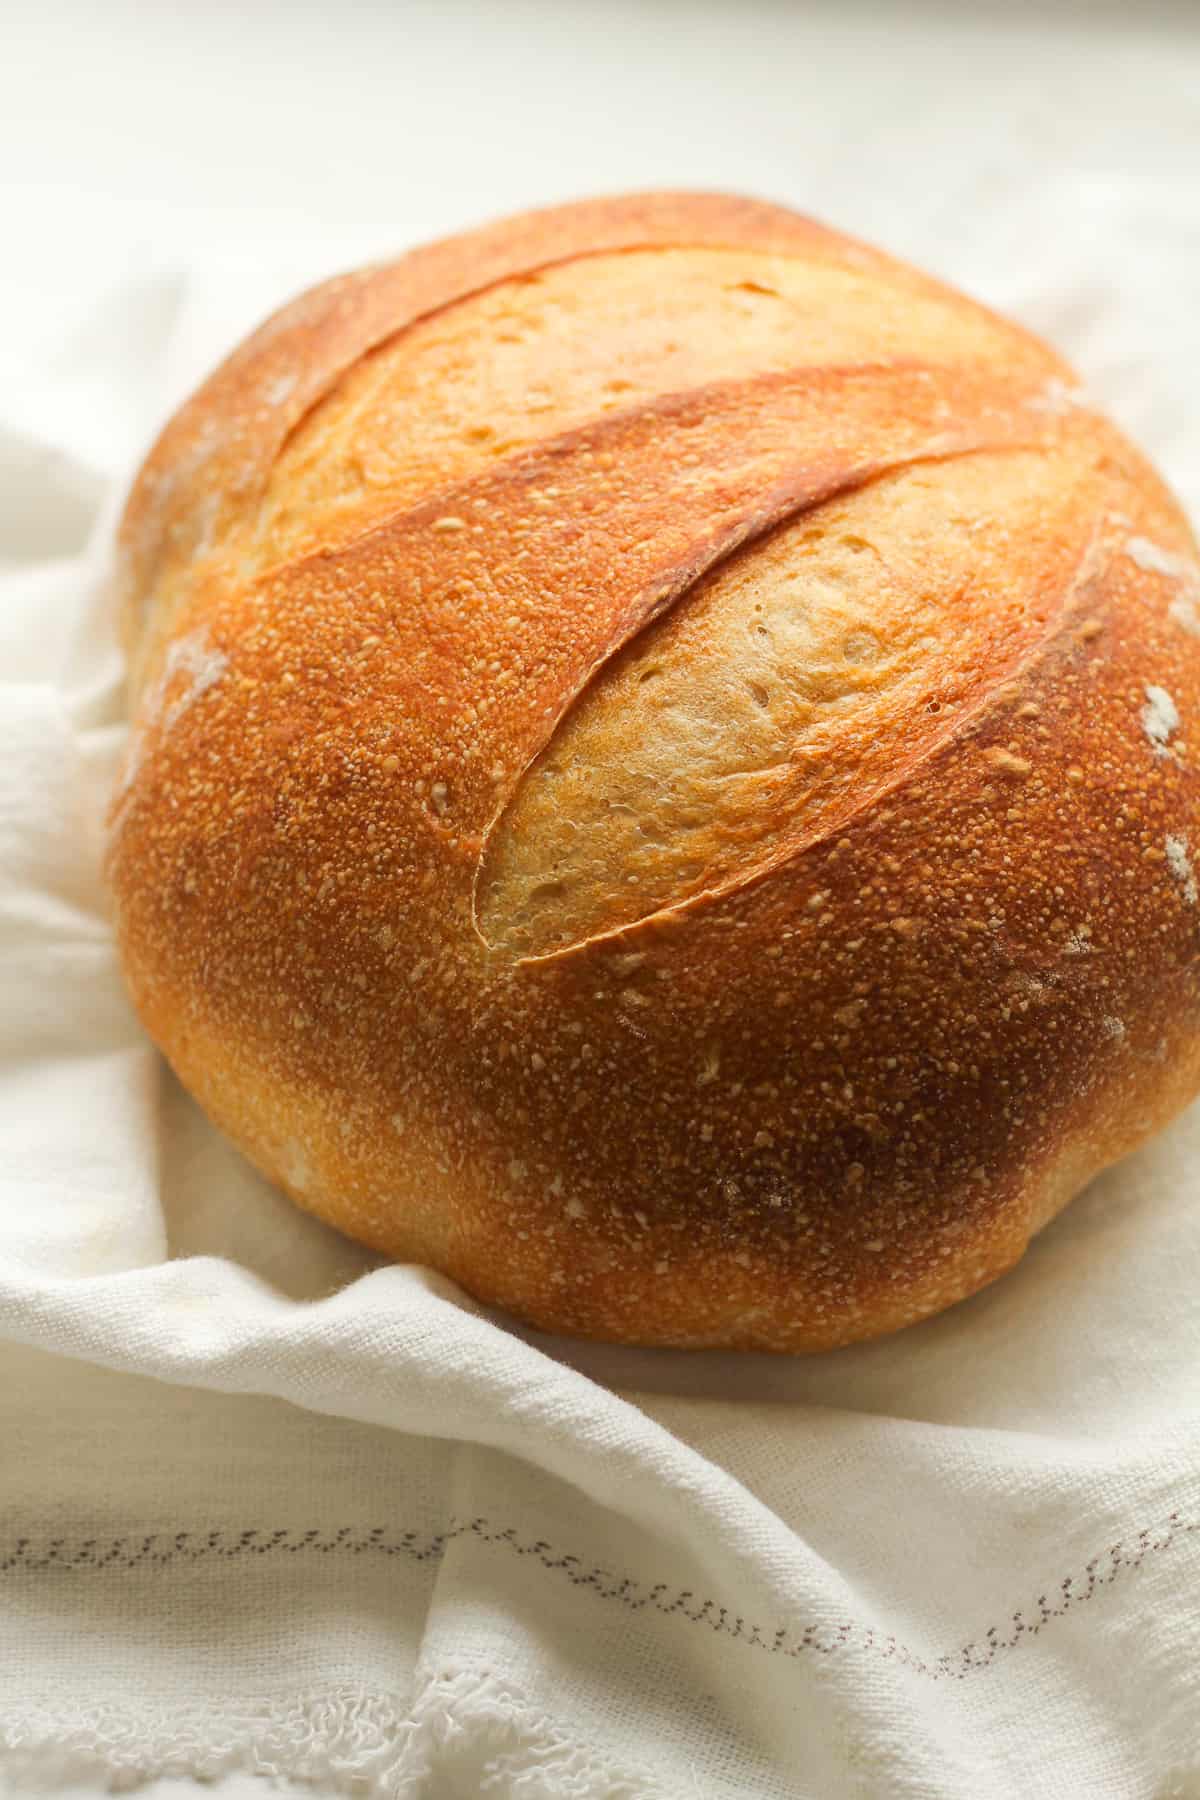
Sourdough Bread Loaf
Were you one of the many who learned how to make sourdough bread during the pandemic of 2020? Well…I was! It all started with my son who came home from college with his own starter. I quickly decided to join him in the adventure and started my own. When I started baking with mine, he let his go. (umphh..kids) And the rest is history!
We have quickly decided that sourdough bread is our favorite bread of all time. It’s chewy, has a delicious sour flavor, makes the best avocado toast, and is also easier on the gut.
After you try this recipe, make sure you make my Sourdough Bagels and the best Sourdough Sandwich Bread recipe!
Freaky Friday Blog Hop
Why is today so special you ask? Well, that is because today is Freaky Friday, hosted by Michaela at An Affair from the Heart! No, not the movie where the mom and daughter switch places, but a good old fashioned blog hop with some of my favorite food blogger buddies!
We secretly get assigned one another’s blogs to make a recipe from, and then we all reveal who we had and what we made on the same Friday, and that is today! See below for ALL the fun Freaky Friday recipes created by my blog hop friends!
Hostess At Heart
It’s been so fun to “get to know” Julie, the owner and creator of Hostess at Heart. She has grown kids, like my husband and I, and while we don’t have grandchildren YET, we do have two grand dogs! Like myself, Julie loves entertaining and believes in simple recipes.
When I saw that Julie had an Overnight Sourdough Bread Recipe on her blog, I KNEW it was the one for me. Like I said, I’ve been wanting to share the sourdough method that I’ve been using for over a year now!
Next up? After browsing her site, I can’t wait to try Julie’s Overnight Brioche Cinnamon Rolls Recipe and these amazing looking Cheese Stuffed Pork Chops! Plus, doesn’t this Spice Cake Recipe with Peanut Butter Frosting look TO DIE FOR?! Julie, your recipes look AMAZING.
Ingredients Used
Only four ingredients are required for this delicious bread!
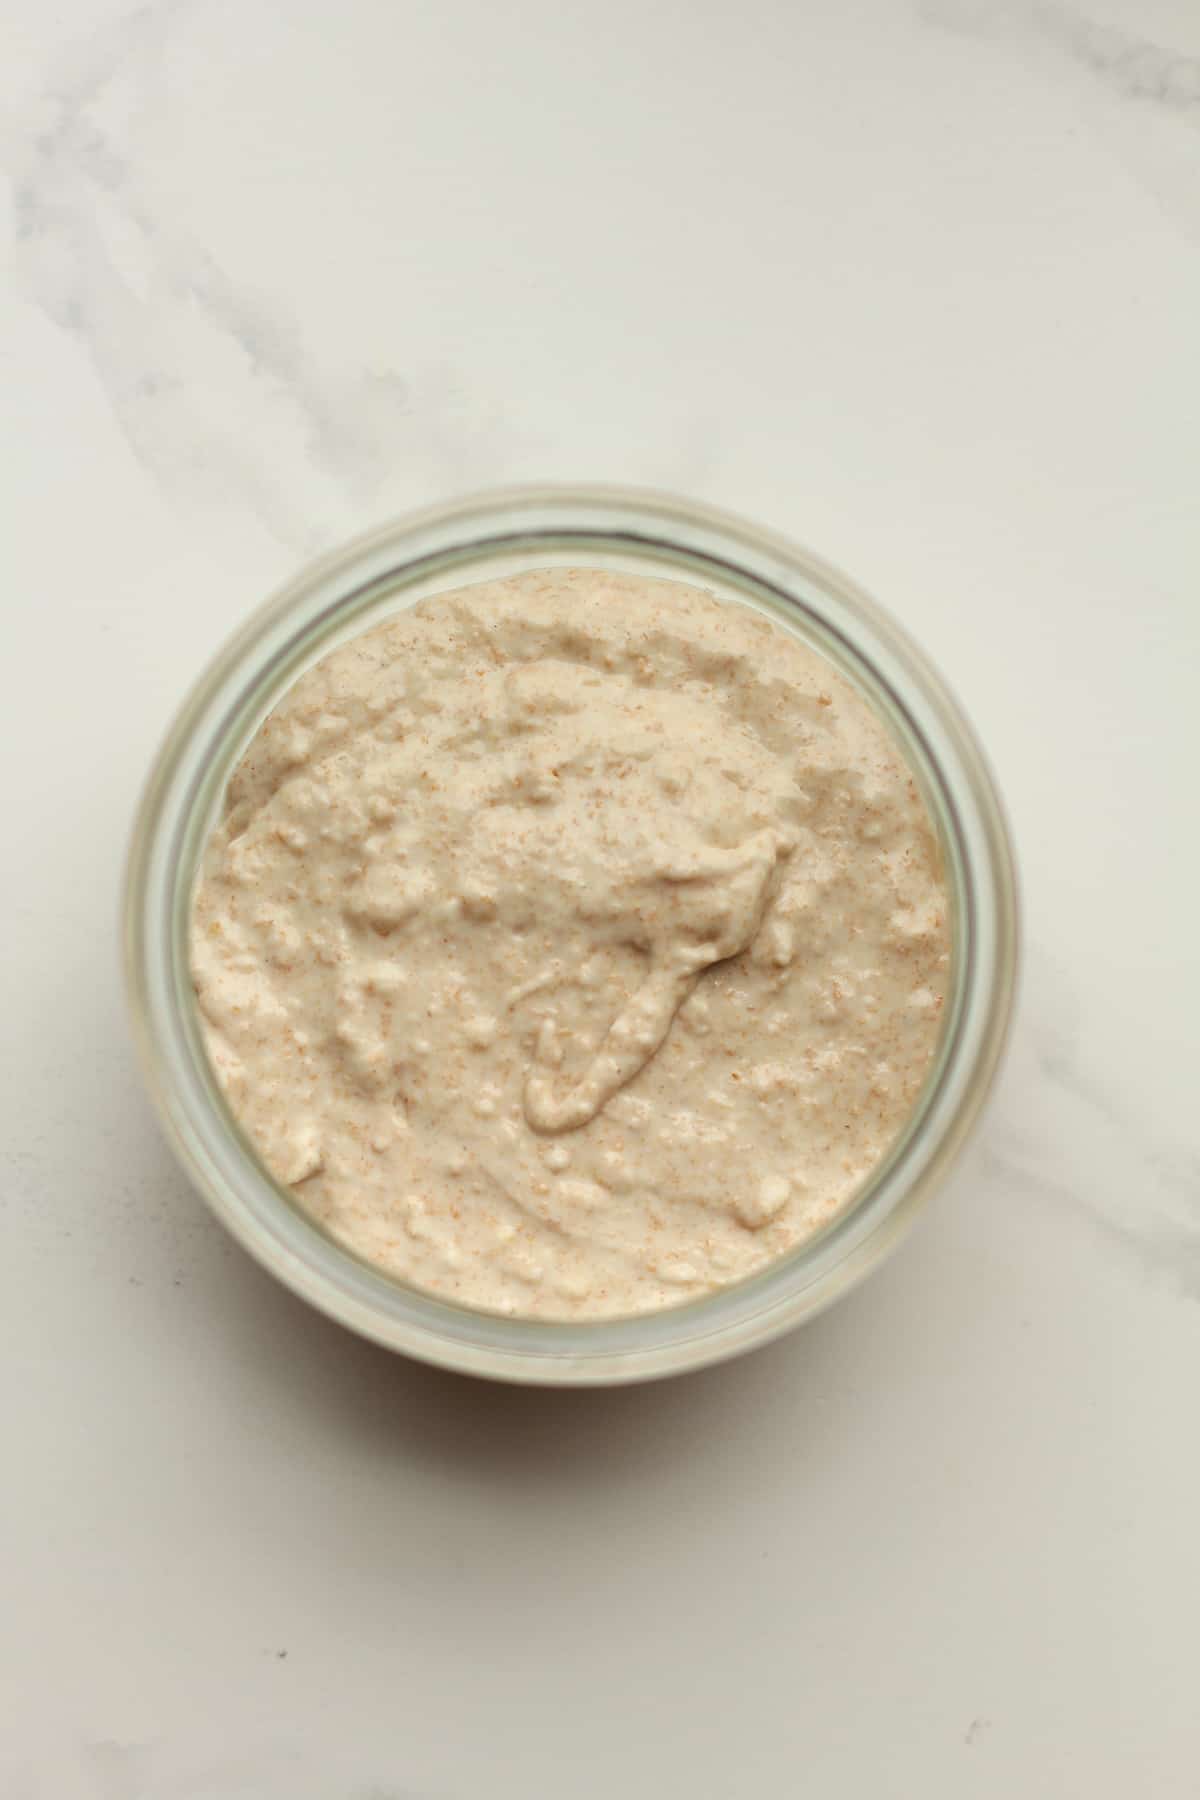
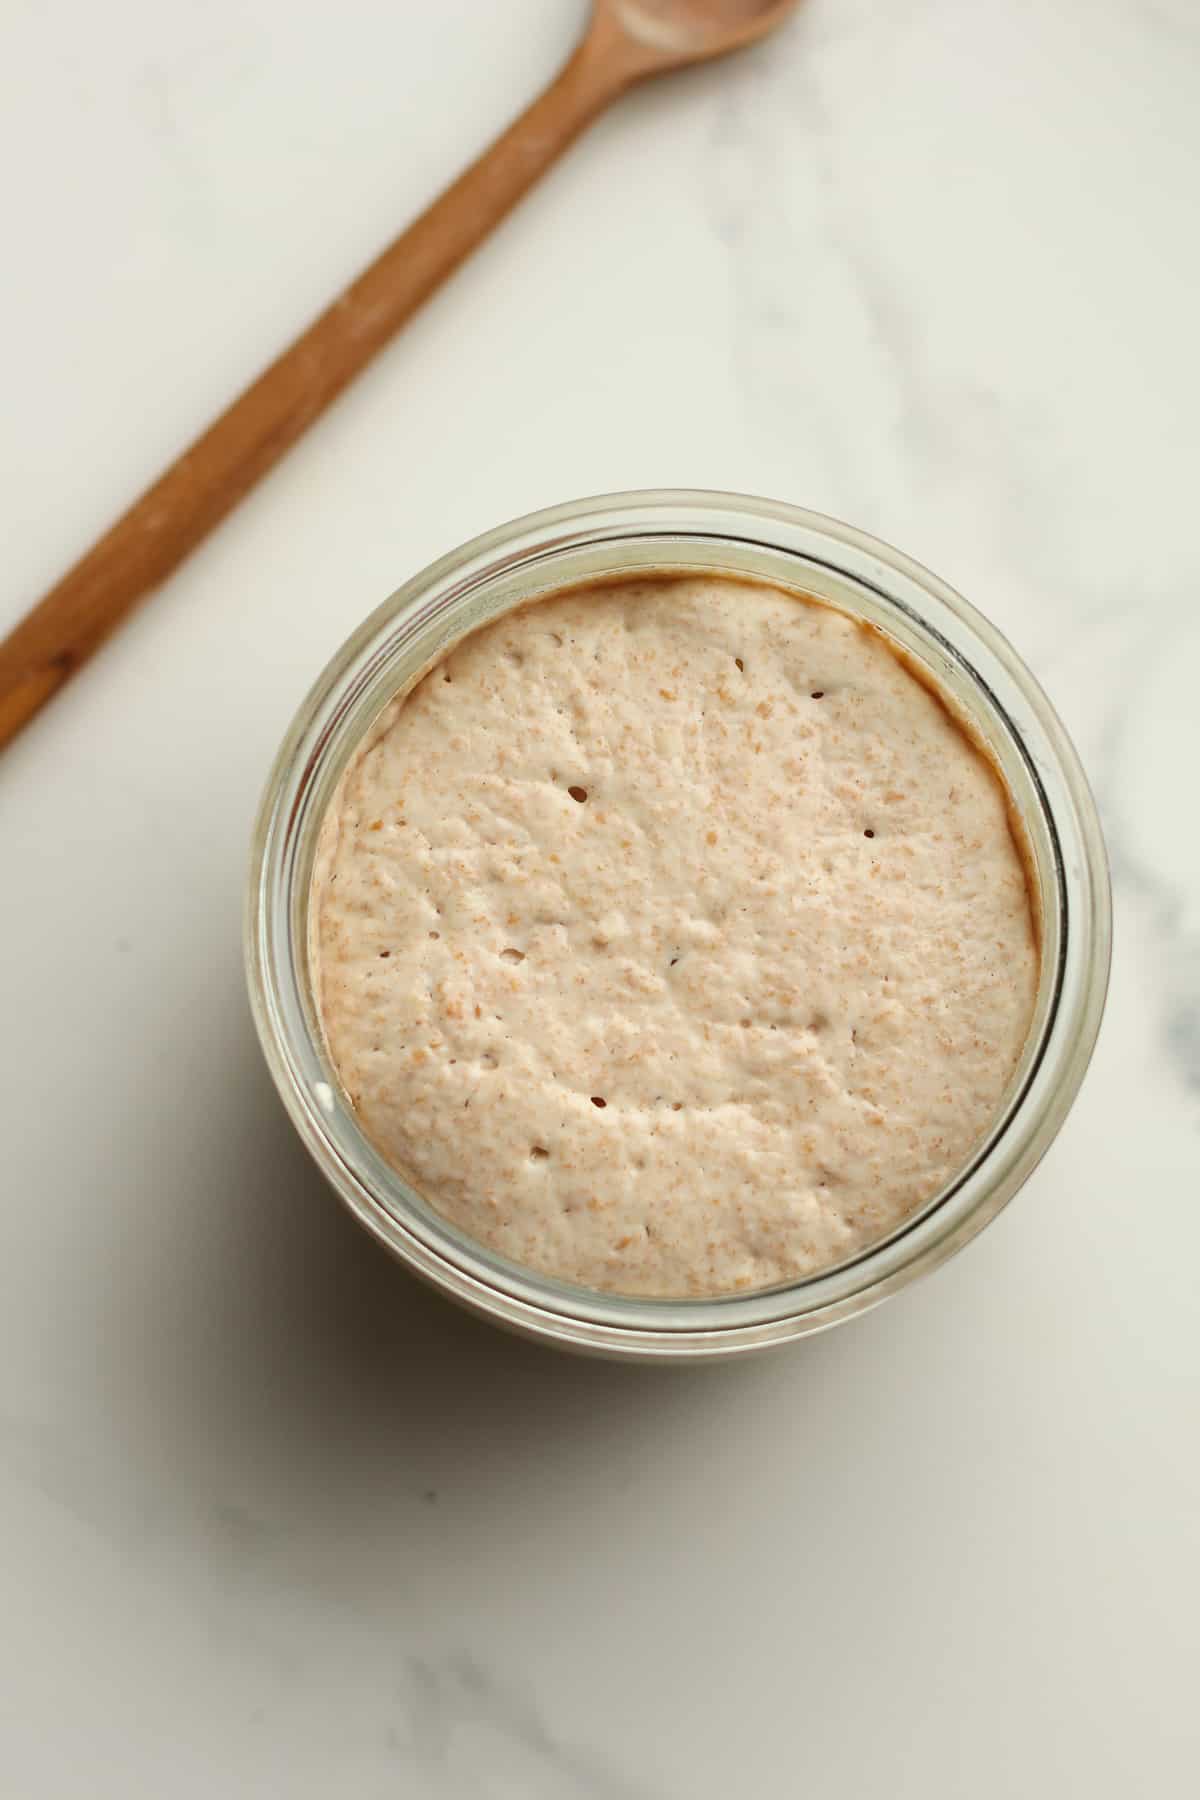
- Bubbly Starter – The starter is THE most important part of sourdough bread making. It takes a little time, but you will be rewarded over and over again.
- Filtered Water – Use a filtered water, either out of your refrigerator filter system or use bottled water. The water should either be room temperature or slightly warmed before adding it to the sourdough process.
- Bread Flour (Unbleached) – For this recipe, use unbleached bread flour. Organic is normally unbleached, btw.
- Sea Salt – I recommend using fine sea salt.
Make your own sourdough starter at home with just a few simple ingredients using Sourdough Starter Basics. In just over a week’s time and a little bit of patience, you’ll be ready to use your active starter to make the best sourdough bread!
How to make Overnight Sourdough Bread
Step 1
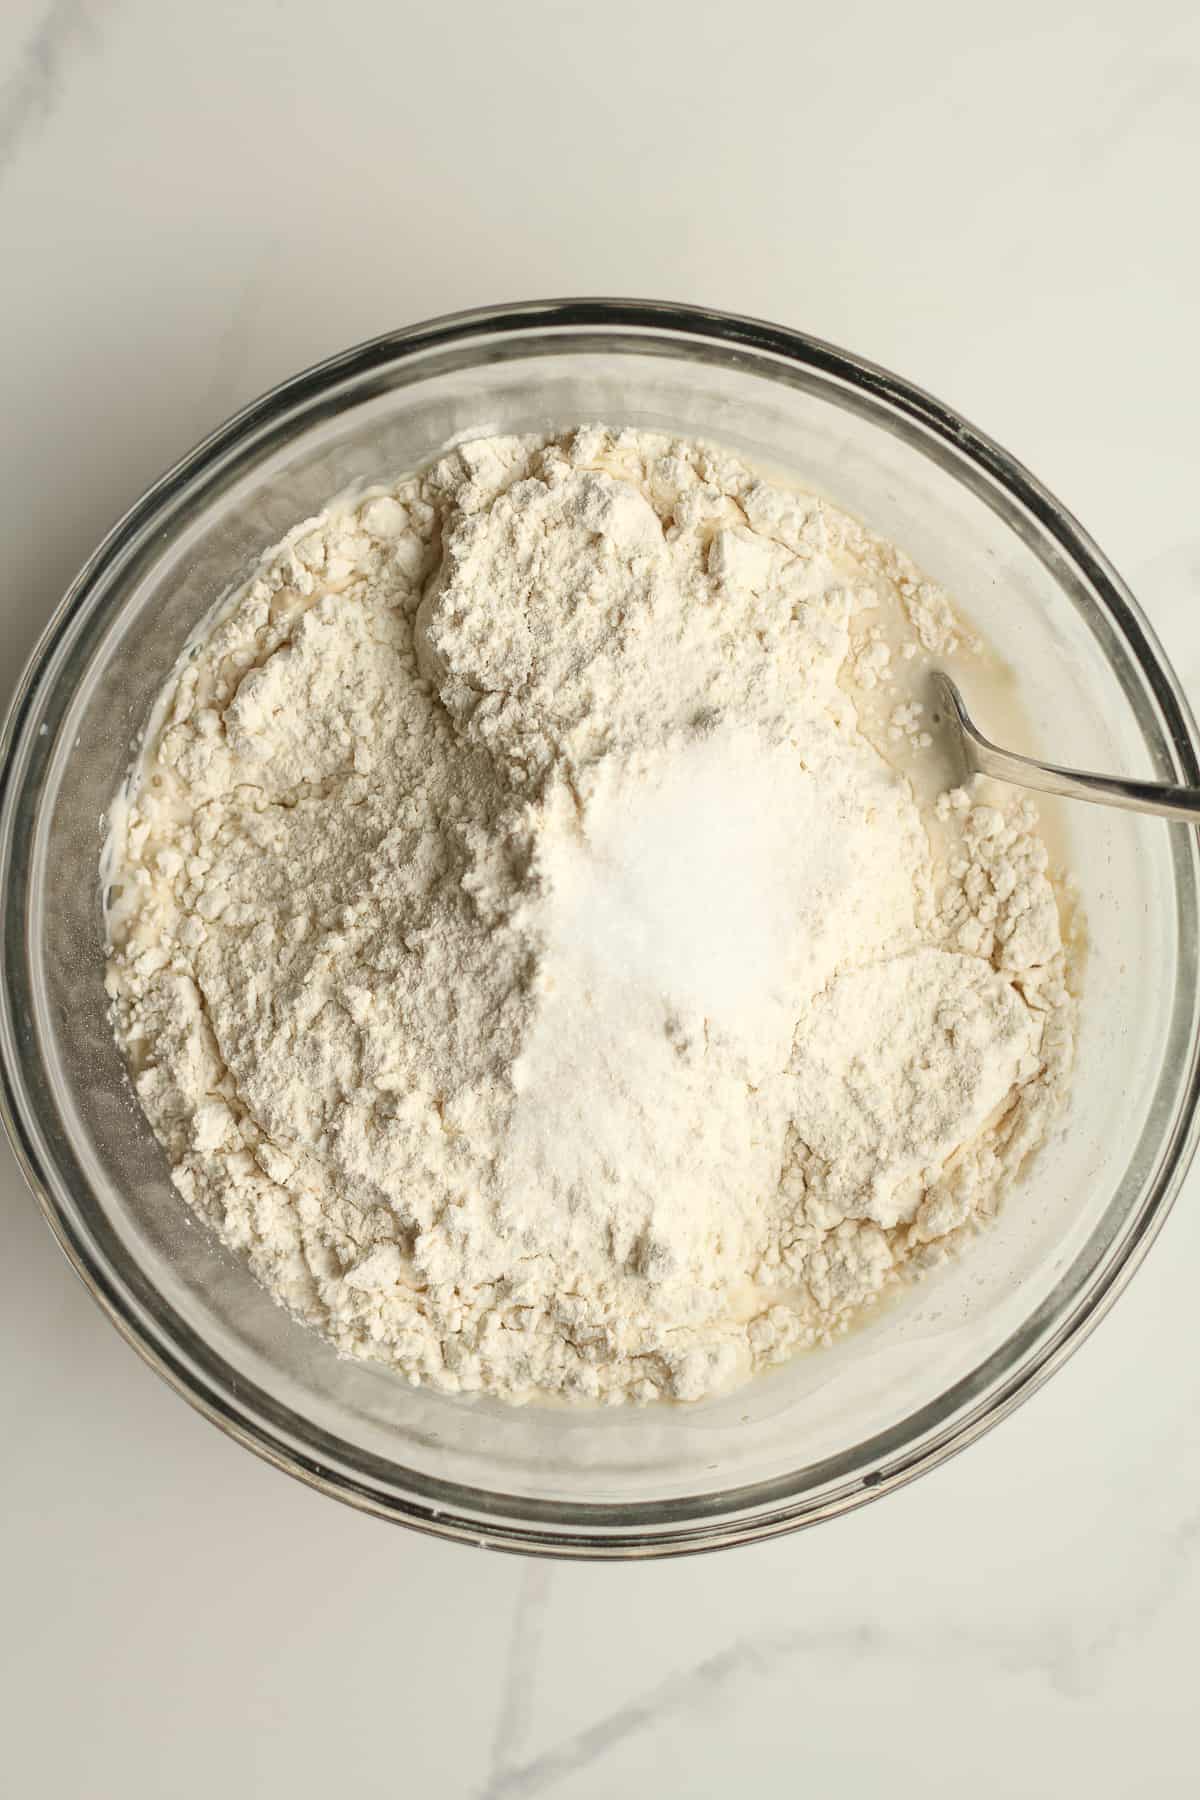
Carefully measure out all the ingredients and combine in a mixing bowl. Use a fork and stir.

Step 2
Then use your hands to bring the ingredients together. It will look shaggy. Cover with a damp towel and let it sit for 30 minutes. (Be sure to set a timer.) This is the AUTOLYSE.

Step 3
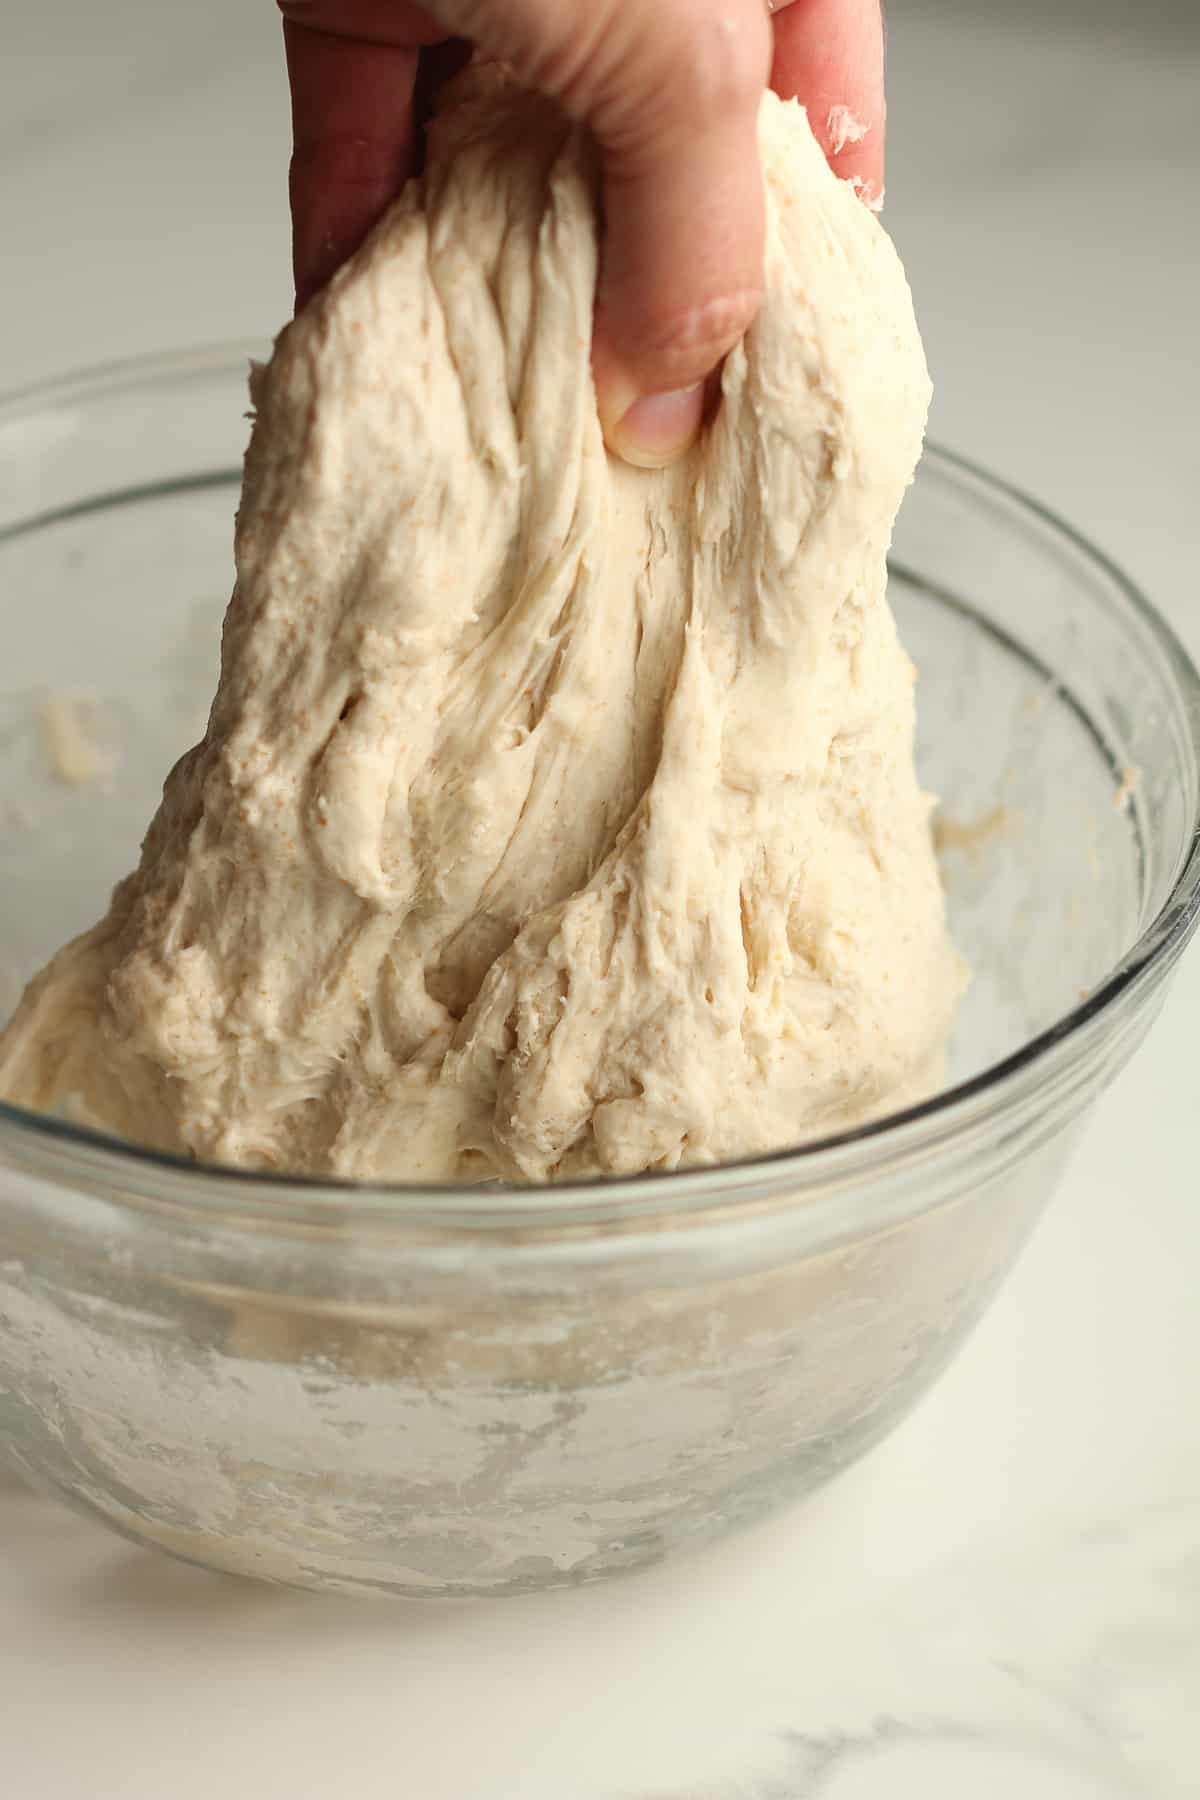
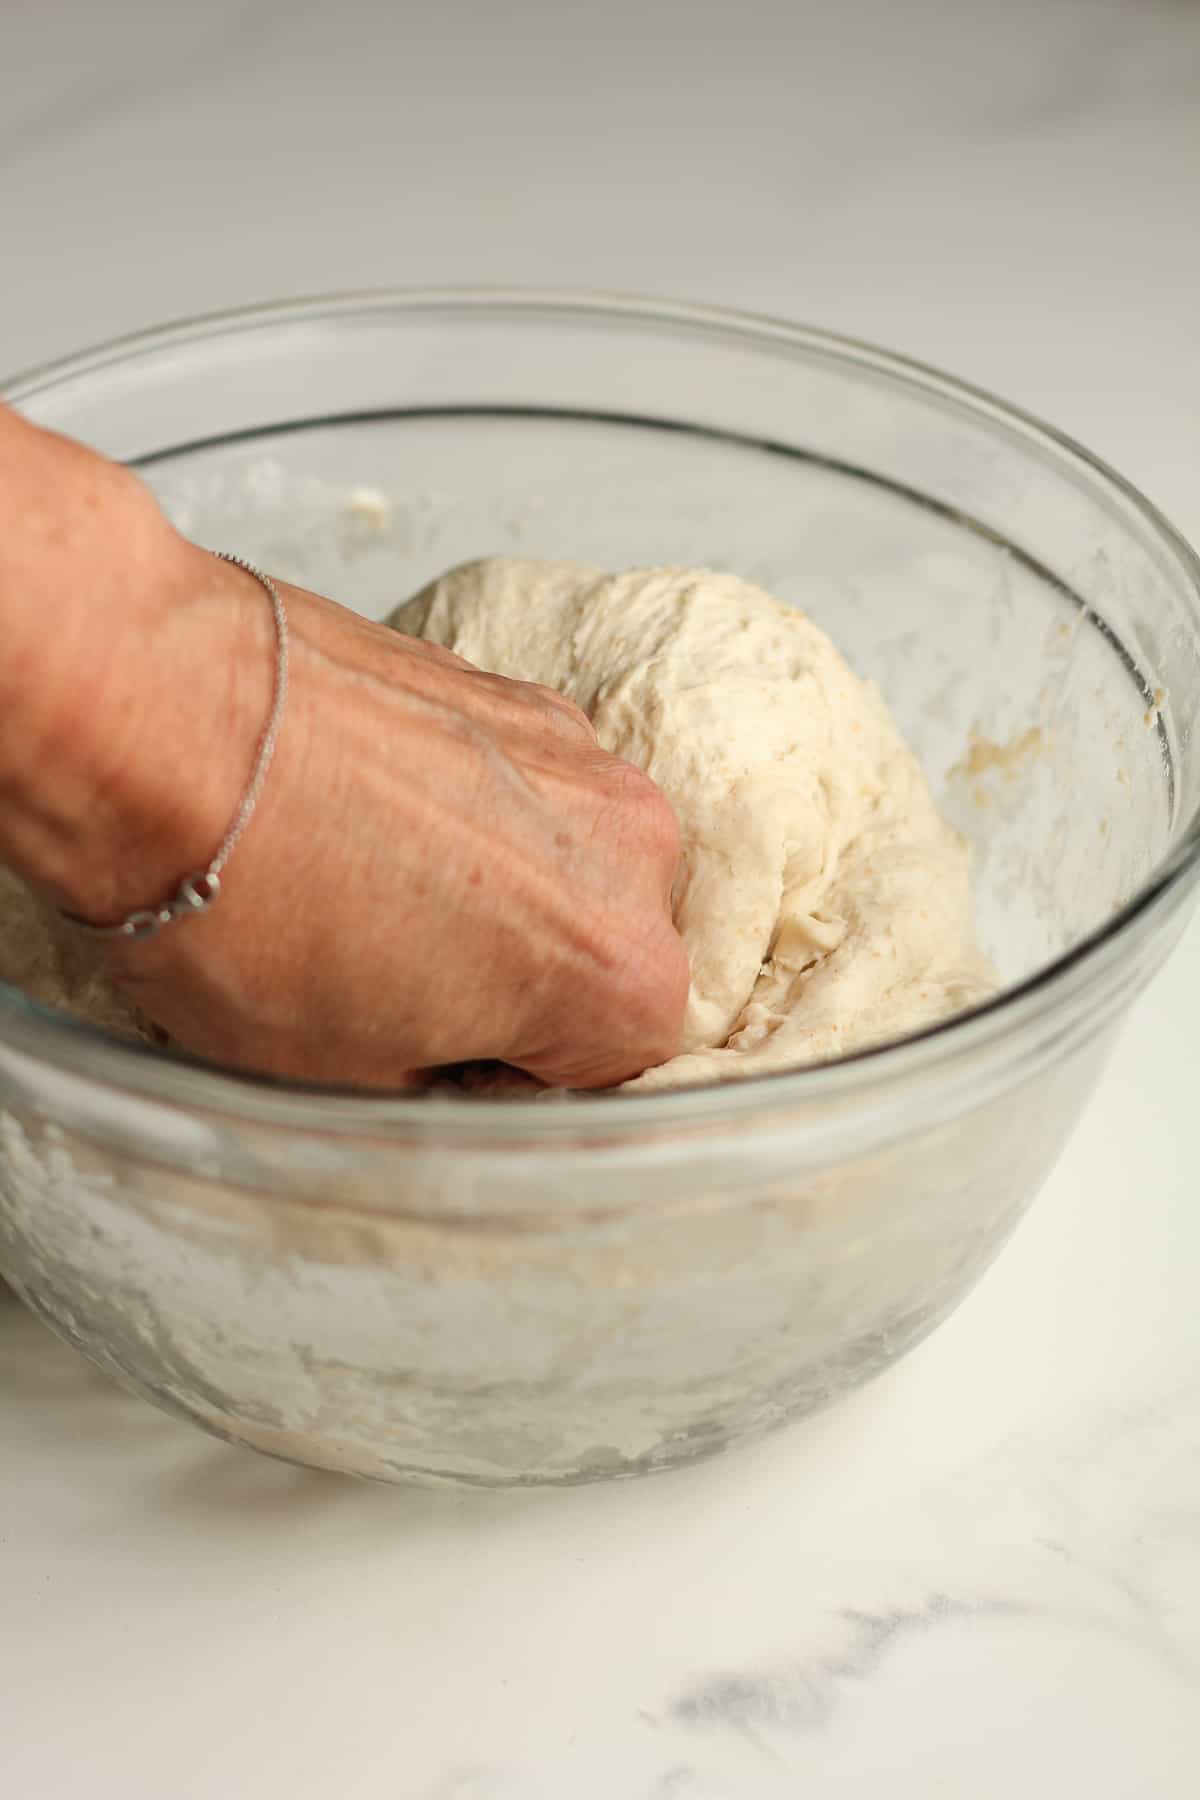
After 30 minutes, start the stretch and folds. Use your hand and lift the dough up on one side, stretching it upward, and then punch into the center of the dough. Turn the dough and repeat. Continue this process for about one minute. This is the STRETCH AND FOLDS.
Form the dough into a smooth ball, and place towel back on the bowl.
ADDITIONAL STRETCH AND FOLDS: I recommend doing additional stretch and folds if time permits. Do these every 30 minutes for 3-4 more times to further develop the gluten structure.
Step 4
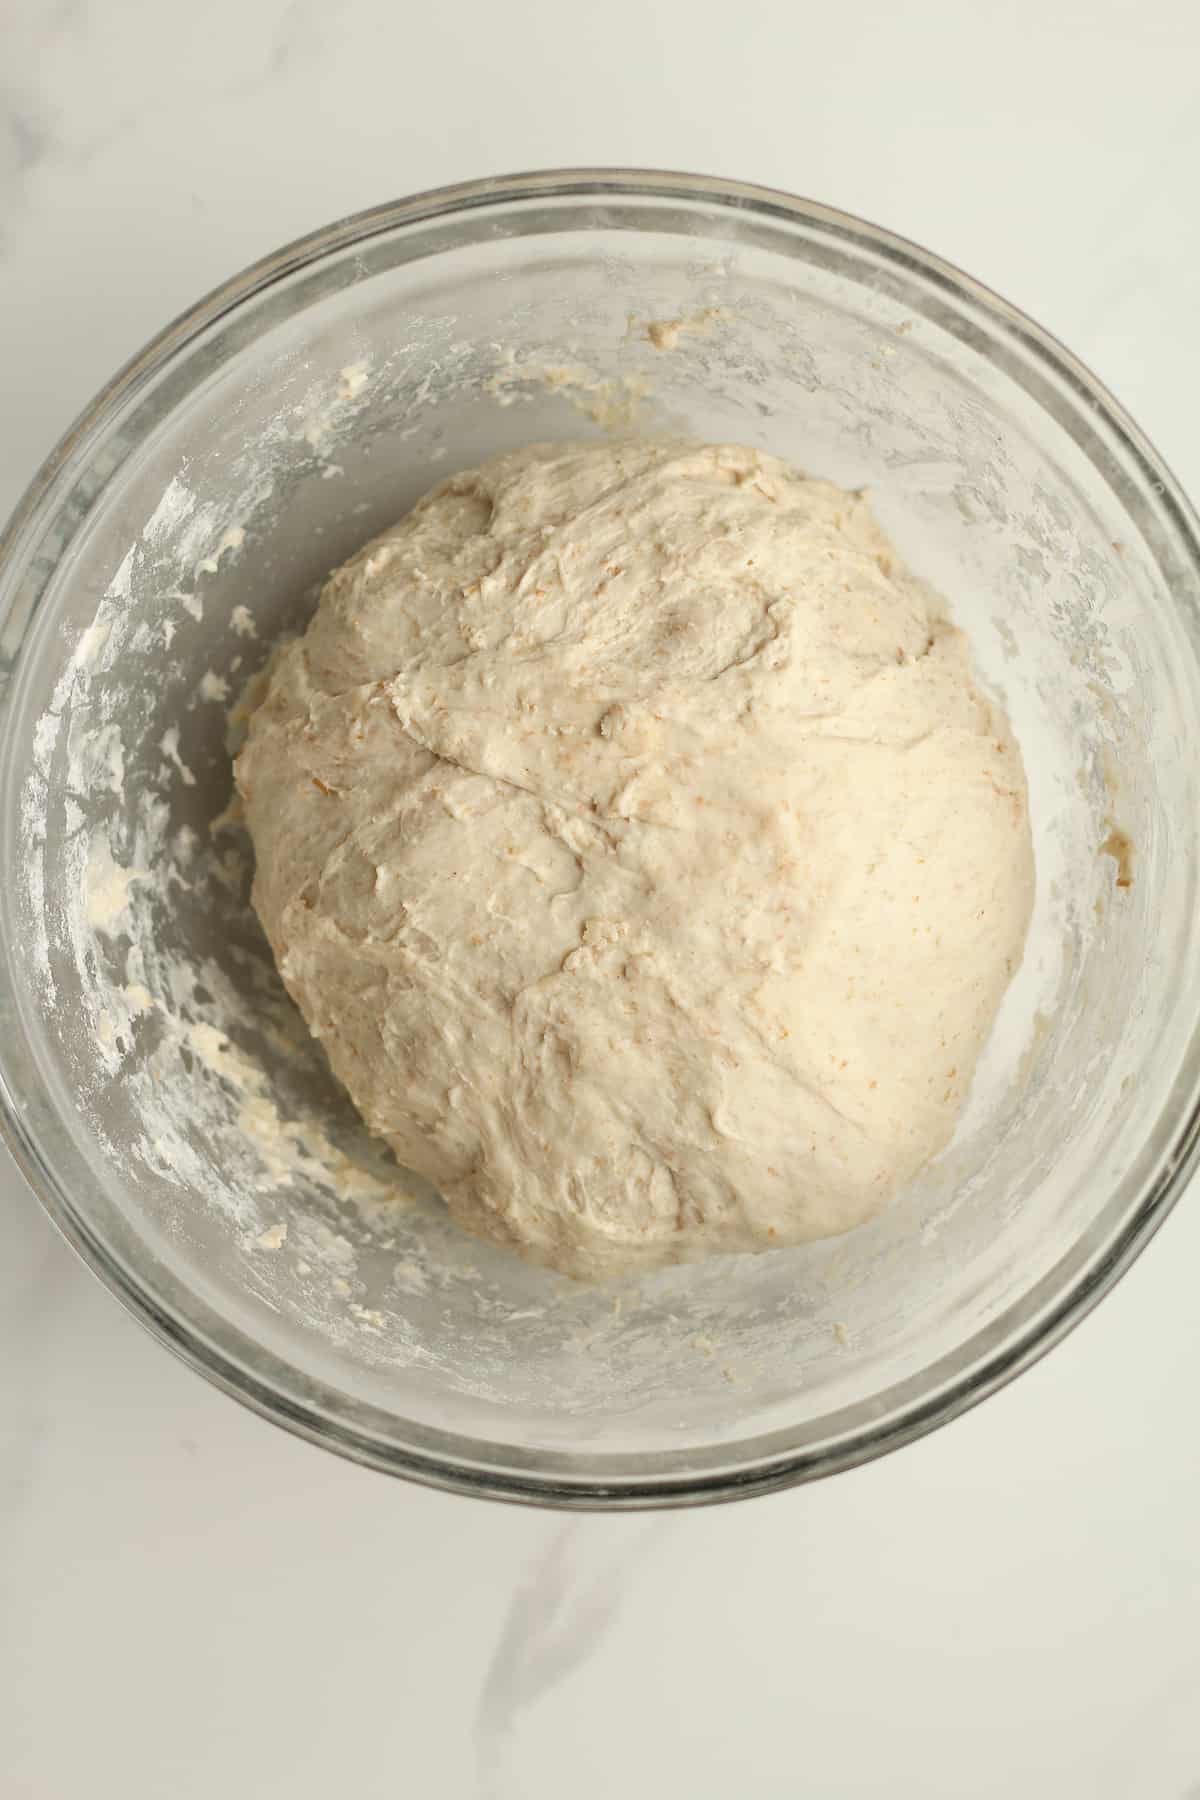
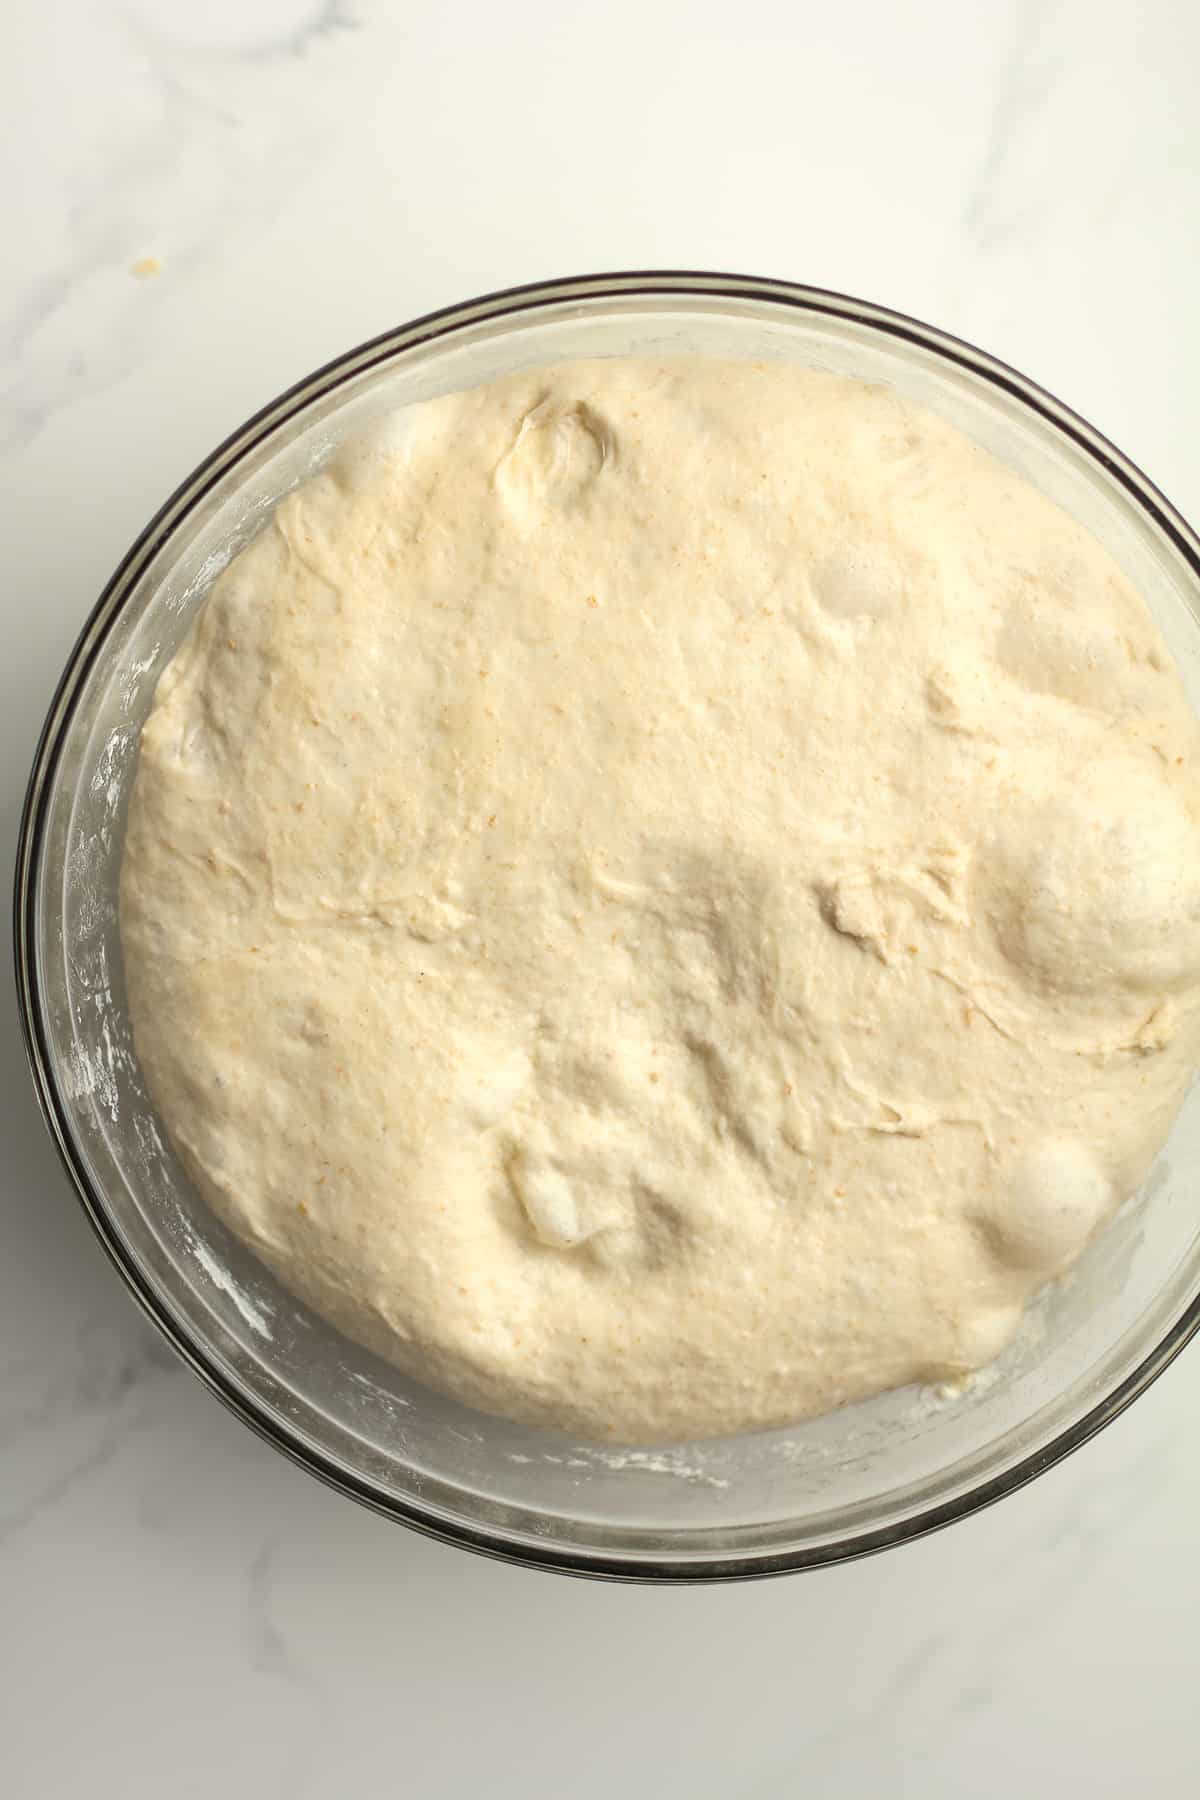
After the stretch and folds, let the dough rise for 6-8 hours. It should almost double in size and appear soft on top. Small air bubbles may appear as well. This is the BULK RISE.
Depending on the time of day, you can prepare the bread for baking. I occasionally place the dough into my refrigerator overnight, however. (The bulk rise is very flexible. You can adjust the time to work with YOUR schedule!)
TIP: To avoid getting a crusty layer on the dough during the bulk rise, make sure the bowl is large and the towel is damp. You can also add a light coating of oil over the top of the dough, especially if you are letting it sit out overnight.
Step 5
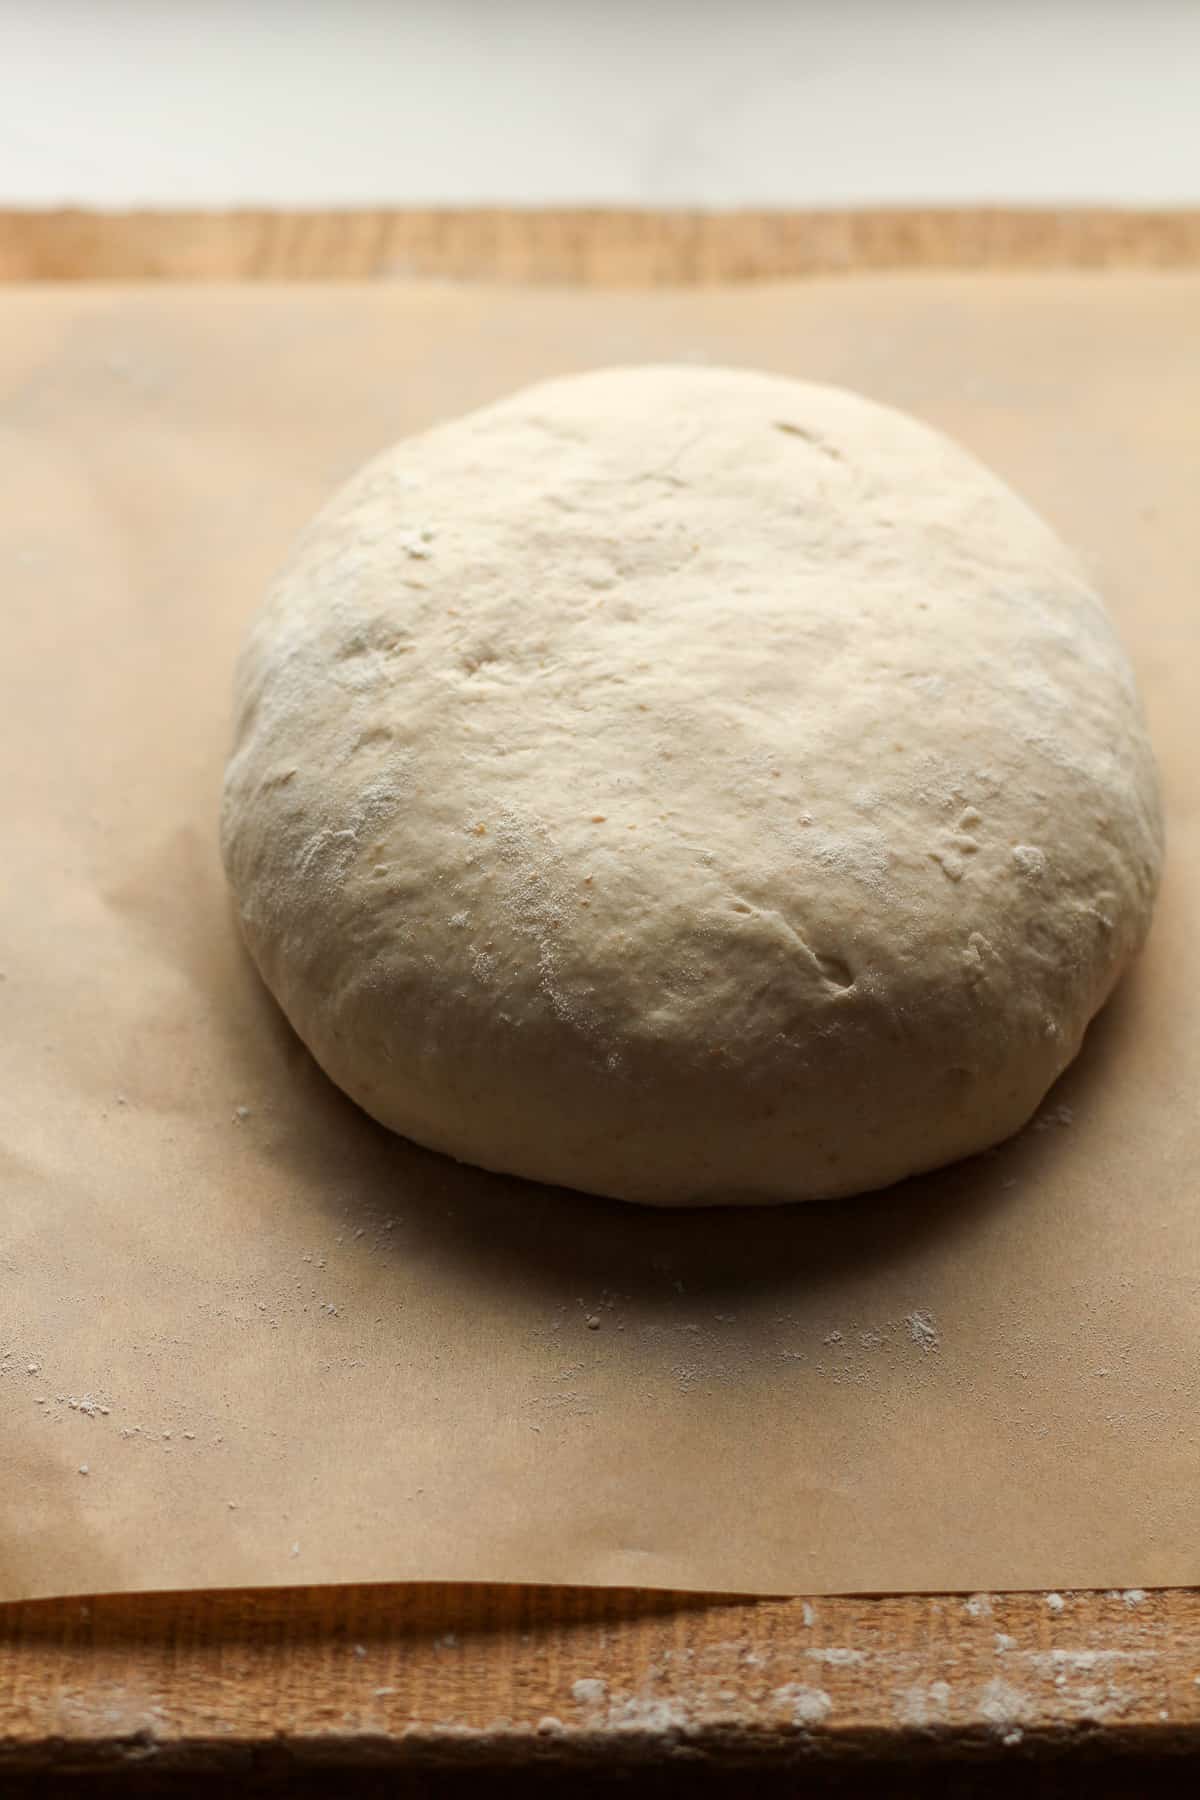
Add a light dusting of flour to a baking mat or clean surface. Remove the dough to the flour and gently form into your desired shape, usually round. Don’t punch the dough down because you don’t want to remove all the air. Let dough sit for five minutes.
Step 6
After five minutes, use your hands to pull the dough toward you, dragging it along the mat to tighten it up. Repeat in the other directions to tighten.
Step 7
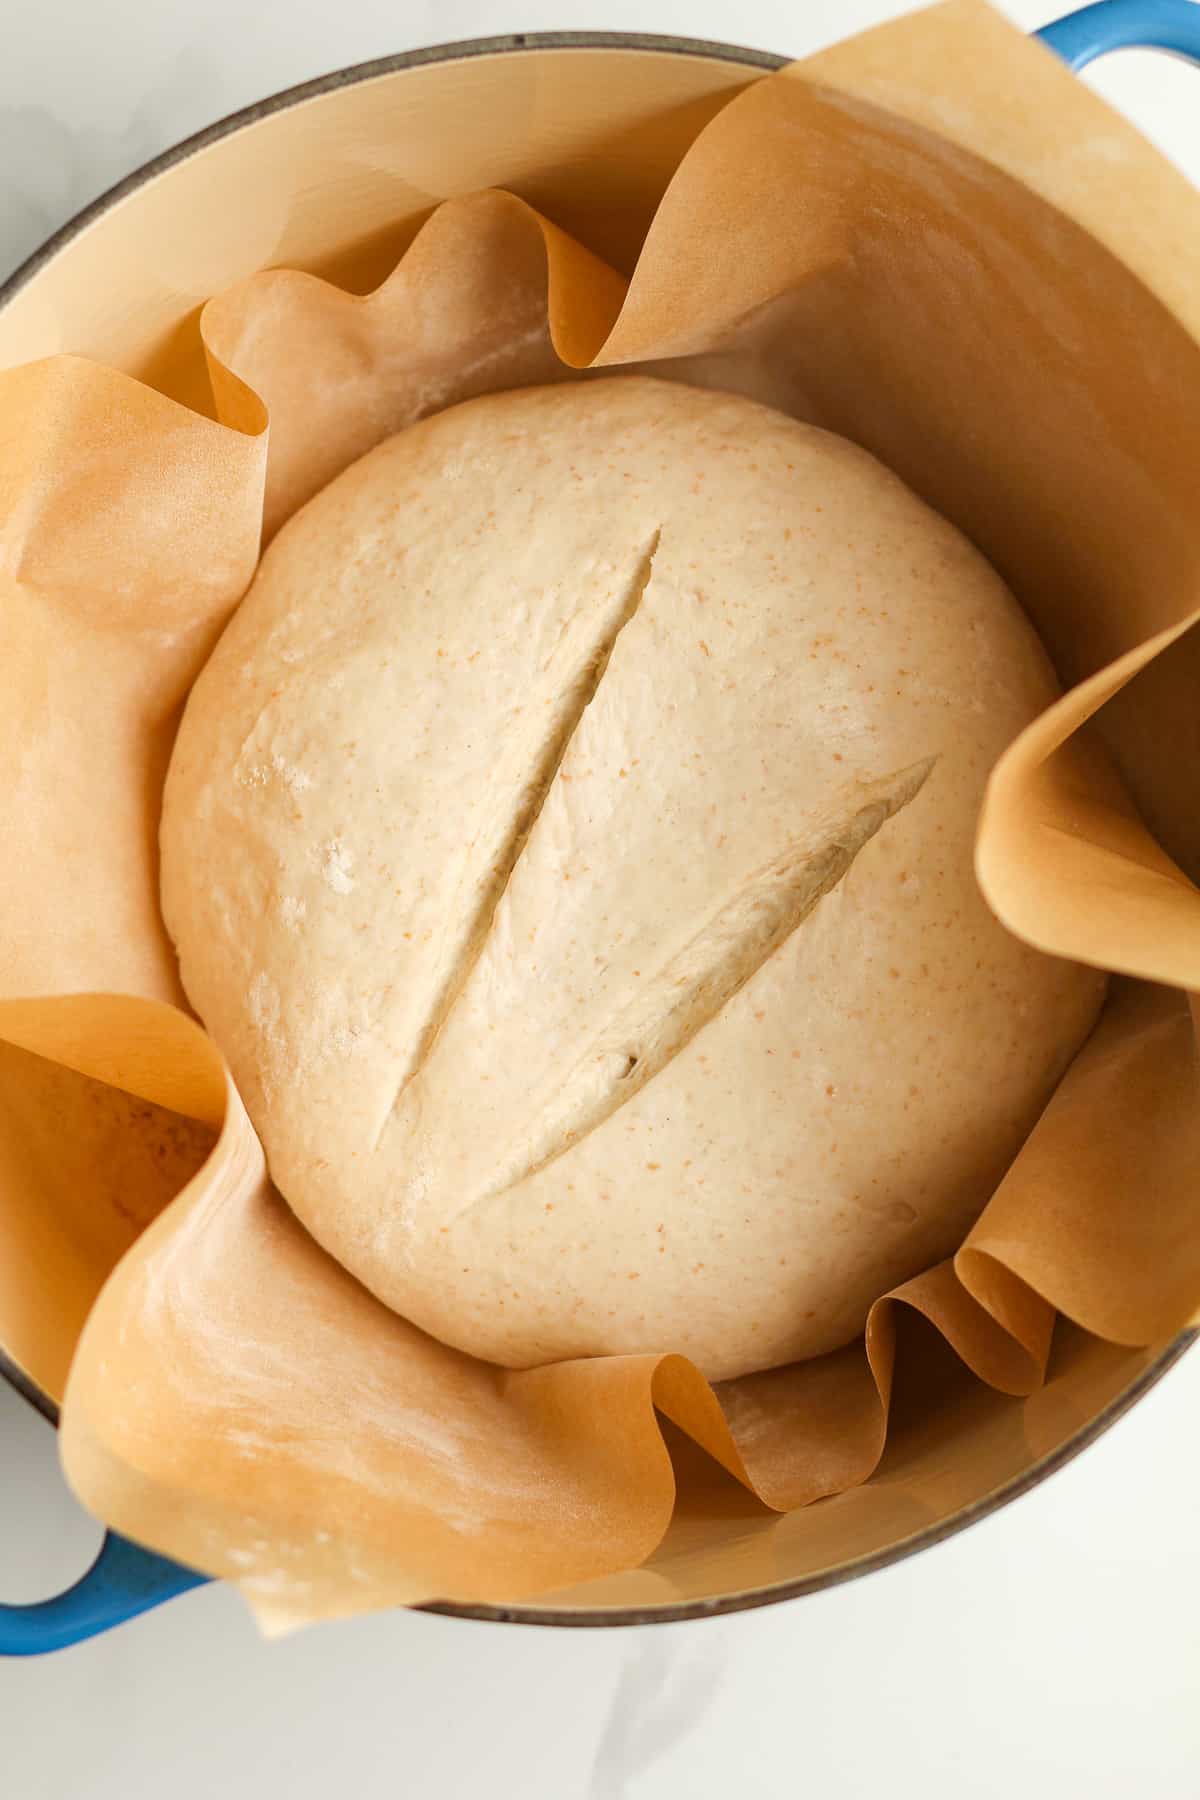
Place the dough on a piece of parchment paper. Cover with some cling wrap and let it sit for about 1-2 hours. For this bread, it does not need to double again in size. This is the SECOND RISE.
Step 8
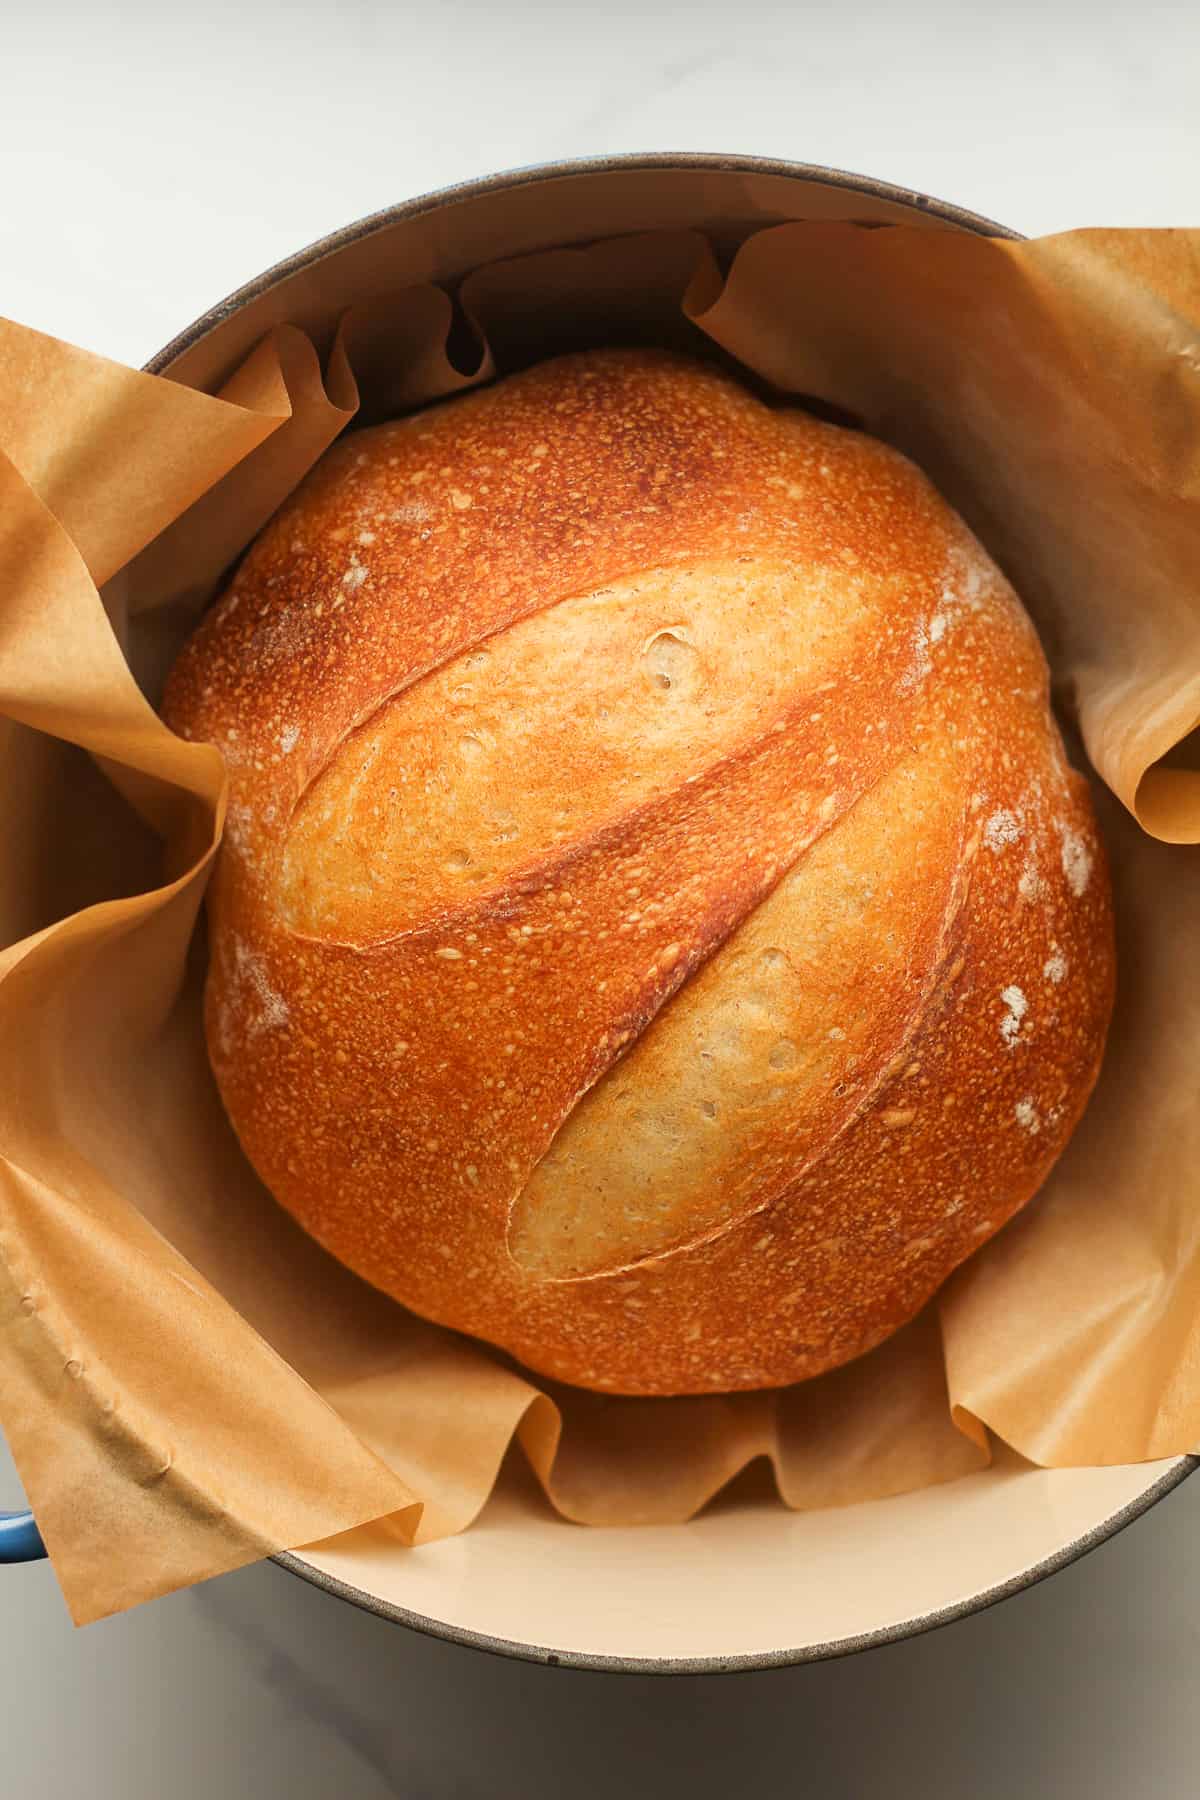
Prepare for baking. Preheat oven to 450 degrees. Then take a serrated edge knife (linked below) and score the bread a couple of times. Place the bread (including parchment paper) into a dutch oven.
Add the lid to the pan and bake for 20 minutes. Then remove the lid and bake an additional 20-25 minutes.
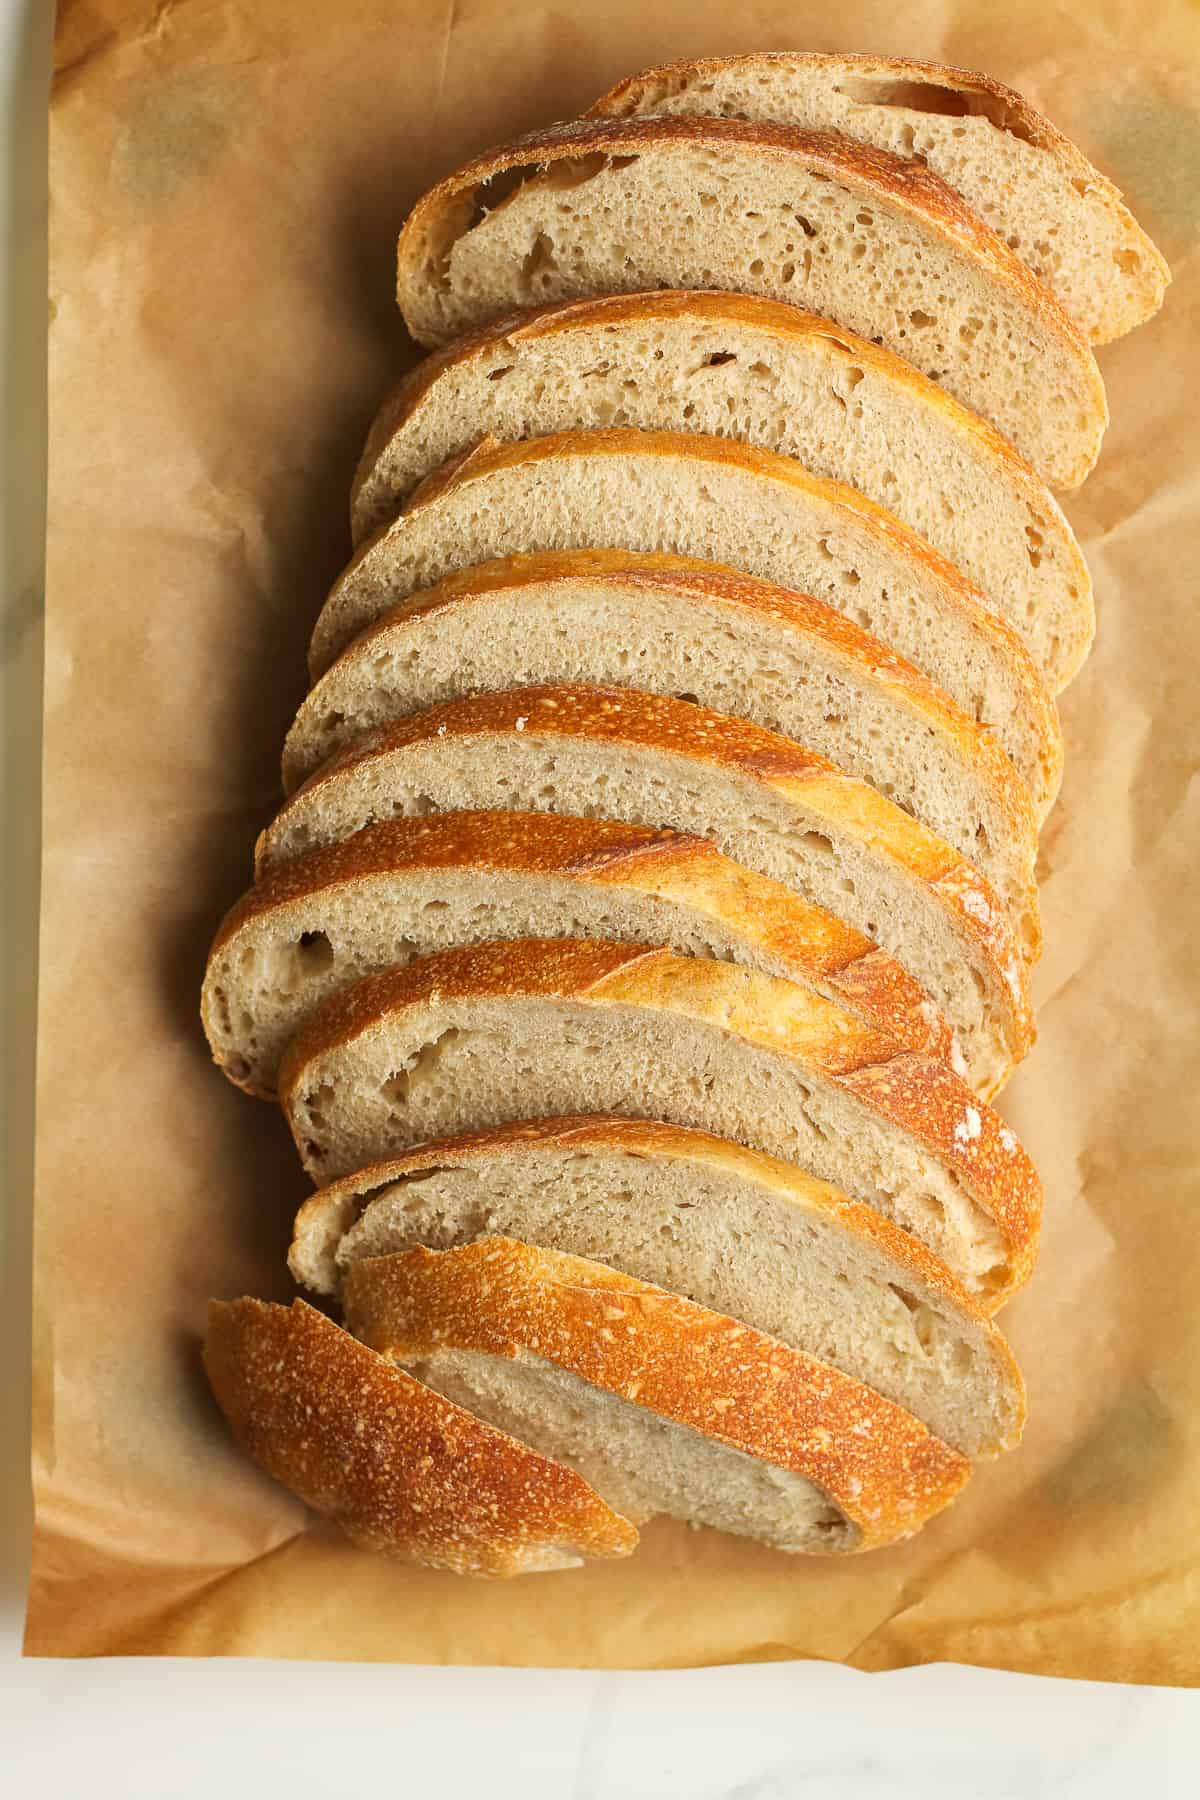
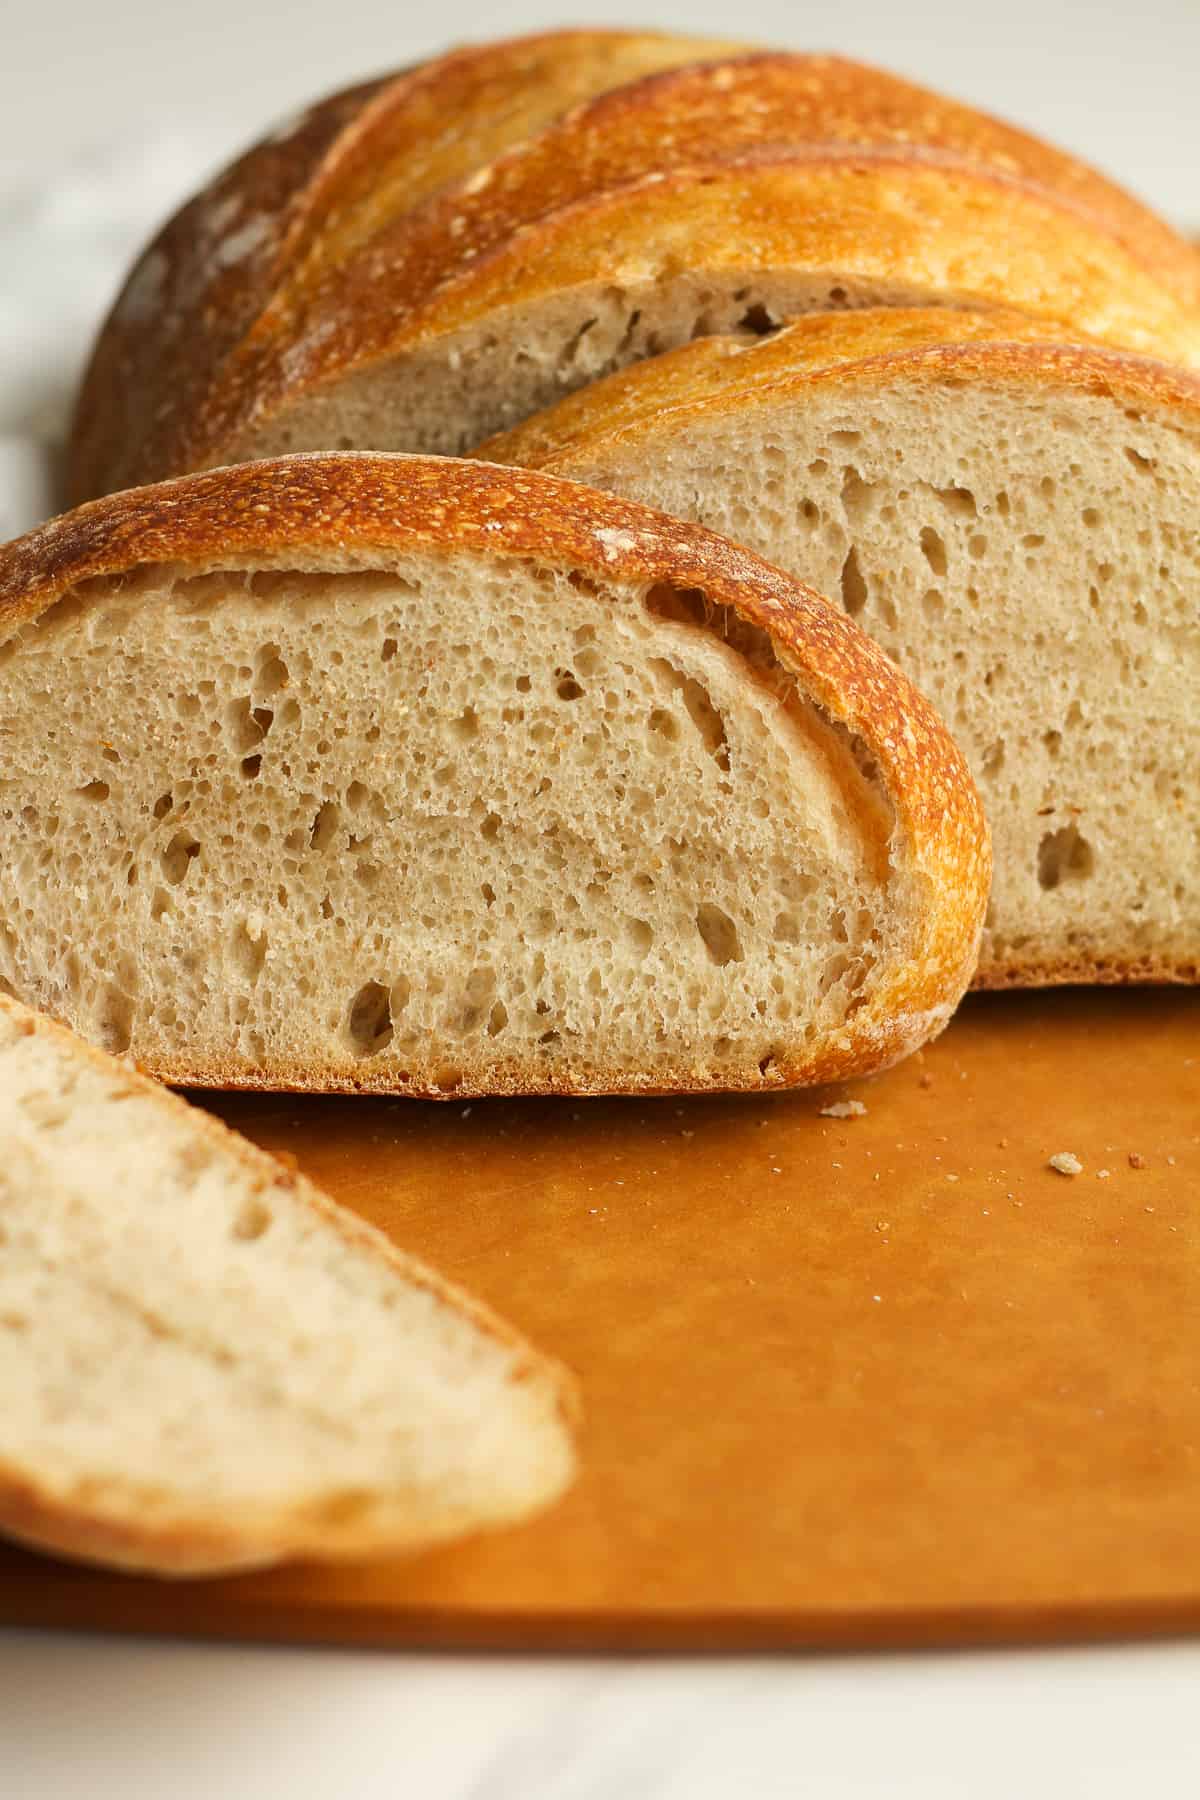
Step 9
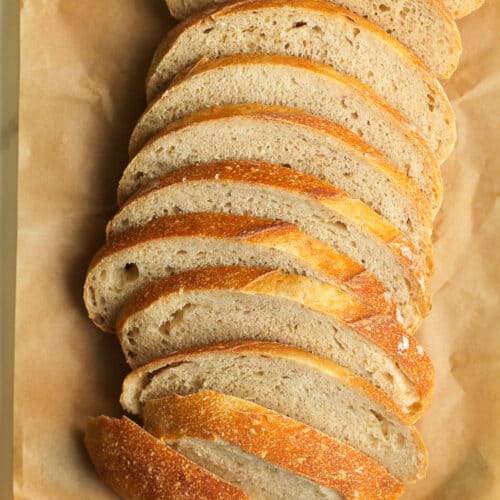
Remove pan and then use parchment paper as handles to lift the bread out of the pan. Place on a cooling rack. Let the bread COMPLETELY COOL before slicing.
Frequently Asked Questions
- What is sourdough? Sourdough is a slow-fermented bread that doesn’t require store-bought yeast to make it rise. It’s a LIVE fermented culture which creates a natural leavening agent. A starter is required to make sourdough.
- What is a starter? A starter is a live culture made over a series of days, consisting of flour and water. It can be kept alive for years with periodic feeding.
- How do you make a starter? A starter can be created in less than a week with a simple combo of unbleached flour and filtered water. It’s a process of removing half of the starter and then “feeding” it every day, storing in a jar on your countertop, and getting it to a bubbly, sour point where it floats in water. More on this later.
- Is sourdough bread healthy? Sourdough bread is NOT gluten-free, as it contains flour, but its long fermentation helps break down this gluten. It’s easier on the gut because it’s more digestible and easier for the body to absorb. It’s also DELISH!
Expert Tips
- Make sure your starter is ready. If you store your starter in the refrigerator between use, make sure it’s active and ready to go before baking with it. I often feed it 2-3 times before using it after resting (i.e. sleeping in the refrigerator). You can test this with a float test. (See definition below.)
- Be flexible. If you’re bulk rise is taking longer than normal, or the starter isn’t as bubbly as you’d like it, be flexible. You can add time to either of these, and still make delicious bread. Many factors will come in to play as to when your sourdough is ready. In the summer months, the humidity and heat will make the process shorter. In the winter months, the process may be longer.
- Measure carefully and then adjust as needed. Make sure you use a digital scale to measure your ingredients in grams. This is important. Even with measuring carefully, you MAY need to adjust slightly. When your hands are on the dough doing stretches and folds, you will come to feel if more water/more flour is needed to make the dough pliable and soft. This comes with practice.
- Practice. Like I said above, as you practice making this bread and enjoying the bounties, you’ll learn all the little nuances to the sourdough process. Practice makes perfect!
- Let the bread cool. One of the biggest mistakes you can make is to slice the bread immediately after coming out of the oven. If you do this, it will be doughy tasting. Let the bread completely cool before slicing!
What is a float test? A float test is when you place a small amount of your starter in a cup of water. If it floats to the top, it’s active and ready to be used.
Example Sourdough Schedules
Like I’ve mentioned, the bulk rise is VERY flexible when making sourdough. You can adjust it to YOUR schedule. If you are working out of the home, you may need to start on a Friday evening. Here are a few examples.
Example 1 – my normal method
- Monday Morning: Feed your starter. Let it rest on the counter until bubbly (time varies greatly).
- Monday Afternoon (or after work): If the starter has doubled and is bubbly (you can also do a float test), then you’re ready to mix up the bread. Make the dough according to my directions. Leave on the counter to bulk rise.
- Monday Evening: Place in the refrigerator overnight (covering with Saran Wrap or a damp towel).
- Tuesday Morning: Shape the dough. Do a second rise. Bake.
Example 2 – longer fermentation
- Monday Morning: Feed your starter. Let it rest on the counter until bubbly.
- Monday Evening: Mix up the bread (if starter looks ready). Let it do bulk rise on counter over-night.
- Tuesday Morning: Place sourdough in the refrigerator. (You can also leave it in the refrigerator for longer than just one evening. I’ve done 48 hours in the refrigerator with no problem.)
- Tuesday Evening: Do second rise and bake.
Are you ready to bake? YES, you are! Please let me know if you have any questions. I’ll do my best to help you through this fun thing called sourdough baking!
See my post on how to store sourdough bread for maximum freshness! Let’s not let our hard work go to waste and savor every single morsel of sourdough.
Kitchen Tools Used: (affiliate links)
xoxo ~Sue
Overnight Sourdough Bread
Ingredients
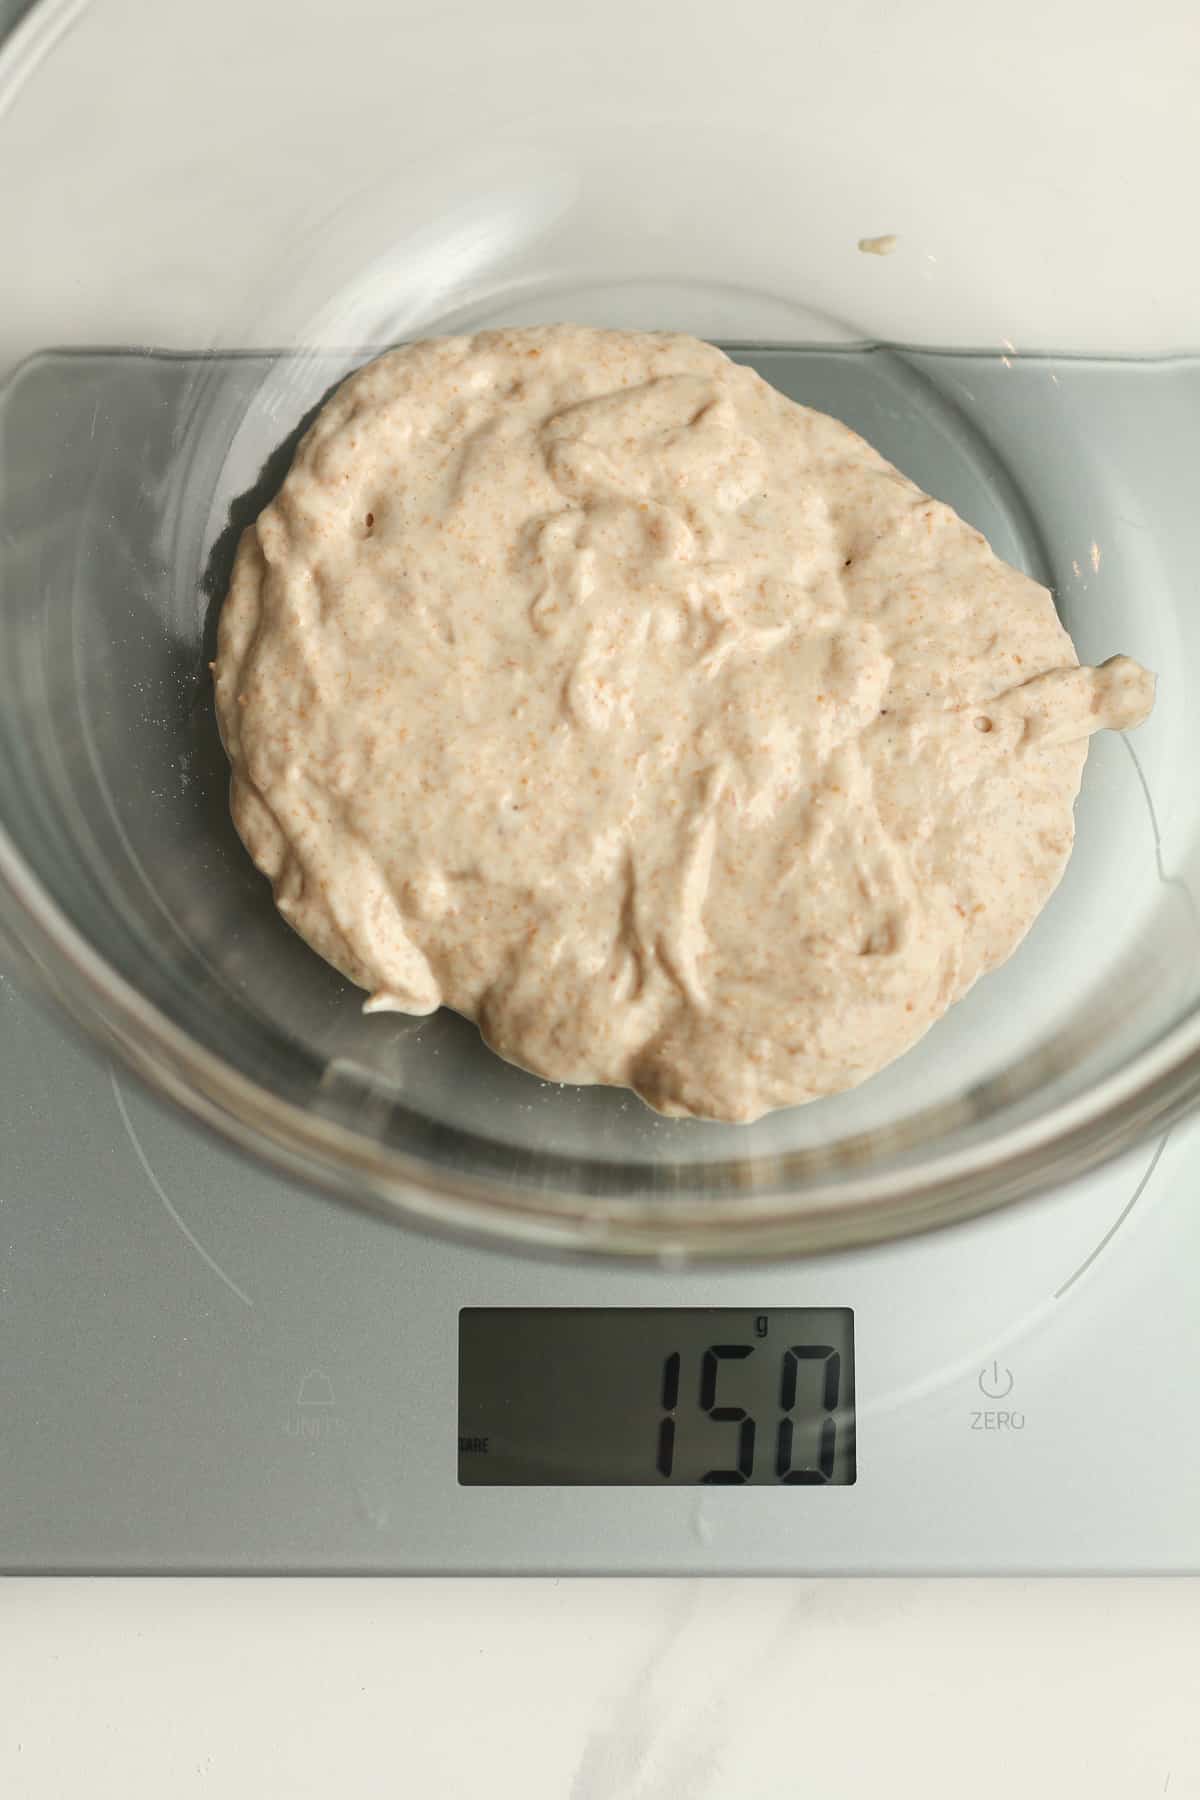
- 150 grams bubbly sourdough starter
- 295 grams filtered water – at room temperature
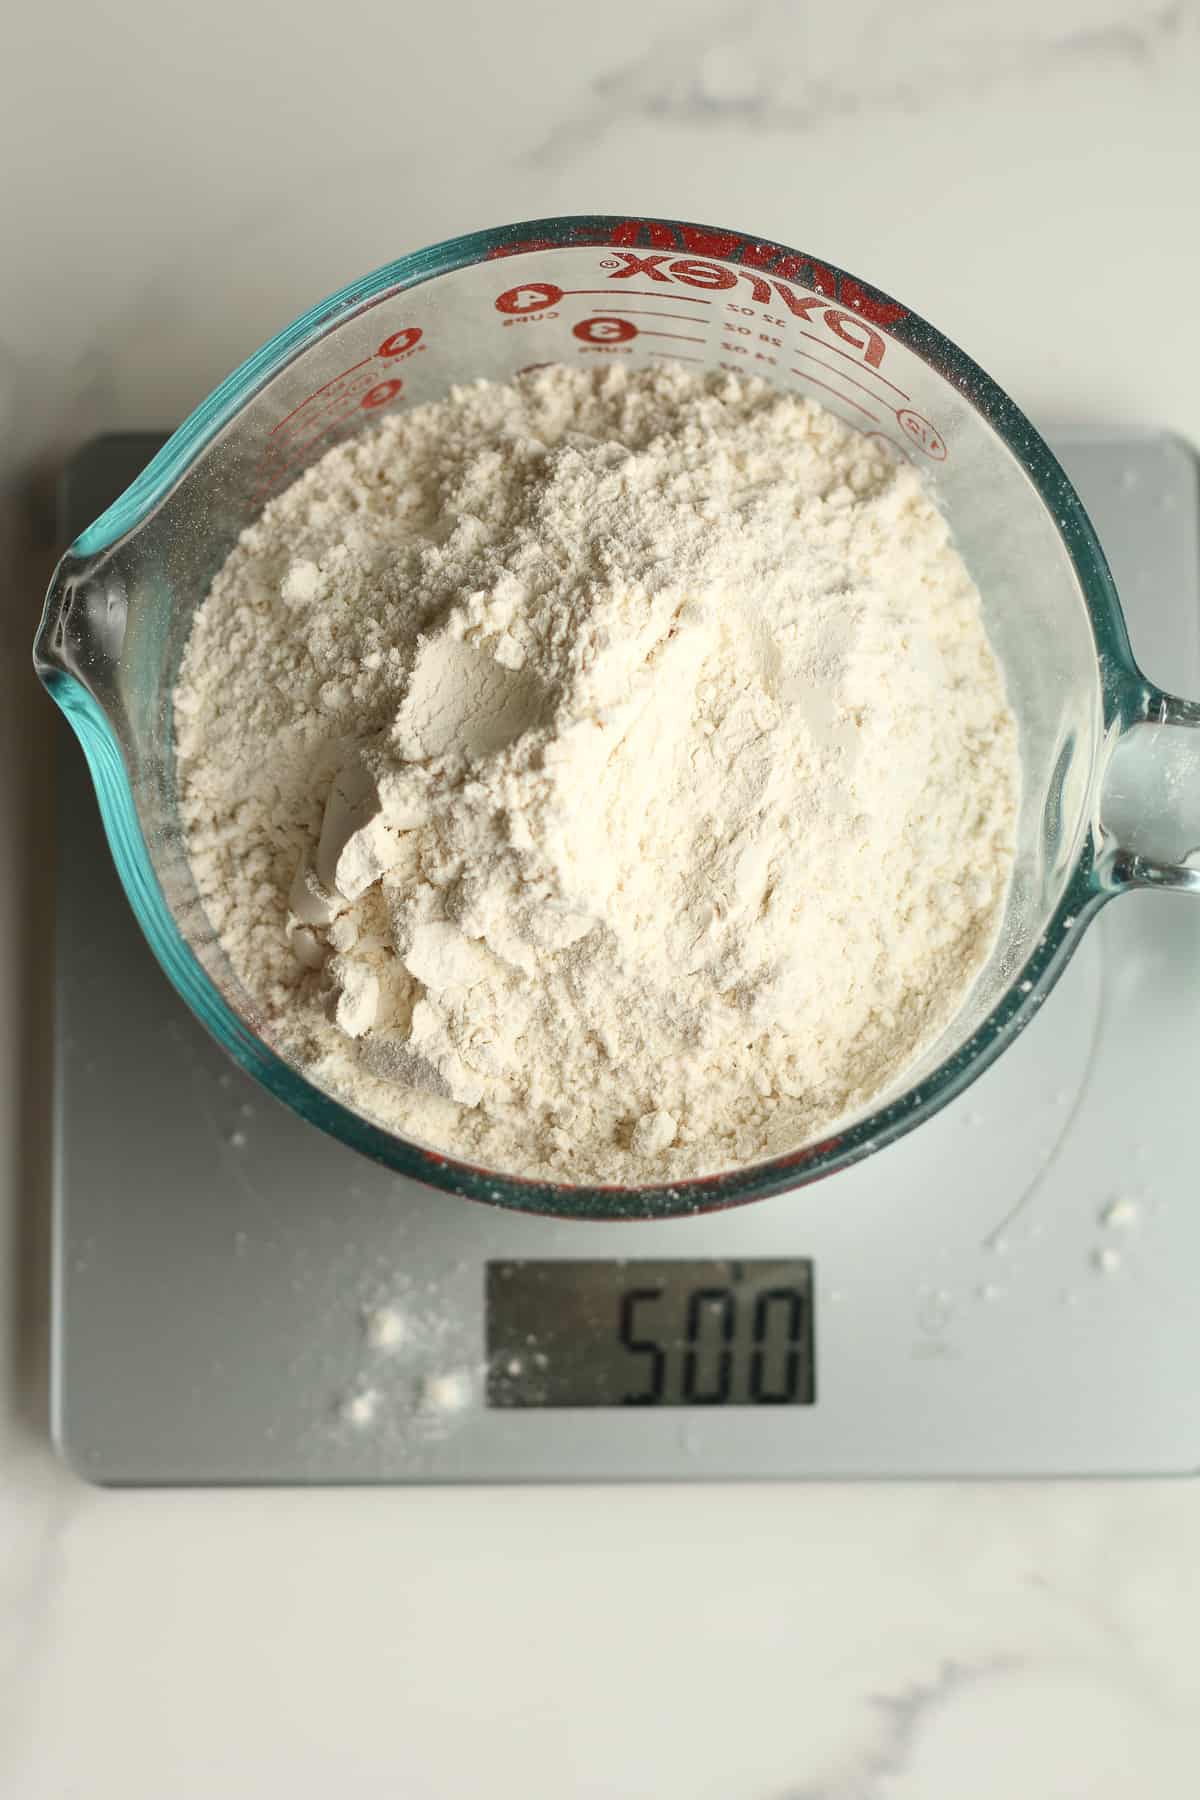
- 500 grams bread flour – unbleached or organic
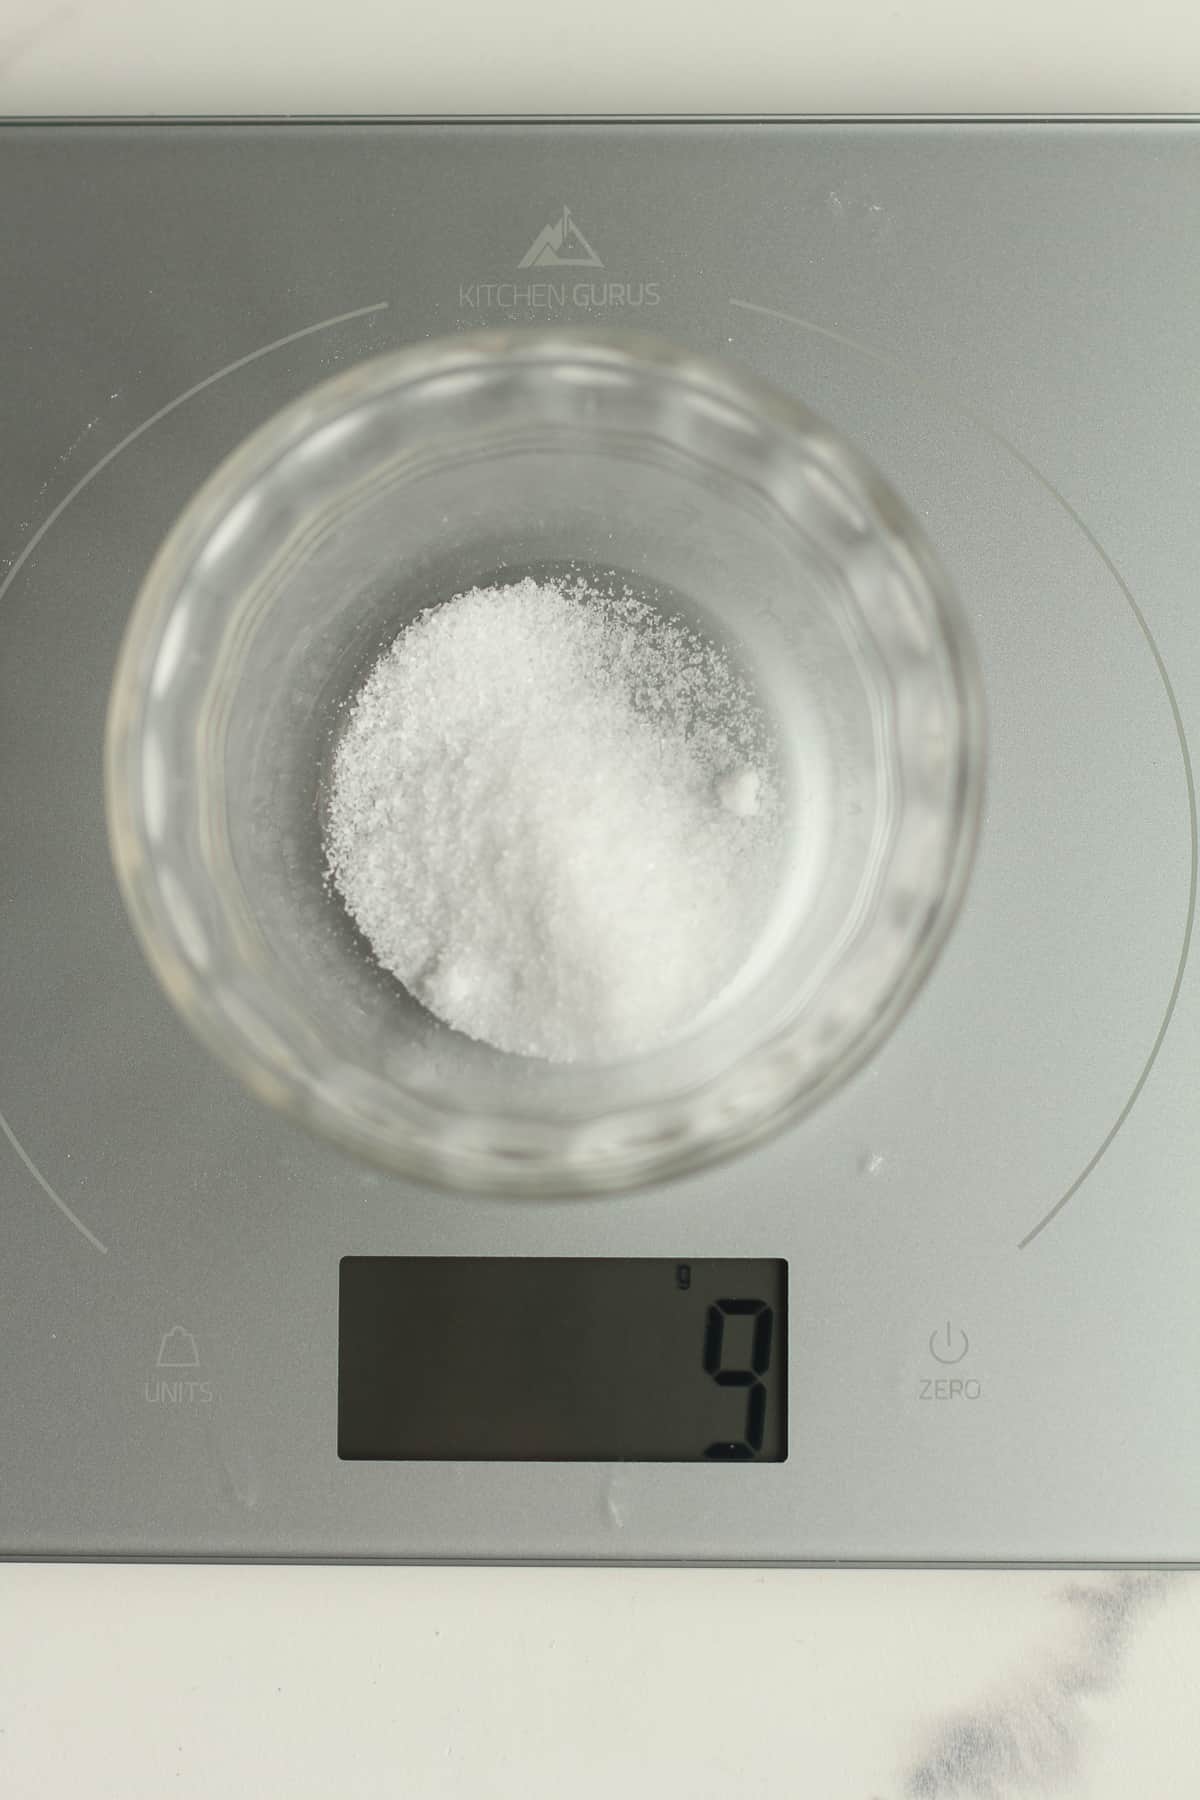
- 9 grams fine sea salt
Instructions
- ** You should always use your starter when it's at it's PEAK or close to it.
- In a mixing bowl, combine all the carefully measured out ingredients. Use your hands to bring everything together. The dough will look scraggy. Cover with a damp towel, and set a timer for 30 minutes. This is the AUTOLYSE.150 grams bubbly sourdough starter, 295 grams filtered water, 500 grams bread flour, 9 grams fine sea salt
- Do a stretch and folding of the dough for about one minute, rotating the bowl as you do the folds. Place the dough seam-side down in the bowl, and cover with the towel again. ADDITIONAL STRETCH AND FOLDS: I recommend doing additional stretch and folds if time permits. Do these every 30 minutes for 3-4 more times to further develop the gluten structure.
- Leave the dough sit on the counter-top for 6-8 hours, or overnight depending on several factors. The dough should double in size. This is the BULK RISE.
- TIP: To avoid getting a crusty layer on the dough during the bulk rise, make sure the bowl is large and the towel is damp. You can also add a light coating of oil over the top of the dough, especially if you are letting it sit out overnight.
- If you'd like, set the dough in the refrigerator for up to 24 hours. This will add to the "sour" taste of the dough.
- Preheat oven to 450 degrees F. Use a dutch oven lined with parchment paper.
- Dust your counter or a baking mat with a light amount of flour. Move your dough from the bowl to the counter and GENTLY FORM into your desired shape. Don't punch down, but pull the outsides inward to form shape. Let the dough sit for five minutes.
- Pull the dough towards you and away, trying to get the dough to be as tight as possible. (See photos.) Cover the dough lightly with saran wrap and let rest for about 1-2 hours. This is the SECOND RISE.Then use a serated knife to slash the top of the bread.
- Transfer the dough to the dutch oven, using parchment paper as a liner. Add the lid and place in the preheated oven. Bake for 20 minutes.
- After 20 minutes, remove lid and bake another 20-25 minutes.
- Remove from the oven and transfer the bread to a cooling rack. Let the bread FULLY cool before slicing.
Notes
Expert Tips
- Make sure your starter is ready. If you store your starter in the refrigerator between use, make sure it’s active and ready to go before baking with it. I often feed it 2-3 times before using it after resting (i.e. sleeping in the refrigerator). You can test this with a float test. (See definition below.)
- Be flexible. If you’re bulk rise is taking longer than normal, or the starter isn’t as bubbly as you’d like it, be flexible. You can add time to either of these, and still make delicious bread. Many factors will come in to play as to when your sourdough is ready. In the summer months, the humidity and heat will make the process shorter. In the winter months, the process may be longer.
- Measure carefully and then adjust as needed. Make sure you use a digital scale to measure your ingredients in grams. This is important. Even with measuring carefully, you MAY need to adjust slightly. When your hands are on the dough doing stretches and folds, you will come to feel if more water/more flour is needed to make the dough pliable and soft. This comes with practice.
- Practice. Like I said above, as you practice making this bread and enjoying the bounties, you’ll learn all the little nuances to the sourdough process. Practice makes perfect!
- Let the bread cool. One of the biggest mistakes you can make is to slice the bread immediately after coming out of the oven. If you do this, it will be doughy tasting. Let the bread completely cool before slicing!
Nutrition
Take a look at all of our 2021 Freaky Friday Fall Edition Recipes:
- An Affair from the Heart – Pumpkin Pie Bars with Shortbread Crust
- Aunt Bee’s Recipes – 30 Minute Skillet Lasagna
- The Carefree Kitchen – Brazilian Cheese Bread
- Devour Dinner – Instant Pot Applesauce
- Fresh April Flours – Instant Pot Garlic Mashed Potatoes
- The Fresh Cooky – Air Fryer Ravioli
- The Foodie Affair – Bacon Wrapped Green Bean Recipe
- Hostess at Heart – Fudgy Chocolate Brownie Cookie Recipe
- House of Nash Eats – Pumpkin Bundt Cake
- Kathryn’s Kitchen Blog – Halloween Monster Cookie Recipe
- Life Currents – Loaded Potato Skins
- Life, Love & Good Food – Lemon Chicken Orzo Soup
- The Speckled Palate – Tortellini Butternut Squash Pasta with Pancetta and Spinach
- Sue Bee Homemaker – Overnight Sourdough Bread
- Take Two Tapas – Air Fryer Asparagus Fries
This was my very first sourdough recipe, and it turned out perfectly on the first try! I’ve made it countless times since — it’s become a staple in our home. We love it with soups, for grilled cheese, or my favorite; with butter and a sprinkle of flaky salt.
I’m so happy to hear this, Sami! Thanks for leaving a review!
I am trying to follow your longer fermentation schedule. My dough is in the bulk rise phase. i did 4-5 pull and folds and then let it bulk rise over night. It has been about 10 hours…it still doesn’t seem doubled and fluffy like your picture. I’m supposed to put it in the fridge now and I was going to bake in the evening. But I am wondering if it is still too early to put in the fridge? Or will it continue to rise in the fridge? Please help!
It may not always get extremely fluffy and that is ok. I’d proceed with placing in the refrigerator for awhile and then getting ready to bake.
Could you tell me what is your formula/ratio to make 150 grams starter? thanks, Pat
Follow our Sourdough Starter Basics to learn how to make a starter. It is half water and half flour.
I am currently making this bread, the first recipe I was given was a fail. But I will say that’s my fault I didn’t know when to use my starter. So I’m excited for this one. I’ll let you know how it turns out.
Please let me know, Alice!
Thank you so much! I made this bread and it’s delicious!
This makes me happy. Thanks Susie!
Do you heat the Dutch over before baking?
I don’t normally do that but you could if you’d like.
This was the first highly successful sourdough recipe I’ve tried!!! Thank you so much for this recipe! I love the overnight process, too, and having fresh bread first thing in the morning. I’m curious, have you ever tried baking this recipe in a loaf pan or would you recommend just sticking with the dutch oven method? Thanks!
Hi Claire. I have not tried baking this in a loaf pan but I think that would also work. You would get more of a smooth exterior instead of a crunchy one.
Thanks for all your support getting me started on my sourdough journey. “Sadie” and I aren’t best friends yet, but working towards it! I truly appreciate all your pro-tips, photos and phone calls last week!
I hope Sadie yields delicious bread for you, Danalea!
Things I love about this loaf:
It’s pretty!
It’s easy!
Tastes amazing!
Can be sliced thinly
Makes the best toast and grilled cheese…
I have made this over and over and it’s never failed. Thank you!!
Hi Amanda! I’m so glad that this recipe turned out for you! Thanks for your feedback!
I was so intimidated to try to make sourdough, but it was very easy! I kept telling my family that we had to wait for it to cool before we cut it, but the smell of fresh bread was more than they could take. They cheated and declared it “cool enough” and preceeded to devoured almost the entire loaf that night! 😂
Haha. Thanks Cathy!
I have never been able to bake bread and I spend a fortune at the bakery on crusty loaves of bread. So i can’t tell you how excited I was to try this recipe. Can I say that I look like a professional baker now and the bread is so good!
Sourdough bread is one of my favorite types of bread! I loved how easy this recipe was, and the homemade flavor of this bread was so good!
Thanks Rebecca!
This made the PERFECT loaf! We made our sourdough starter, Penelope, during the early days of 2020, and she’s still going strong. This bread was delicious!
All these tips and tricks and PHOTOS were awesome! Thanks for sharing, Sue!
Obsessed with this recipe! It was so easy to make and we ate it so fast, can’t wait to make this again! Thanks for another great recipe 🙂
Thank you so much, Kathryn!
We make bread all the time, but your tips were very helpful for me too! And this loaf of bread is simply fantastic!
Thank you so much, Debi!
All of your bread is awesome, but this is my new favorite!
Thanks for sharing so many helpful tips to help me get over all my bread making intimidation! My family absolutely loves sourdough bread and this loaf is just beautiful!
Thanks Sheila!