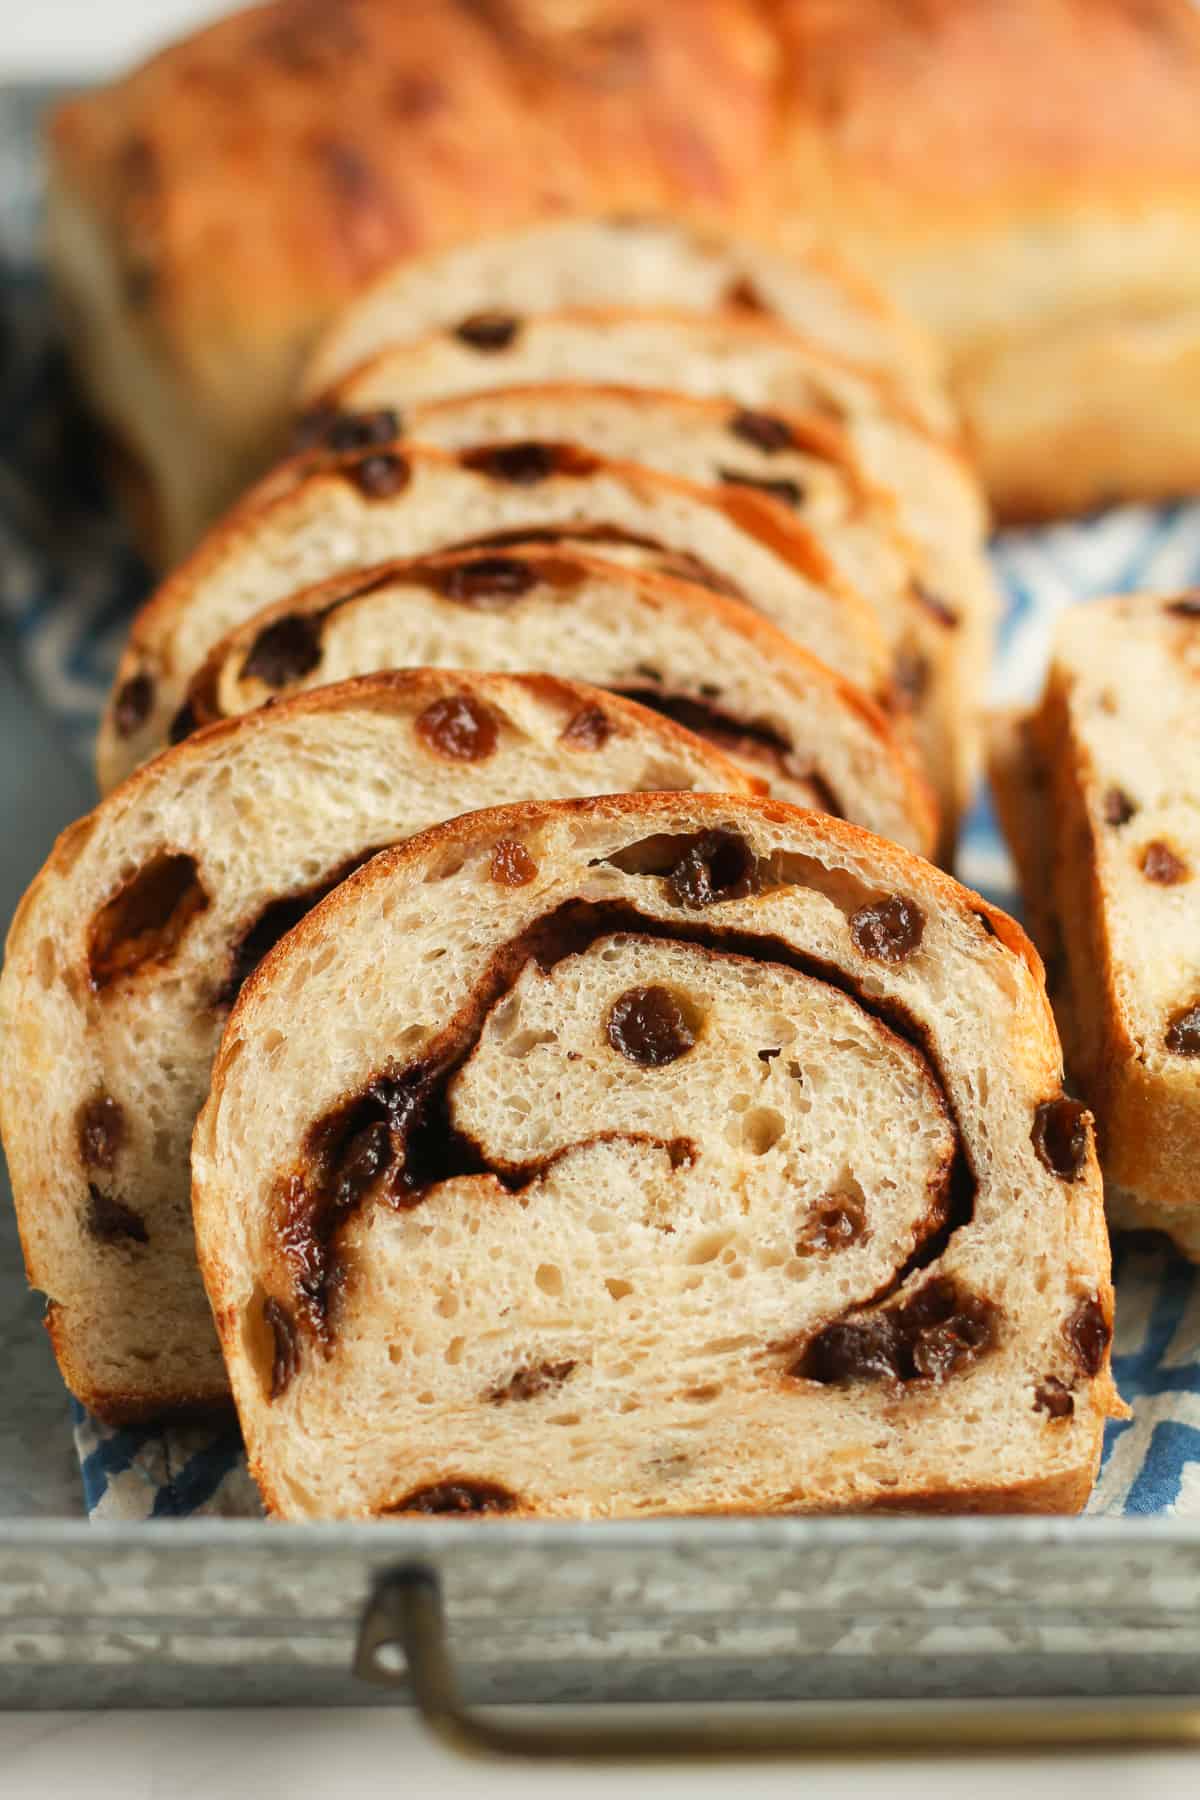
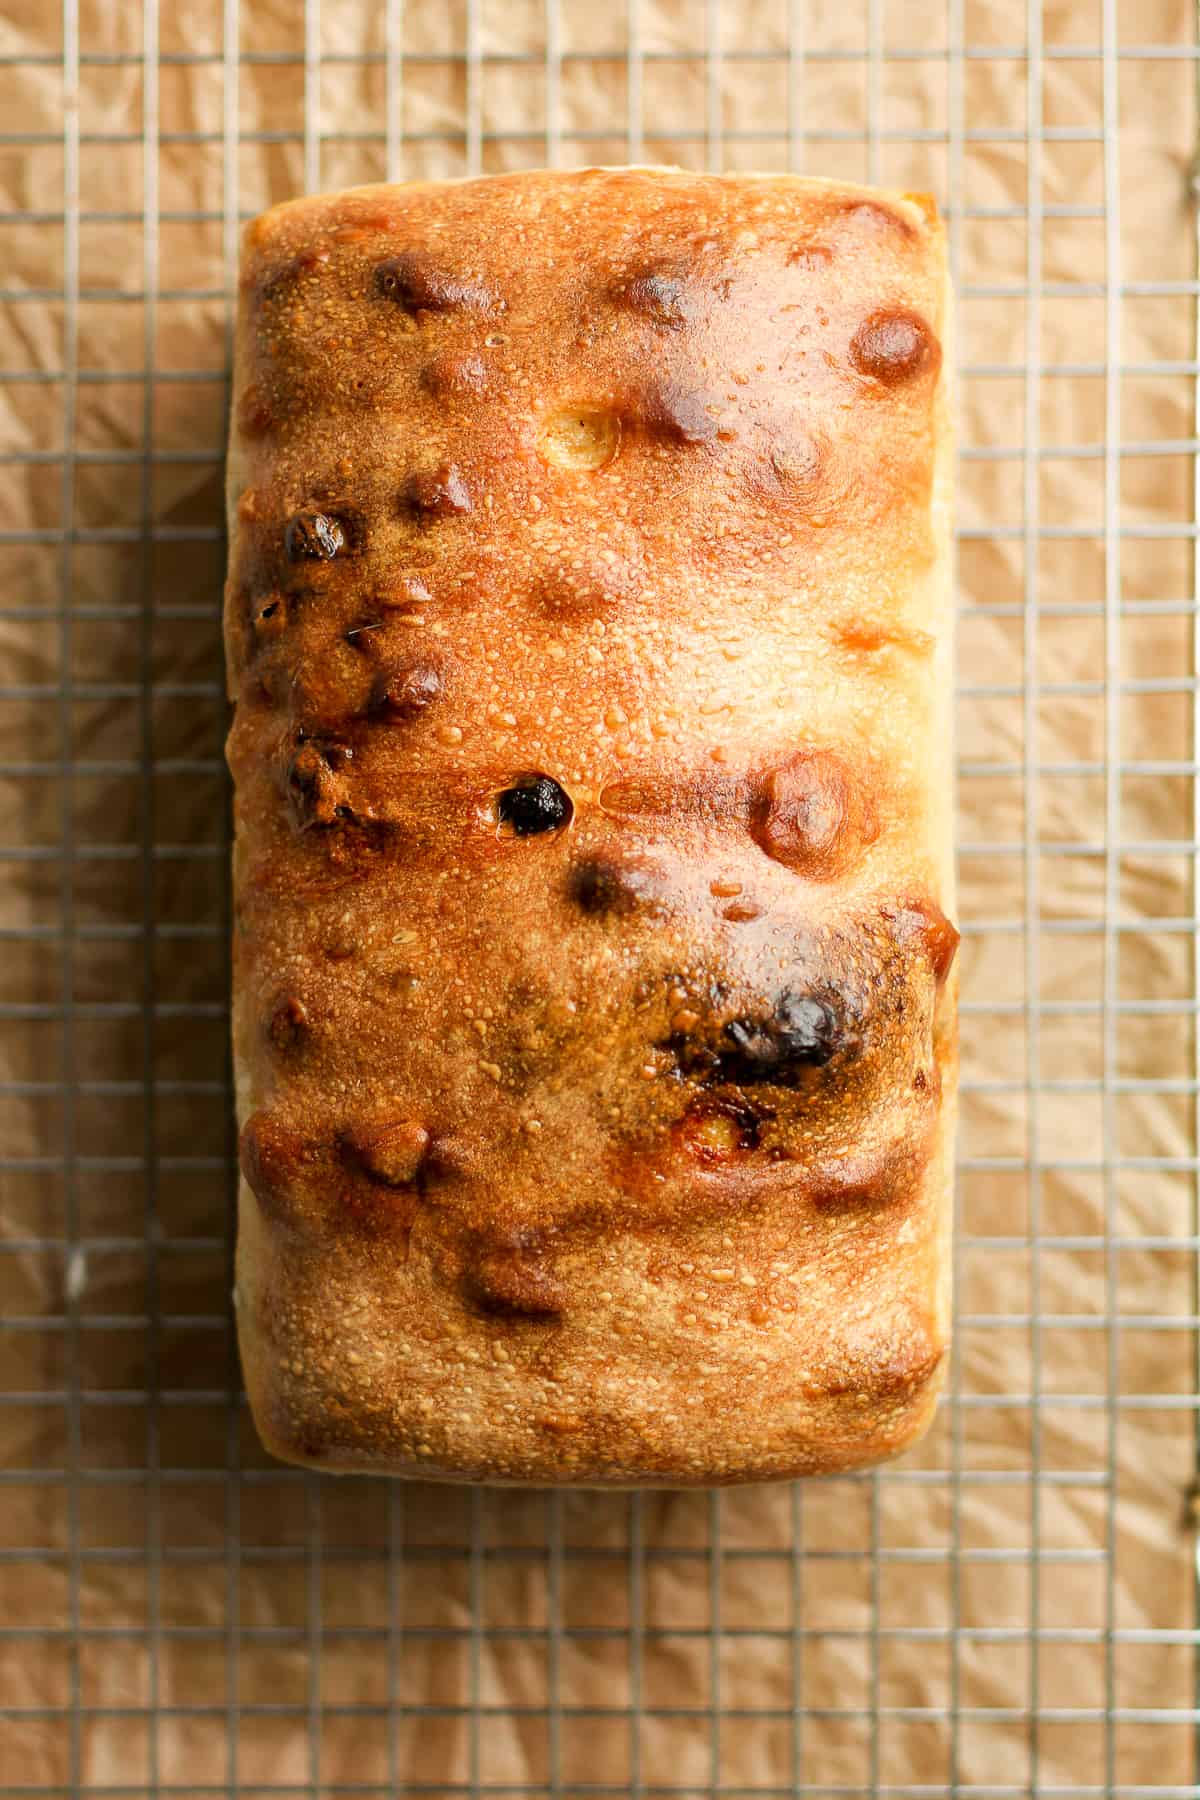
Cinnamon Raisin Sourdough Bread
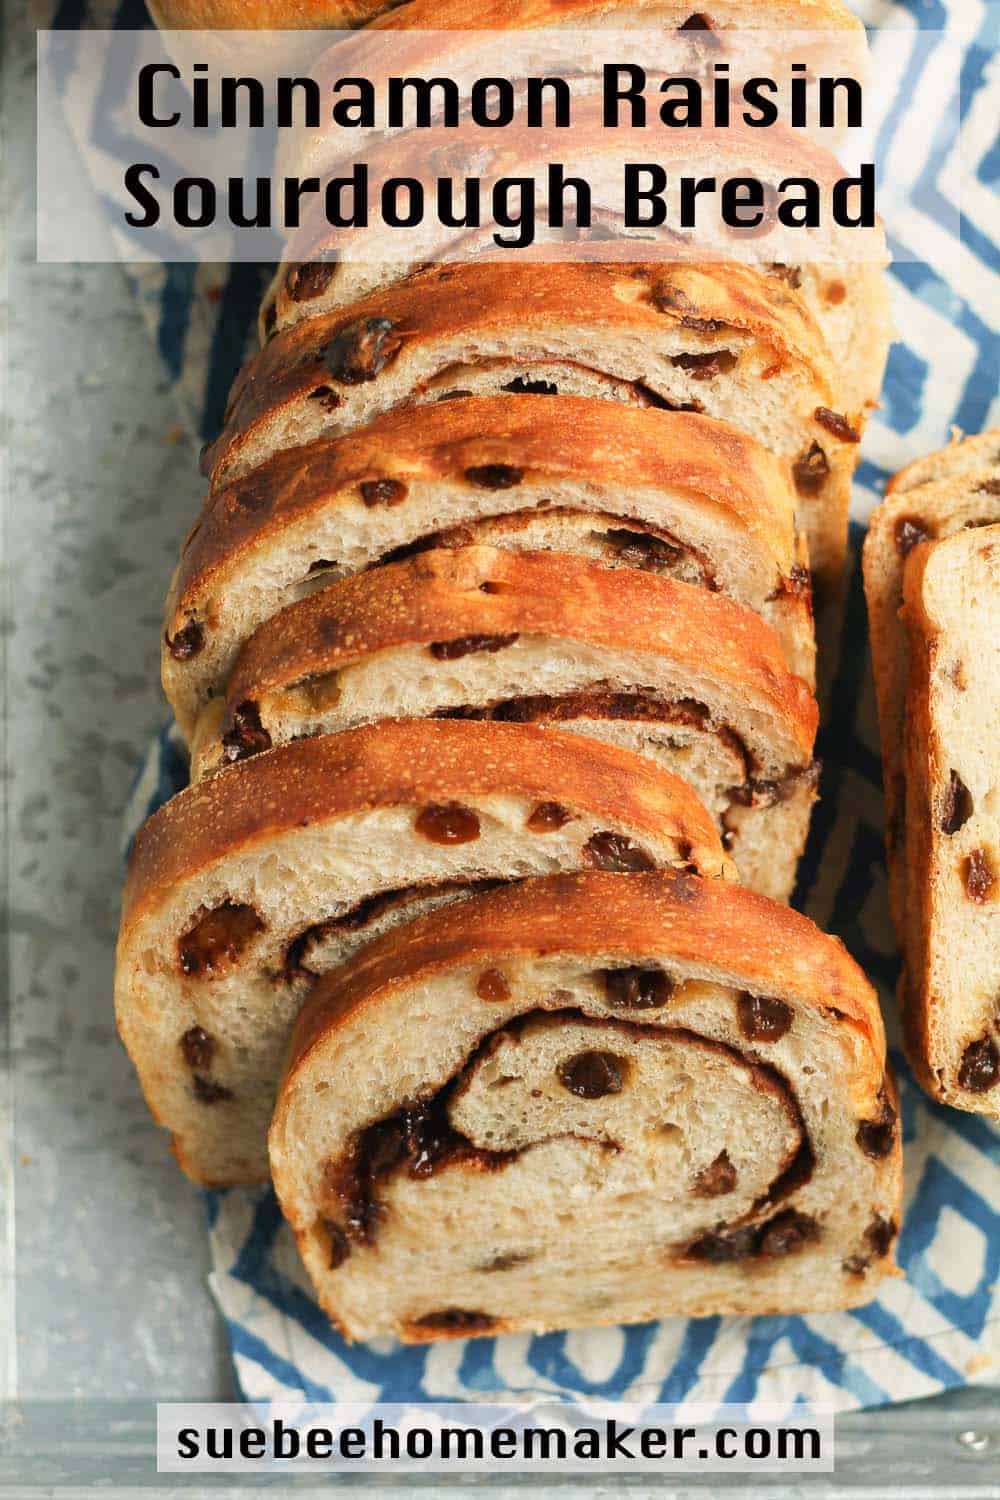
Adding cinnamon and raisins to sourdough bread takes your everyday loaf up a notch. Cinnamon Raisin Sourdough Bread makes the best toast, especially when you add a pat of butter or a slathering of jam!
Sourdough Raisin Bread
Hello from the self-professed sourdough bread addict! I’m on the bandwagon big time, and I can’t even explain how many batches of bread I’ve made while testing this delicious cinnamon raisin bread! (If you follow me on Insta Stories, you already know. LOL!)
This bread? It’s cinnamon spiced, full of raisins, with that sourdough flavor we all love – and will make you say “mmmm good”! Toast it, top it with butter, jam, or BOTH, and then devour. It would also make an amazing French Toast Casserole. Can you imagine?
While I love a good slice of regular sourdough sandwich bread, this one is special. It reminds me of that packaged slice bread but SO MUCH better. If you’re planning for company, definitely make this right before they come because the smells are intoxicating!
Make your own sourdough starter at home with just a few simple ingredients using Sourdough Starter Basics. In just over a week’s time and a little bit of patience, you’ll be ready to use your active starter to make the best sourdough bread!
Ingredients Used:
- Bubbly Starter – The starter is THE most important part of sourdough bread making. It takes a little time, but you will be rewarded over and over again.
- Filtered Water – Use a filtered water, either out of your refrigerator filter system or use bottled water. The water should either be room temperature or slightly warmed before adding it to the sourdough process.
- Flour (Unbleached) – For this recipe, I used a combination of bread flour and whole wheat flour. Organic is normally unbleached, btw.
- Salt – I use a fine sea salt.
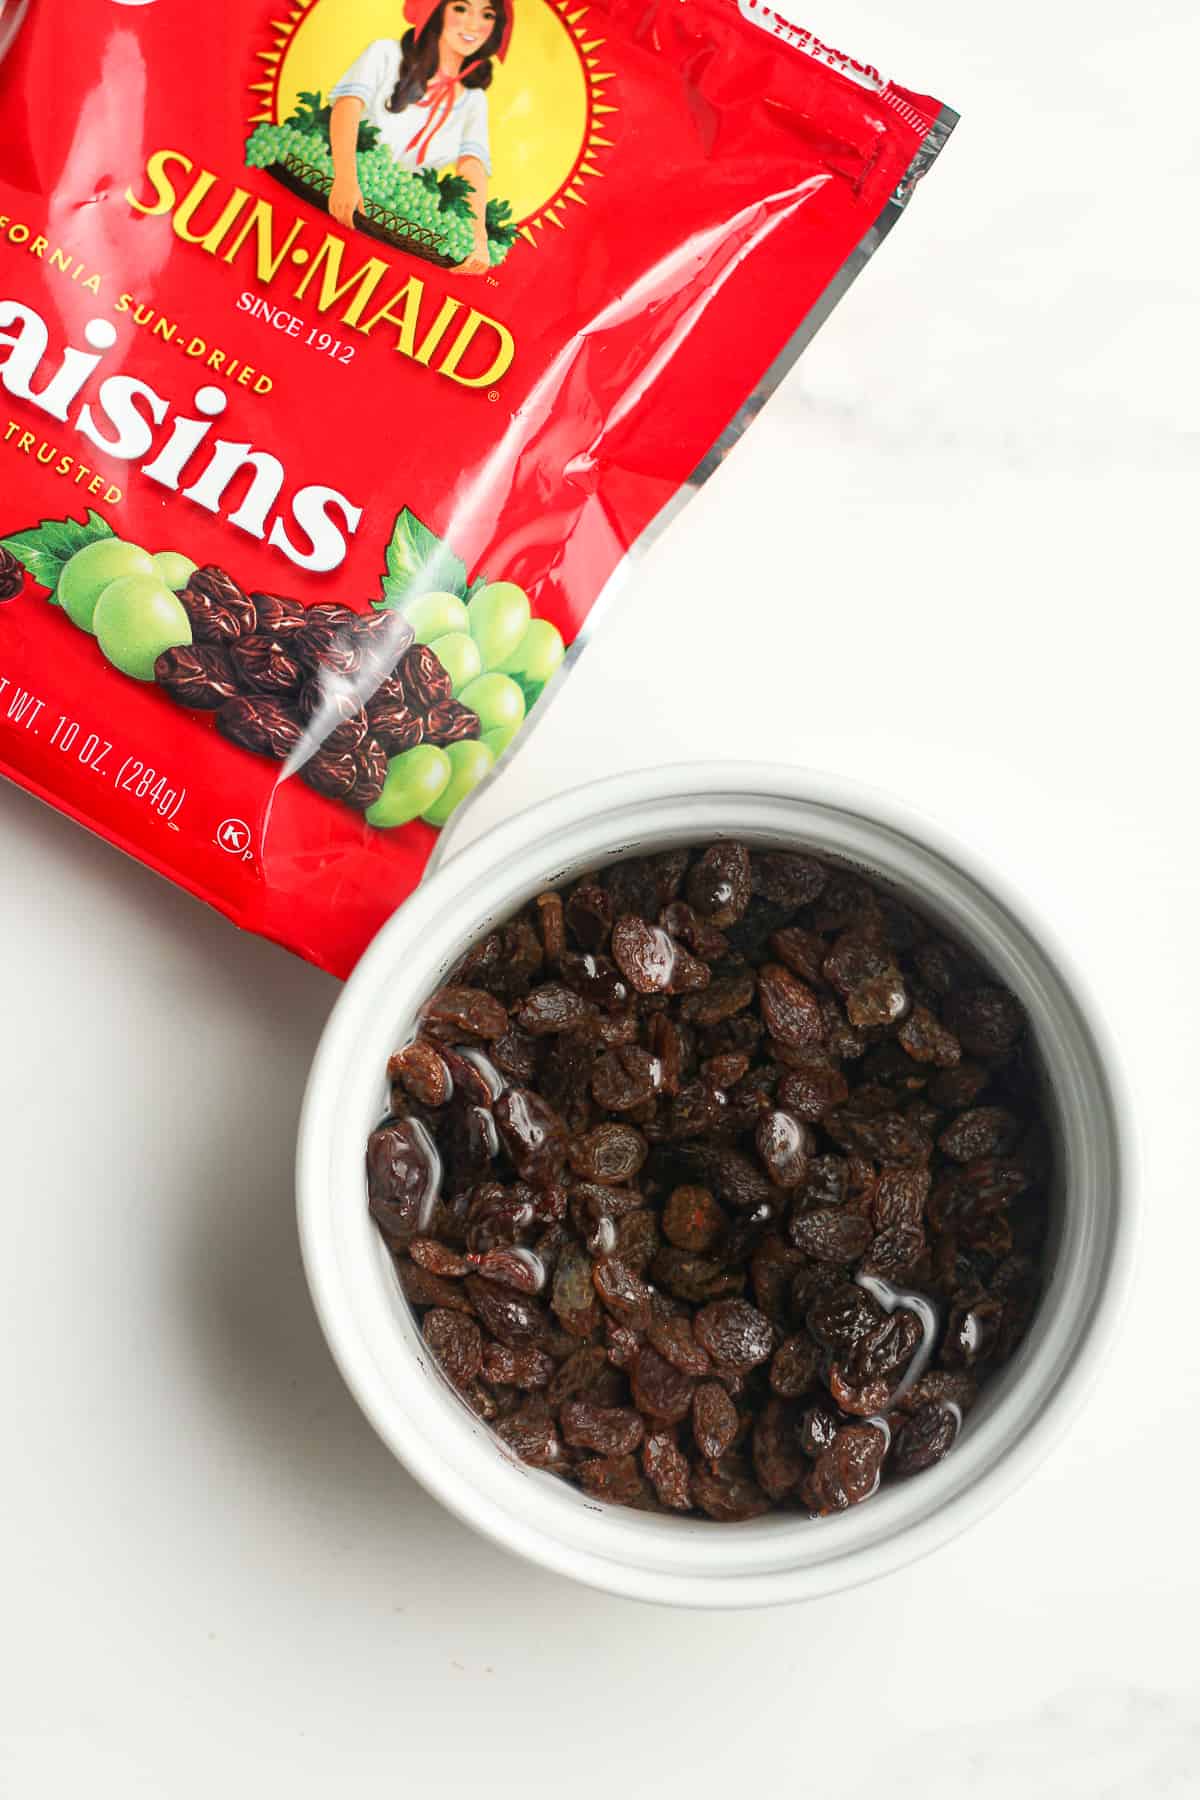
- Raisins – Make sure you soak the raisins in warm water for about 45 minutes to an hour. This is also important in our Cranberry Walnut Sourdough Bread.
- Sugar – Use brown sugar for a little sweetness.
- Cinnamon – Some cinnamon adds great flavor to this bread.
How to prepare starter to have enough for your recipe:
First of all, consider this:
- If your starter is rather large and you’ll know you have enough to bake with, then carry on. No need to adjust.
- If your starter is rather small, you’ll need to bulk it up so that you have enough to bake with and some to keep. (Because my rule of thumb is to NEVER RUN OUT OF STARTER!)
Proceed, if necessary:
- Feed the starter as normal up to the day before you bake, generally speaking.
- Adjust the starter the day before you bake OR the day you bake.
- If you need 75 grams of starter in your recipe, you’ll want to have roughly 100 grams of starter at the ready. Some to use and some to keep.
- So if you only have about 50 grams of starter and then 25 grams after discard, add 35 grams of water and 35 grams of flour to your starter to bulk it up.
How to make Cinnamon Raisin Bread
Step 1
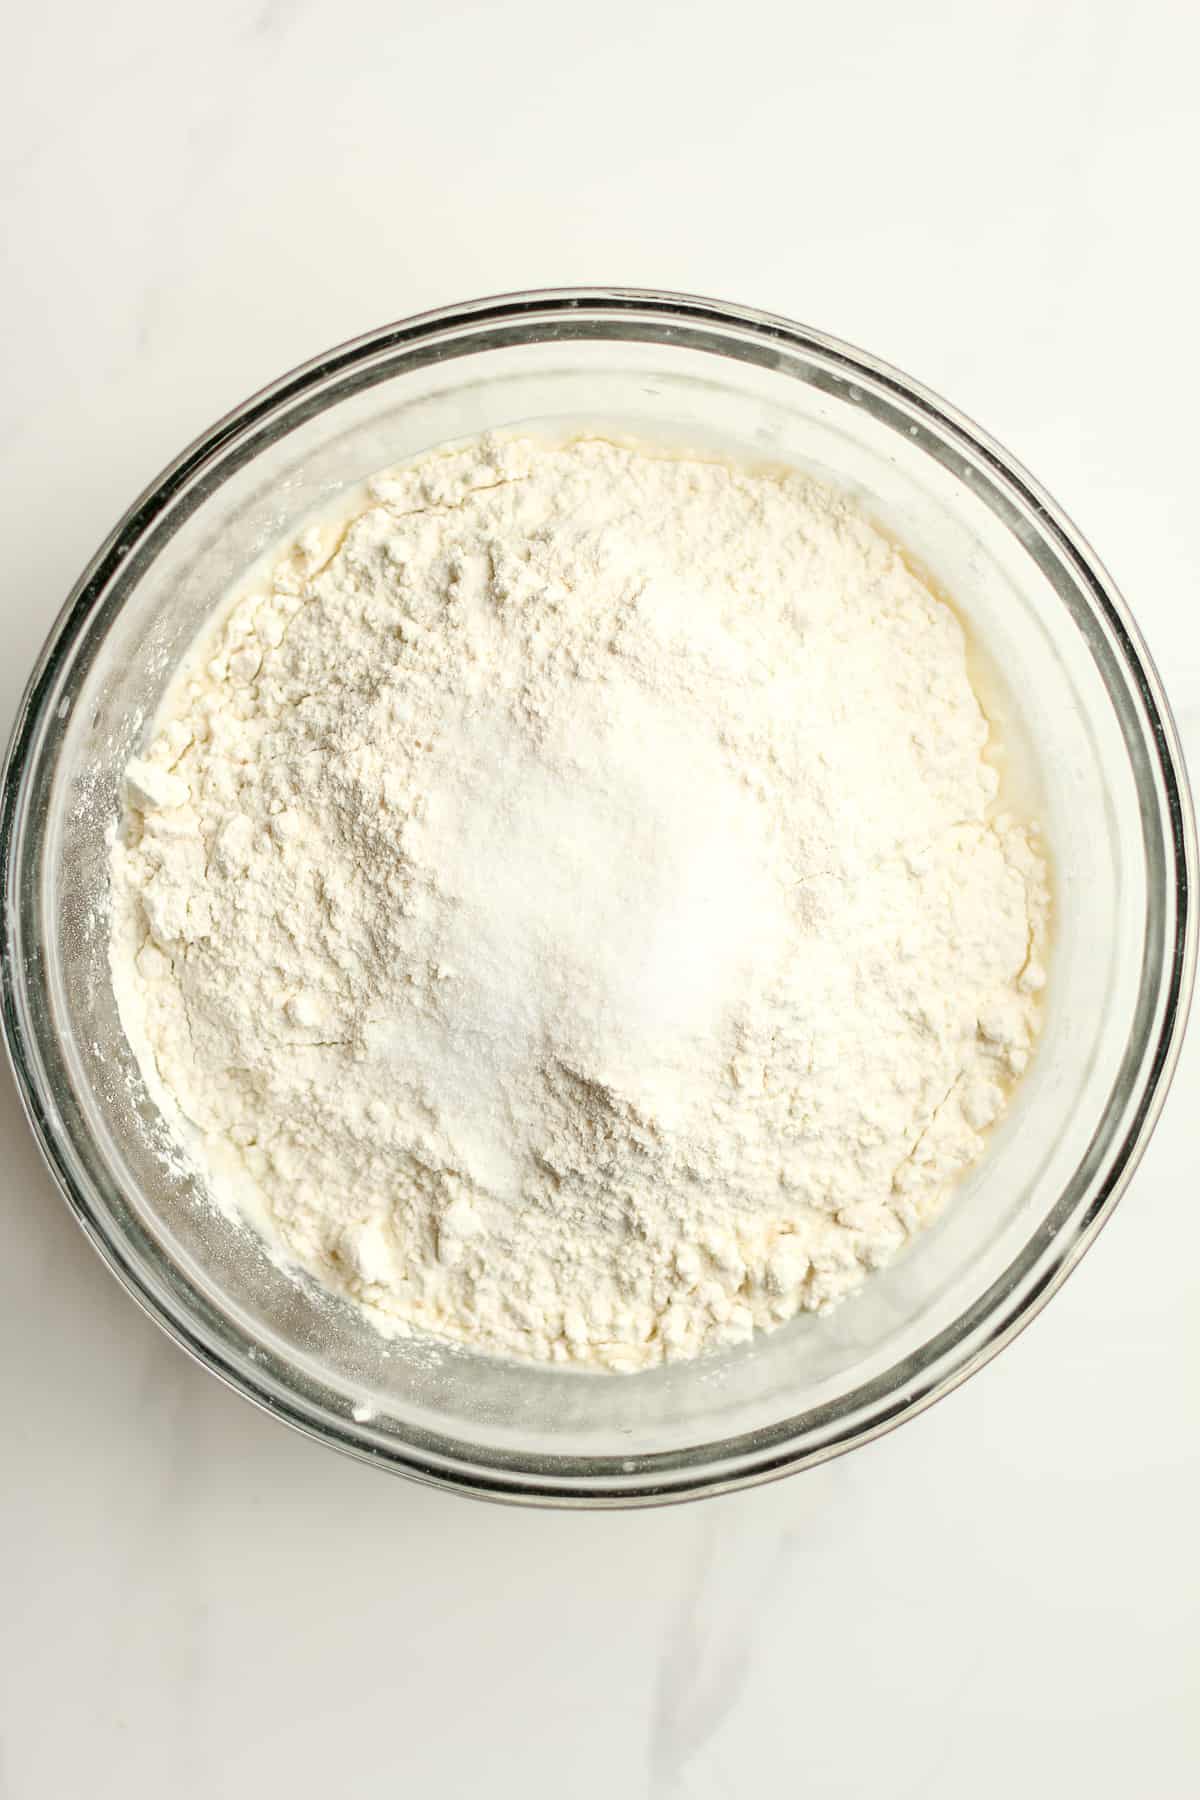
Carefully measure out all the ingredients and combine in a mixing bowl. Use a fork and stir.
Step 2
Then use your hands to bring the ingredients together. It will look shaggy. Cover with a damp towel and let it sit for 45 minutes. (Be sure to set a timer.) This is the AUTOLYSE.

Step 3
Soak the raisin in some warm water for least an hour. Drain the liquid off.
Step 4
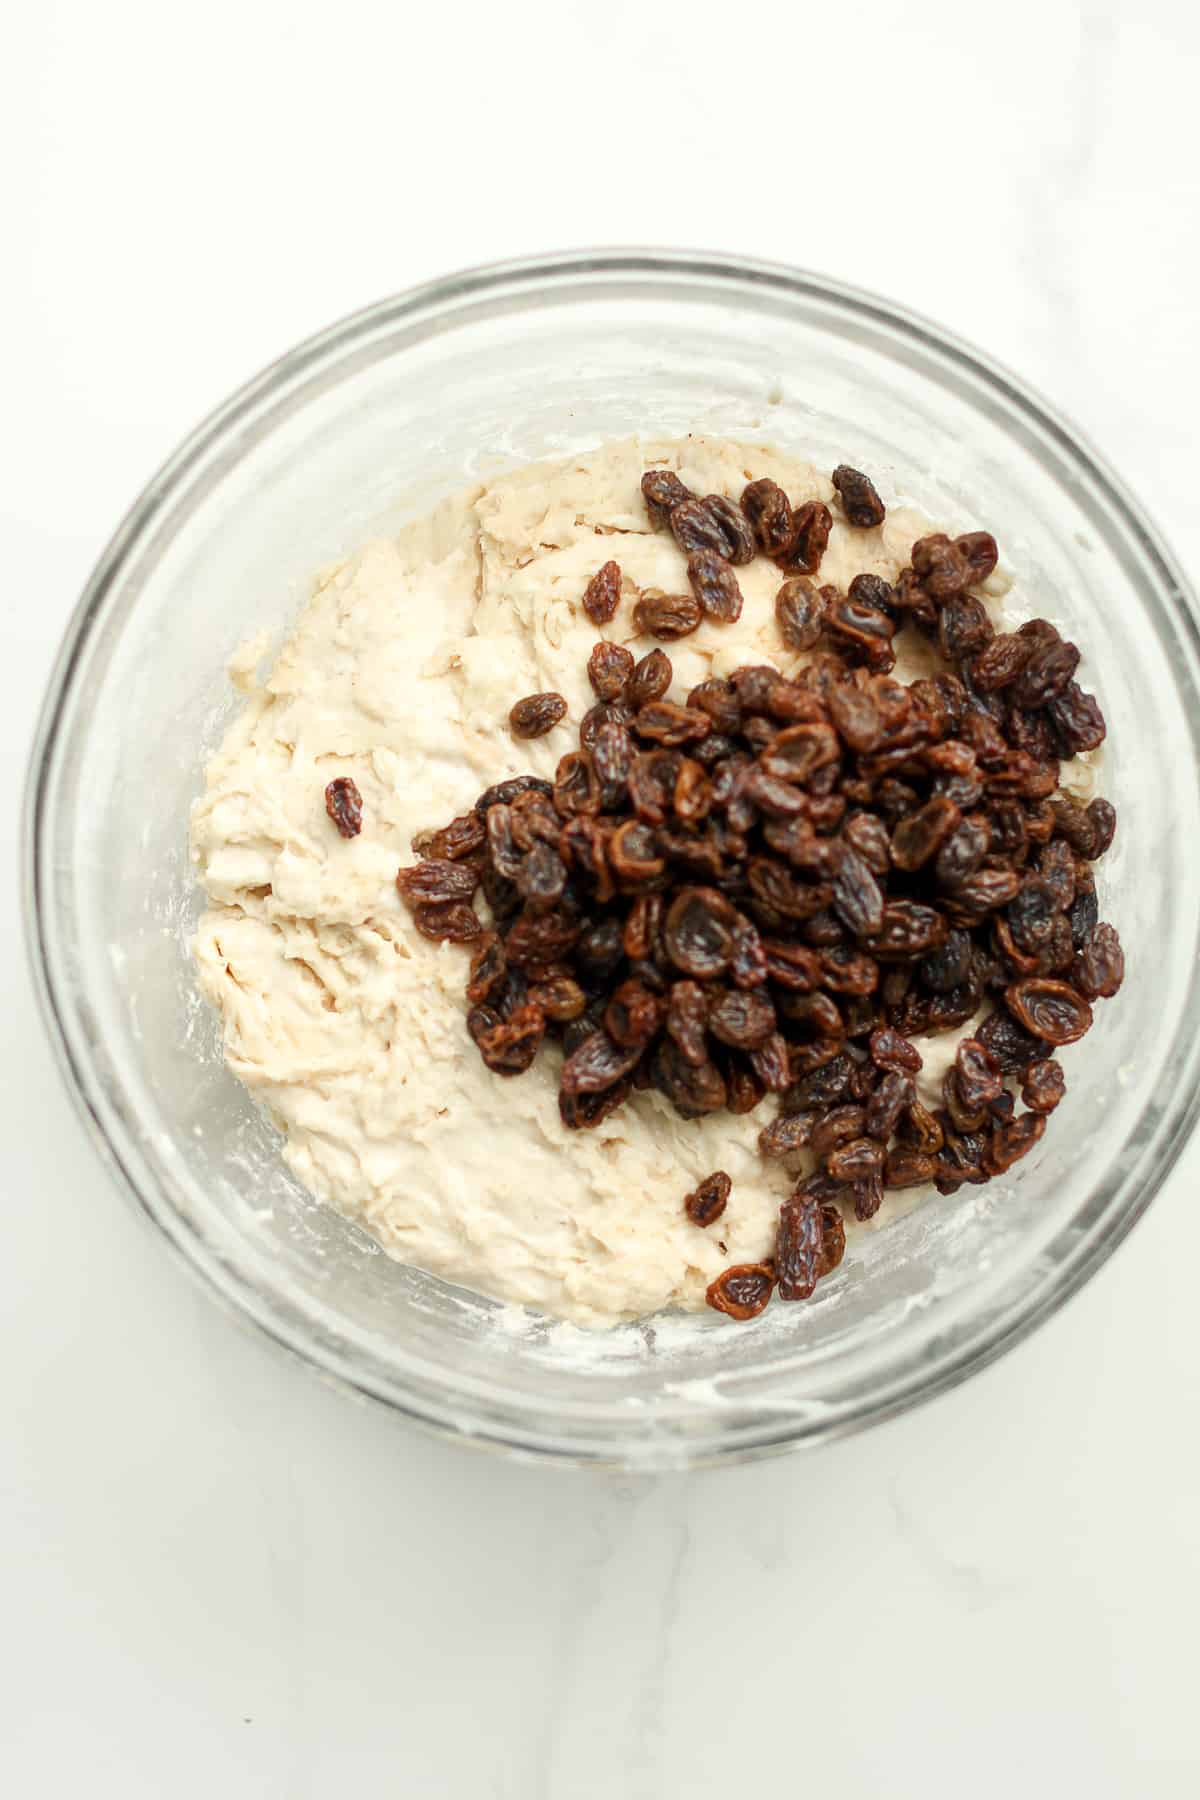
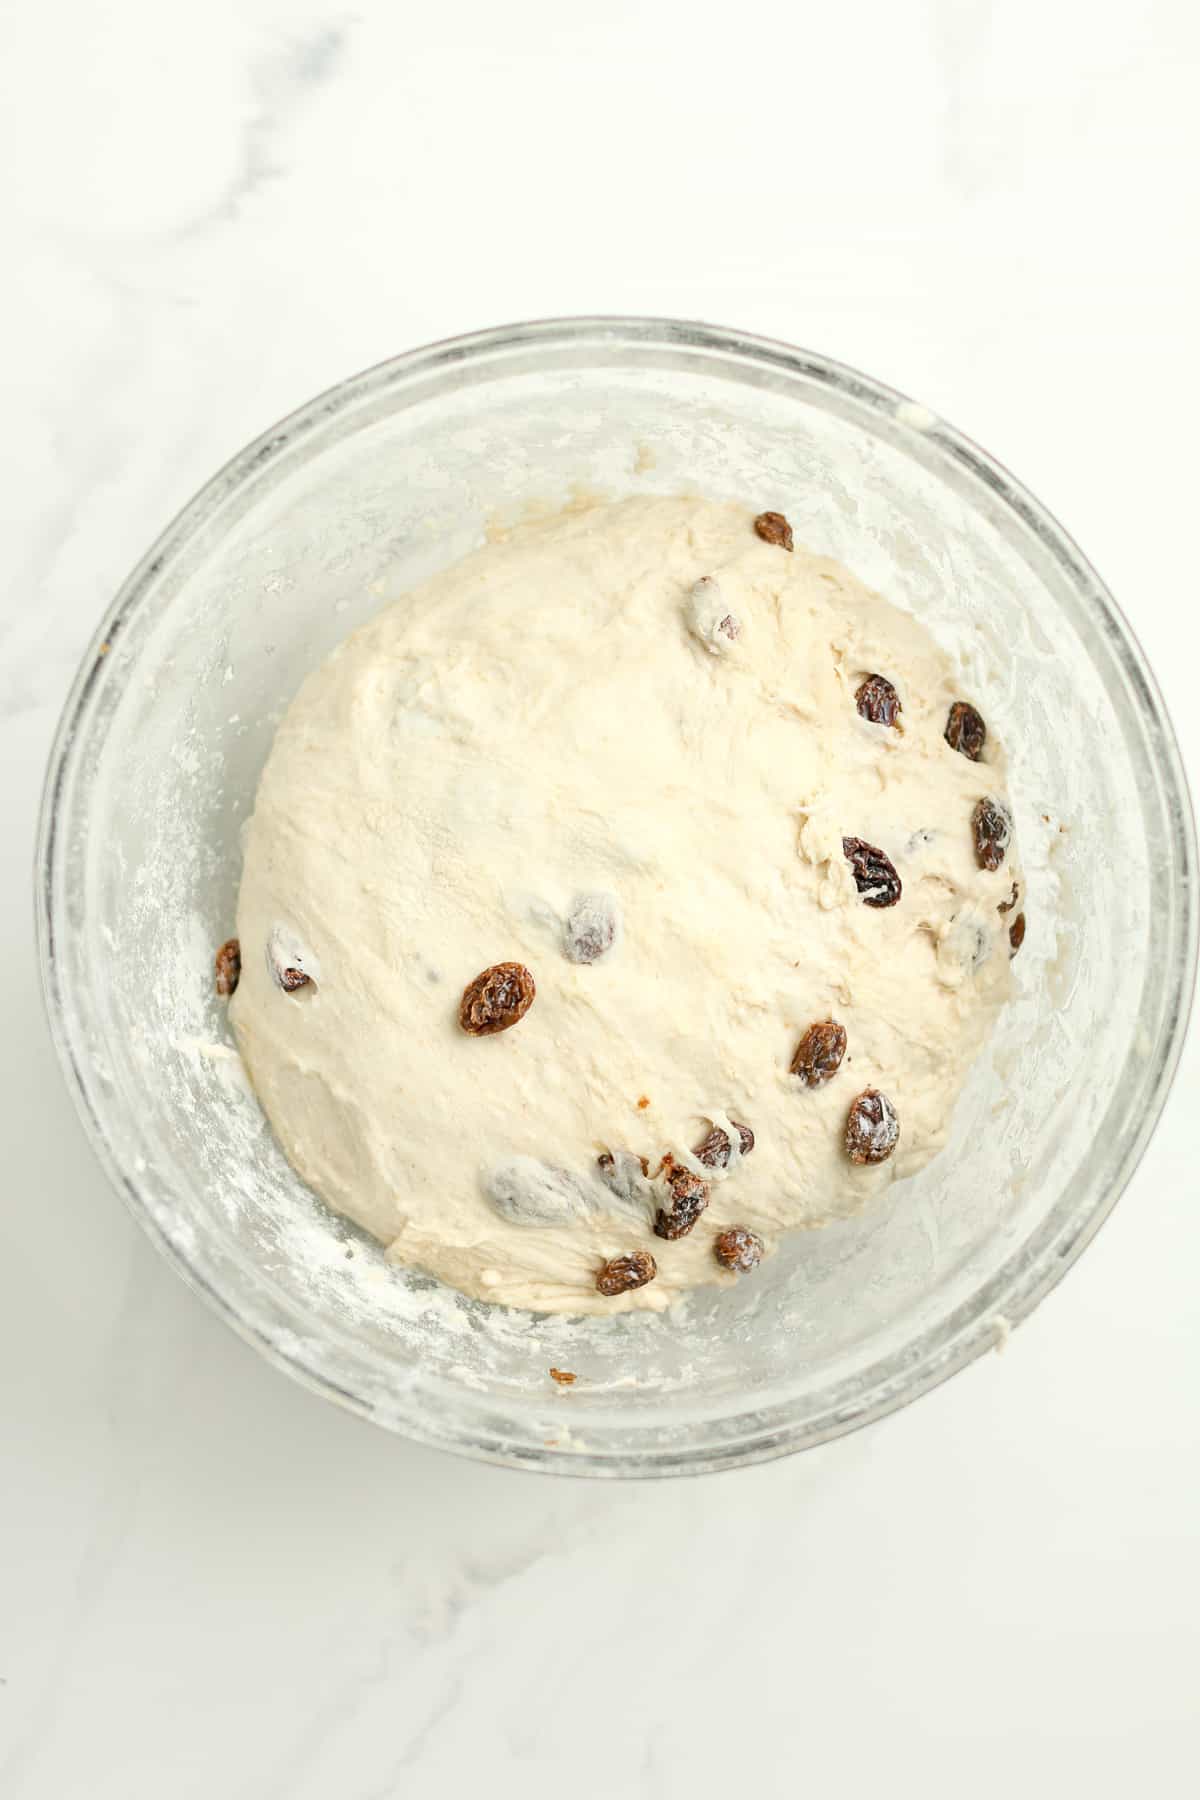
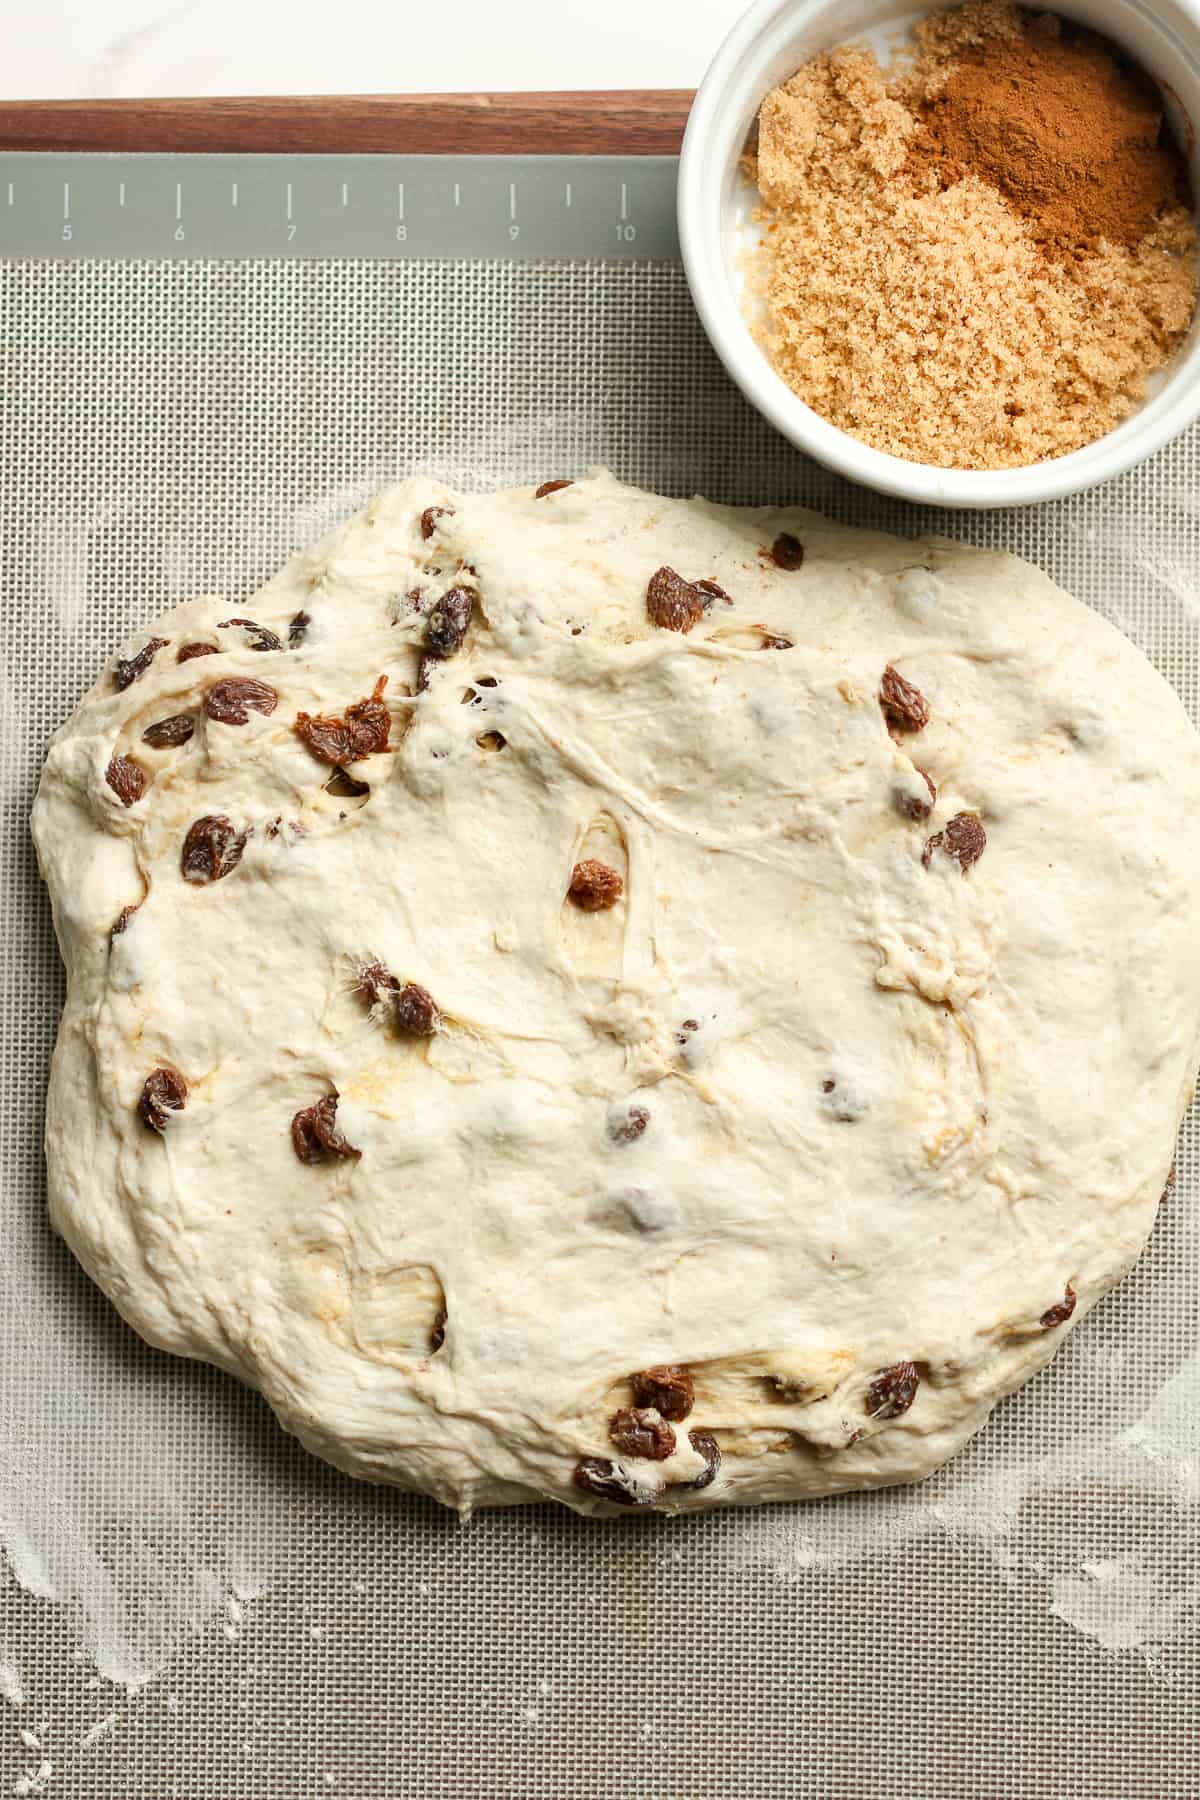
After the autolyse, add the raisins and start the stretch and folds. Use your hand and lift the dough up on one side, stretching it upward, and then punch into the center of the dough. Turn the dough and repeat, trying to keep the raisins in the center of the dough. Continue this process for about one minute. This is the STRETCH AND FOLDS. Form the dough into a smooth ball, and place damp towel back on the bowl.
ADDITIONAL STRETCH AND FOLDS: I recommend doing additional stretch and folds if time permits. Do these every 30 minutes for 3-4 more times to further develop the gluten structure.
Step 5
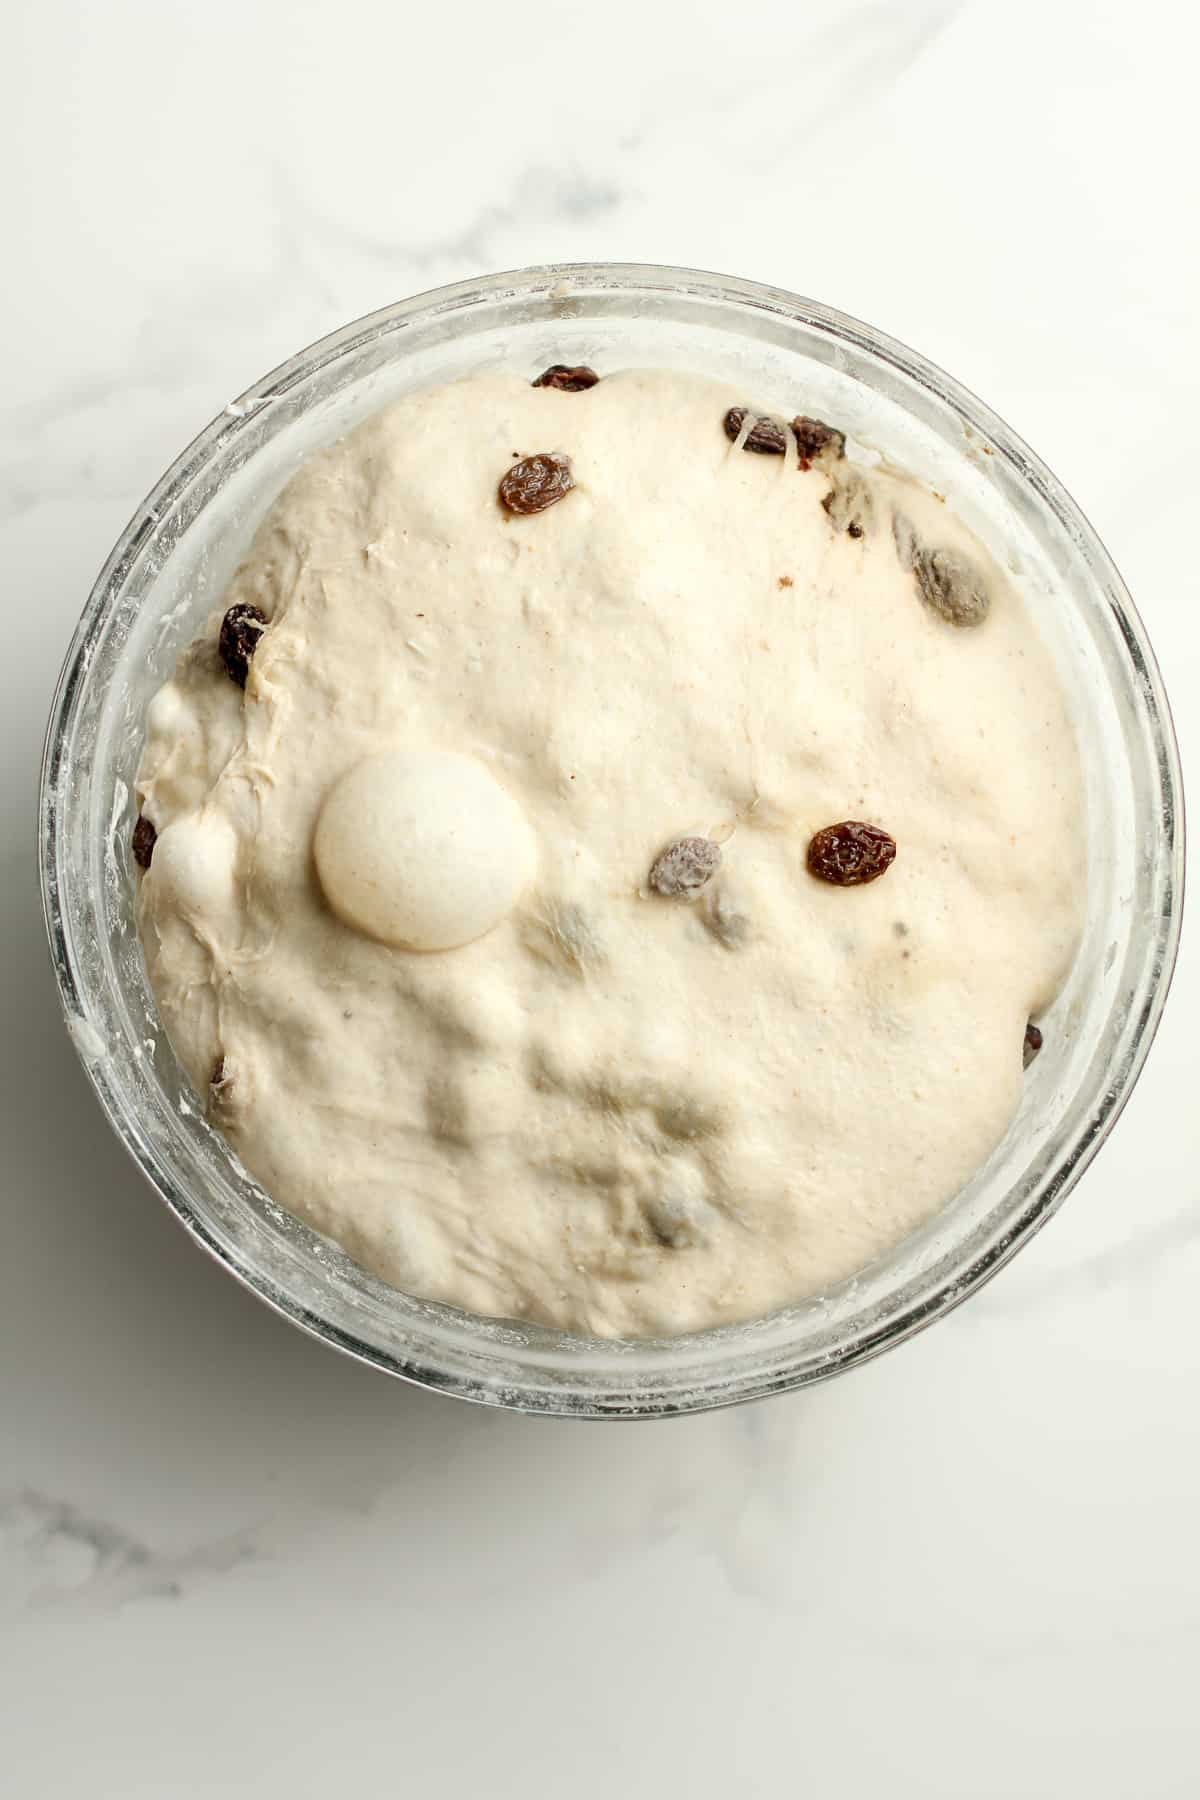
Let the dough rise for 6-8 hours. It should almost double in size and appear soft on top. Small air bubbles may appear as well. This is the BULK RISE.
** If leaving the dough out overnight, you’ll want to rub a bit of oil on top of the dough to prevent a crust from forming on top. Otherwise, you’ll want to make sure the towel is damp and doesn’t dry out.
Depending on the time of day, you can prepare the bread for baking. I occasionally place the dough into my refrigerator overnight, however. (The bulk rise is very flexible. You can adjust the time to work with YOUR schedule!)
Step 6
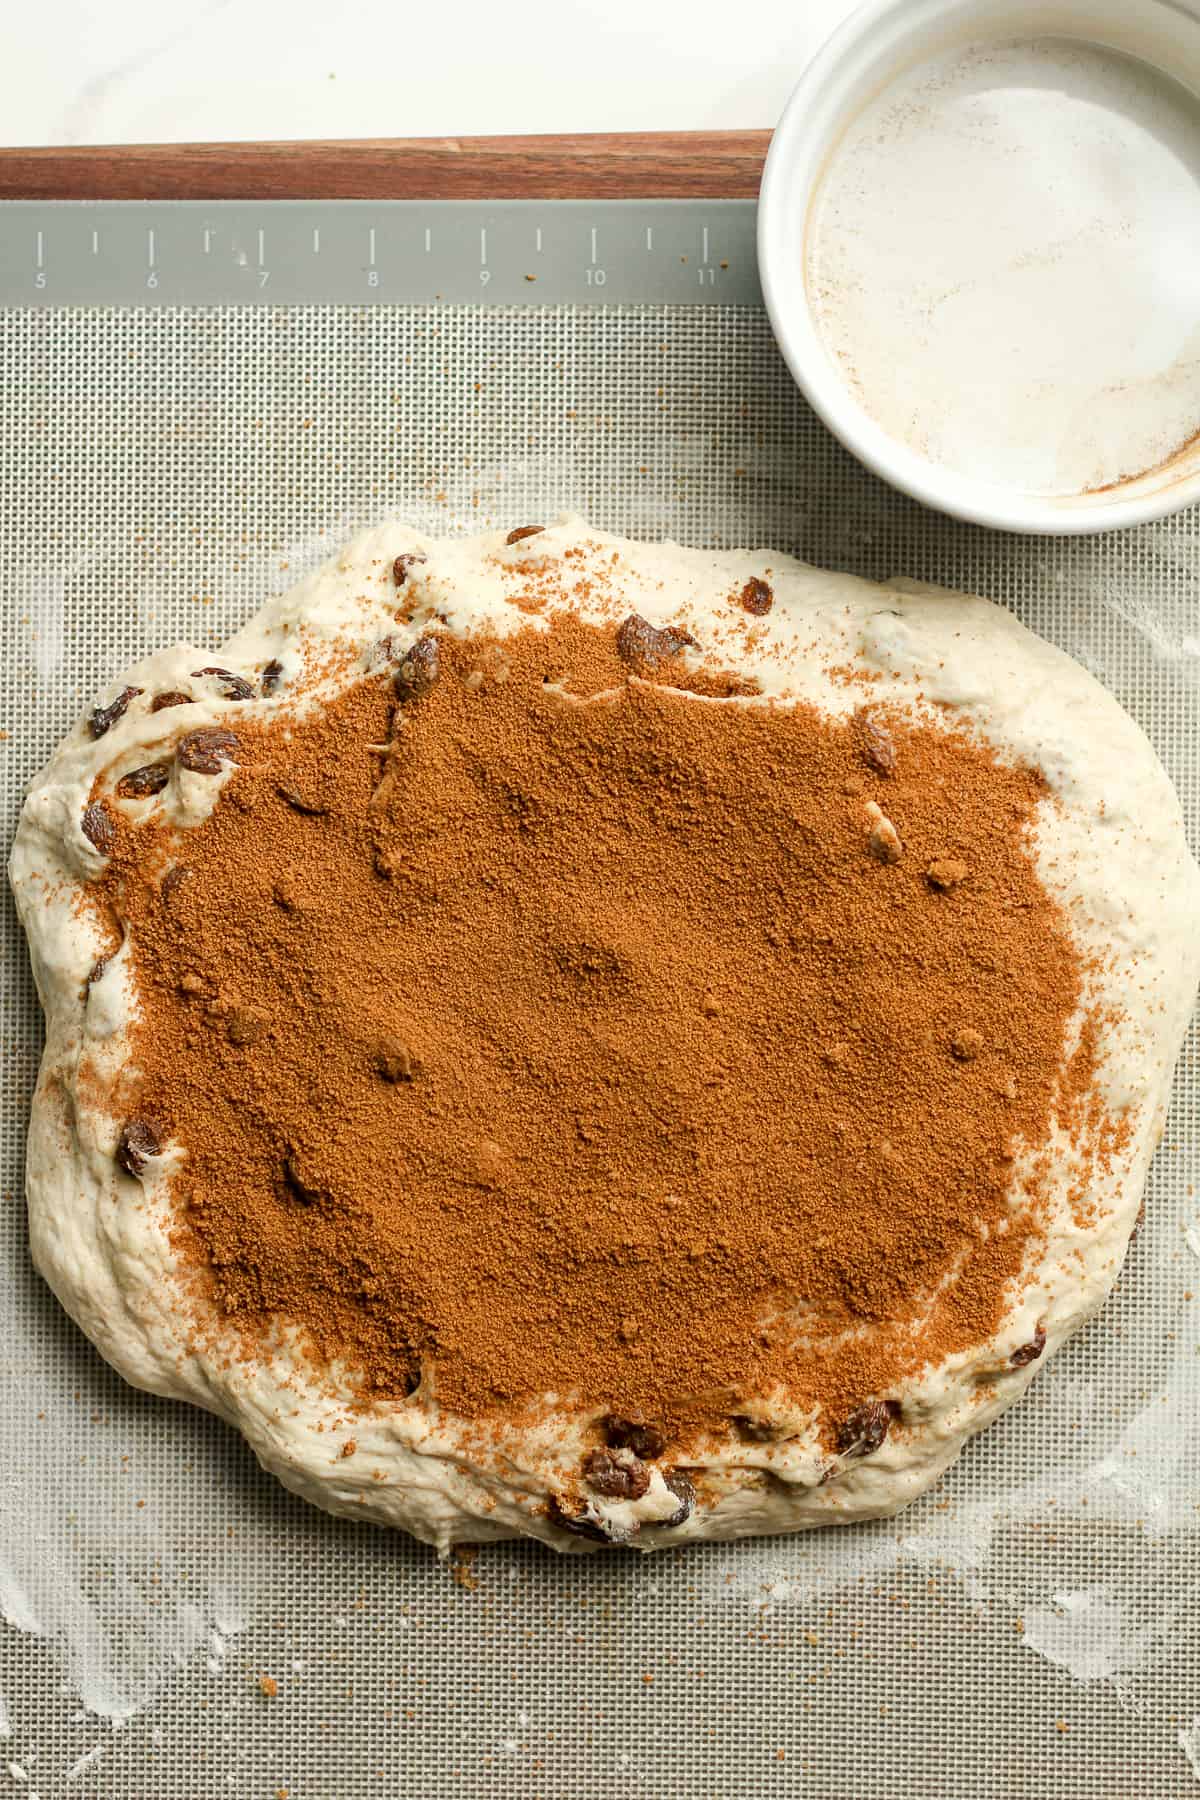
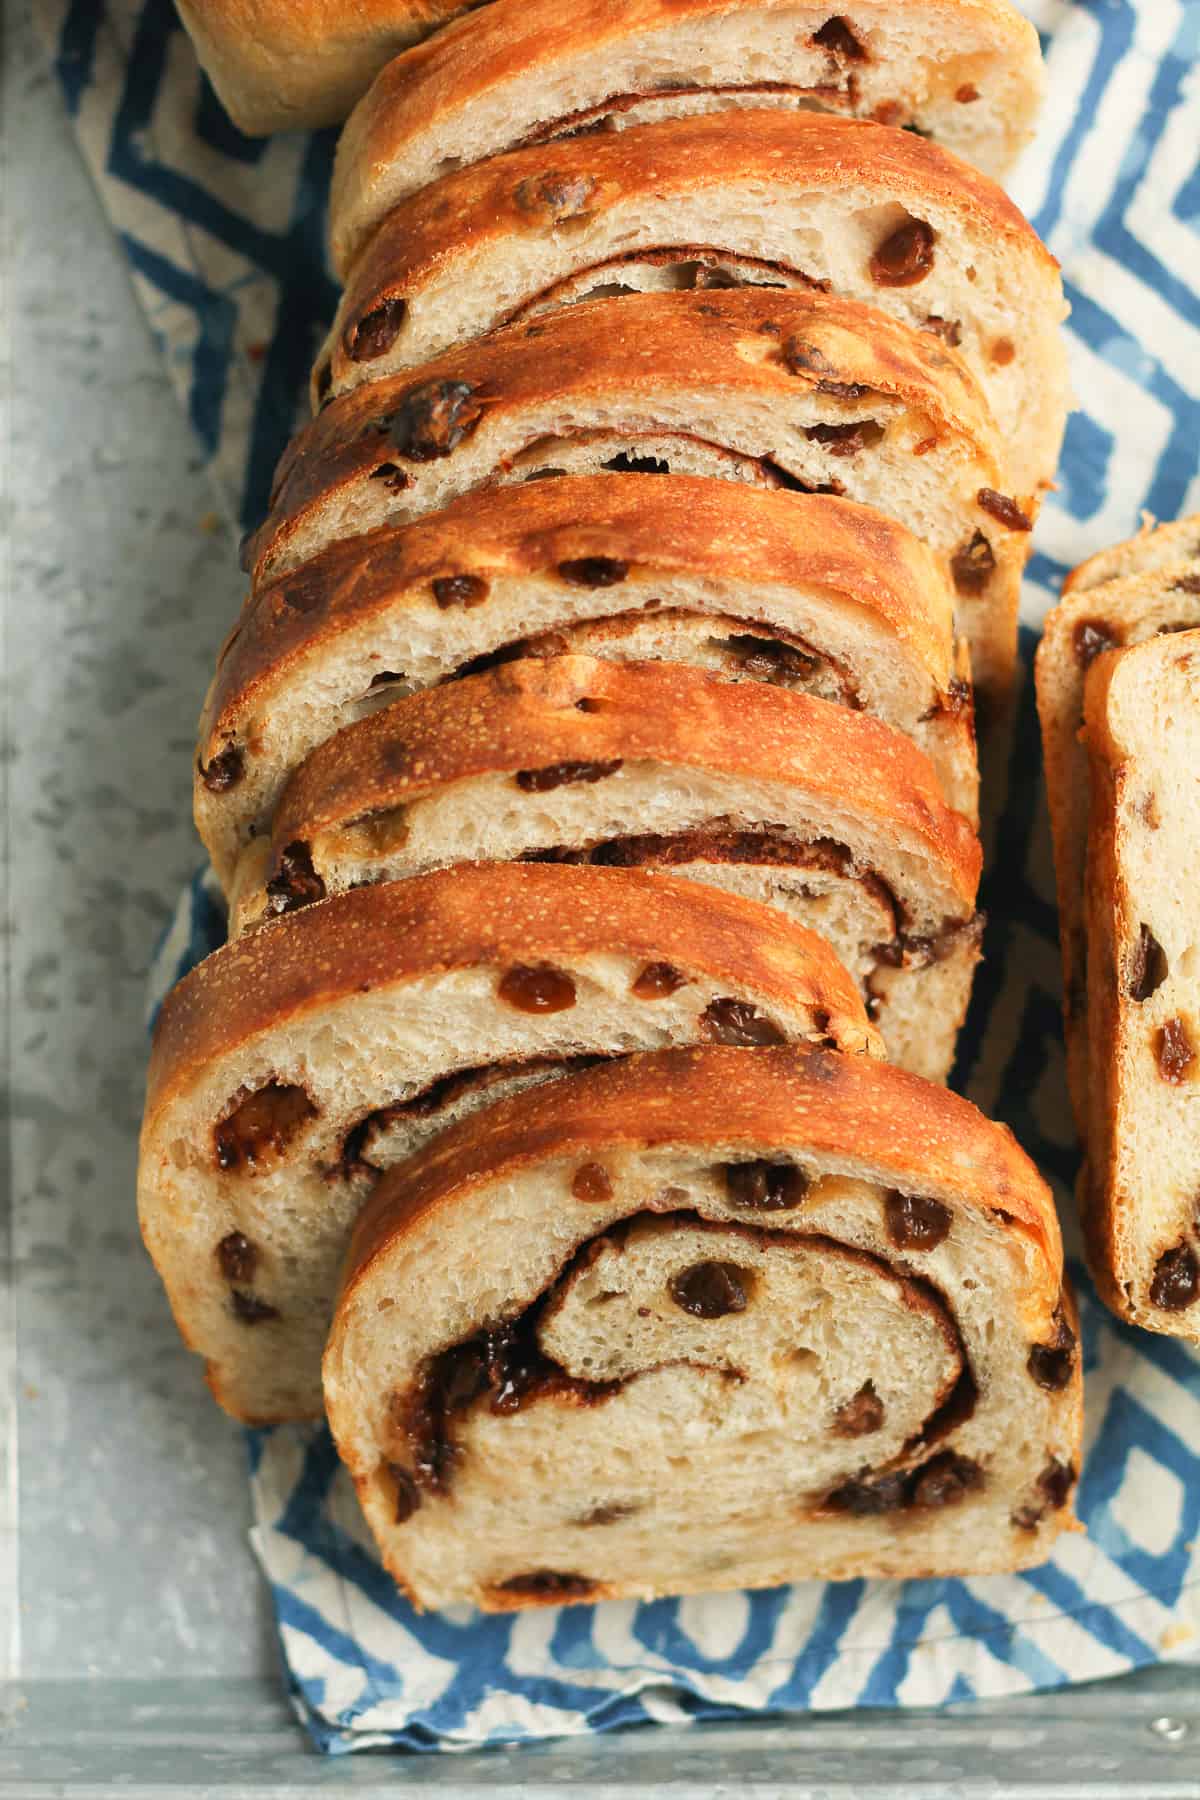
Remove the dough from the bowl to a lightly floured baking mat. Let it rest for five minutes. Then use your hands to flatten into a rectangle. Spread the sugar and cinnamon mixture over the top, leaving some room on the edges. Then roll it up so that it fits in a loaf pan.
Step 7
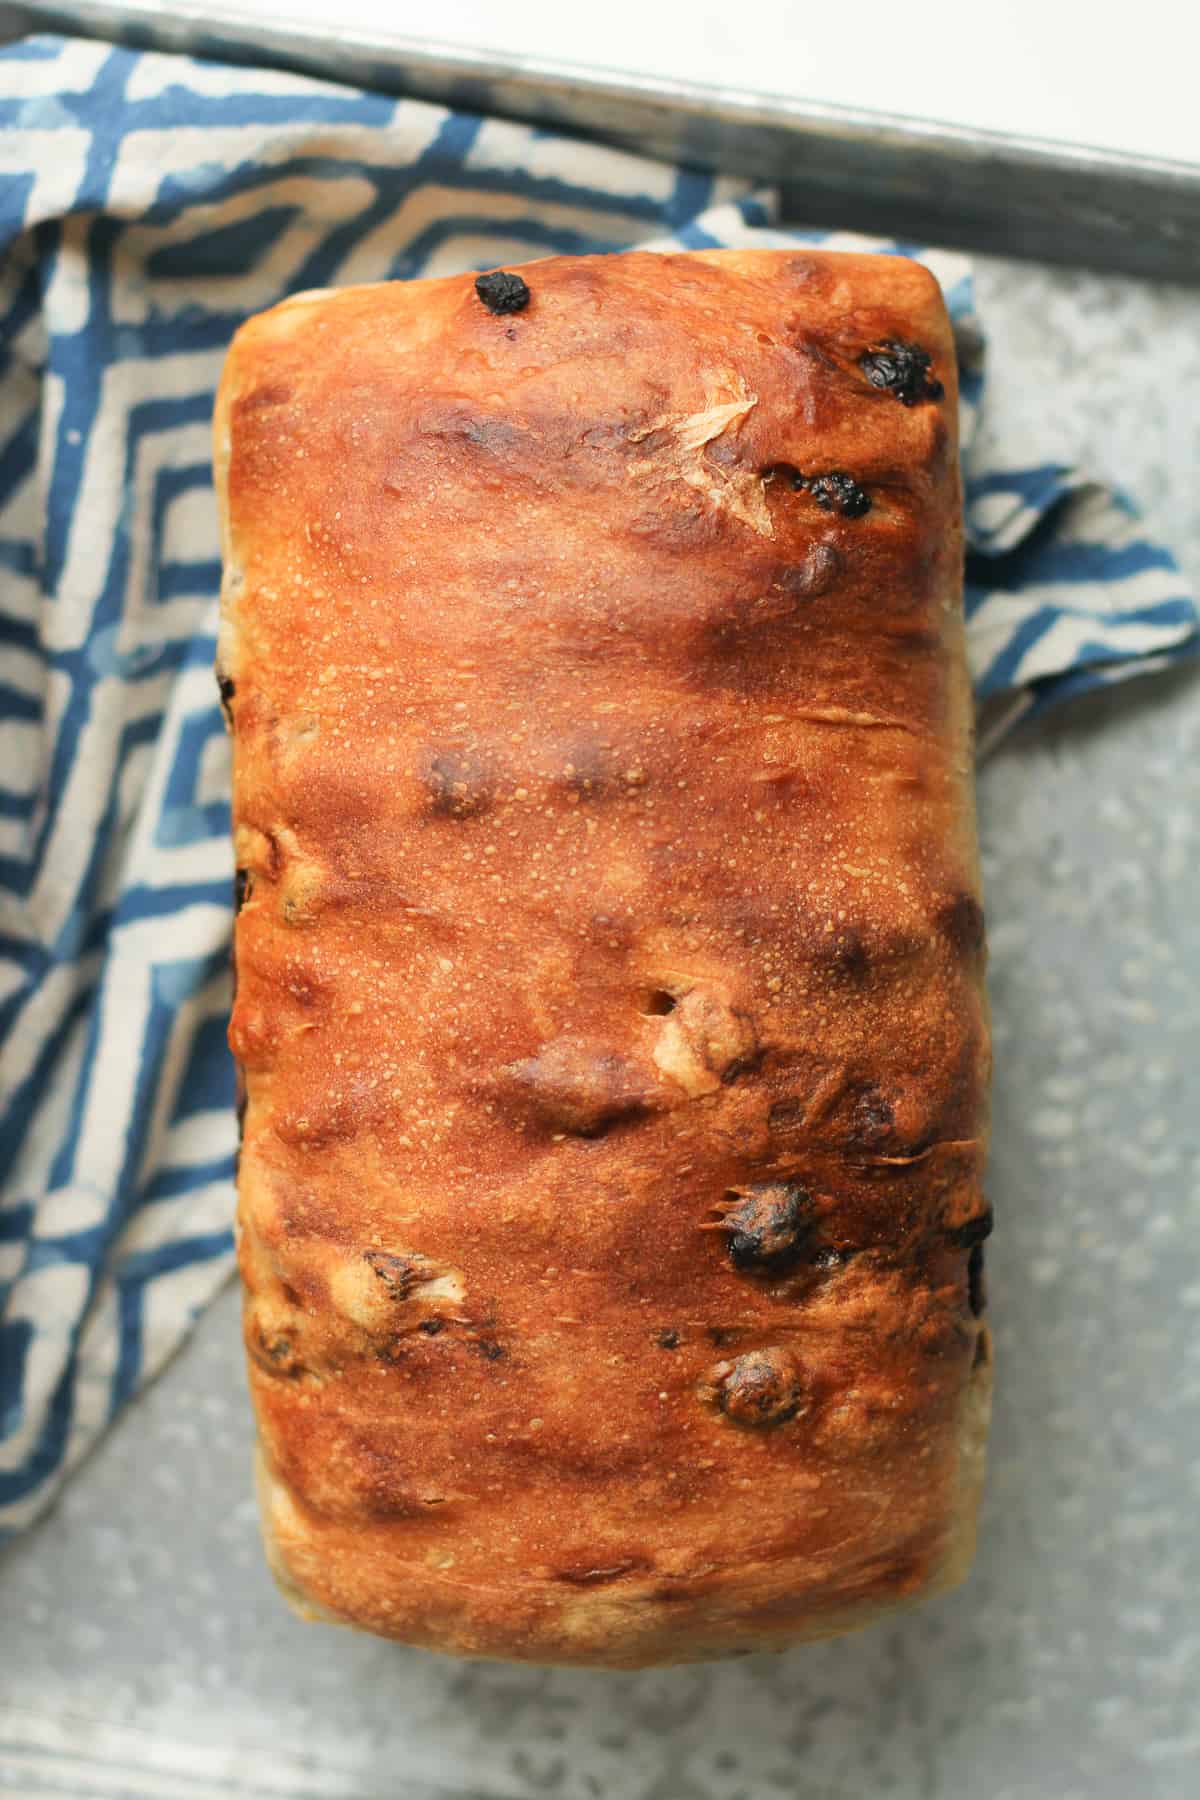
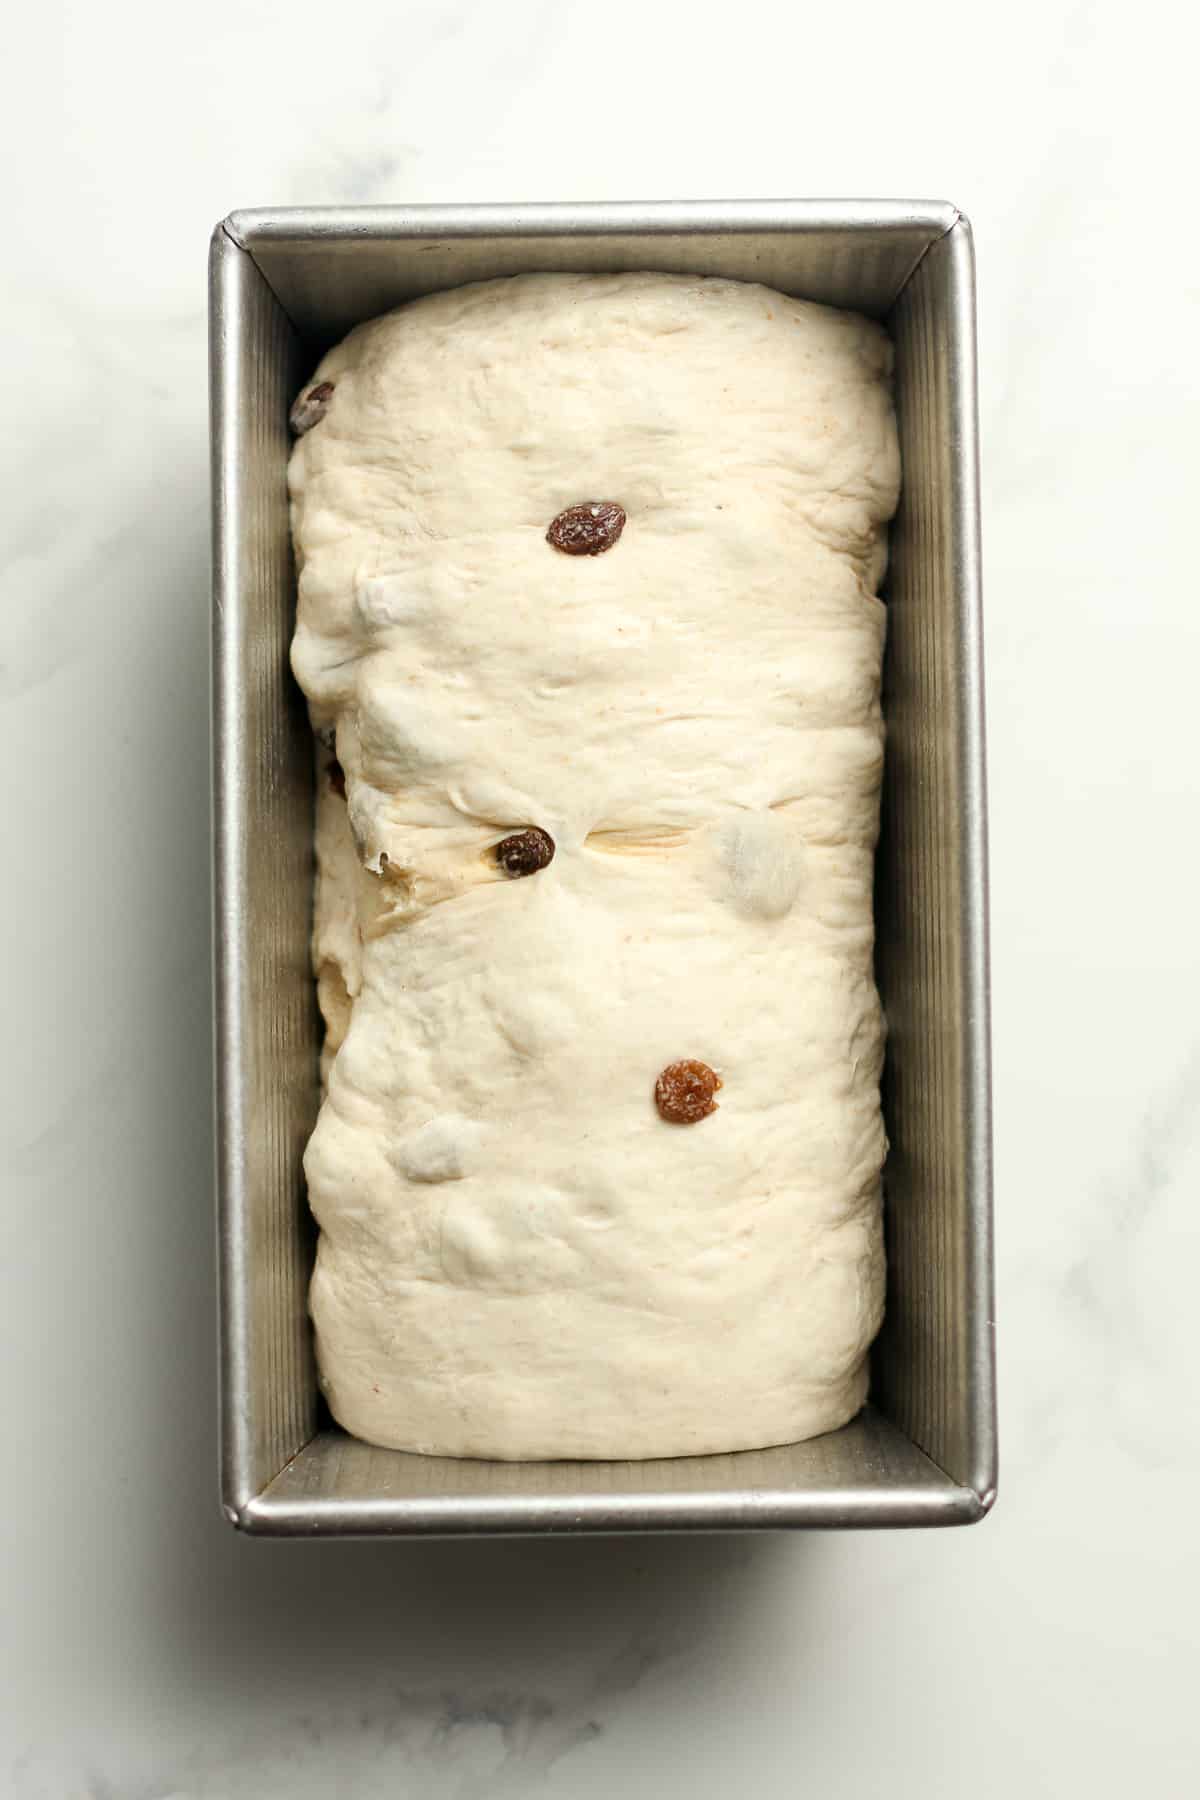
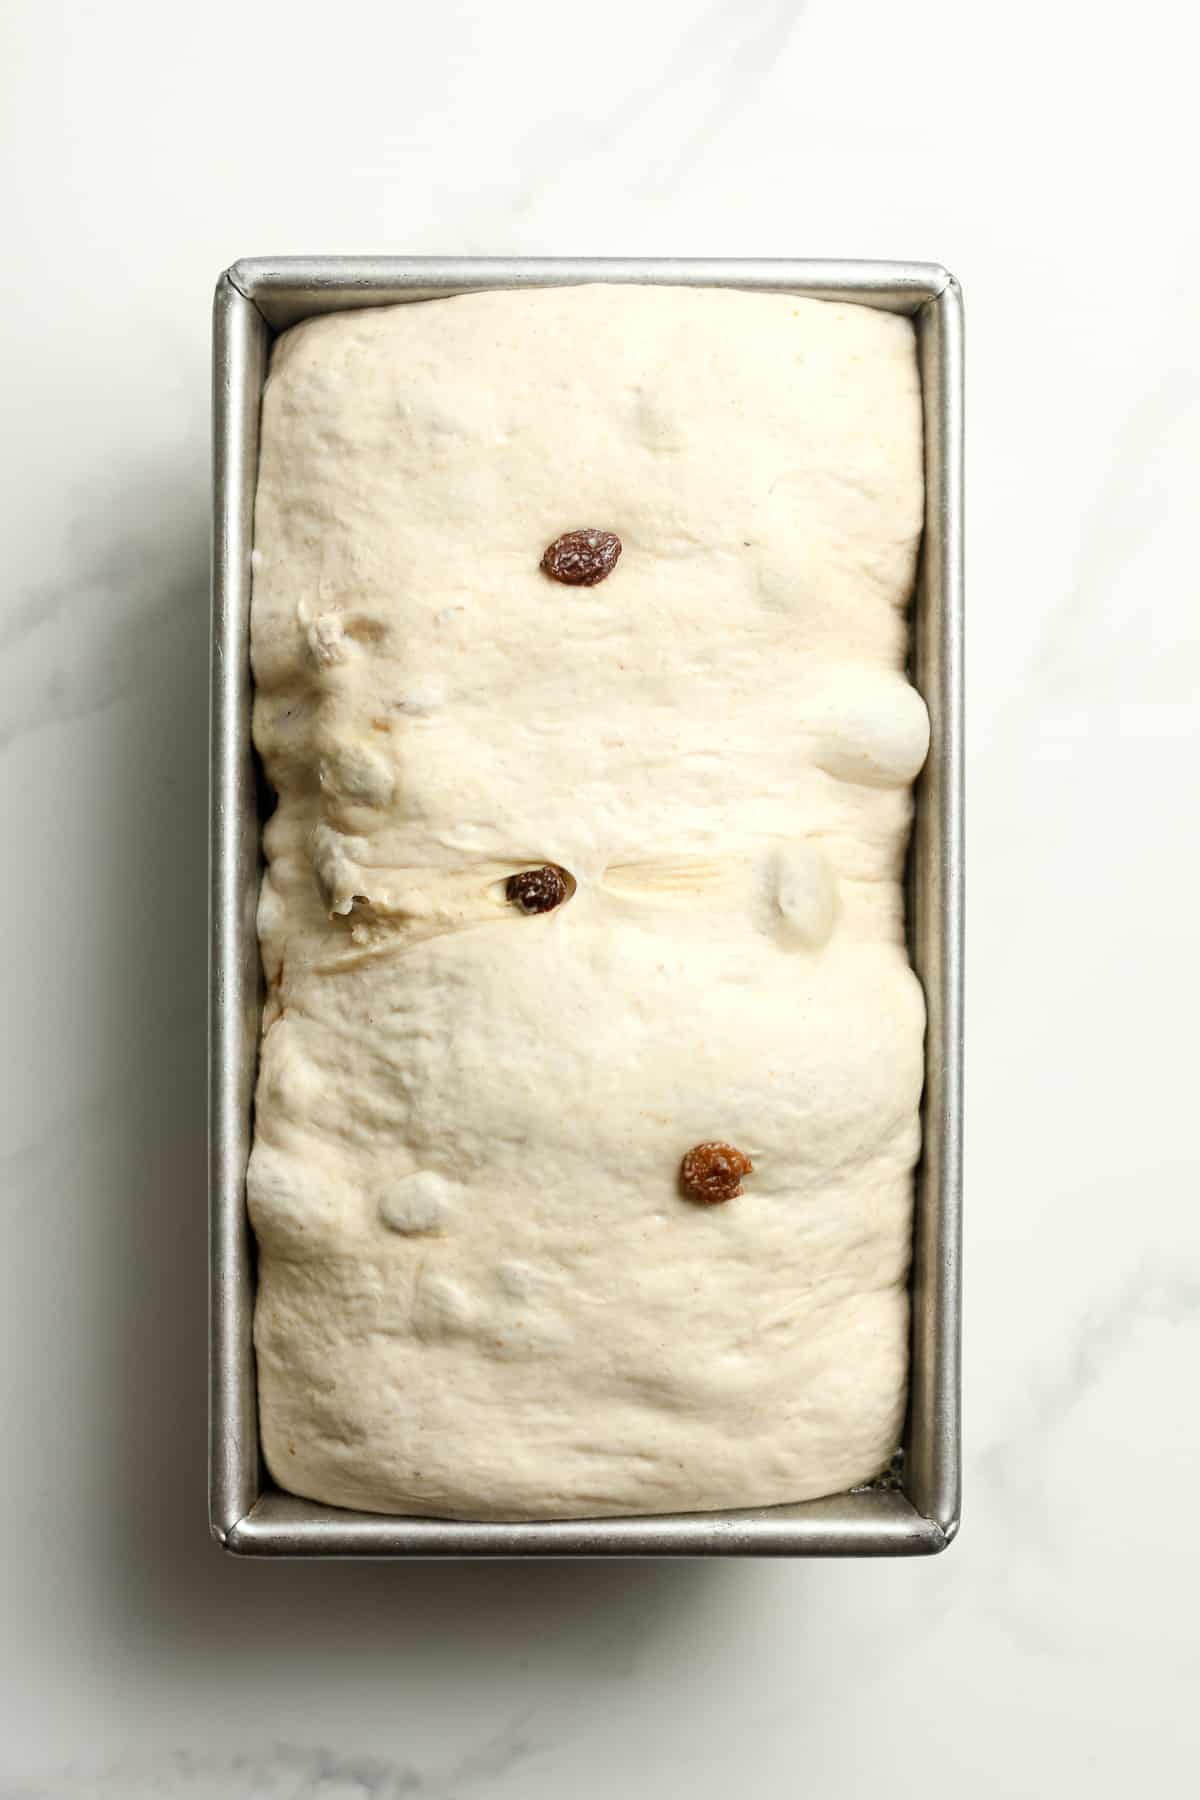
Place the dough in a sprayed loaf pan. Cover with a damp towel and let the dough rise again until it rises just above the rim of the pan. This may take a couple of hours to 5-6 hours. This is the SECOND RISE.
Step 8
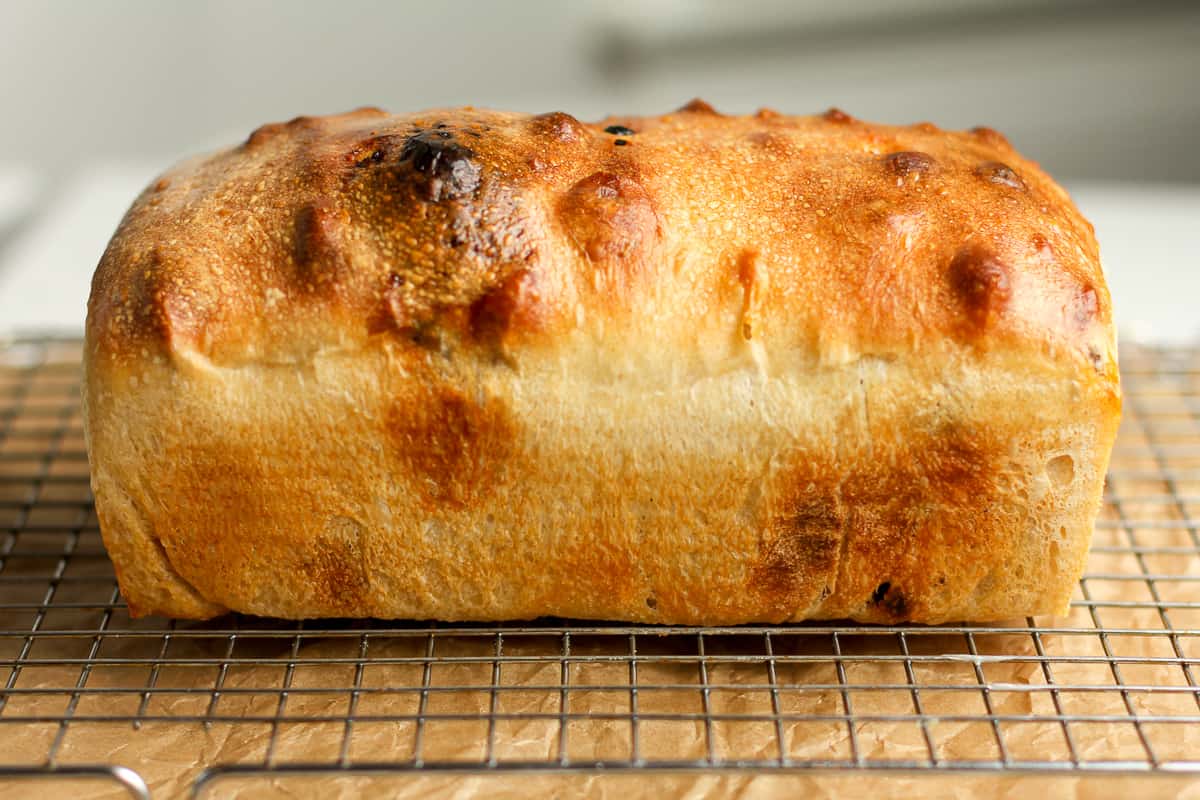
Bake in a 400 degree preheated oven for 40-45 minute minutes, or until golden brown on top and cooked through. Remove from oven and brush the top with butter.
Step 9
Let the bread completely cool before slicing, about an hour or more.
Sourdough 101 FAQs:
- What is sourdough? Sourdough is a slow-fermented bread that doesn’t require store-bought yeast to make it rise. It’s a LIVE fermented culture which creates a natural leavening agent. A starter is required to make sourdough.
- What is a starter? A starter is a live culture made over a series of days, consisting of flour and water. It can be kept alive for years with periodic feeding.
- How do you make a starter? A starter can be created in less than a week with a simple combo of unbleached flour and filtered water. It’s a process of removing half of the starter and then “feeding” it every day, storing in a jar on your countertop, and getting it to a bubbly, sour point where it floats in water. More on this later.
- Is sourdough bread healthy? Sourdough bread is NOT gluten-free, as it contains flour, but its long fermentation helps break down this gluten. It’s easier on the gut because it’s more digestible and easier for the body to absorb. It’s also DELISH!
See our post on how to store sourdough bread for maximum freshness! Let’s not let our hard work go to waste and savor every single morsel of sourdough.
Other sourdough recipes include Garlic Sourdough Bread, Sourdough Bagels, and Whole Wheat Sourdough Sandwich Bread!
Expert Tips:
- Make sure your starter is ready. If you store your starter in the refrigerator between use, make sure it’s active and ready to go before baking with it. I often feed it 2-3 times before using it after resting (i.e. sleeping in the refrigerator).
- Be flexible. If you’re bulk rise is taking longer than normal, or the starter isn’t as bubbly as you’d like it, be flexible. You can add time to either of these, and still make delicious bread. Many factors will come in to play as to when your sourdough is ready. In the summer months, the humidity and heat will make the process shorter. In the winter months, the process may be longer.
- Measure carefully and then adjust as needed. Make sure you use a digital scale to measure your ingredients in grams. This is important. Even with measuring carefully, you MAY need to adjust slightly. When your hands are on the dough doing stretches and folds, you will come to feel if more water/more flour is needed to make the dough pliable and soft. This comes with practice.
- Practice. Like I said above, as you practice making this bread and enjoying the bounties, you’ll learn all the little nuances to the sourdough process. Practice makes perfect!
- Let the bread cool. One of the biggest mistakes you can make is to slice the bread immediately after coming out of the oven. If you do this, it will be doughy tasting. Let the bread completely cool before slicing!
Tips for THIS Recipe, in particular:
- Don’t skip the step of soaking the raisins. Soaking the raisins will allow them to stay nice and plump and hydrated, and thus preventing them from drying out during the baking process.
- Be sure to mix the raisins into the dough as much as possible. Don’t worry too much if the raisins look to be clumped up in the dough at first. They’ll disperse nicely as you work with the dough later on.
Kitchen Tools Used: (affiliate links)
xoxo ~Sue
Cinnamon Raisin Sourdough Bread
Ingredients
- 75 grams bubbly active sourdough starter
- 350 grams filtered water
- 480 grams bread flour
- 35 grams whole wheat flour
- 10 grams fine sea salt
- 120 grams raisins
- 50 grams brown sugar
- 5 grams cinnamon
Instructions
- Use a digital scale to measure all ingredients. Combine the sourdough starter and water, and whisk together with a fork. Then add the bread flour, whole wheat flour, and sea salt. Mix again.75 grams bubbly active sourdough starter, 350 grams filtered water, 480 grams bread flour, 35 grams whole wheat flour, 10 grams fine sea salt
- Then use your hands to bring the ingredients together. The dough will look shaggy. Cover with a damp towel and let it sit for 45 minutes. THIS IS THE AUTOLYSE.
- Meanwhile, soak the raisins in some water for 45 minutes. Drain the liquid off when ready to add.
- After the autolyse, add the raisins and start the stretch and folds. Use your hand and lift the dough up on one side, stretching it upward, and then punch back into the center of the dough. Turn the bowl and repeat, trying to keep most of the raisins in the center of the dough. Continue this process for about one minute. THIS IS THE STRETCH AND FOLDS. Form the dough into a smooth ball, and place towel back on top of the bowl.120 grams raisins
- ADDITIONAL STRETCH AND FOLDS: I recommend doing additional stretch and folds if time permits. Do these every 30 minutes for 3-4 more times to further develop the gluten structure.
- Let the dough rise for 6-8 hours, or overnight if needed. (This time can be adjusted as needed.) It should almost double in size and appear soft on top. Small air bubbles may appear as well. THIS IS THE BULK RISE.
- Remove the dough from the bowl to a slightly floured baking mat. Let it rest for five minutes. Then use your hands to flatten into a rectangle. Spread the sugar and cinnamon mixture over the top, leaving some room on the edges. Then roll it up so that it fits nicely into a loaf pan.50 grams brown sugar, 5 grams cinnamon
- Place the dough into a sprayed loaf pan. Cover with a damp towel and let the dough rise again until it rises just above the rim of the pan. This may take anywhere from 2-6 hours or so. THIS IS THE SECOND RISE.
- Bake bread in a preheated 400 degree oven. for 40-45 minutes, or until golden brown on to and cooked through. Remove from oven and brush the top with butter.
- Let the bread COMPLETELY cool before slicing, about an hour or longer.
Notes
- If your starter is rather small, you’ll need to bulk it up so that you have enough to bake with and some to keep. (Because my rule of thumb is to NEVER RUN OUT OF STARTER!)
- Don’t skip the step of soaking the raisins. Soaking the raisins will allow them to stay nice and plump and hydrated, and thus preventing them from drying out during the baking process.
- Be sure to mix the raisins into the dough as much as possible. Don’t worry too much if the raisins look to be clumped up in the dough at first. They’ll disperse nicely as you work with the dough later on.
- One of the biggest mistakes you can make is to slice the bread immediately after coming out of the oven. If you do this, it will be doughy tasting. Let the bread completely cool before slicing!
This bread is by far the very best cinnamon raisin bread I’ve ever made. I will be tossing all my other recipes out as I will only make this one. Thank you for this delicious recipe!
Thanks Dyanne!
So very yummy!! And makes the best french toast! Going to be sure to keep some in the freezer for sure!
We love using this bread for French toast too! Thanks Kerri!
Made this several times and always enjoy it so much!
Hi Ashley! I’m so glad you enjoy this sourdough bread like we do. It’s our favorite!
Pretty new to sourdough bread making. The directions were perfect and easy this is the best rise I’ve gotten on bread. So tasty will make again for sure!! Thank you!
Thank you Tina! So happy you enjoyed this one!
This sourdough recipe is so good! I made 2 loaves and we made french toast with it this morning and it was so yummy. Can’t wait to eat the rest toasted with butter this week!!
My favorite sourdough recipe! Thanks Sami!
I absolutely love this recipe!!! I have made this loaf many times. It is my go to cinnamon raisin bread recipe. My friends love it too! I have a friend who is vegan and am glad it is one of the things I can give her. Thank you so much for this amazing recipe!
Hi Heidi! It makes me so happy to hear how much you are enjoying this bread! Thanks for letting me know!
This cinnamon raisin sourdough turned out to be everything I hoped for. The crust has that classic sourdough bite, and the inside is soft, airy, and just the right balance of sweet and tangy. The raisins are plump, the cinnamon comes through nicely, and it toasts up beautifully with a little butter. It’s cozy, comforting, and kind of addictive. I made it once and shared it, and now I’m getting special requests to bake it again. I’m baking my second batch, and this time I doubled it. Mahalo, Sue, for sharing this recipe!!
Thanks so much for the sweet review, Lauri! I really appreciate it!
Do you put any of your breads into the frig to cold ferment? I’ve always done that and just curious why you do not.
Also, I’ve never done a second rise. Can you explain why you do that.
Always learning 🙂
Thank you.
Yes, I do this often and should add that to my instructions. See my Crusty Sourdough Loaf to see how I do that! The second rise is simple letting the bread rise once you form the loaves. It’s a shorter rise.
Just took my loaf out of oven, smells awesome cant wait to cut into it. I buttered it right out of oven but the crust is still hard, not sure what I did wrong? Baked in 9.5 loaf pan, no lid. I will enjoy either way.
I wonder if your oven is running hot. Do you own an oven thermometer? Hopefully the inside of the bread will be delicious. Please stop back and let me know.
This bread is absolutely amazing!! I’m a very beginner sourdough baker and this is so freaking good and I’m a very harsh critic of anything i make! I did use my original sourdough recipe of 100g starter, 500g bread flour, 350g water, and 10g salt because I had already mixed it and decided I wanted to try something different. Plus I didn’t have other types of flour to adjust this with and wanted to use what I had on hand. But I can’t wait to wake up and eat this in the morning and usually again for a snack hah I can’t get enough! I slice the loaf and put it in a bag in the freezer and grab a fresh slice whenever I want it. Thank you for sharing!
Thanks so much Ashley! We love our sourdough!
This was the best bread that I have made.
One of our favorites!
Question…. I’ve made this quite a few times now. Always delicious, but most of the time I end up with some filling leaking out the side. What am I doing wrong? 🙂 Any suggestions? Thanks!!
Hi Beth. Try to make sure that the filling isn’t too close the edges when rolling it up. Mine leaks out a little too and that is normal.
If it is too late to bake after the bull fermentation can I put it in the fridge overnight and in the morning shape the dough, put in a pan do the second rise and bake in the morning?
I often place the dough in the fridge after the bulk fermentation before forming the loaves. I hope that helps.
New to sourdough.
I tried this recipe but didn’t read the instructions as carefully as I should have. I mixed the sugar and cinnamon into the dough. I wasn’t that hopeful the loaf would turn out.
It was fantastic!!
I used artificial sweetener in place of the sugar.
Will be my go to recipe! I’ll follow the instructions next time!! 😉
I’m so glad it worked out for you Carol!
I love this bread. If I let the dough cold ferment in the fridge overnight should I let it come to room temperature before baking in the morning?
Yes, you’ll need to let it come to room temp, form loaves, and do the second rise.
I’ve made this 3 times and love it love love it..but..is it normal for it to take several hours to rise again. Before baking? I let it rise and ferment over night..made it into a loaf..and it seems to take forever to rise again. It’s in a warm place but hasn’t moved much in over 6 hours.
The rise time will depend on a lot of factors, like climate, temperature of your house, how active your starter was when you used it, etc.
Do you let it rise in the fridge or on the counter overnight? Can’t wait to try it!
I let the bulk rise sit on the countertop overnight and then occasionally place it in the refrigerator for a day. Please check back to let me know how it turns out for you!
So easy for a novice as long as you have a healthy starter. It turned out great and delicious!!!
I’m so glad to hear this, Jacqueline!
The best so far, I am new on the sourdough bread and I’ve looking for a cinnamon raisin sourdough bread and this is the best!!! Thank you so much for this recipe!!
I’m so happy to hear this! Thanks for your feedback.
This bread is amazing! I make it all the time! Today, I made two loaves, I split it in half after it rose over night, and can make 4 regular size loaves with it!
I love to hear this, Kate! Thanks for your feedback!
Do you need to bake this on a stone or with water? Or just right on the rack? The other sandwich style loaves I’ve done require steam
I’ve never used steam and this turns out every time.
Is the dough supposed to be rather stiff? Mine is, this is the first timeI I have tried this recipe.
The dough should be a little bit sticky. Let me know how it turns out for you!
I made this today. I cooked it for 40 min and the top is pretty dark and hard as a rock. I haven’t cut into it yet bc it’s got my mom. Is it supposed to be really crispy on top? It’s not burnt but I think it could’ve went 5 min less
Have you checked to see if your oven temperature is accurate? I’ve never burnt this sourdough bread.
Wonderful recipe! Very easy to follow and turned out DELICIOUS! Will definitely make again.
I am a relatively new sourdough baker and this recipe turned out great. My family loved it!
I’m so happy to hear this, Andrea!
Excellent! Absolutely delicious! Thank you for sharing the recipe!!
Thanks so much, Hope!
This bread was so awesome! I made two loaves a couple days ago and we ate one loaf and I gave the other one away. I am now making two more. I used the proof setting on my oven for the first and second rise and that made the process so much quicker and the loaves were so beautiful.
Thanks so much for your feedback, Amy!
Can this be baked in a Dutch oven in a round loaf?
Yes, you could do that.
YUM! I need to try this out. I love cinnamon raisin bread and sourdough so this will be amazing for breakfast.
This recipe is fantastic! Especially when made with Suebee’s own starter recipe! That stuff is my miracle cure! I add it to smoothies, cereal, and baby formula!
If I don’t have bread/whole wheat flour do you think I can try this recipe with all purpose? If so, should I leave the total amount of flour the same?
I think you could make it with 100% all-purpose too. The amount would be close to the same but adjust if it feels off.
My family’s newest favorite sourdough recipe. It is absolutely delicious!
Yay! I’m so happy to hear this, Kim!
I made a loaf today and it was delicious! I’m making another loaf for my son. Great recipe! A keeper!
Oh I love hearing this, Tina! Thank you for trying it!
This was such a stunning recipe! I made two batches for me and a new neighbor.
This tasted so good! I love the combination of flavors of raisin and cinnamon. Husband already asked to make it again this weekend. Thanks for a keeper recipe!
Mine is doing it’s final rise right now. LOVE IT! I also whipped up a little cinnamon honey butter, cause well — cinnamon, raisins and honey butter! Great recipe!
That sounds like perfection, Kathleen. I can smell it from here!
Oh my gosh!! This bread makes the BEST TOAST ever!! I am so addicted!
This bread is one of my favorites, for sure!
I just love homemade bread and this recipe is amazing! It will be a regular in our household.
That’s wonderful to hear, Julie!
Great, well explained, Sourdough recipe. And the raisin cinnamon filling takes it to the next level!
Thanks so much, Lynn!
Ok, heck yes to this! So good and a great way to use my sourdough starter!
I agree 100%!
I made french toast with this the other morning and it was a huge hit!!
A perfect way to use this bread!
Based on time of starting (late afternoon) can I do final rise, slow, in refrigerator, and take out to finish rising in the am? Thanks!
Hi Maria. I normally place the bulk rise (first rise) in the refrigerator if needed. I’ve never placed second rise (in pans) in the refrigerator overnight so I’m not 100% sure. Please let me know how it turns out for you.
You can do the final rise (in the pan) in the refrigerator, overnight or even over two nights (12-36 hours), and then pop it in the preheated oven right out of the fridge. You get even better oven spring this way, and the long cool fermentation makes the bread more sour because at refrigerator temperatures lacto bacillus fermentation predominates.
Thanks for that info, David!
I am not a huge fan of cooked raisins, but we ate the entire loaf in 2 days! lol! Loved the brown sugar and cinnamon filling! I really like that it was a sourdough bread and not too sweet. Toasted and with a tiny bit of butter, it made a wonderful companion to my morning coffee.
This is one of our favorite sourdough recipes too! 🙂
Love this recipe. Like you said, work the dough and add more flour if too sticky. Mine baked just like your pic!! Delicious!
Thank you so much for letting me know, Isabel! Enjoy!
I love making sourdough bread (did you know it’s good for gut health due to the natural [good] bacteria in the sourdough starter?) and this might be my favorite. I slice the whole loaf and put it in the freezer and take a slice or two out at a time and put it in the toaster. Better than anything you can buy and it’s relatively easy to make. Storing it in the freezer makes it last longer because a) there aren’t any preservatives and b) I won’t eat the entire loaf in a day. I haven’t made French toast with it yet but it’s on the list!
Can’t wait to hear how you like it in French Toast! So glad you are enjoying sourdough, Big Papa!
I love this! Thank you for another great sourdough recipe with yummy “mix-ins”… I’d make it everyday if I could just for the amazing aroma in my house as it bakes. Toasted with butter is my favorite way to enjoy it! So easy and delicious.
I’m so glad you are enjoying it as much as we do, Traci! Thanks for your feedback!