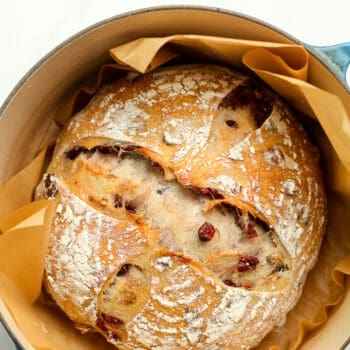
Cranberry Walnut Sourdough Bread
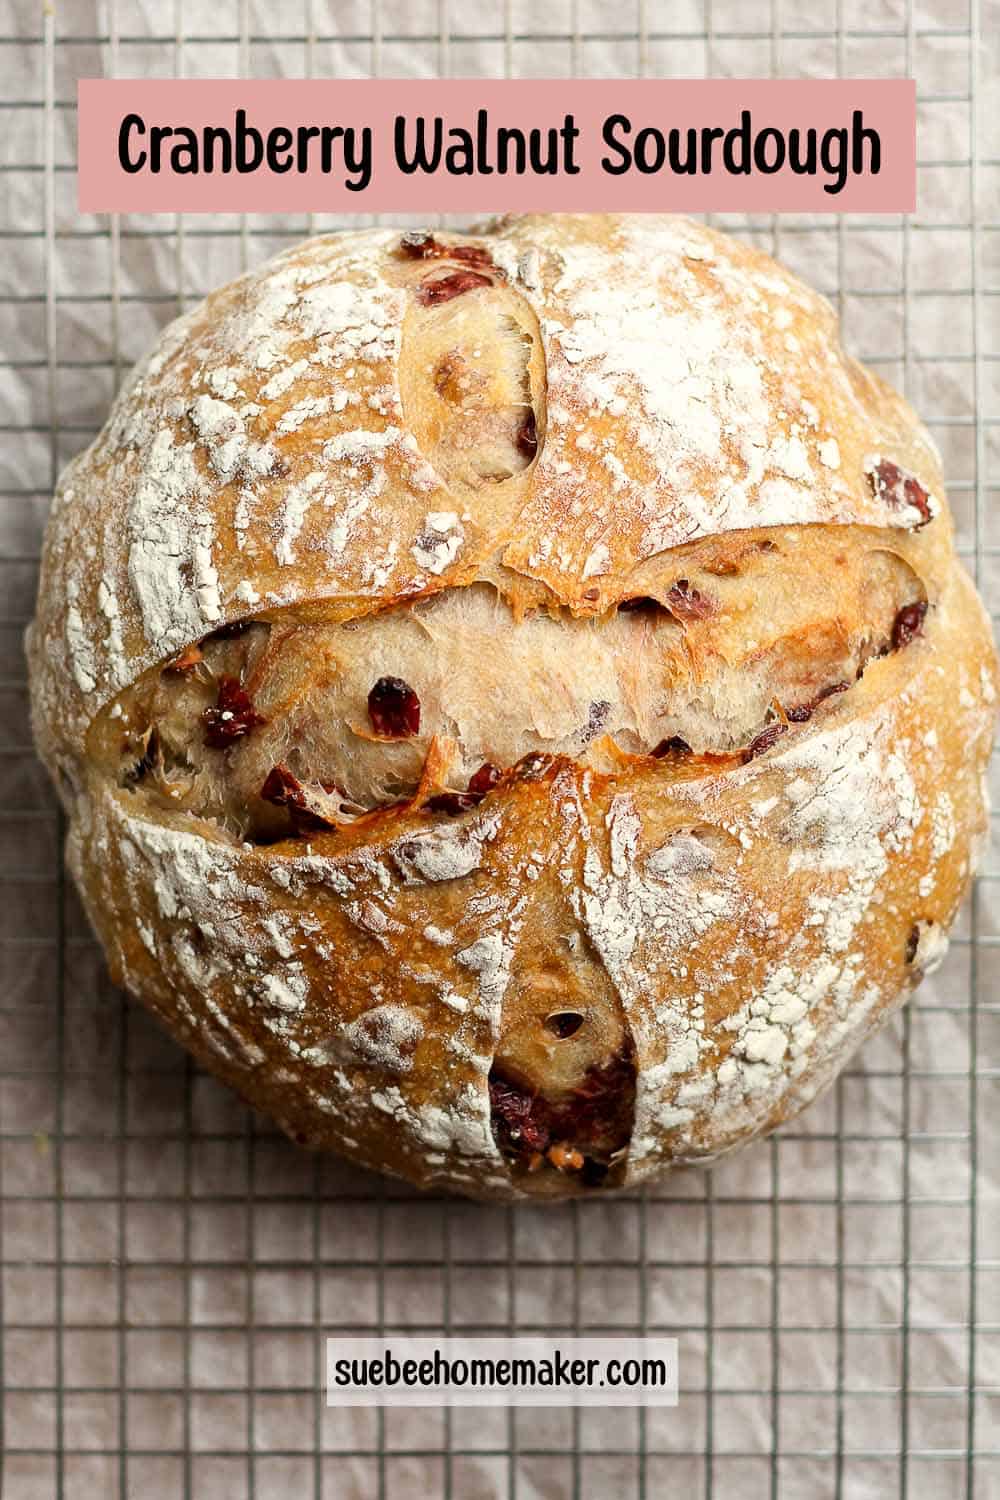

Cranberry Walnut Sourdough Bread is a chewy bread filled with cranberries and walnuts. This sourdough makes a delicious toast with butter and jam and the perfect peanut butter and jelly sandwich!
Cranberry Sourdough
Are you a raisin-in-your-bread type of person? If so, you’re going to love THIS one in addition to my Cinnamon Raisin Sourdough Bread.
When adding raisins and nuts to sourdough, remember to soak the add-ins before incorporating them. That way they’ll stay soft and fresh when biting into the bread!
Making sourdough requires a little bit of planning but it’s flexible at the same time. If you are going during the day, you can plan around it by making it over the weekend until you get used to what it takes.
The most important thing to remember is that you can ALWAYS place the bulk rise in the refrigerator for a day or two and then readjust your baking schedule. In addition, I always recommend making two loaves at a time because it freezes so wonderfully. Happy baking!
Why we LOVE this sourdough recipe:
- SWEET AND SAVORY – We love the combo of sweet cranberries and the nutty flavor of walnuts in a loaf of bread.
- FREEZES WELL – I always have several loaves of bread in the freezer because I love sharing it with friends and family. A crusty artisan loaf of sourdough bread makes the best gift!
- MAKES DELICIOUS TOAST – Cranberry walnut bread makes the best toast.
Ingredients Used for Cranberry Walnut Bread:
Only four base ingredients plus three bonus ingredients (Craisins, walnuts, and cinnamon!) are required for this delicious bread! I use two different types of flour, however, but they’re always stocked in my pantry.
- Bubbly Starter – The starter is THE most important part of sourdough bread making. It takes a little time, but you will be rewarded over and over again with an active bubbly starter.
- Filtered Water – Use filtered water, either out of your refrigerator filter system or use bottled water. The water should either be at room temperature or slightly warmed before adding it to the sourdough process.
- Flour – For this recipe, use a combo of unbleached bread flour and whole wheat flour.
- Sea Salt – I recommend using fine sea salt.
- Craisins (or dried cranberries) – The key ingredient and adds incredible flavor. I always use the lower-sugar version.
- Walnuts – I used some chopped earthy walnuts for this bread.
- Cinnamon – This ingredient is often used in my kitchen for SO many of my recipes.
Make your own sourdough starter at home with just a few simple ingredients using Sourdough Starter Basics. In just over a week’s time and a little bit of patience, you’ll be ready to use your active starter to make the best sourdough bread! Join us on our sourdough journey!
How to make Cranberry Walnut Sourdough Bread:
Step 1
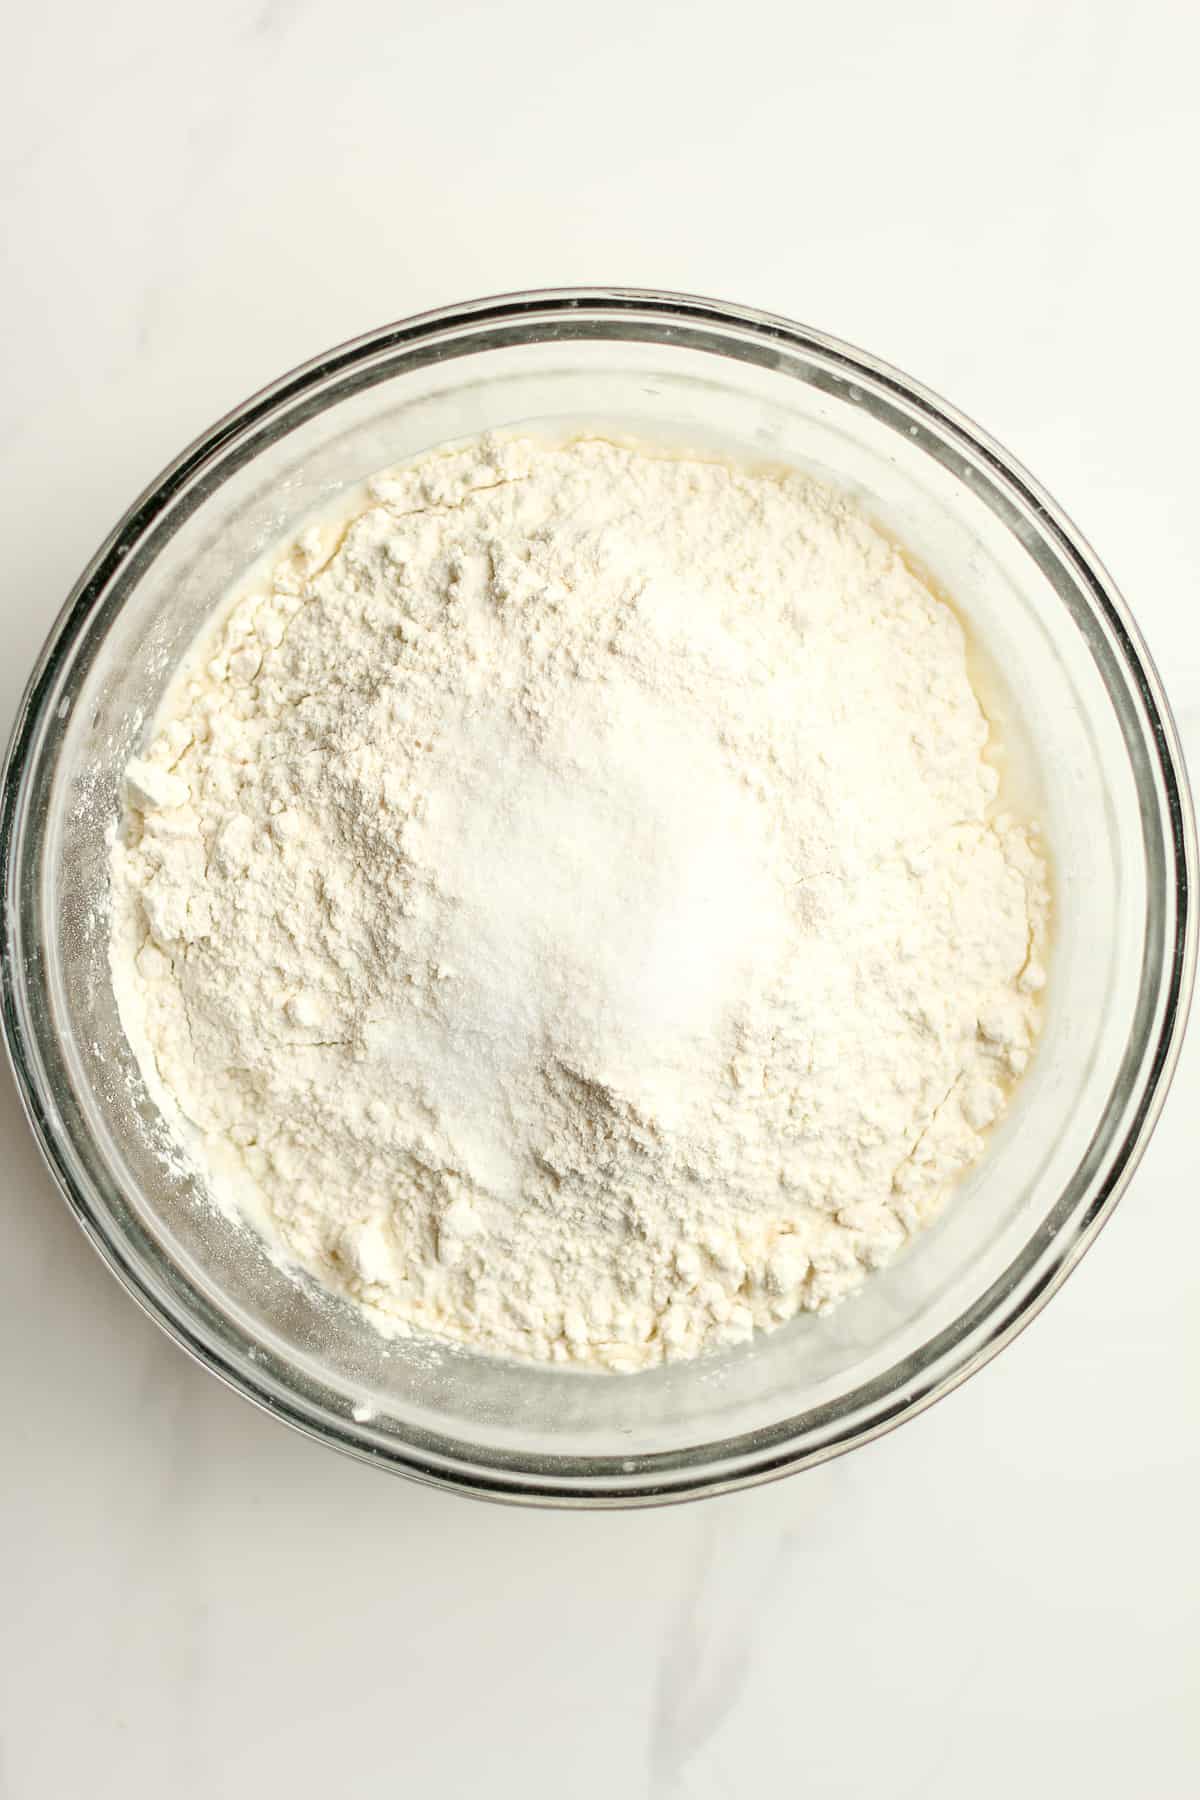
Carefully measure. Use a kitchen scale to measure the water and sourdough starter and add to a large bowl. Stir well with a fork. Add the remaining ingredients (in the order listed) and stir again.
Step 2
Then use your hands to bring the ingredients together. It will look shaggy. Cover with a damp towel and let it sit for 45 minutes. (Be sure to set a timer.) This is the AUTOLYSE.

Step 3
Meanwhile, soak the Craisins and walnuts in some warm water. Let it soak during the autolyse and then drain well.
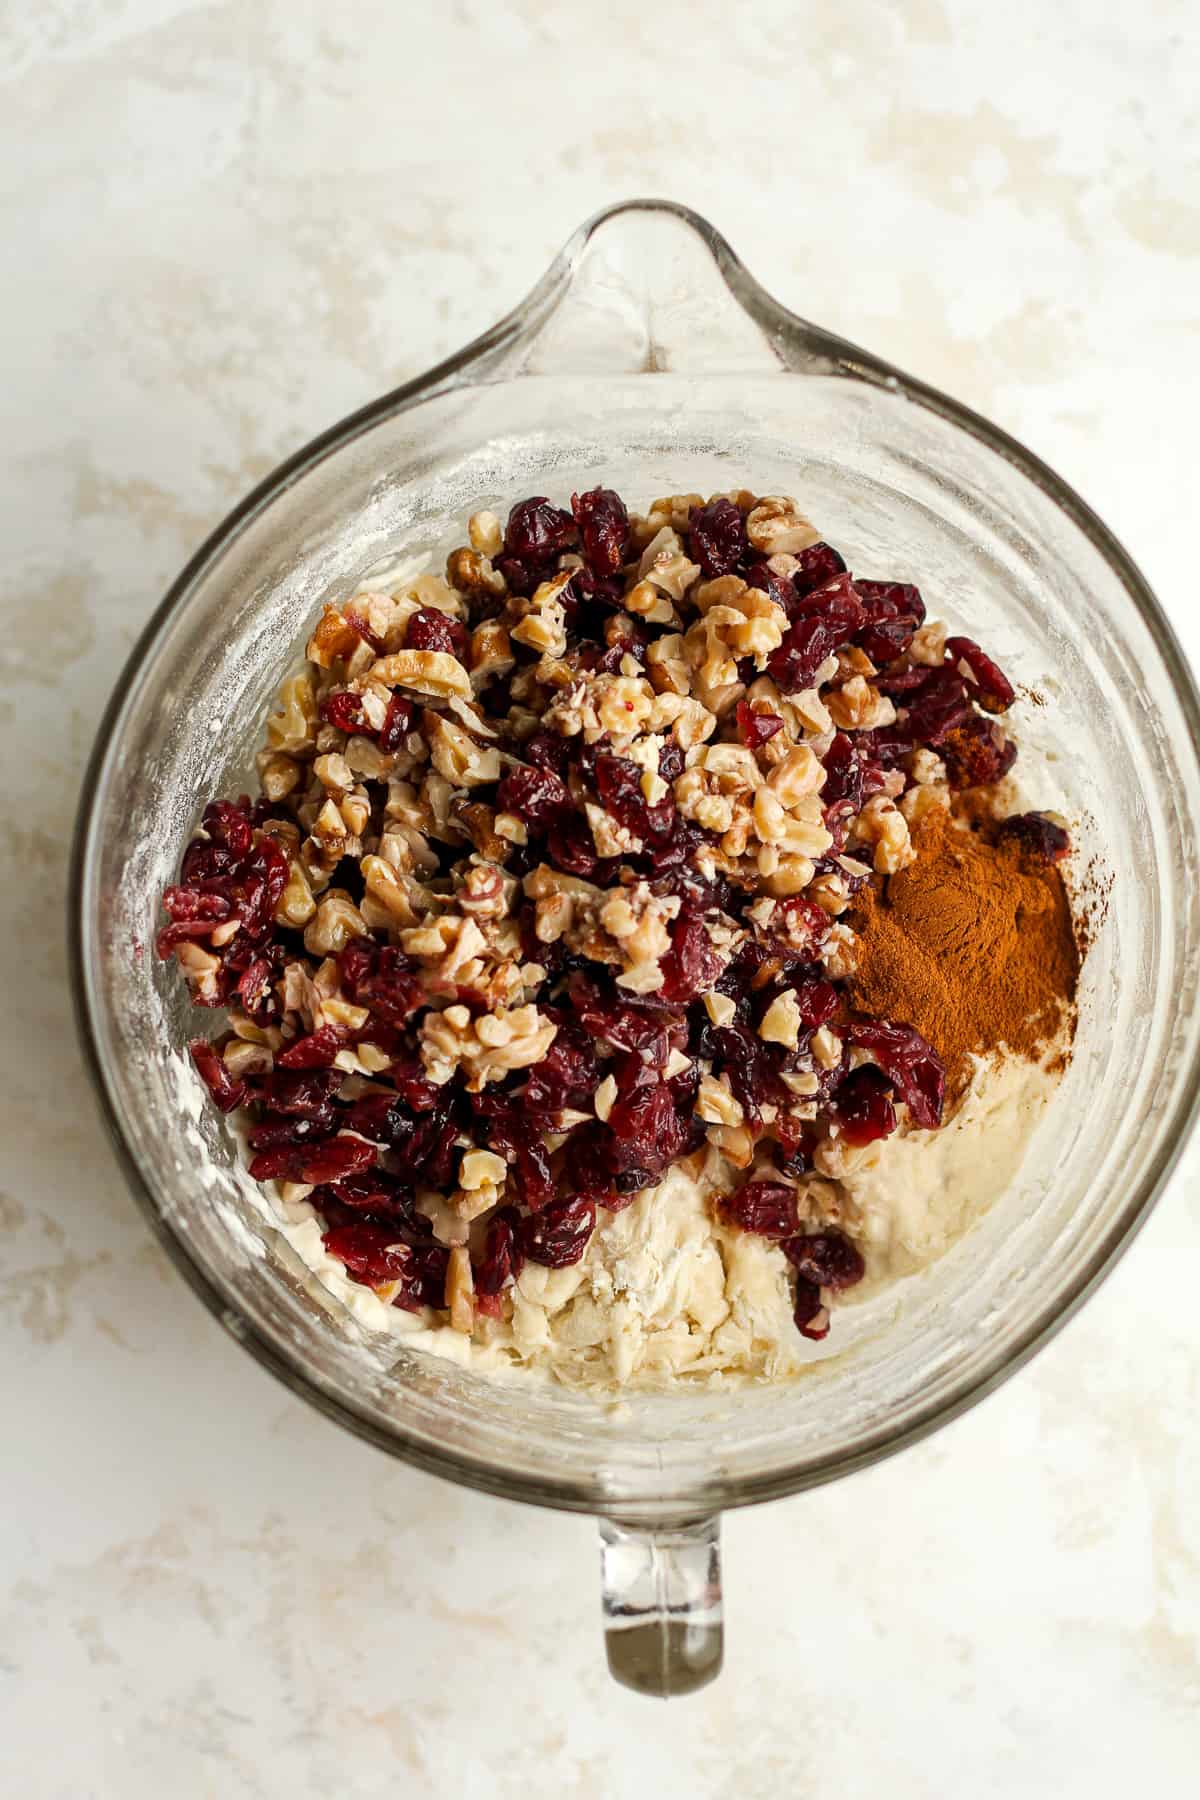
Step 4
After 45 minutes, add the Craisins, walnuts, and cinnamon. Then start the stretch and folds. Use your hand and lift the dough up on one side, stretching it upward, and then punch into the center of the dough. Turn the dough and repeat. Continue this process for about 30 seconds. This is the STRETCH AND FOLDS.
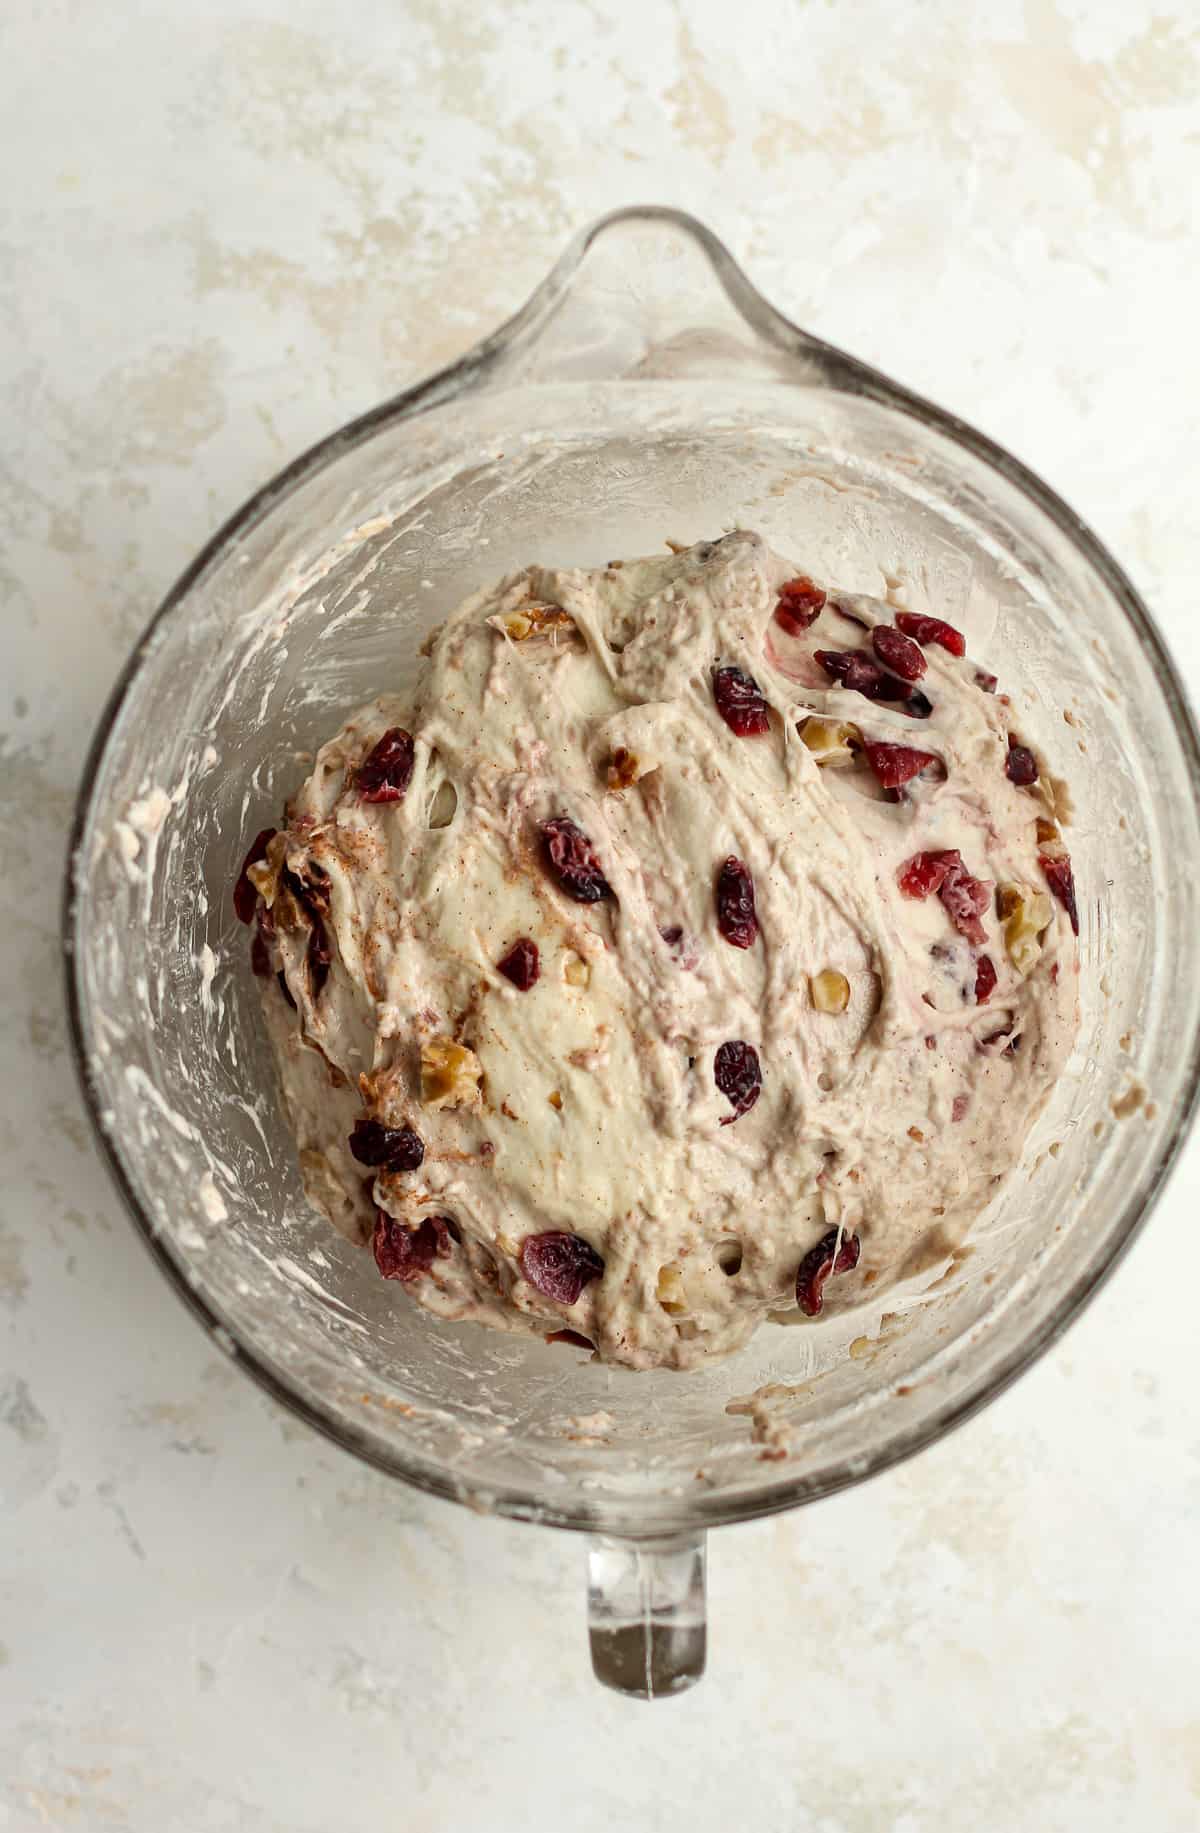
You’ll want to try to get most of the add-ins to the center of the dough during this process. Form the dough into a smooth’ish ball, and place towel back in the bowl.
ADDITIONAL STRETCH AND FOLDS: I recommend doing additional sets of stretch and folds if time permits. Do these every 30 minutes for 3-4 more times to further the gluten development. A bench scraper is an excellent tool to assist with the stretch and folds.
Step 5
Let the dough rise for 6-8 hours, or overnight. It should almost double in size and appear soft on top. Small air bubbles may appear as well. This is the BULK RISE (or bulk fermentation).
Note: I recommend placing a damp towel or some plastic wrap on the dough for the overnight rise. You might also add a bit of oil to the top to keep a crust from forming on the dough overnight.
Step 6
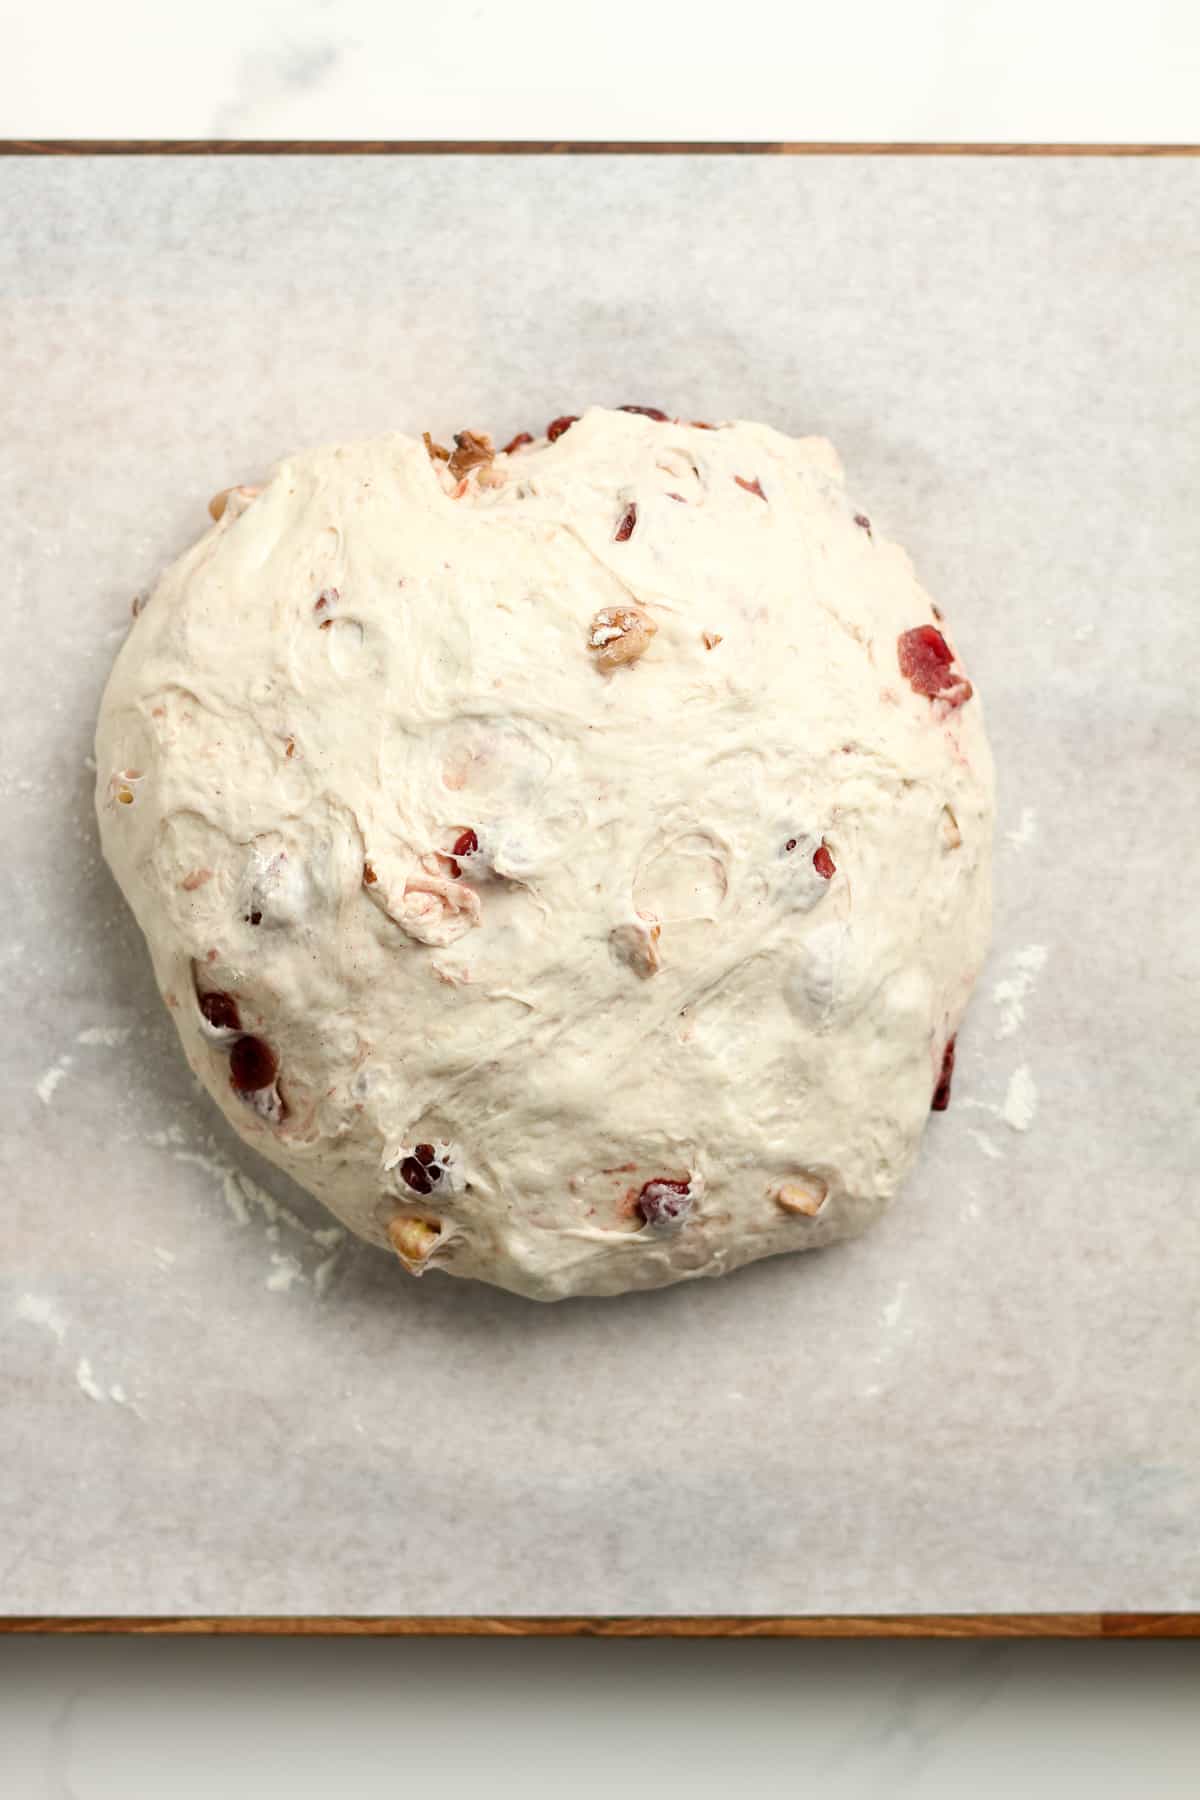
Add a light dusting of flour to a baking mat or clean surface. Remove the dough to the mat and gently form into your desired shape, usually round or oblong. Don’t punch the dough down because you don’t want to remove all the air. Let dough sit for five minutes.
Step 7
After five minutes, use your hands to pull the dough toward you, dragging it along the mat to tighten it up. Repeat in the other directions to tighten. (Make sure you don’t have too much flour on the surface when tightening the dough, so there is some needed friction necessary to tighten it.)
Step 8
Place the dough, seam side up, in a bowl lined with a towel or a prepared proofing basket (pictured below). Cover with a damp towel and let it sit for about 2-4 hours. For this bread, it does not need to double again in size. This is the SECOND RISE (or final rise).
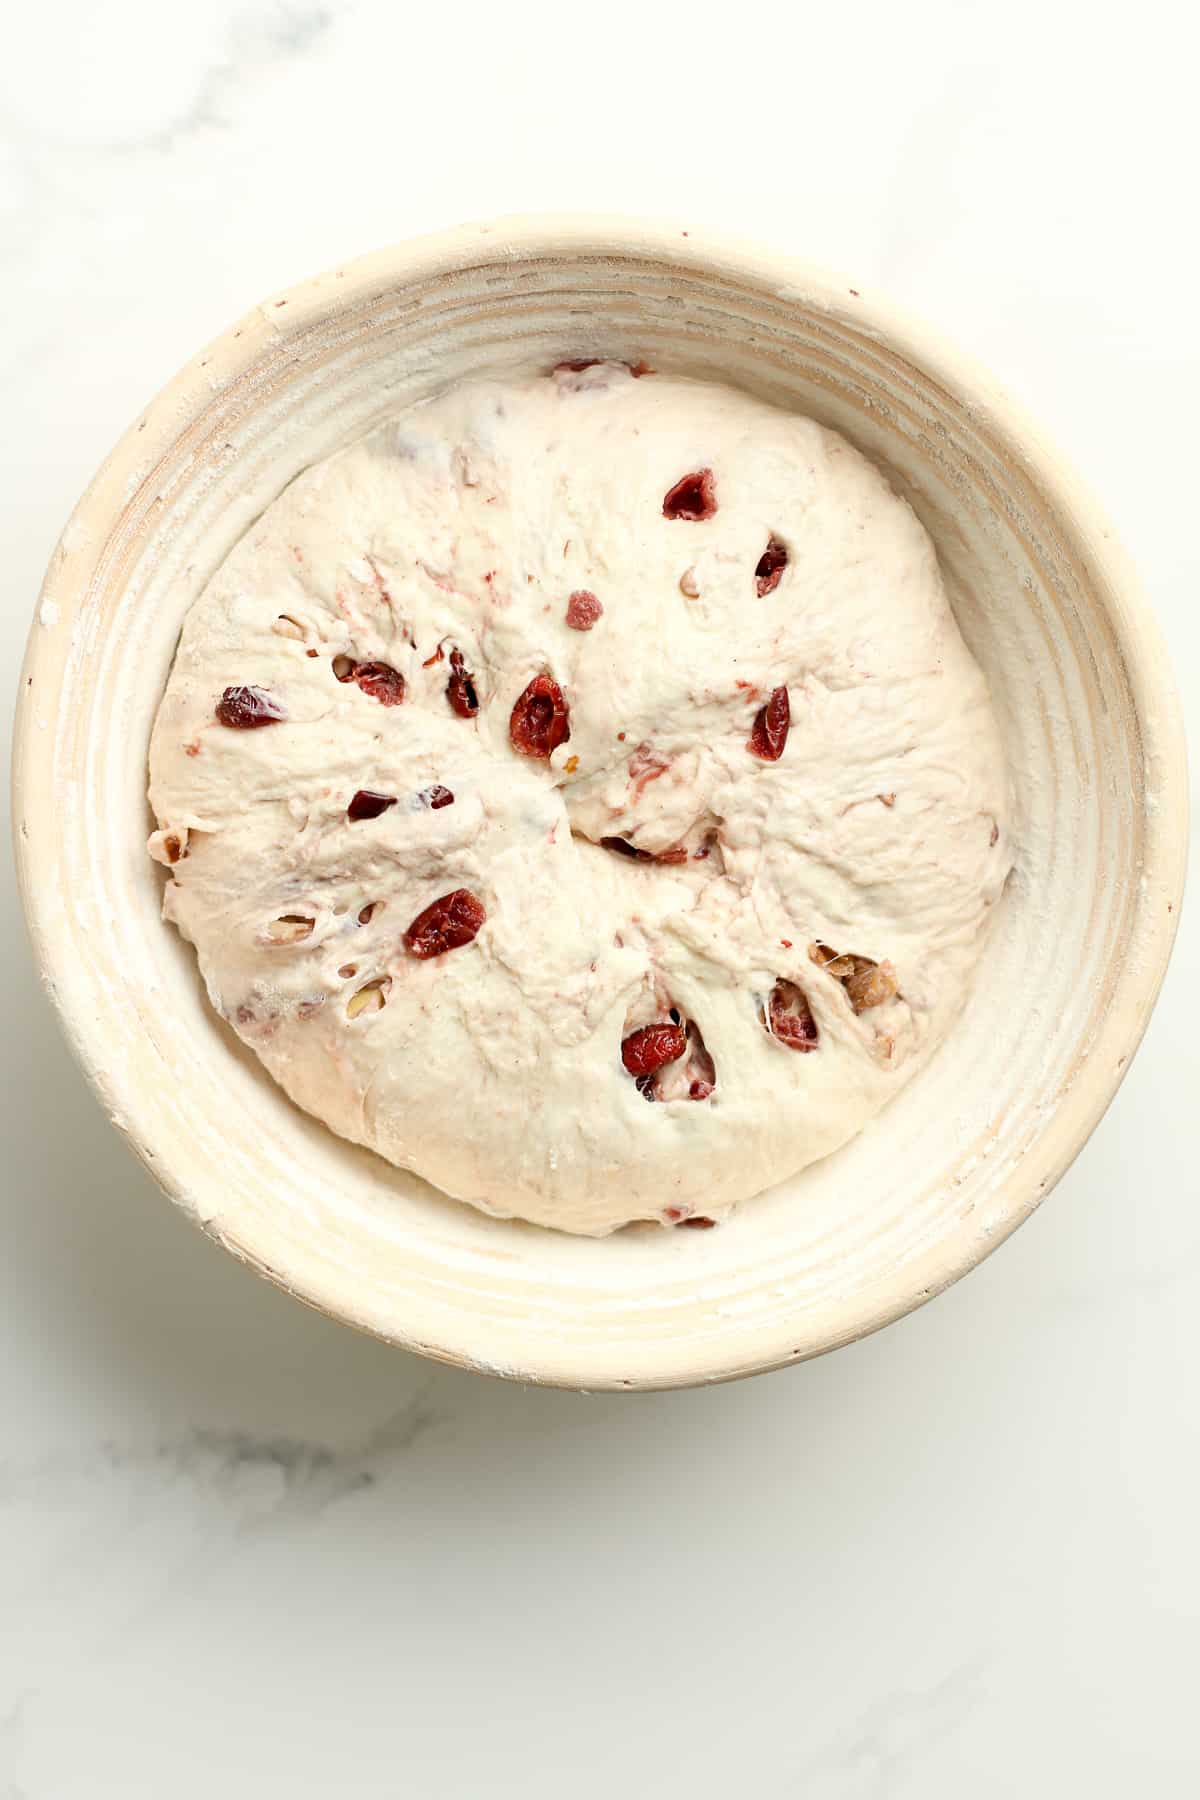
NOTE: For both the bowl or banneton basket, you’ll need to prepare them. For a bowl, add a thin tea towel dusted with rice flour (or regular flour will work in a pinch). For the basket, add some rice flour as well. The rice flour will help prevent sticking while regular flour may not do this as well.
Step 9
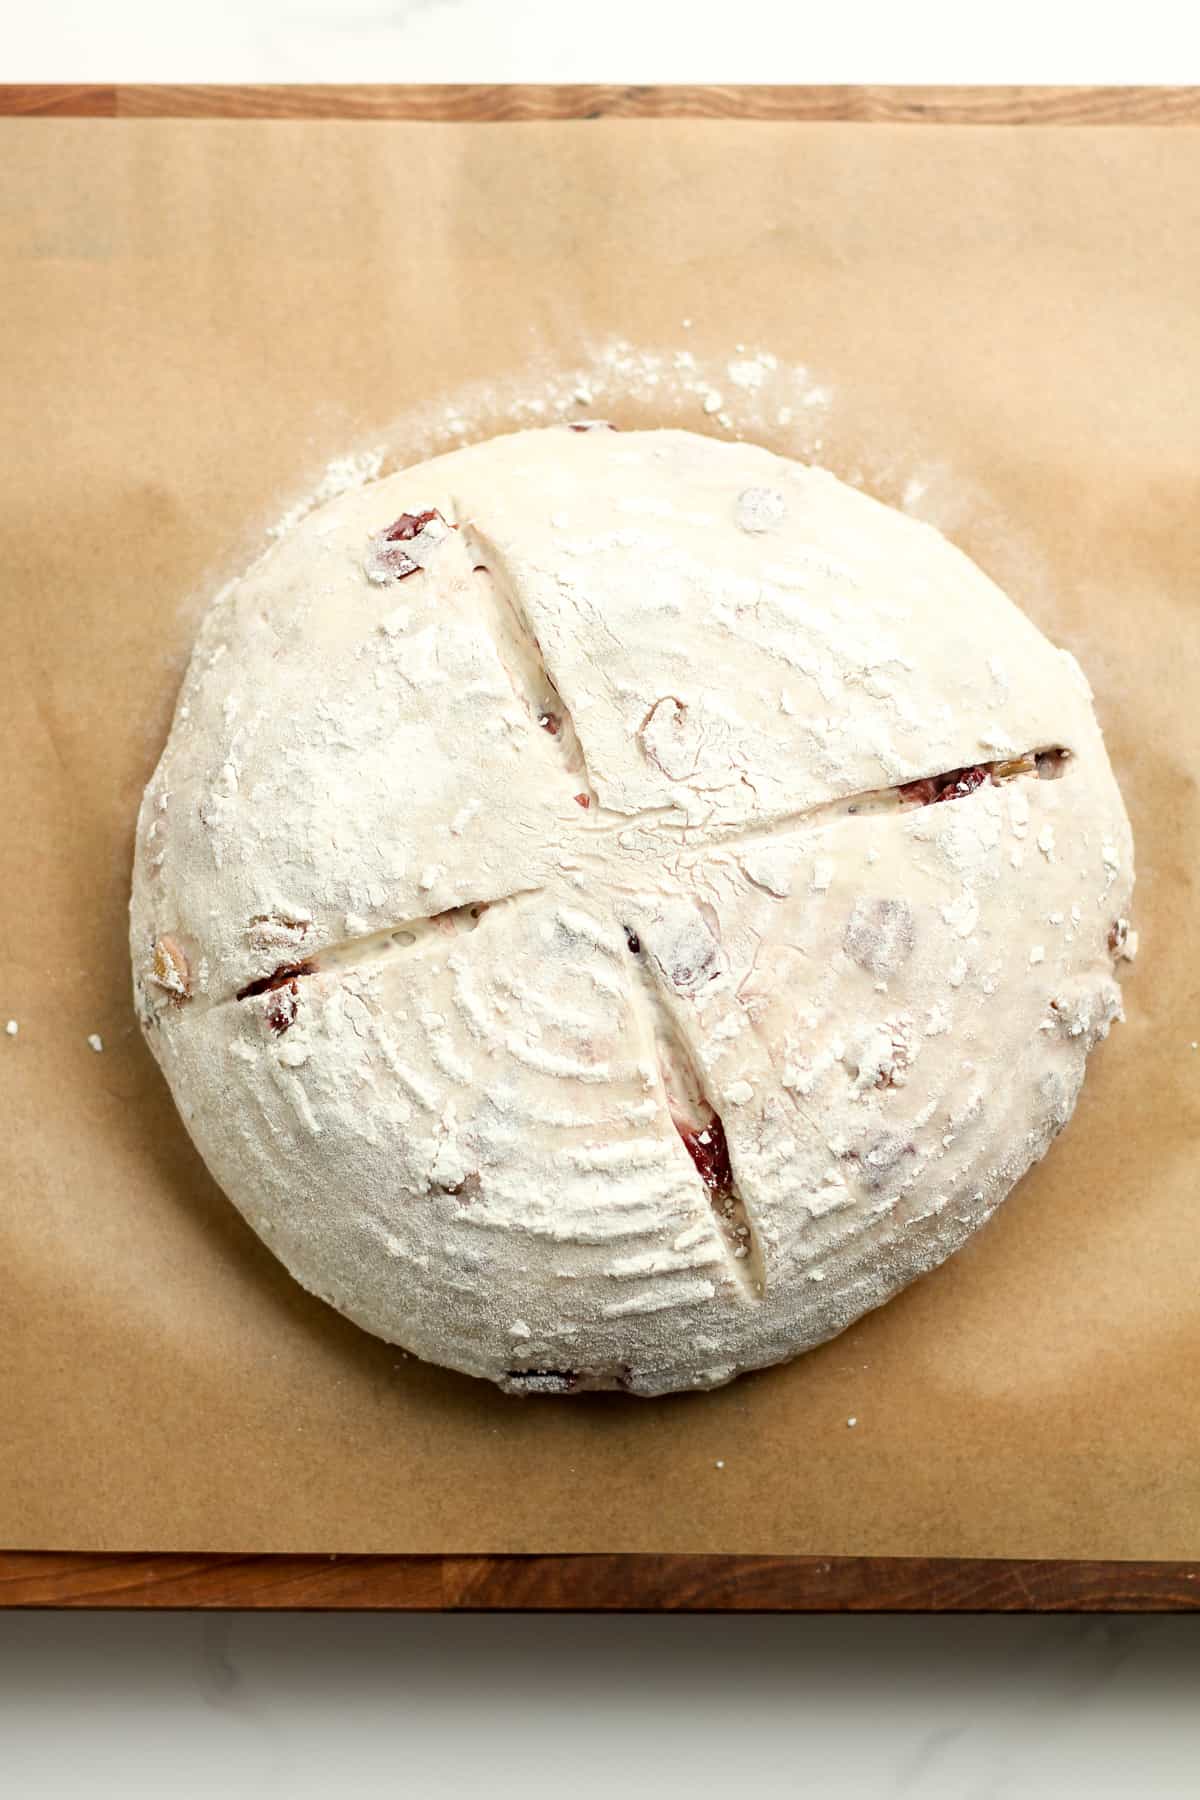
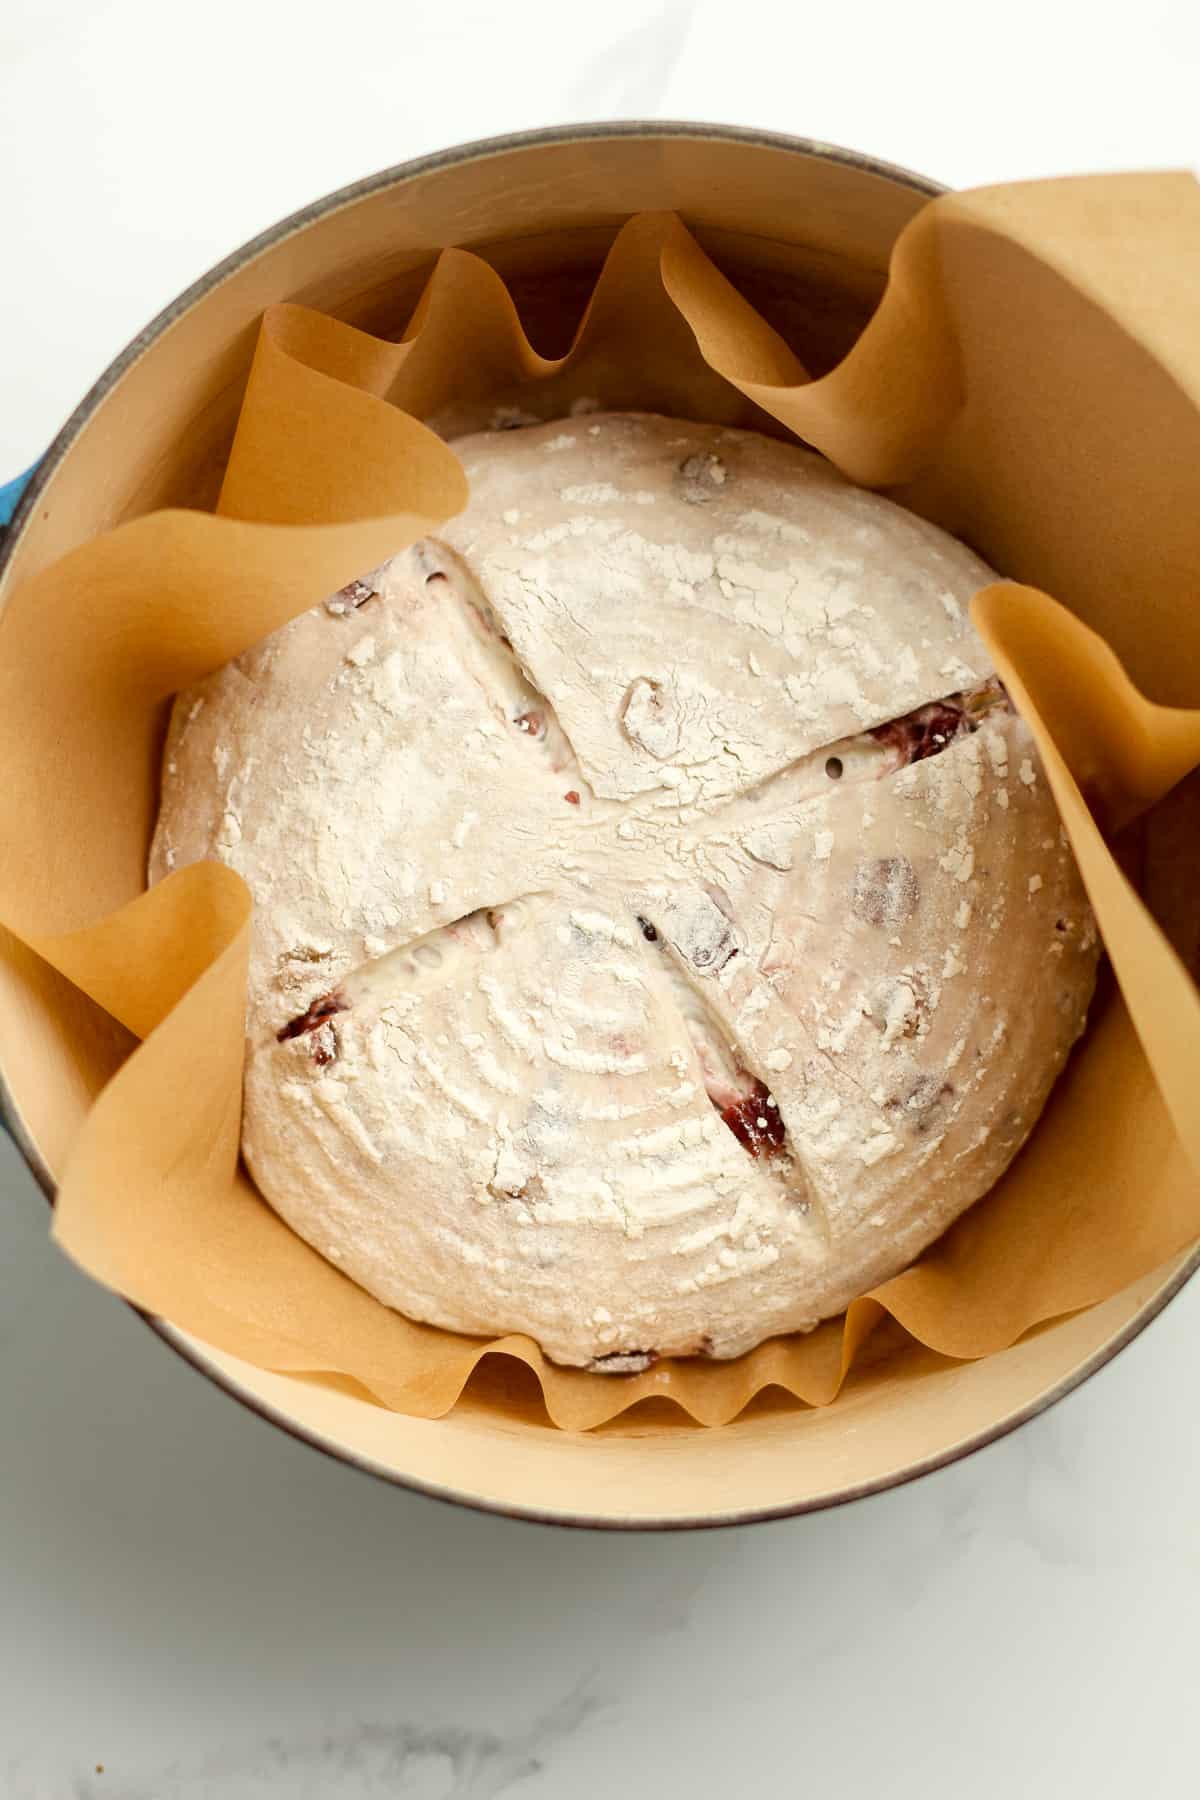
Prepare for baking. Preheat oven to 450 degrees. Carefully remove the loaf to a piece of parchment paper, smooth side up. Then take a serrated edge knife or a bread lame (linked below), and score the top of the dough a couple of times. Place the bread (including parchment paper) into a Dutch oven.
Step 10
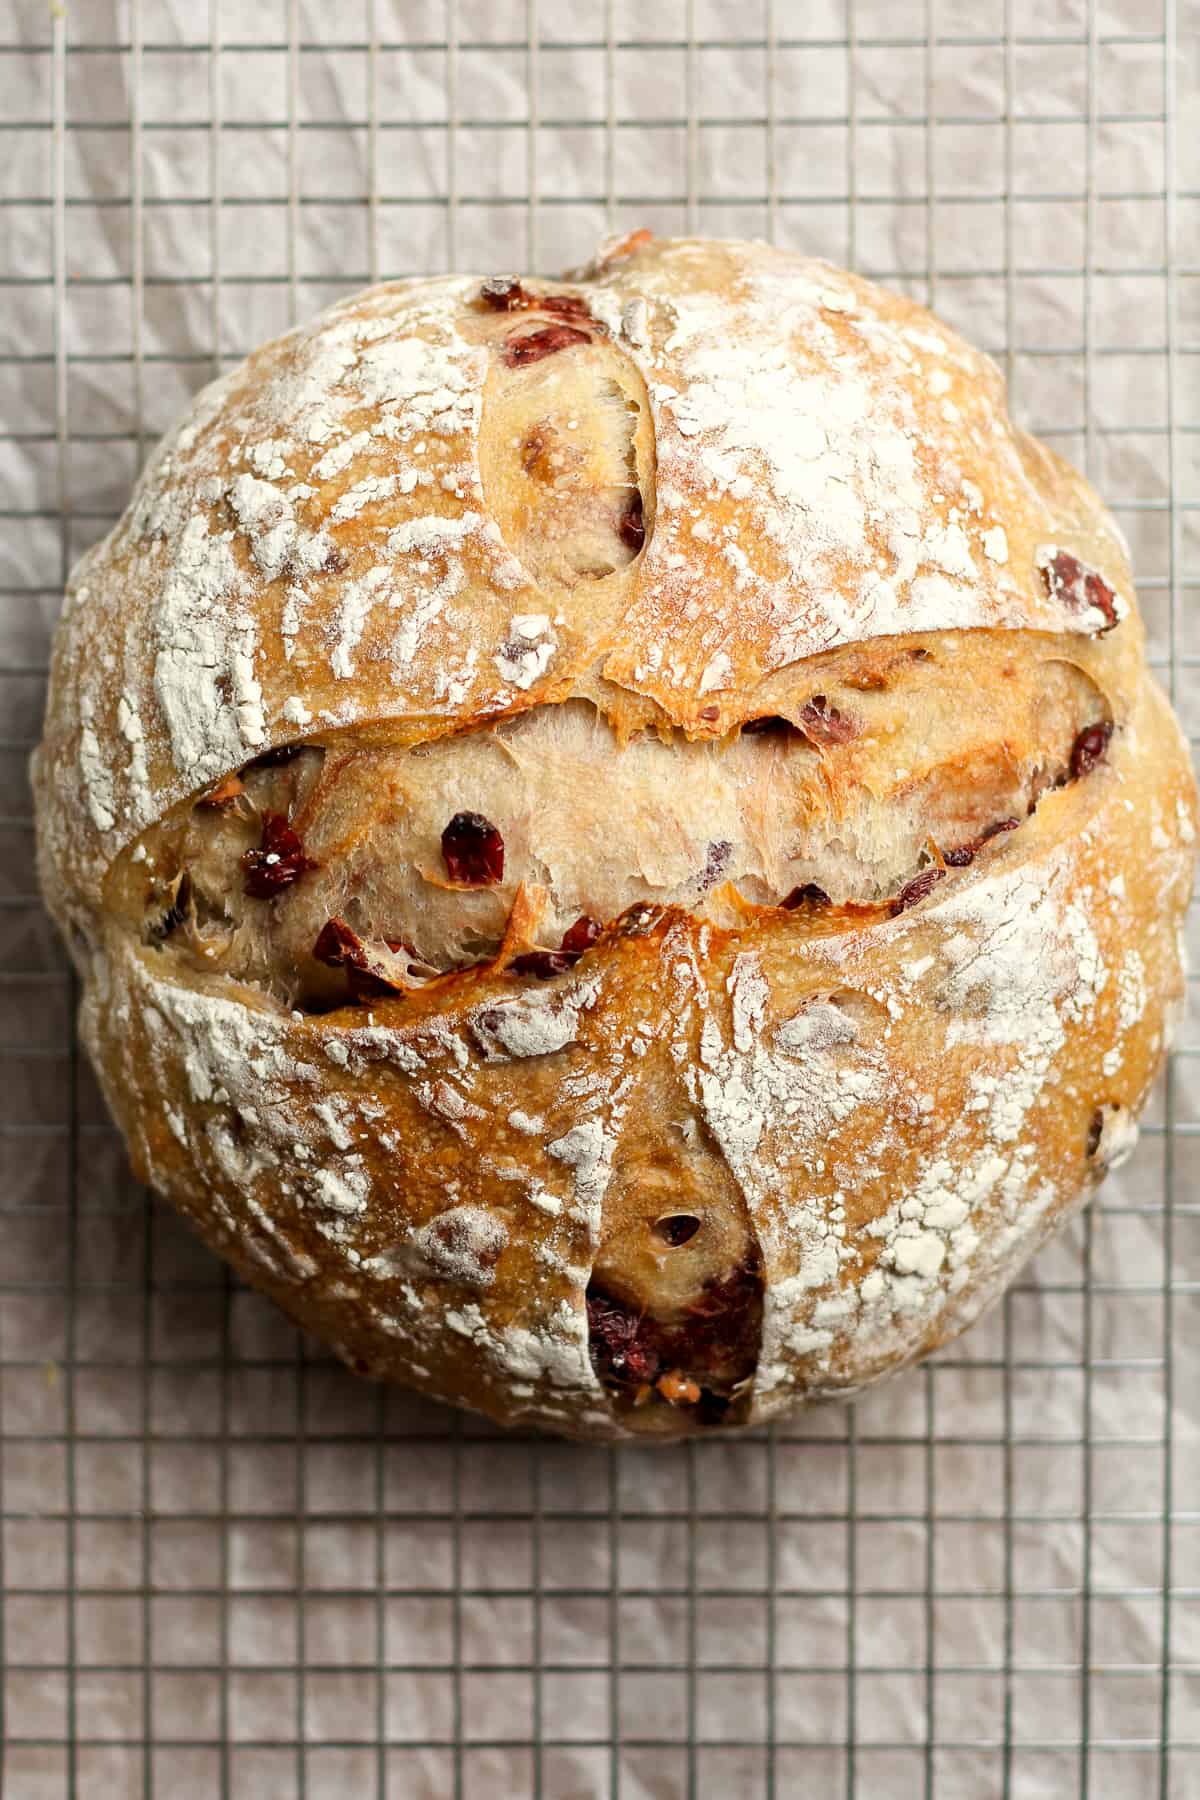
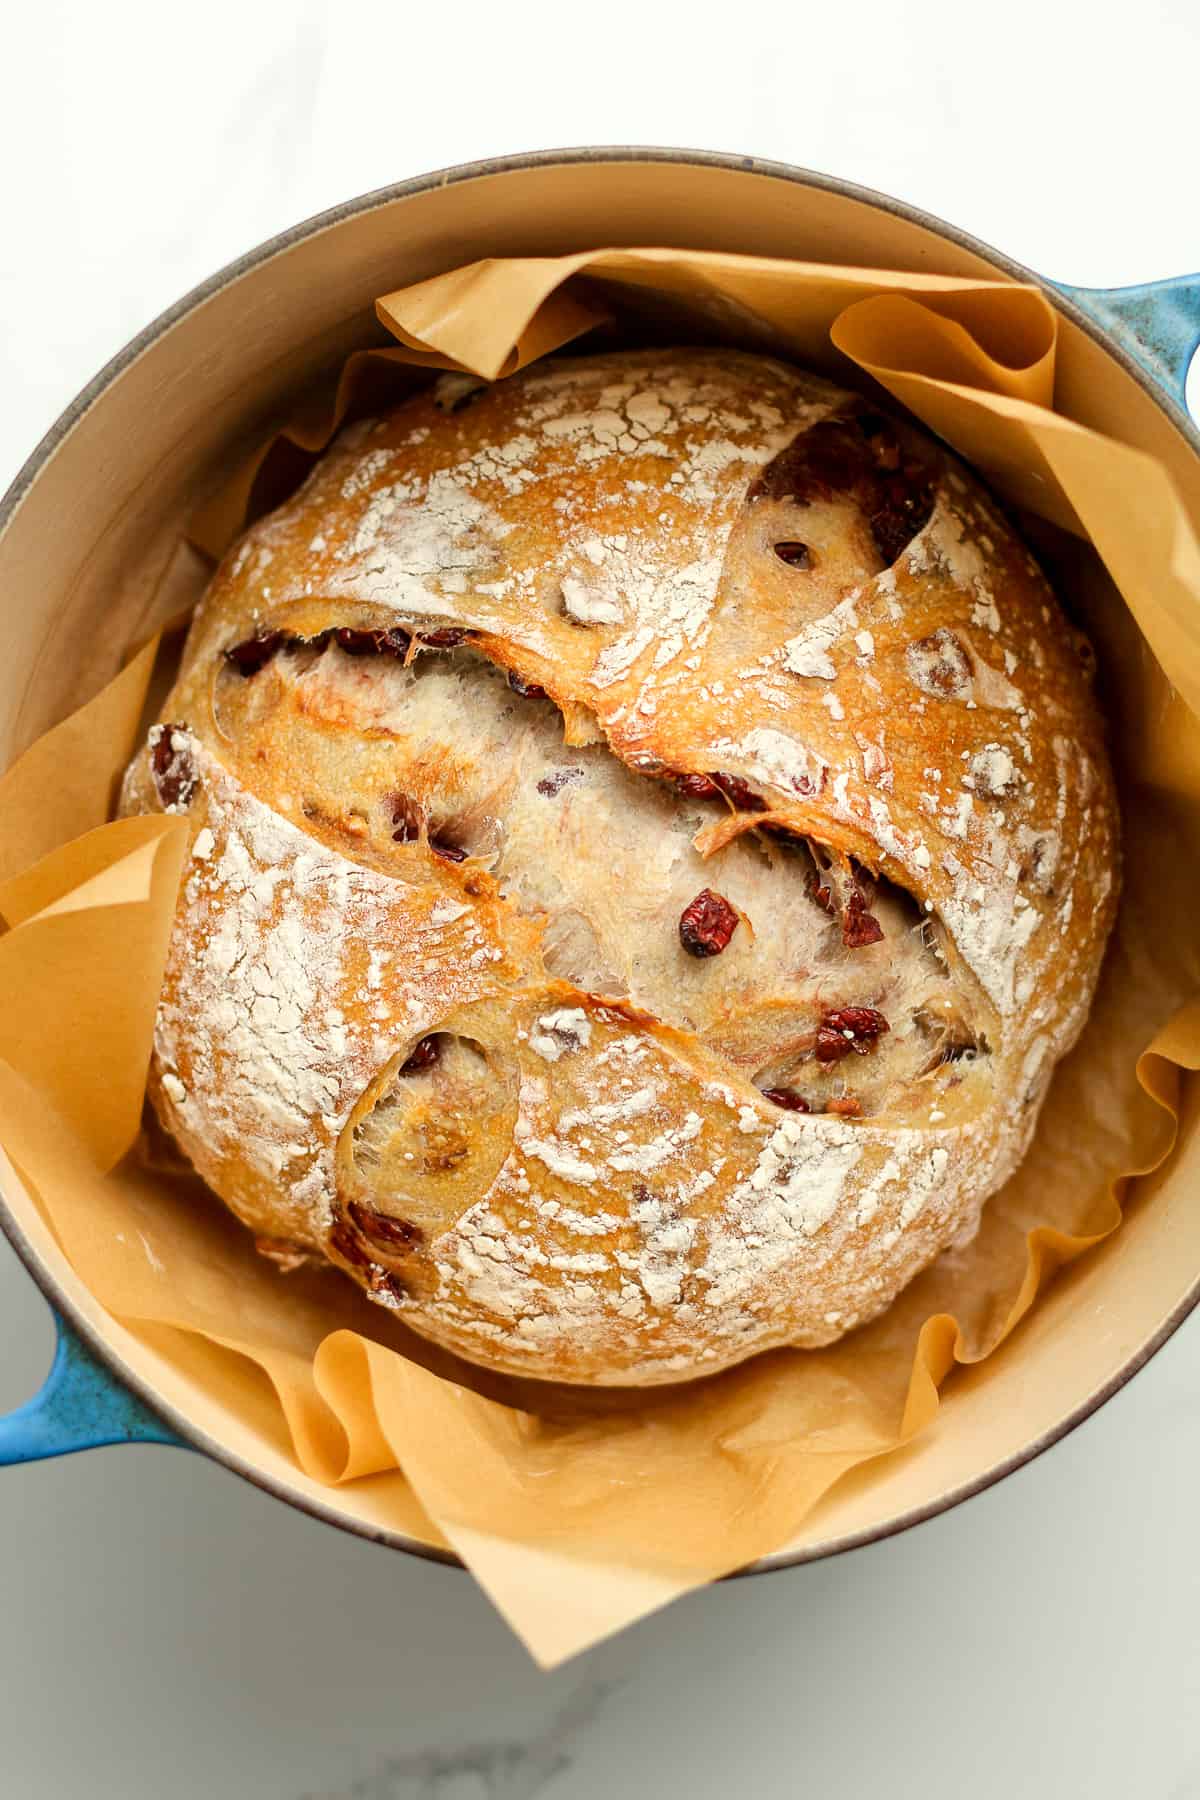
Bake. Add the lid to the pan and bake for 20 minutes. Then remove the lid and bake an additional 30-35 minutes, or until bread is nice and golden on top and bottom.
Step 11
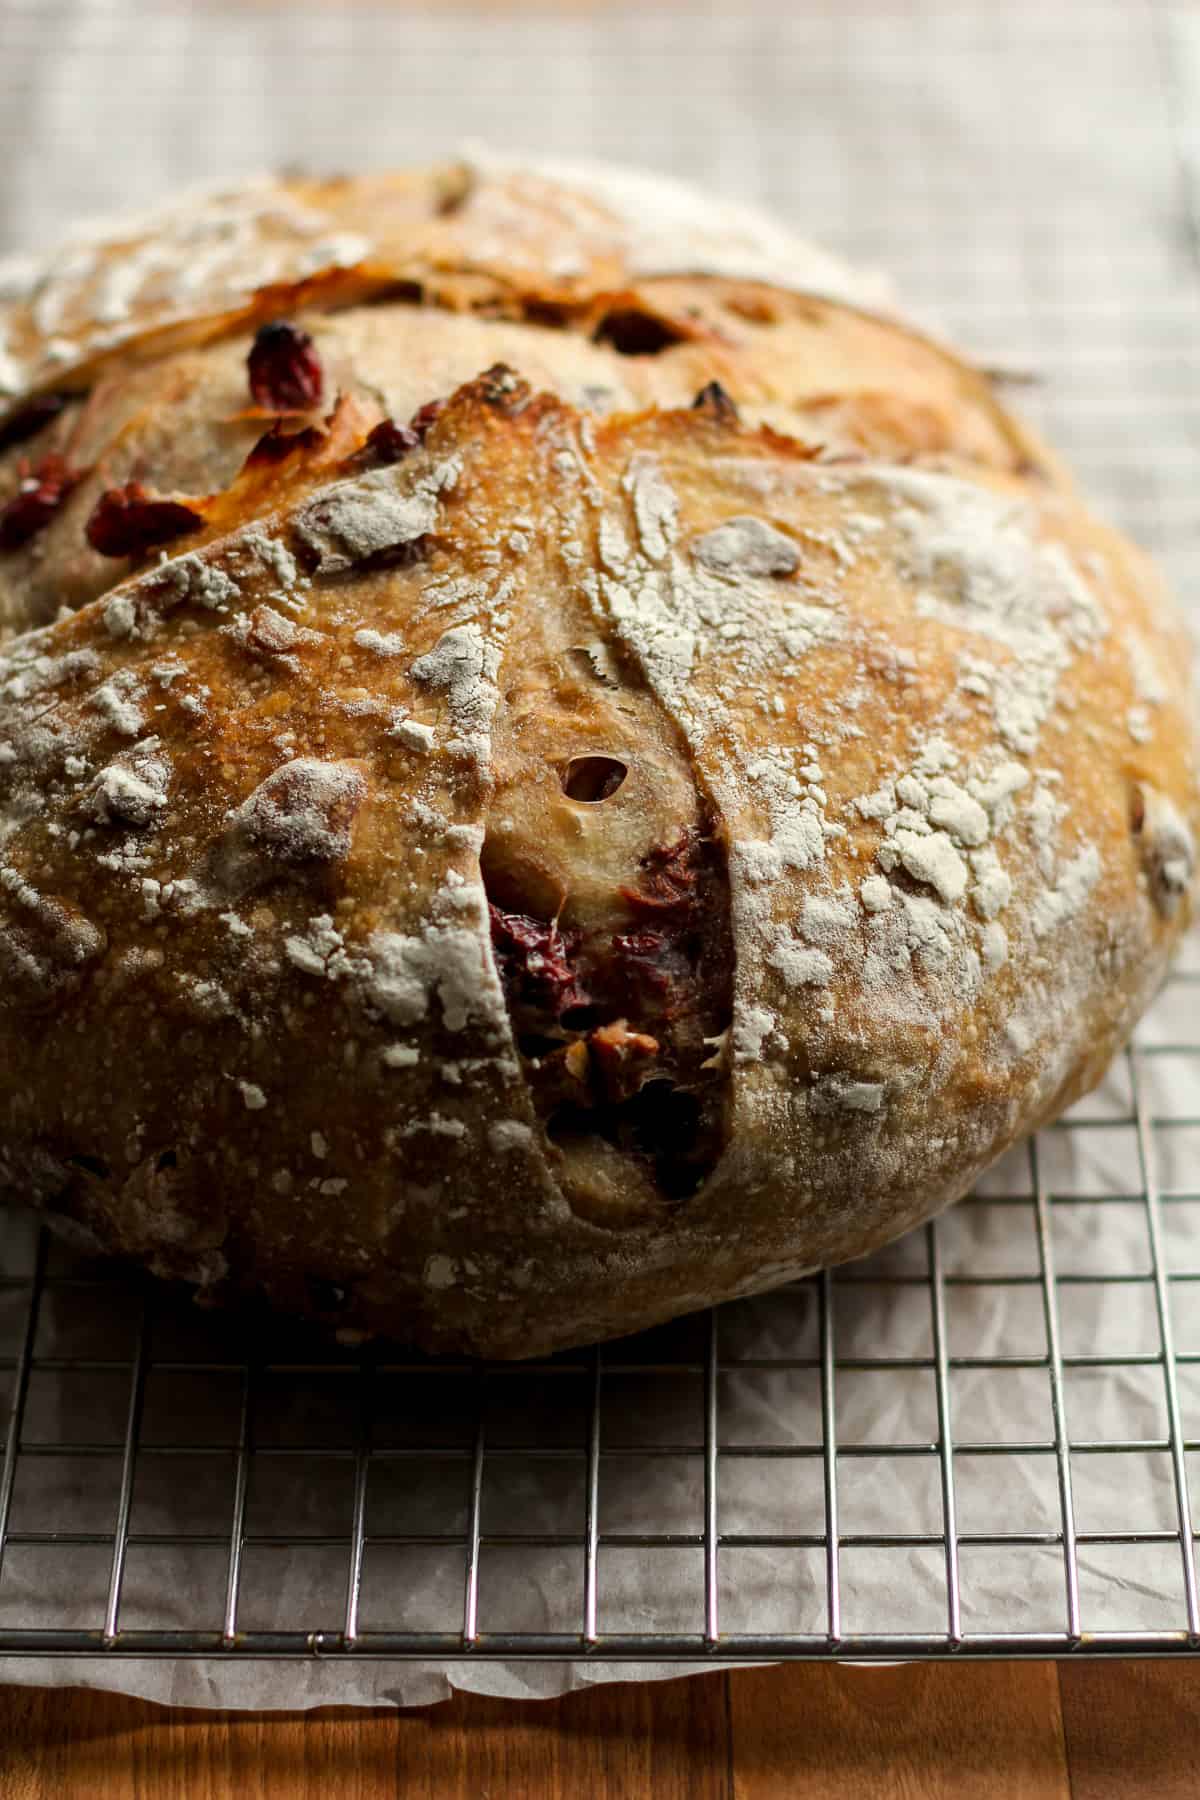
Cool. Remove pan and then use parchment paper as handles to lift the bread out of the pan. Place on a cooling rack. Let the delicous loaf COMPLETELY COOL before slicing.
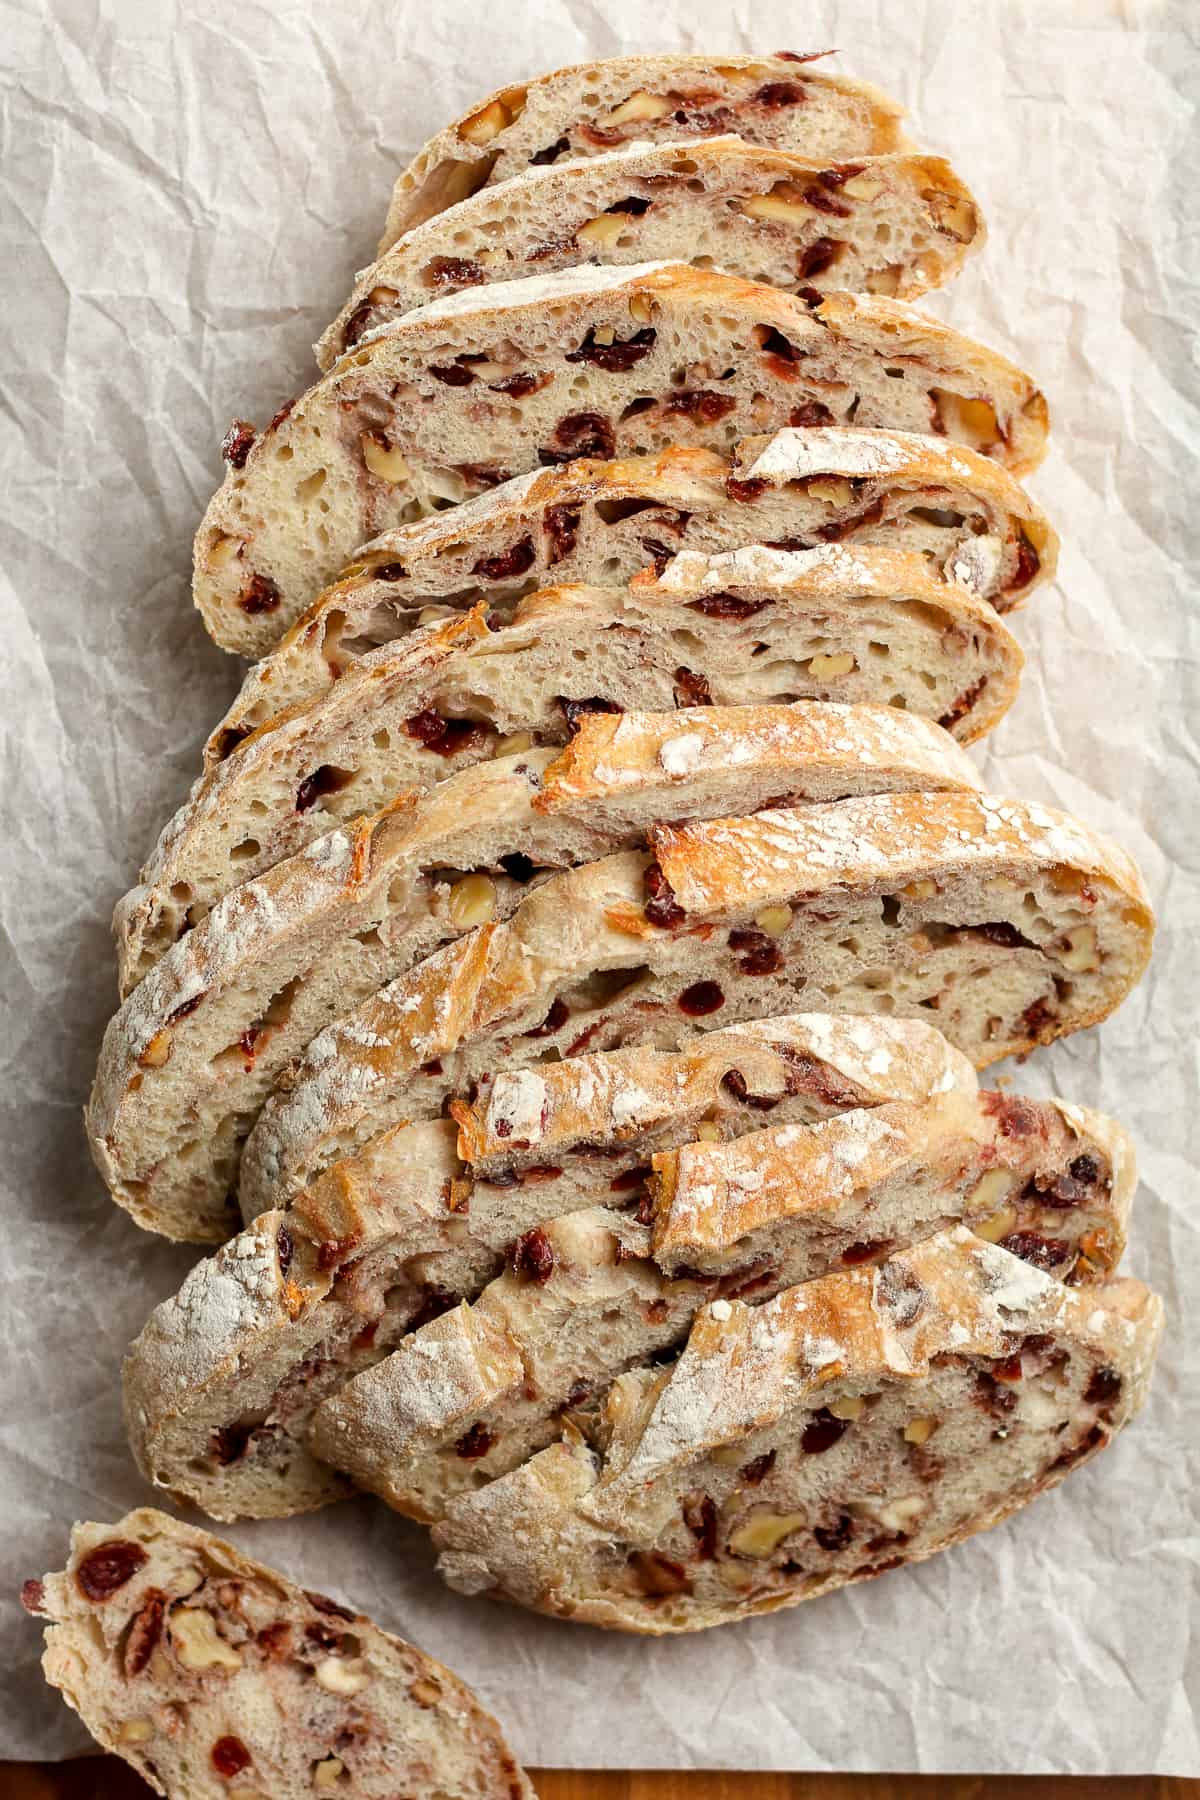
How we enjoy our sourdough bread:
There are so many tasty ways to enjoy a thick slice of cranberry walnut sourdough. In fact, we normally eat it for dinner at least once a week! It’s simple and makes dinnertime a breeze.
- Add butter and jam or any flavor of cream cheese.
- Top with peanut butter and bananas.
- Make a grilled peanut butter and jelly sandwich.
Other Delicious Sourdough Recipes:
Our sourdough options keep getting better, right? Next, try one of the following:
Don’t toss your sourdough discard—it’s packed with flavor and can add a tangy depth to so many recipes. Use it in our Sourdough Discard Crackers, pancakes, muffins, pizza, and more! Not only does it cut down on waste, but it also makes everyday favorites even more delicious.
Sourdough FAQs:
Sourdough is a slow-fermented bread that doesn’t require store-bought yeast to make it rise. It’s a LIVE fermented culture that creates a natural leavening agent. A starter is required to make sourdough.
A starter can be created in less than a week with a simple combo of unbleached flour and filtered water. It’s a process of removing half of the starter and then “feeding” it every day, storing in a jar on your countertop, and getting it to a bubbly, sour point where it floats in water. See my Sourdough Starter Basics for a full tutorial.
Sourdough bread is NOT gluten-free, as it contains flour, but its long fermentation helps break down this gluten. It’s easier on the gut because it’s more digestible and easier for the body to absorb.
xoxo ~Sue
Cranberry Walnut Sourdough Bread Recipe
Ingredients
- 75 grams bubbly sourdough starter
- 350 grams filtered water – slightly warmed
- 250 grams bread flour
- 250 grams all-purpose flour
- 10 grams fine sea salt
- 100 grams lower-sugar Craisins
- 75 grams walnuts – chopped
- 1 teaspoon cinnamon
- warm water – to coat fillings
Instructions
- Carefully measure out the water and sourdough starter in a mixing bowl, and stir well with a fork. Add the bread flour, all-purpose flour, and fine sea salt – and stir again.75 grams bubbly sourdough starter, 350 grams filtered water, 250 grams bread flour, 250 grams all-purpose flour, 10 grams fine sea salt
- Then use your hands to bring the ingredients together. It will look shaggy. Cover with a damp towel and let it sit for 45 minutes. (Be sure to set a timer.) This is the AUTOLYSE.
- Meanwhile, soak the Craisins and walnuts in some warm water. Let it soak during the autolyse and then drain well.
- After 45 minutes, add the Craisins, walnuts, and cinnamon. Then start the stretch and folds. Use your hand and lift the dough up on one side, stretching it upward, and then punch into the center of the dough. Turn the dough and repeat. Continue this process for about 30 seconds. This is the STRETCH AND FOLDS.100 grams lower-sugar Craisins, 75 grams walnuts, 1 teaspoon cinnamon
- You’ll want to try to get most of the add-ins to the center of the dough during this process. Form the dough into a smooth’ish ball, and place towel back in the bowl.
- ADDITIONAL STRETCH AND FOLDS: I recommend doing additional stretch and folds if time permits. Do these every 30 minutes for 3-4 more times to further develop the gluten structure.
- Let the dough rise for 6-8 hours, or overnight. It should almost double in size and appear soft on top. Small air bubbles may appear as well. This is the BULK RISE.
- Note: I recommend placing a damp towel on the dough for the overnight rise. You might also add a bit of oil to the top to keep a crust from forming on the dough overnight.
- Add a light dusting of flour to a baking mat or clean surface. Remove the dough to the mat and gently form into your desired shape, usually round or oblong. Don’t punch the dough down because you don’t want to remove all the air. Let dough sit for five minutes.
- After five minutes, use your hands to pull the dough toward you, dragging it along the mat to tighten it up. Repeat in the other directions to tighten. (Make sure you don’t have too much flour on the surface when tightening the dough, so there is some needed friction necessary to tighten it.)
- Place the dough, seam side up, in a bowl lined with a towel or a prepared banneton basket (pictured below). Cover with a damp towel and let it sit for about 2-4 hours. For this bread, it does not need to double again in size. This is the SECOND RISE.
- NOTE: For both the bowl or banneton basket, you’ll need to prepare them. For a bowl, add a thin tea towel dusted with rice flour (or regular flour will work in a pinch). For the basket, add some rice flour as well. The rice flour will help prevent sticking while regular flour may not do this as well.
- Prepare for baking. Preheat oven to 450 degrees. Carefully remove the loaf to a piece of parchment paper, smooth side up. Then take a serrated edge knife or a bread lame (linked below), and score the bread a couple of times. Place the bread (including parchment paper) into a dutch oven.
- Bake. Add the lid to the pan and bake for 20 minutes. Then remove the lid and bake an additional 30-35 minutes, or until bread is nice and golden on top and bottom.
- Cool. Remove pan and then use parchment paper as handles to lift the bread out of the pan. Place on a cooling rack. Let the bread COMPLETELY COOL before slicing.
Delicious and easy sourdough recipe. ❤️
Thanks so much Lena!
Made this bread today and it turned out absolutely fantastic. Than you!!
Thanks so much for you feedback Su!
Can I use fresh cranberries?
I haven’t tested the bread with fresh cranberries but I’m betting it would work. Please stop back and let me know!
Did you try it? I want to use fresh ones too.
I let mine rise the first time for 6 hours then overnight in the batons in the fridge. Will that work?
Can I use 50/50 AP and Whole Wheat flour?
Thanks!
Do I have to make this sourdough?
I’ve been making sourdough bread for a few years and this is my favorite recipe! It makes absolutely delicious toast. I usually slice it and wrap it and freeze until I’m ready to eat it. I always add the zest of one orange and either use pecans or walnuts.
This makes me so happy! Thanks Cathy!
Orange zest is a nice touch! I’ll have to try that! This recipe is delicious! I’ve made it a few times now!
Hello! Do you have tips on splitting this into two loaves so I can share with a neighbor?
Well, I think I’d personally bake it and then just slice it in half for the neighbor.
I cut mine in half right after 1st rise, then place in flour dusted tea towel in 2 separate baskets to finish 2nd rise, then score, then I place on parchment paper and place both loaves, in own parchment paper, inside my big turkey roaster that was preheated with lid on and bake at 400 degrees with lid on for 23 minutes, then lid off for 23 minutes
Do you preheat your Dutch oven?
I don’t normally preheat my Dutch oven but you can if you prefer it.
I always do
Your instructions say to add salt but the ingredients list don’t say how much salt. When doing the 4 hour rest, stretching 30 minutes apart, aren’t we suppose to covered with a with a damp cloth between stretches to promote autolyse?
The recipe says to add 10 grams of fine sea salt. And yes, cover the bowl between the stretch and folds.
Can I let it sit in my boul overnight instead of 2-4 hours?
I recommend placing the first rice in the refrigerator overnight instead of the second rise.
Which is it?… leave the first rise in the refrigerator overnight or on the counter in a bowl.
I leave the first rise on the countertop and then sometimes add more time in the refrigerator.
This is my first fruit/nut sourdough loaf I’ve made. It appears to be burnt, but won’t know until I cut into it tomorrow. Should it be looking/smelling like it’s burnt? Cooked for 20 at 450 with lid on, and 31 mins with lid off. Thanks for any advice.
No, it shouldn’t smell burnt. Perhaps your oven runs hot? This bread has never burned for me.
This is so delicious!! I have to check out the rest of your sourdough recipes. This was the best crumb structure I’ve ever gotten. Thanks for sharing!
I haven’t been very lucky with my sourdough endeavors but this really caught my eye. I love cranberries and also nuts so I had to make this. My sourdough was perfect and I really turned out a great “big” loaf of bread. The only thing was it didn’t get as crispy as it should have. I don’t know what I did wrong but the bread was fantastic and I will be making again.
Sounds like you had amazing results. Thanks for your feedback, Maureen!
I’ve been using my sourdough starter for almost a year now and your recipes are my absolute favorite! Just finished a batch of regular over night sourdough, now working on a batch of your crasin walnut! Thank you for posting amazing recipes!
Thanks so much, Charla!
And the list goes on! Another top Sourdough recipe to choose from. The pro tip of freezing is next level!