Multigrain Sourdough Bread
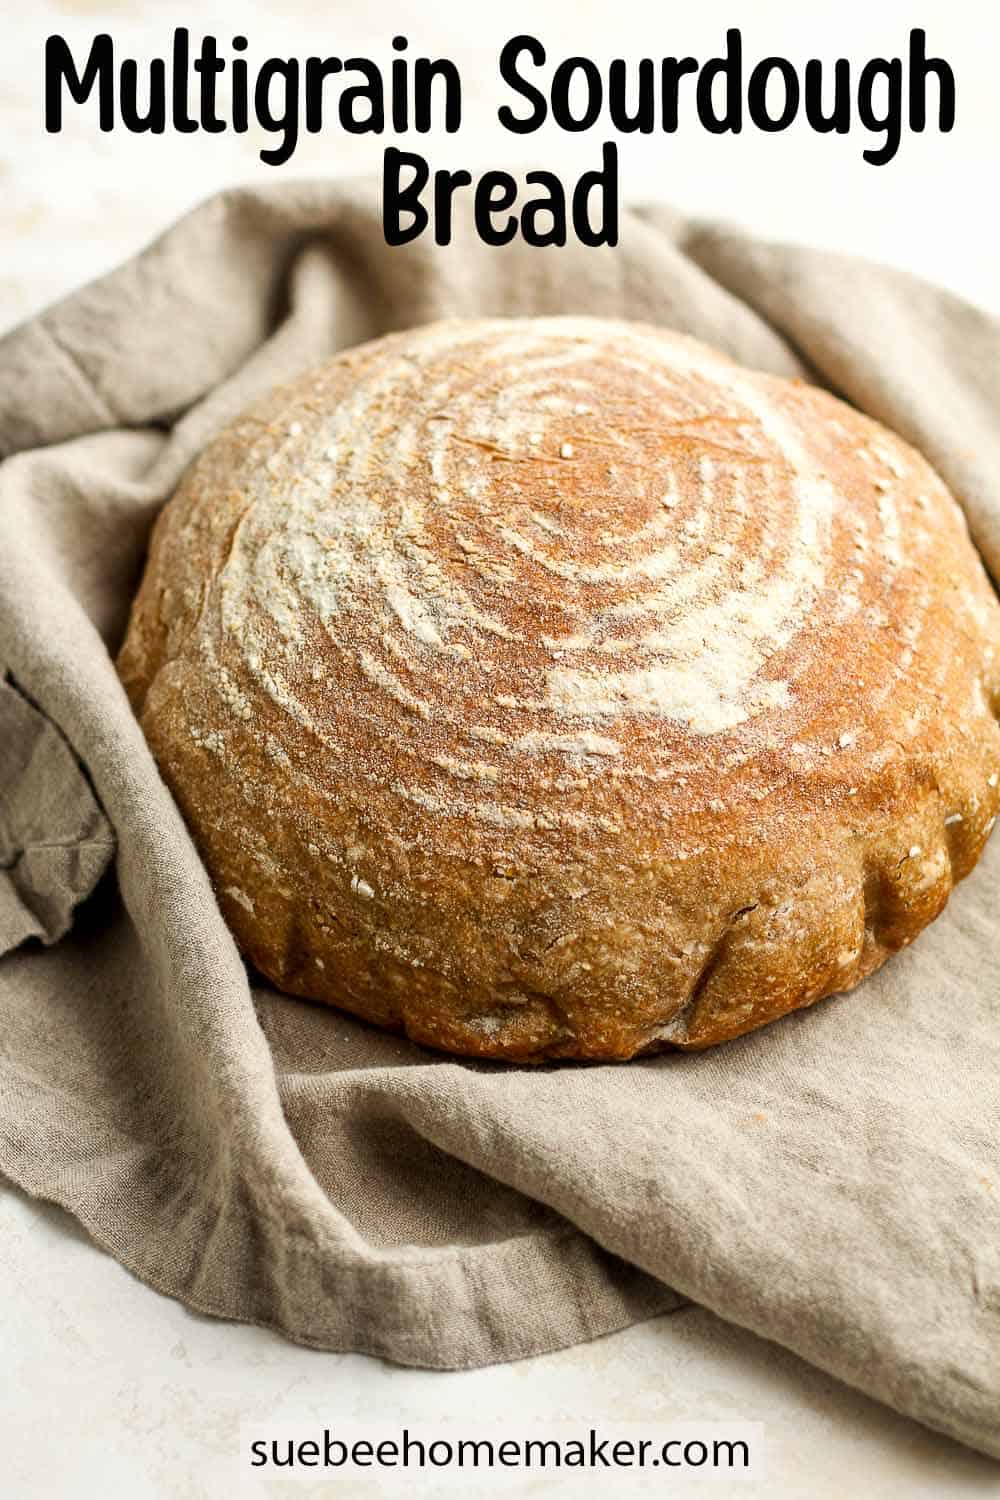
Make some Multigrain Sourdough Bread at home and enjoy slices of soft and gut-healthy bread. This delicious sourdough is easy to make with just seven ingredients and you can adjust the baking time to work with your schedule!
Have you hopped on the sourdough bandwagon yet? If so, try my Sourdough Bagels, the best ever Jalapeño Cheddar Sourdough Bread, and some Whole Wheat Sourdough Sandwich Bread next!
Seeded Sourdough
This Multigrain Bread incorporates a 10-grain cereal that I bought on Amazon. I believe you can also find it at most local stores. This cereal is key to this seeded bread as it contains a blend of whole grain wheat, rye, triticale, oat bran, oats, corn, barley, soy beans, brown rice, millet, and flaxseed. Other similar blends would work as well.
Why This Recipe Works:
- It’s simple. As mentioned, this has only seven ingredients and is quick to mix up.
- The multigrain adds a health factor. We can always use a little extra fiber and in our diet, and this helps!
- Gut healthy. Sourdough is a gut healthy bread. Sourdough bread is NOT gluten-free, as it contains flour, but its long fermentation helps break down this gluten. It’s easier on the gut because it’s more digestible and easier for the body to absorb.
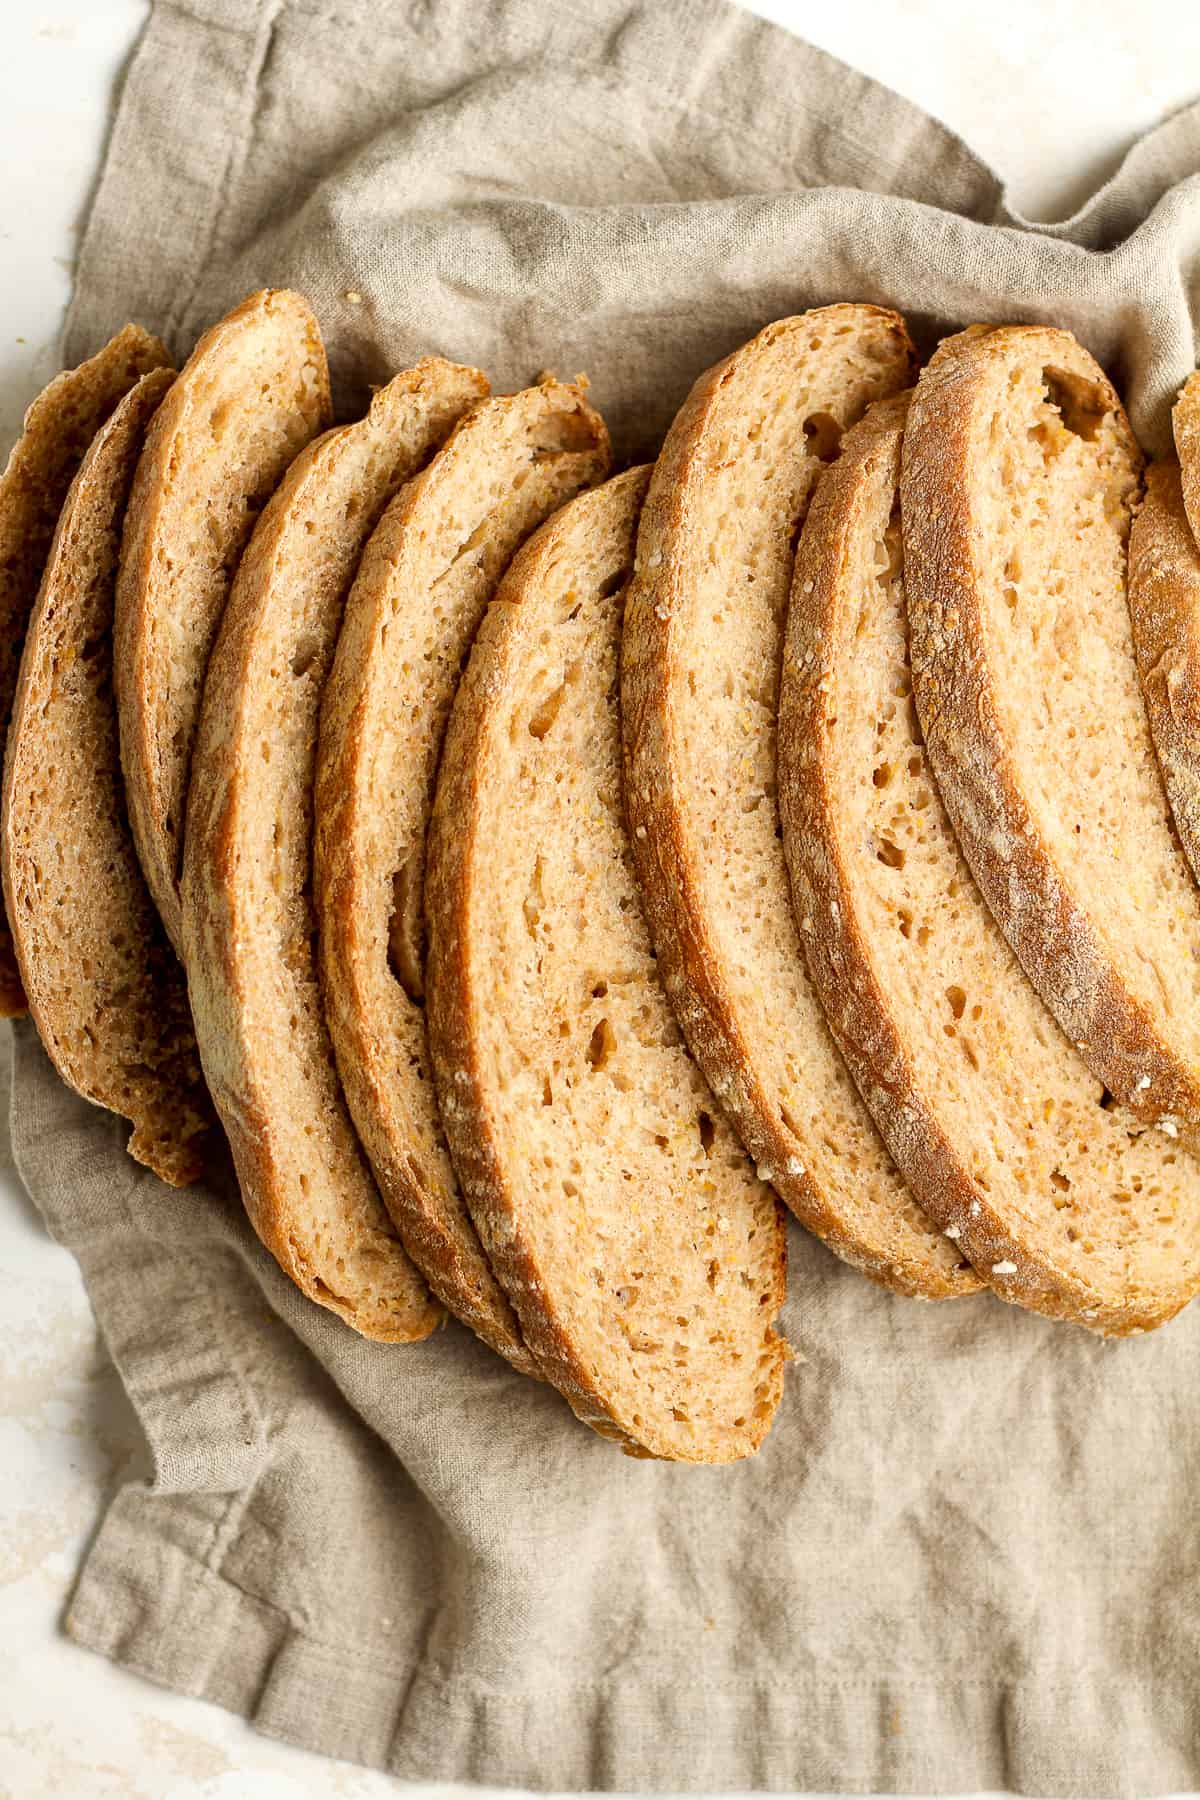
- Higher Hydration. This recipe is 70% hydration which means it’s a softer and has a more open crumb. You’ll see more “holes” in this bread due to a higher water to flour ratio.
- Delicious! We love the “sour” flavor of sourdough bread and this one is pretty sour. The grains also add a nutty flavor that we enjoy too.
I’ve also got a Multigrain Bread Recipe using yeast, if you’d prefer to go that route instead!

Make your own sourdough starter at home with just a few simple ingredients using Sourdough Starter Basics. In just over a week’s time and a little bit of patience, you’ll be ready to use your active starter to make the best sourdough bread!
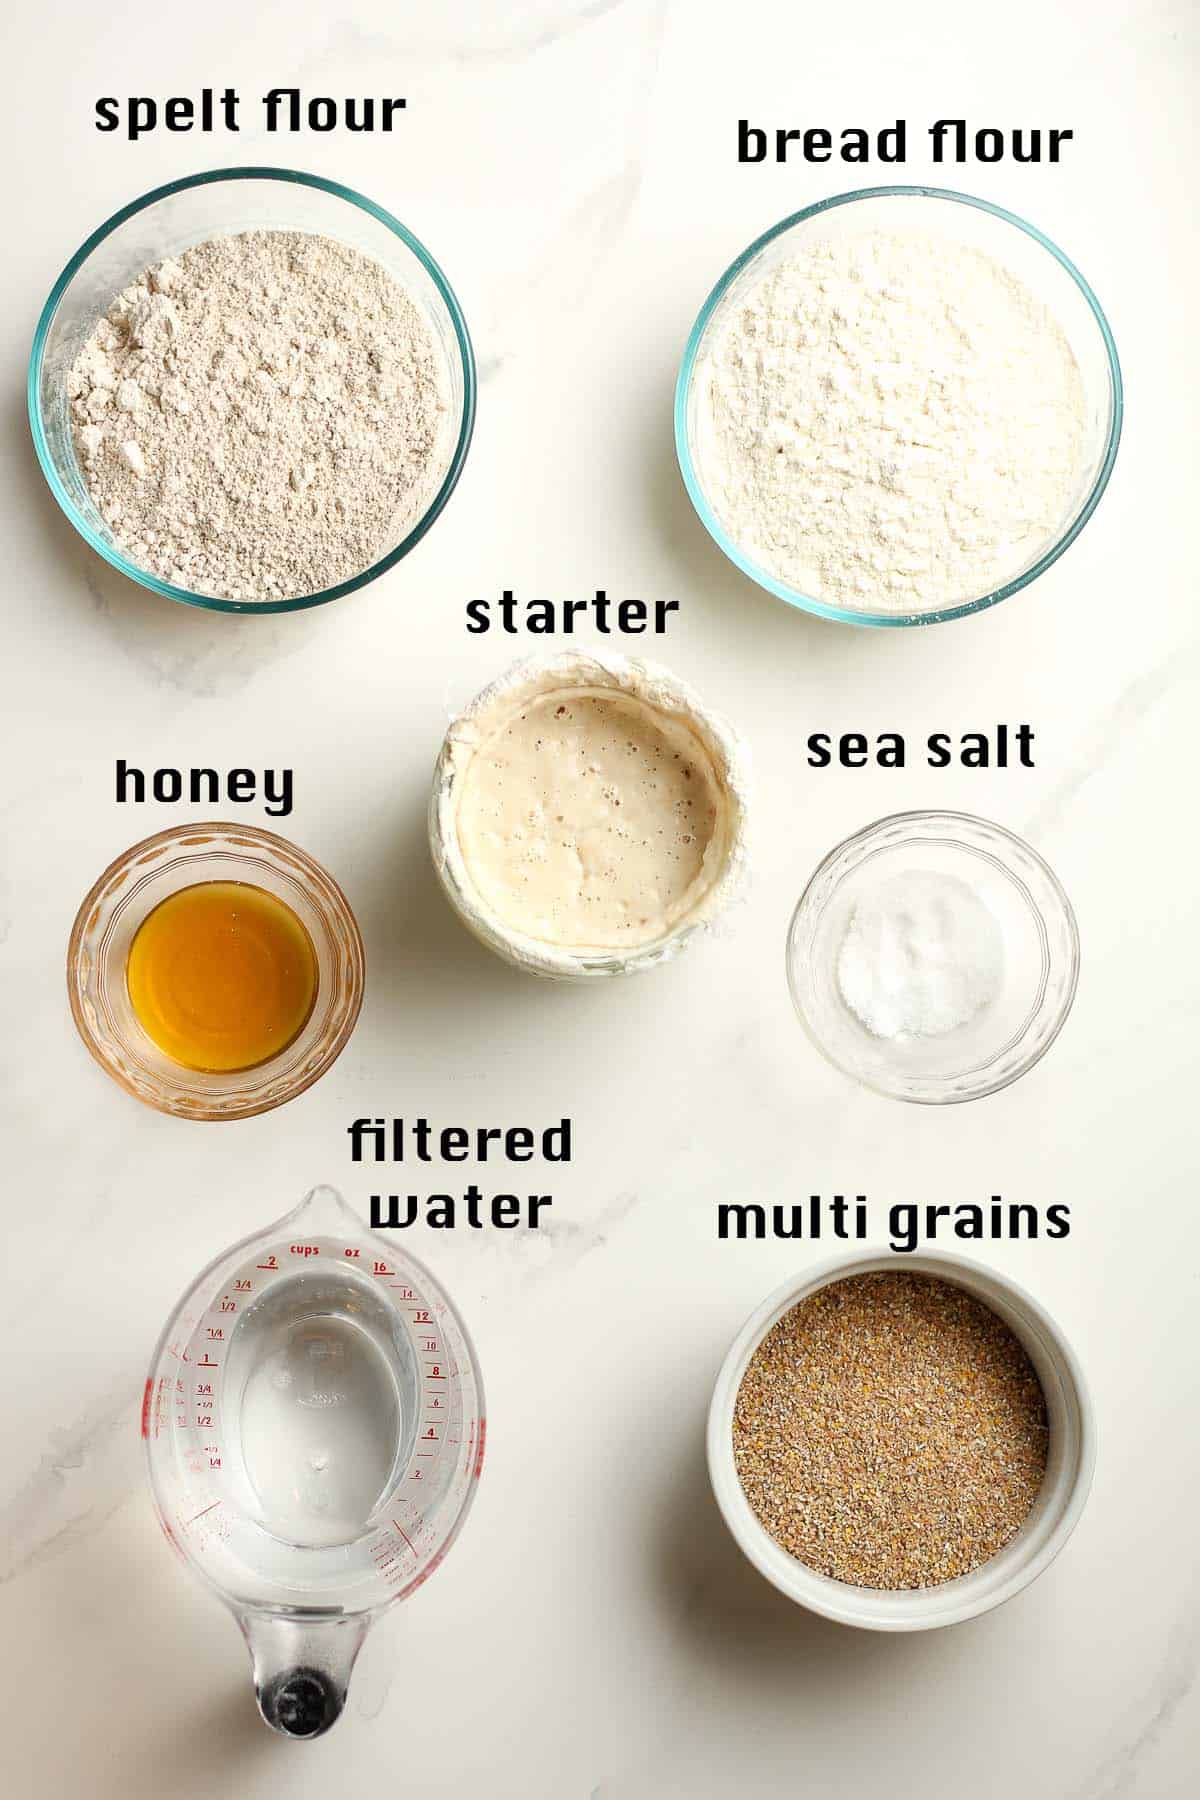
Ingredients Used:
- Bubbly Starter – The starter is THE most important part of sourdough bread making. It takes a little time, but you will be rewarded over and over again.
- Filtered Water – Use a filtered water, either out of your refrigerator filter system or use bottled water. The water should either be room temperature or slightly warmed before adding it to the sourdough process.
- Honey – I often add honey to wheat or multigrain bread to balance flavors.
- Flour – For this recipe, use a combo of unbleached bread flour and spelt flour. You could use an all-purpose flour instead of the spelt.
- Sea Salt – I recommend using fine sea salt.
- Multigrains – I used a 10 Grain Hot Cereal blend I found on Amazon. You could use another blend offered in your local store.
What is spelt flour?
While spelt is a cereal grain in the wheat family, it is not the same thing as wheat (same genus, different species). It looks similar to wheat in appearance, but it has a much harder outer shell before it has been milled. Spelt has a nutty and slightly sweet flavor, similar to that of whole wheat flour.
Spelt flour is popular because it is easy to work with and also tasty. This flour DOES contain gluten, which makes it very easy to substitute it into “regular” recipes that would typically call for all purpose flour. By adding spelt flour, you’ll get the flavor and nutritional benefits of the whole grain flour without without dramatically compromising the texture of your baked good.
Another important reason that spelt flour is popular is that it has a fairly strong nutritional profile. Spelt has fewer calories than wheat flour and is slightly higher in protein. It’s also easy to digest but is lower in fiber than wheat.
How to prepare starter to have enough for your recipe
First of all, consider this:
- If your starter is rather large and you’ll know you have enough to bake with, then carry on. No need to adjust.
- If your starter is rather small, you’ll need to bulk it up so that you have enough to bake with and some to keep. (Because my rule of thumb is to NEVER RUN OUT OF STARTER!)
Proceed, if necessary:
- Feed the starter as normal up to the day before you bake, generally speaking.
- Adjust the starter the day before you bake OR the day you bake.
- If you need 75 grams of starter in your recipe, you’ll want to have roughly 100 grams of starter at the ready. Some to use and some to keep.
- So if you only have about 50 grams of starter and then 25 grams after discard, add 35 grams of water and 35 grams of flour to your starter to bulk it up.
How to make Multigrain Sourdough Bread
Step 1
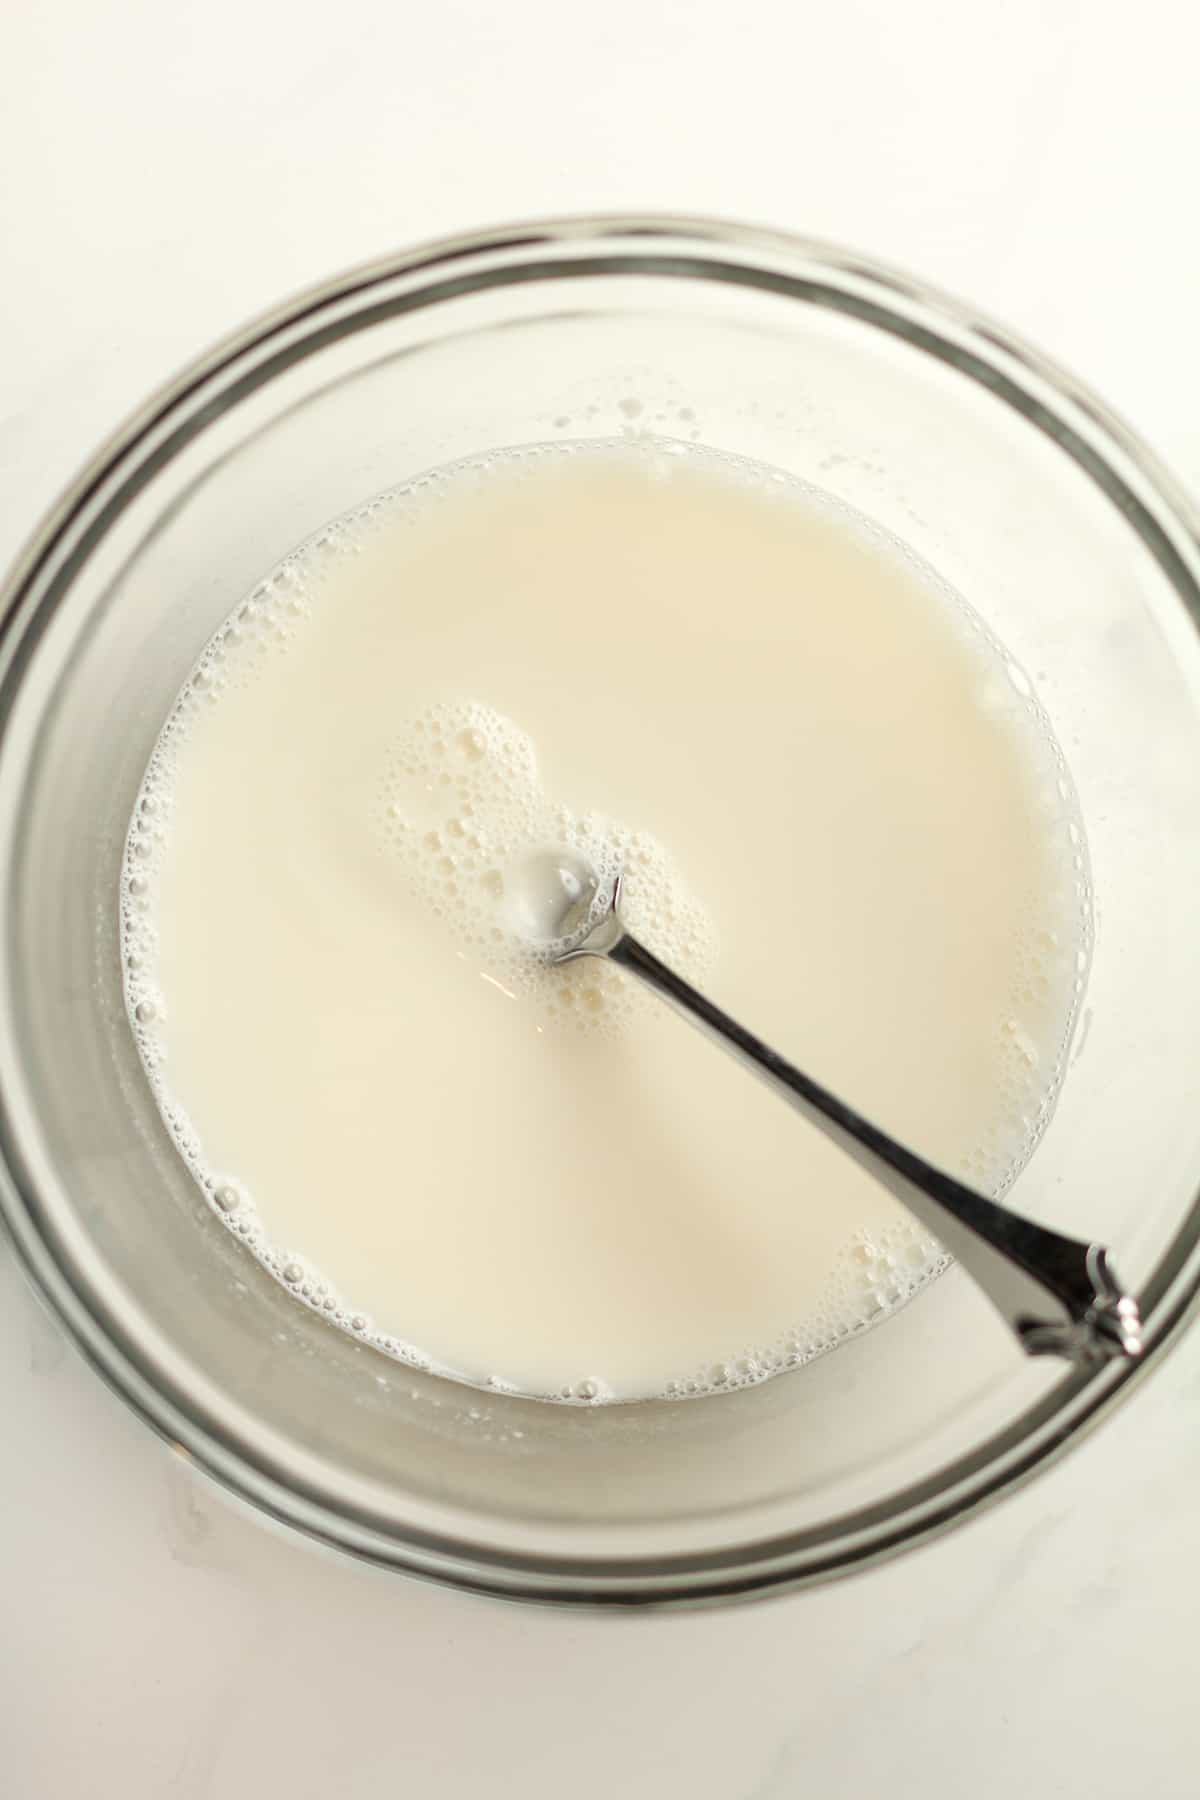
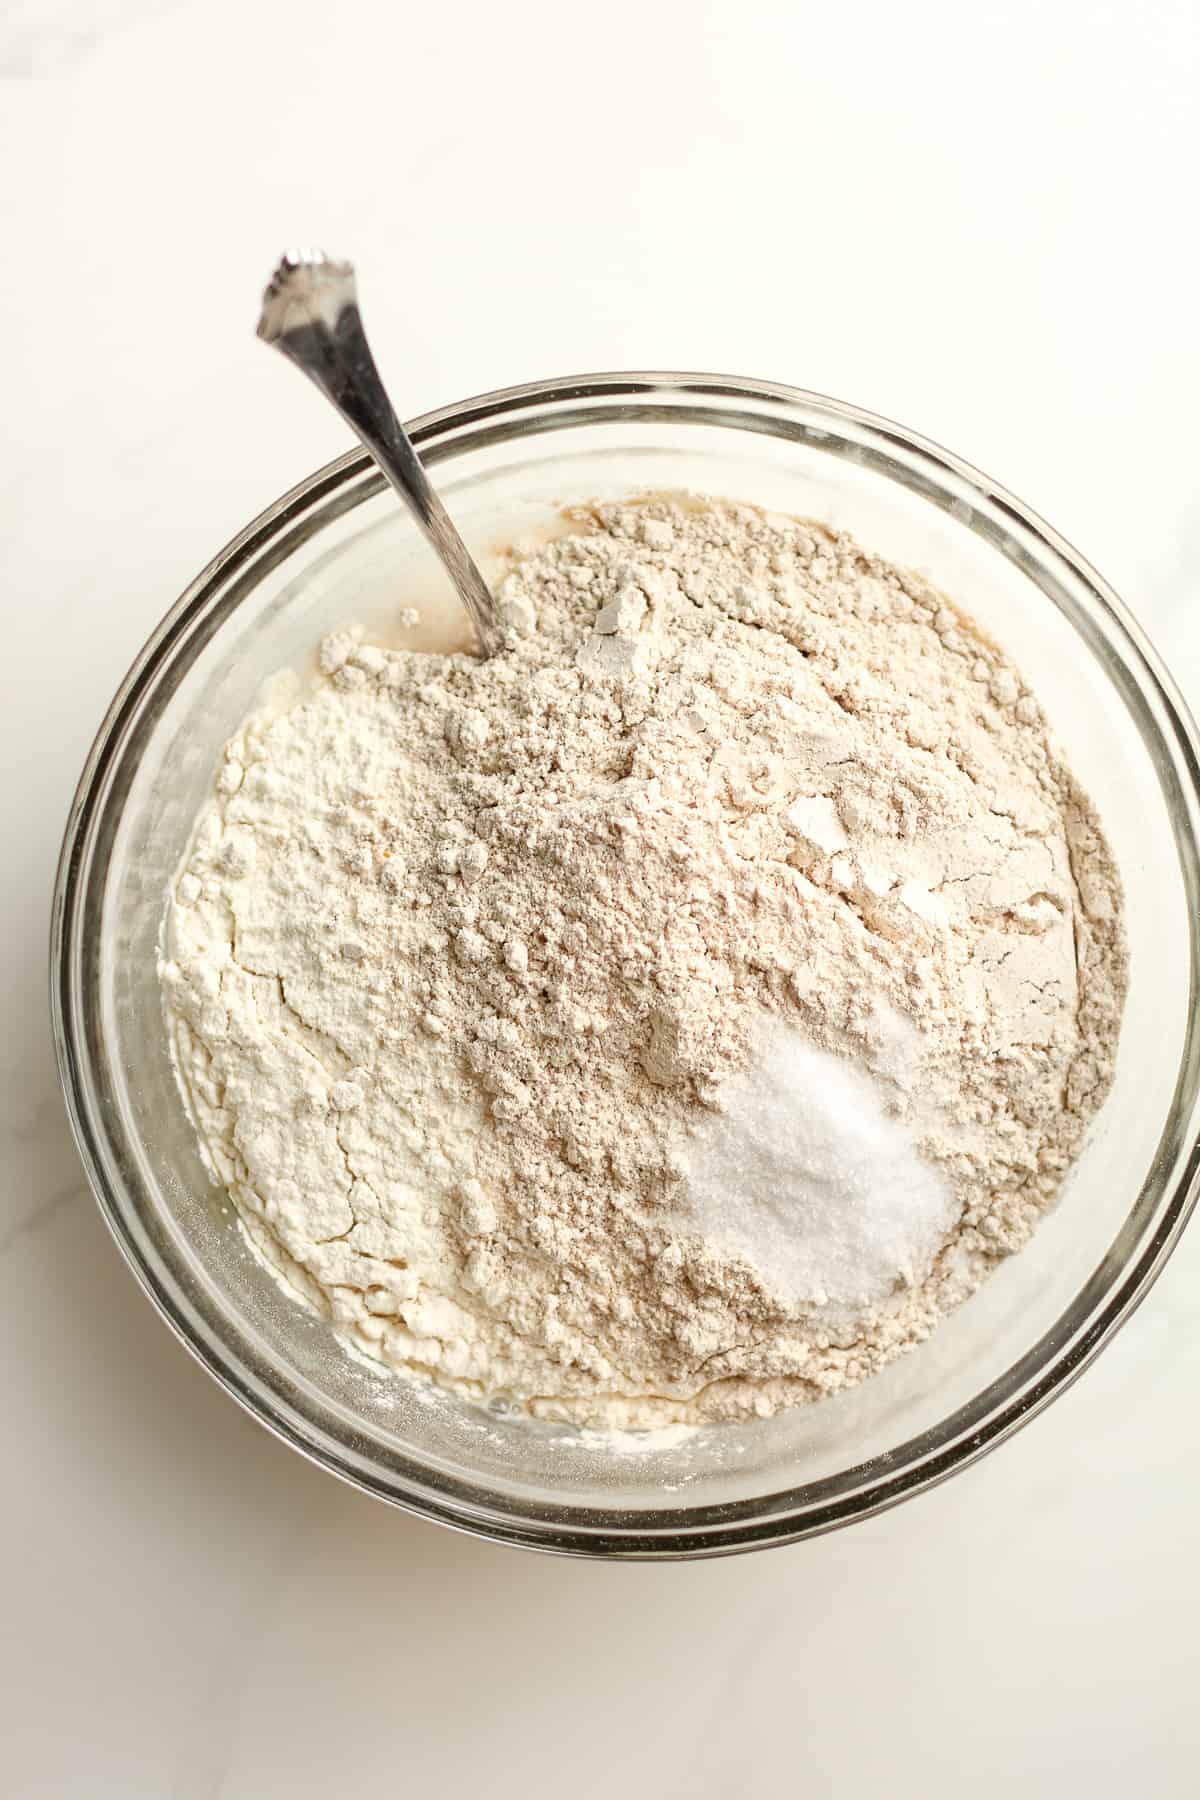
Carefully measure out the ingredients except the multigrain cereal (in the order listed) and combine in a mixing bowl. Use a fork and stir.
Step 2
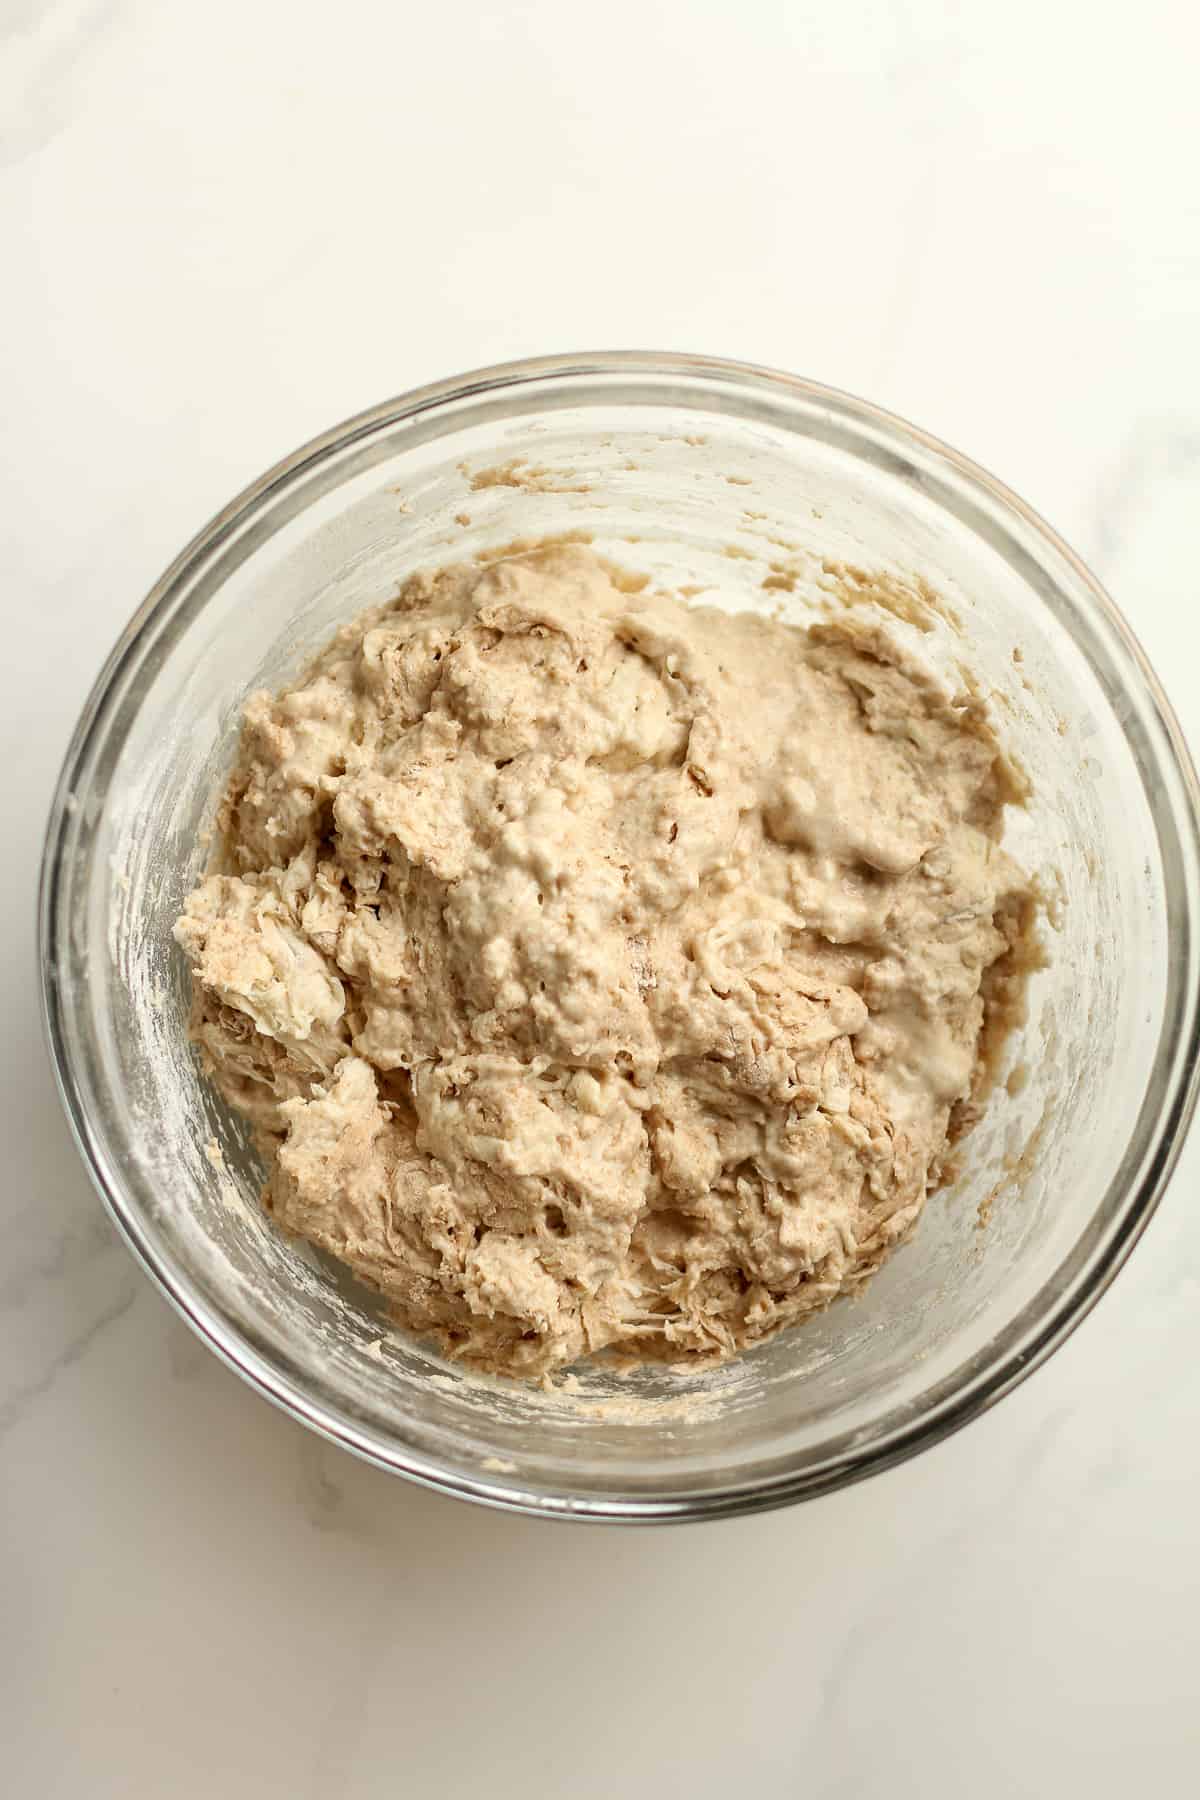
Then use your hands to bring the ingredients together. It will look shaggy. Cover with a damp towel and let it sit for 45 minutes. (Be sure to set a timer.) This is the AUTOLYSE.
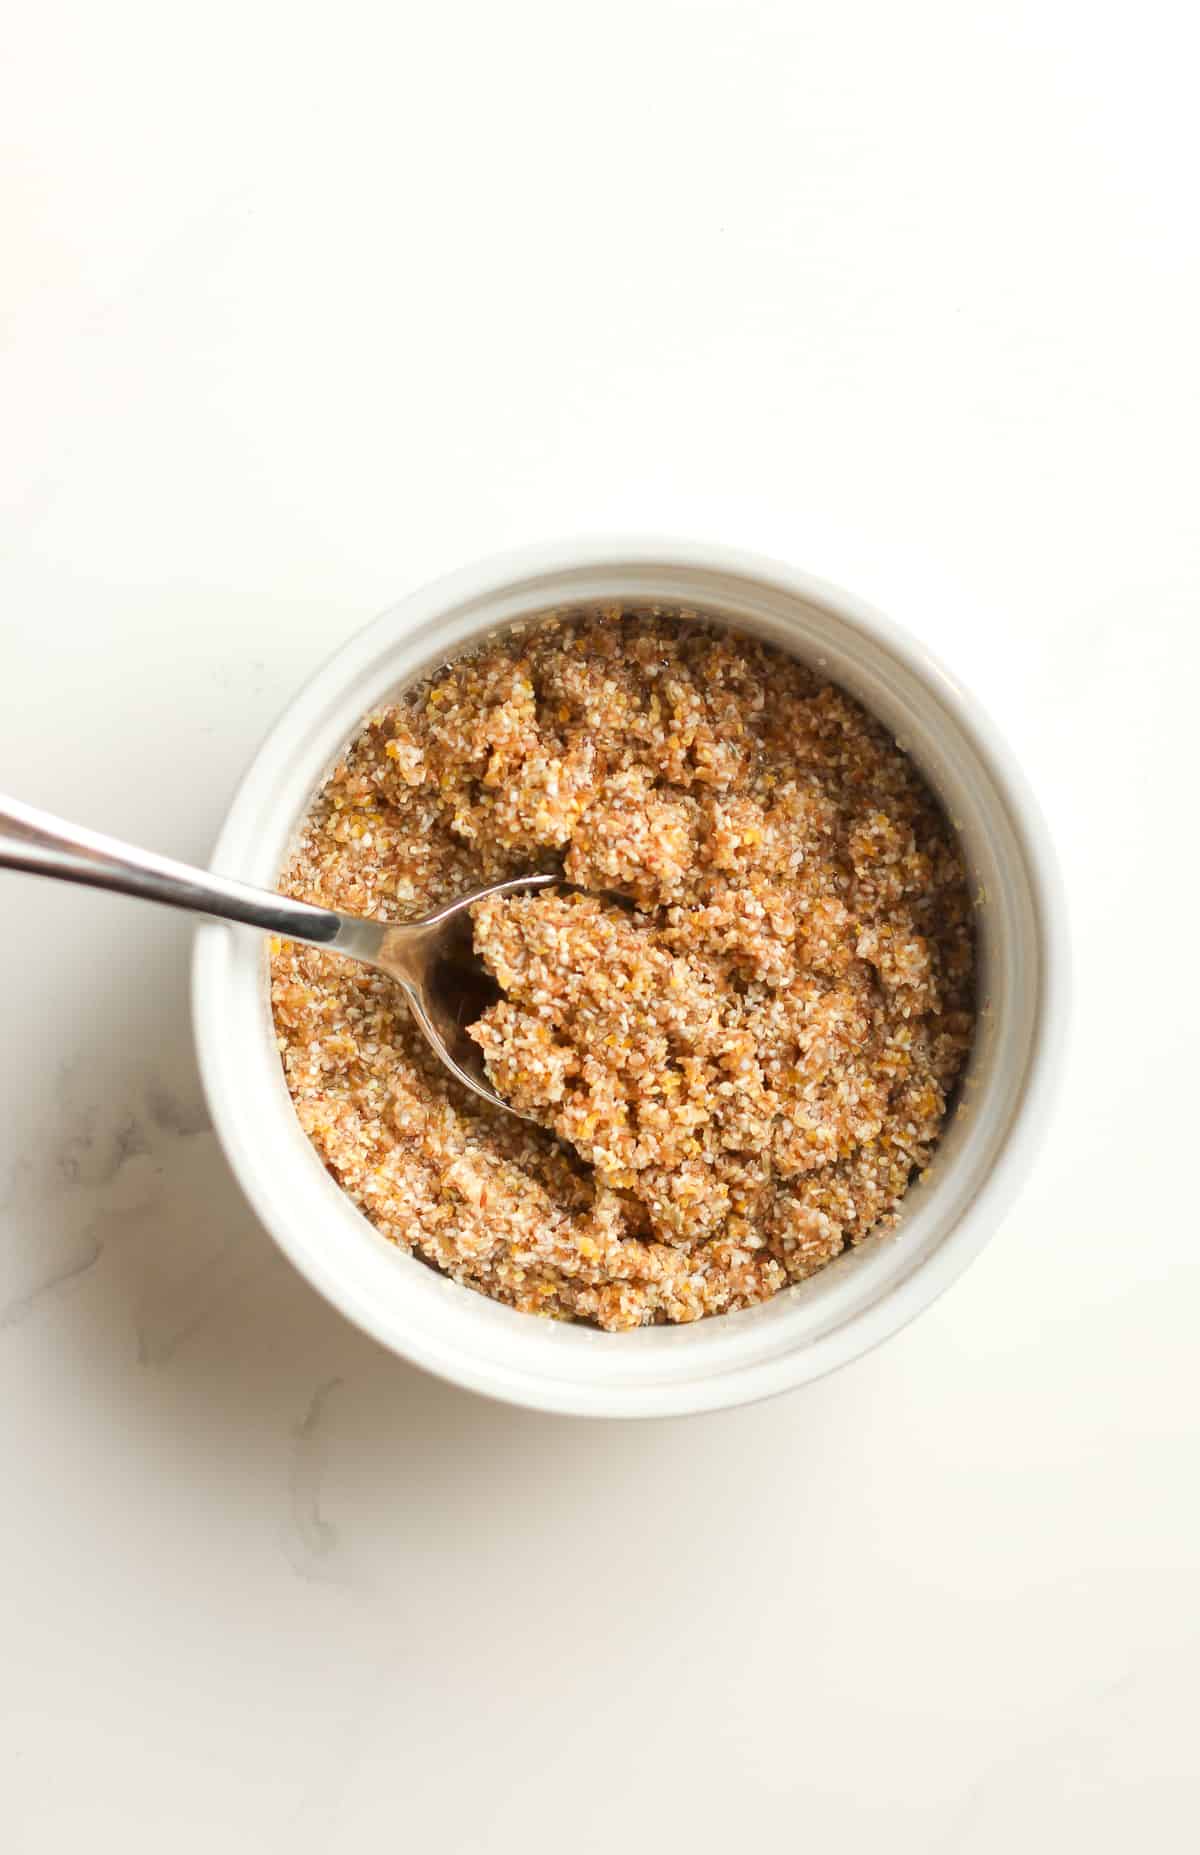
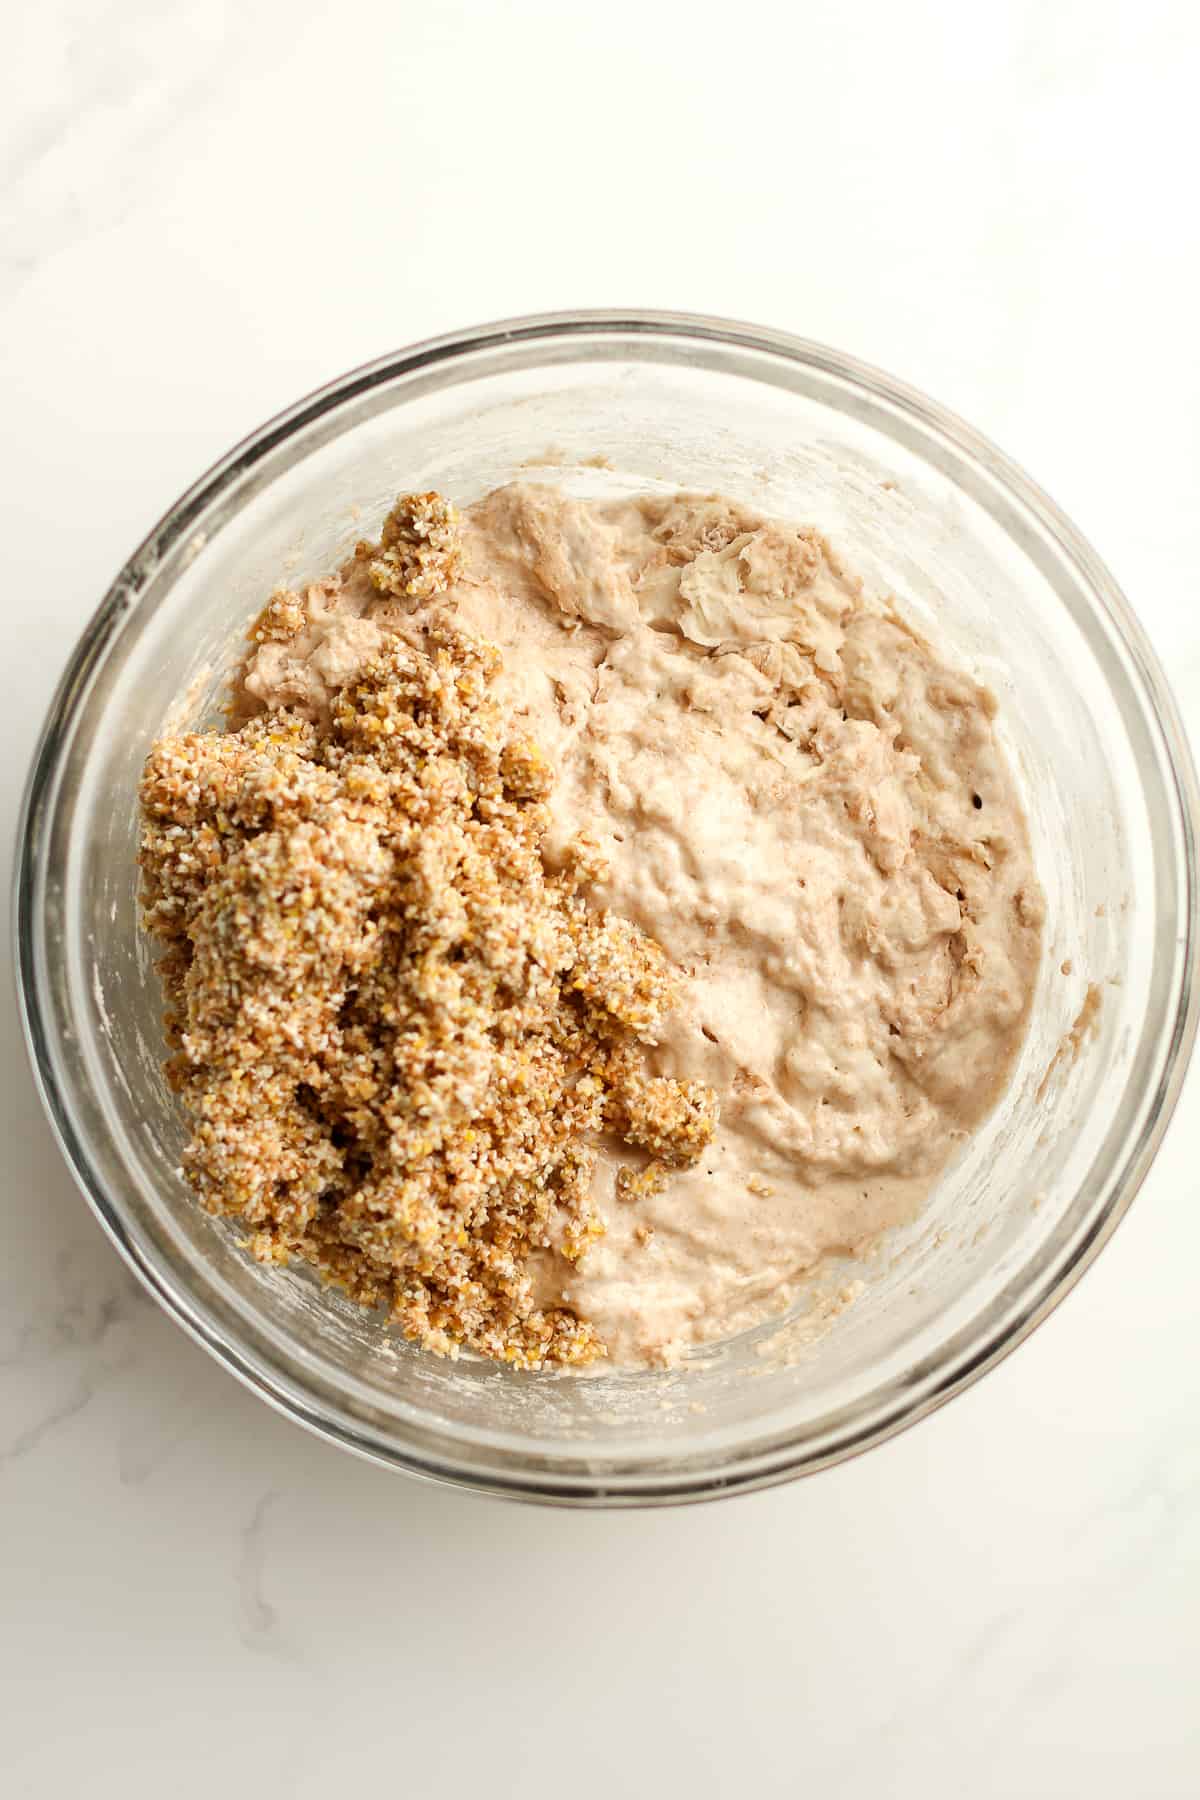
** While the dough is sitting in autolyse, soak the multigrain cereal in about 60 grams of hot water.
Step 3
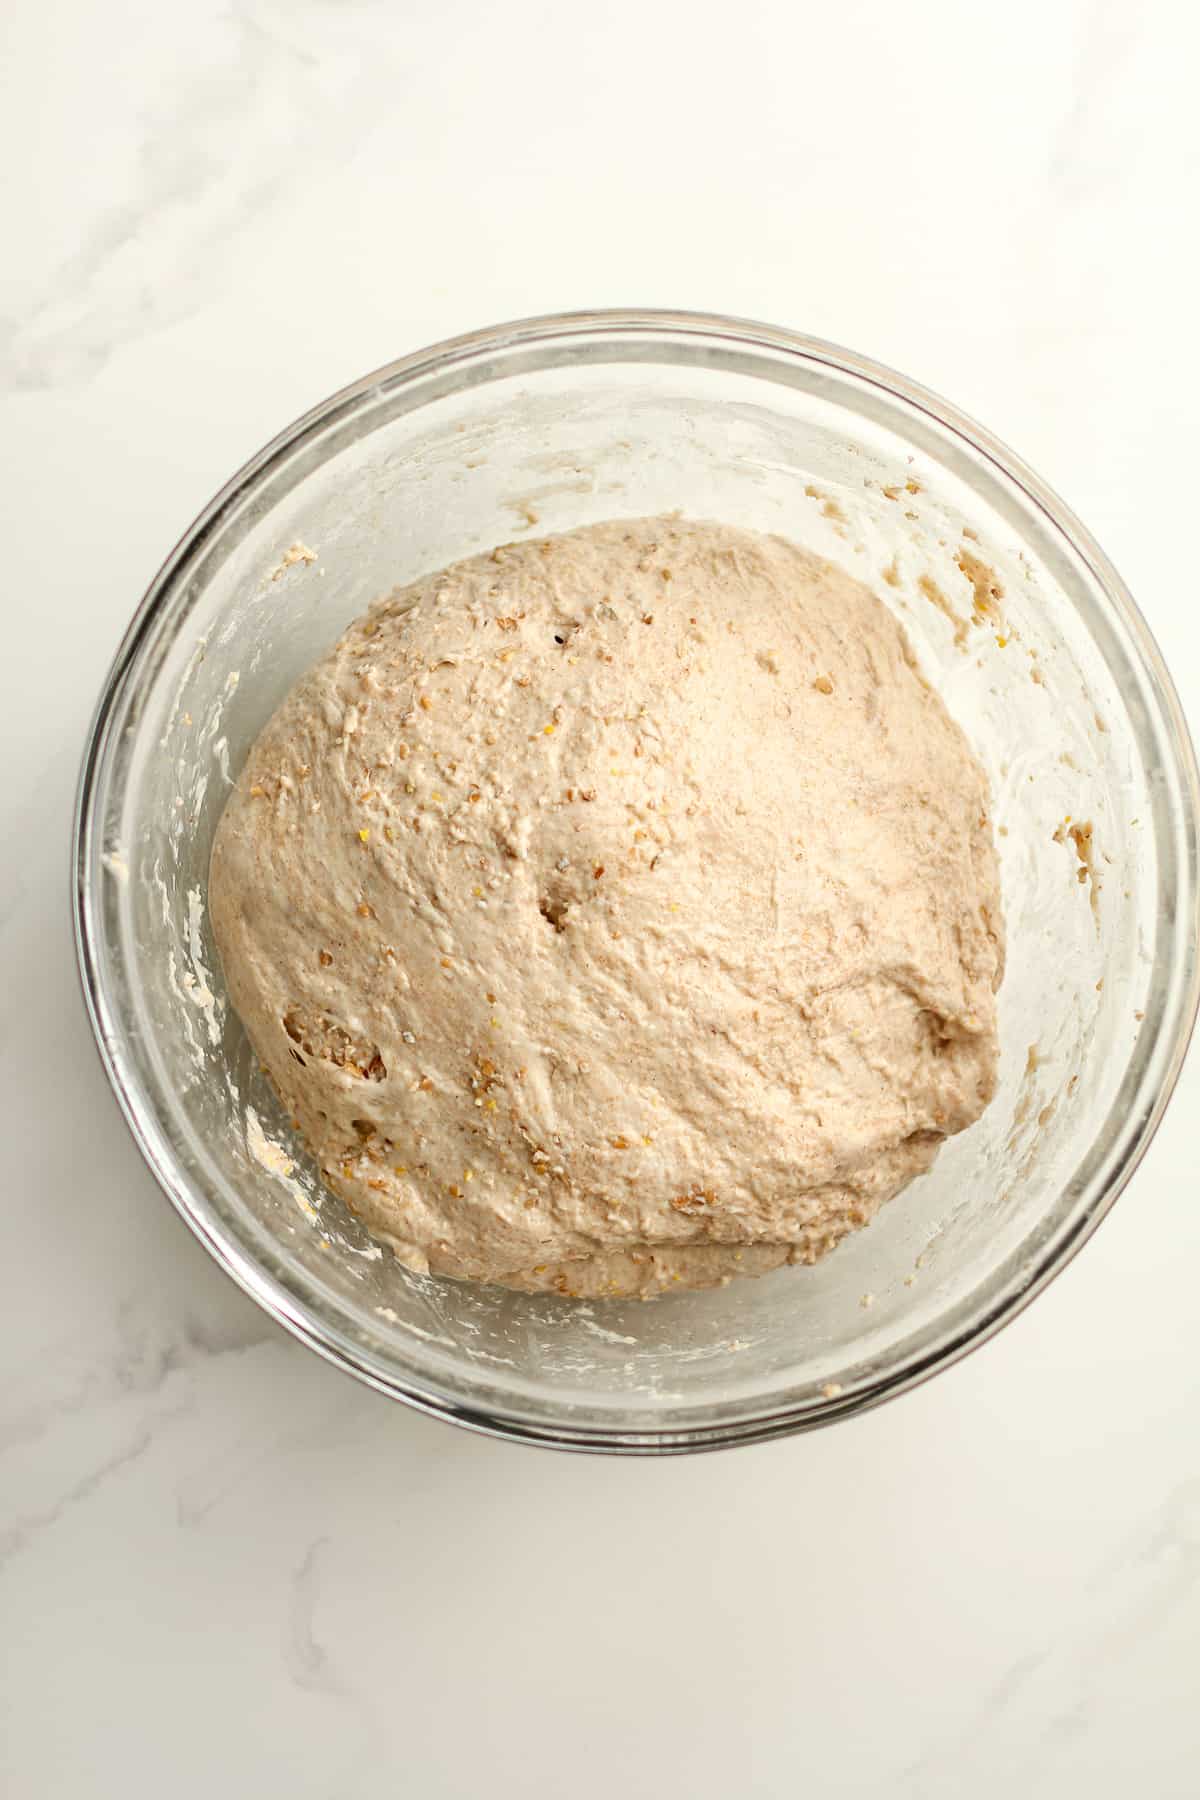
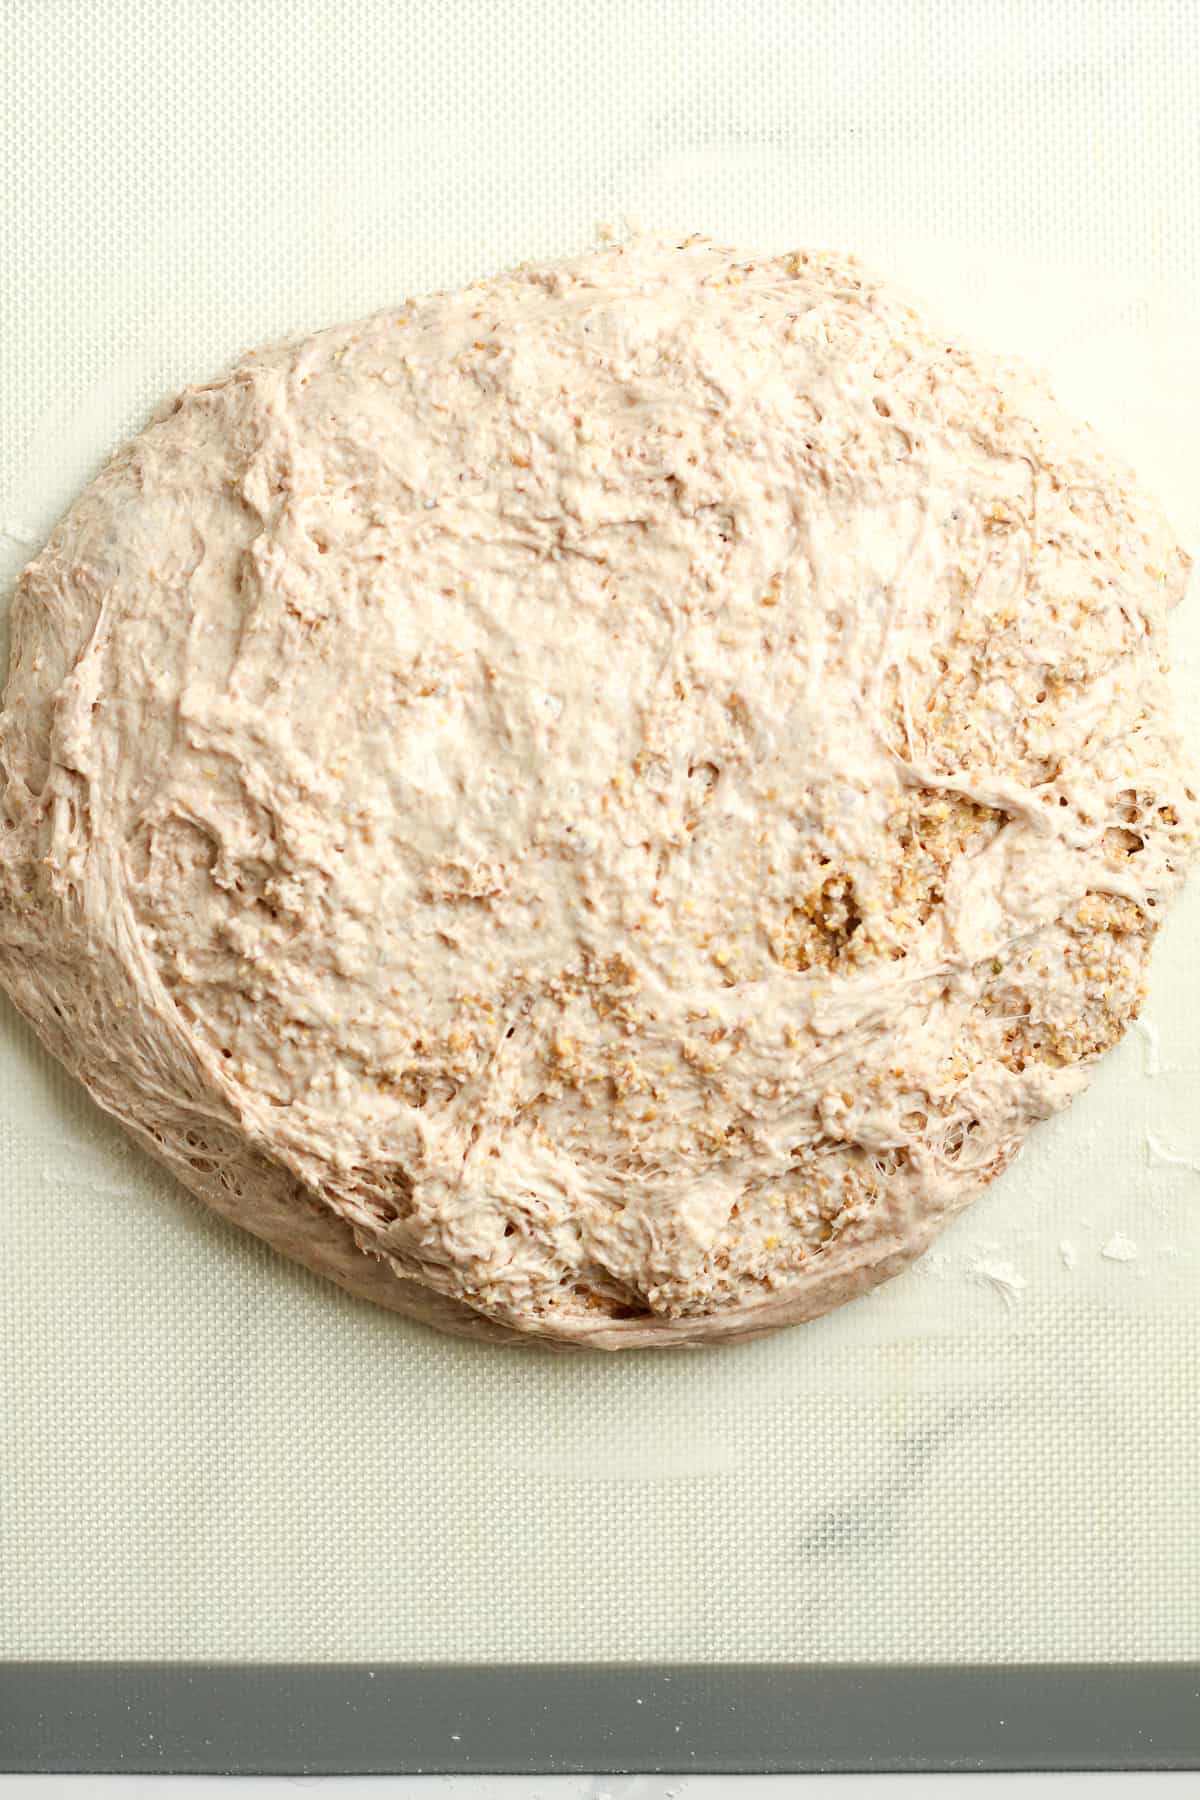
After 45 minutes, add the multigrain cereal to the bowl. Then start the stretch and folds. Use your hand and lift the dough up on one side, stretching it upward, and then punch into the center of the dough. Turn the dough and repeat. Continue this process for about 30 seconds. This is the STRETCH AND FOLDS.
ADDITIONAL STRETCH AND FOLDS: I recommend doing additional stretch and folds if time permits. Do these every 30 minutes for 3-4 more times to further develop the gluten structure.
Step 4
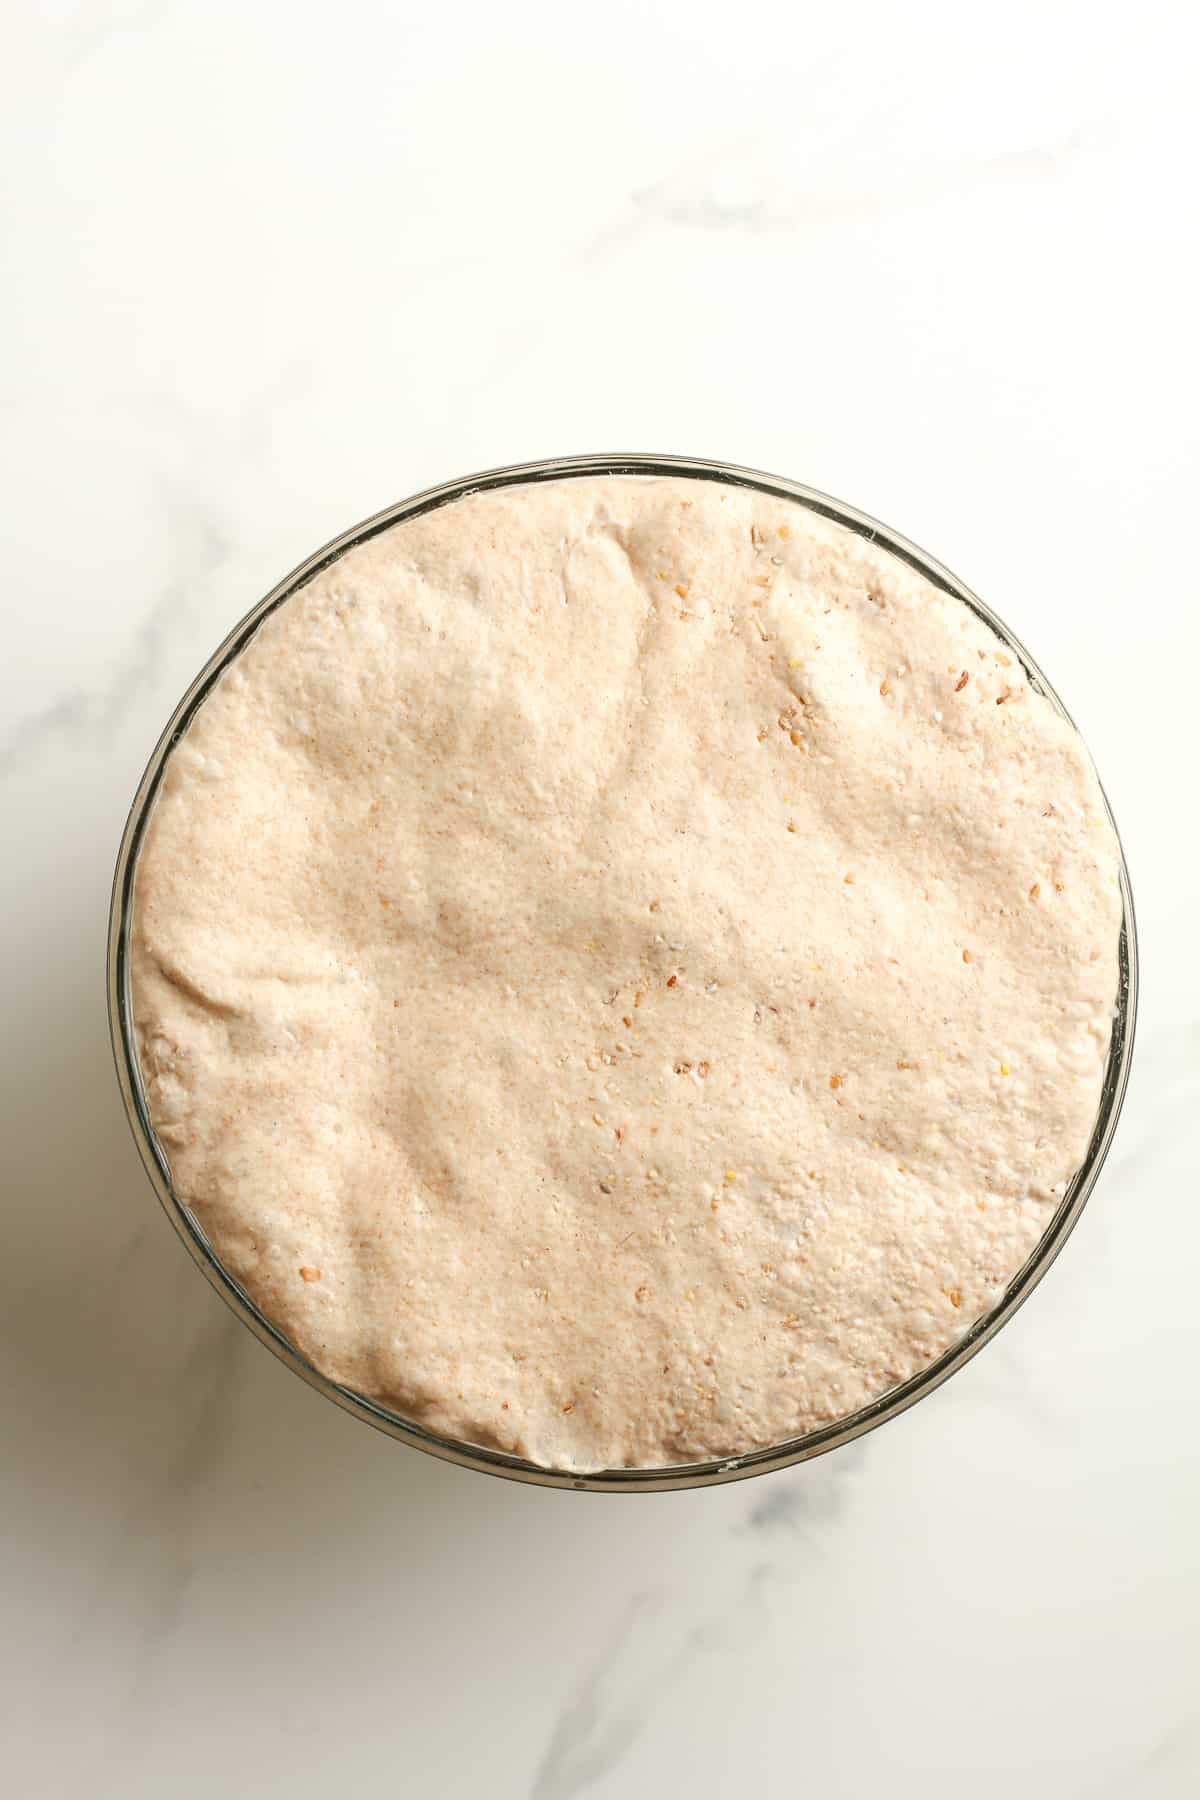
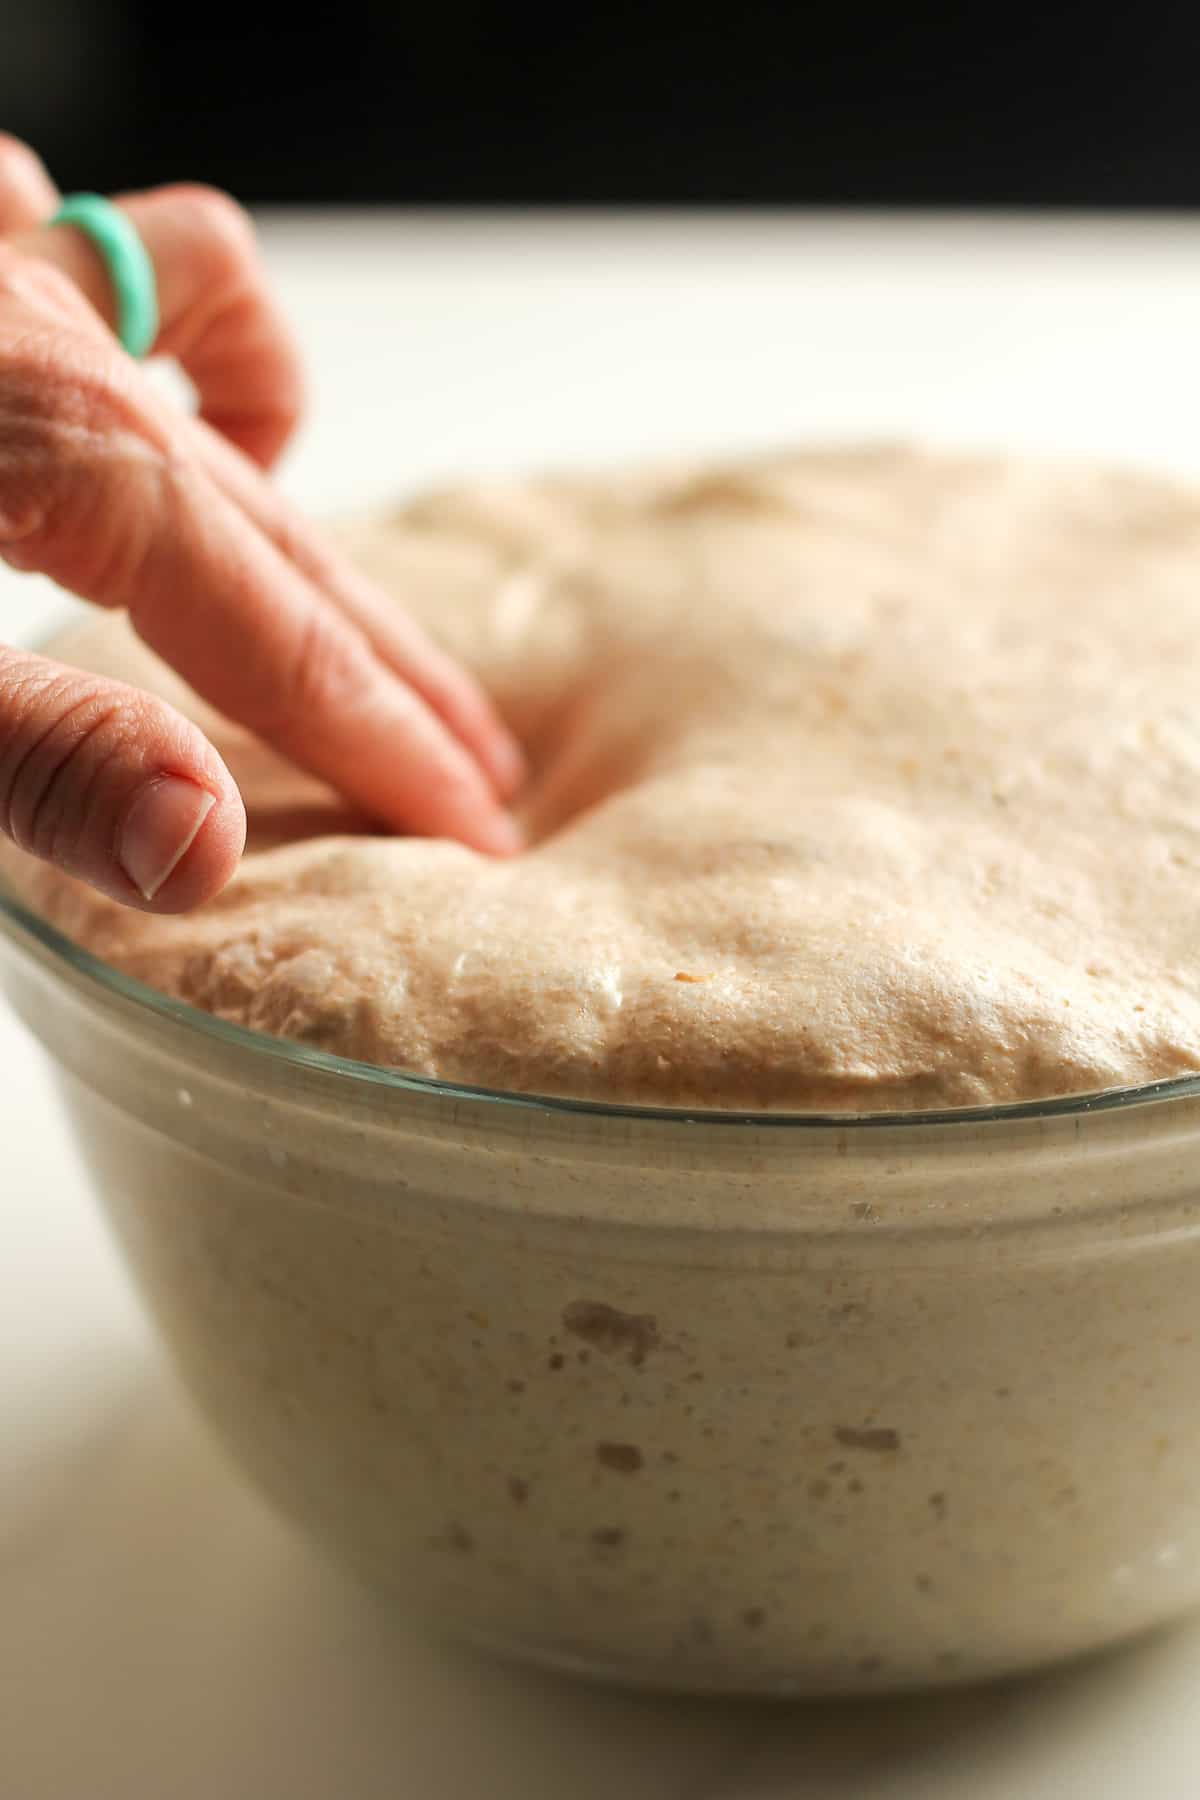
Let the dough rise for 6-8 hours, or overnight. It should almost double in size and appear soft on top. Small air bubbles may appear as well. This is the BULK RISE.
Note: I recommend placing a damp towel on the dough for the overnight rise. You might also add a bit of oil to the top to keep a crust from forming on the dough overnight.
Step 5
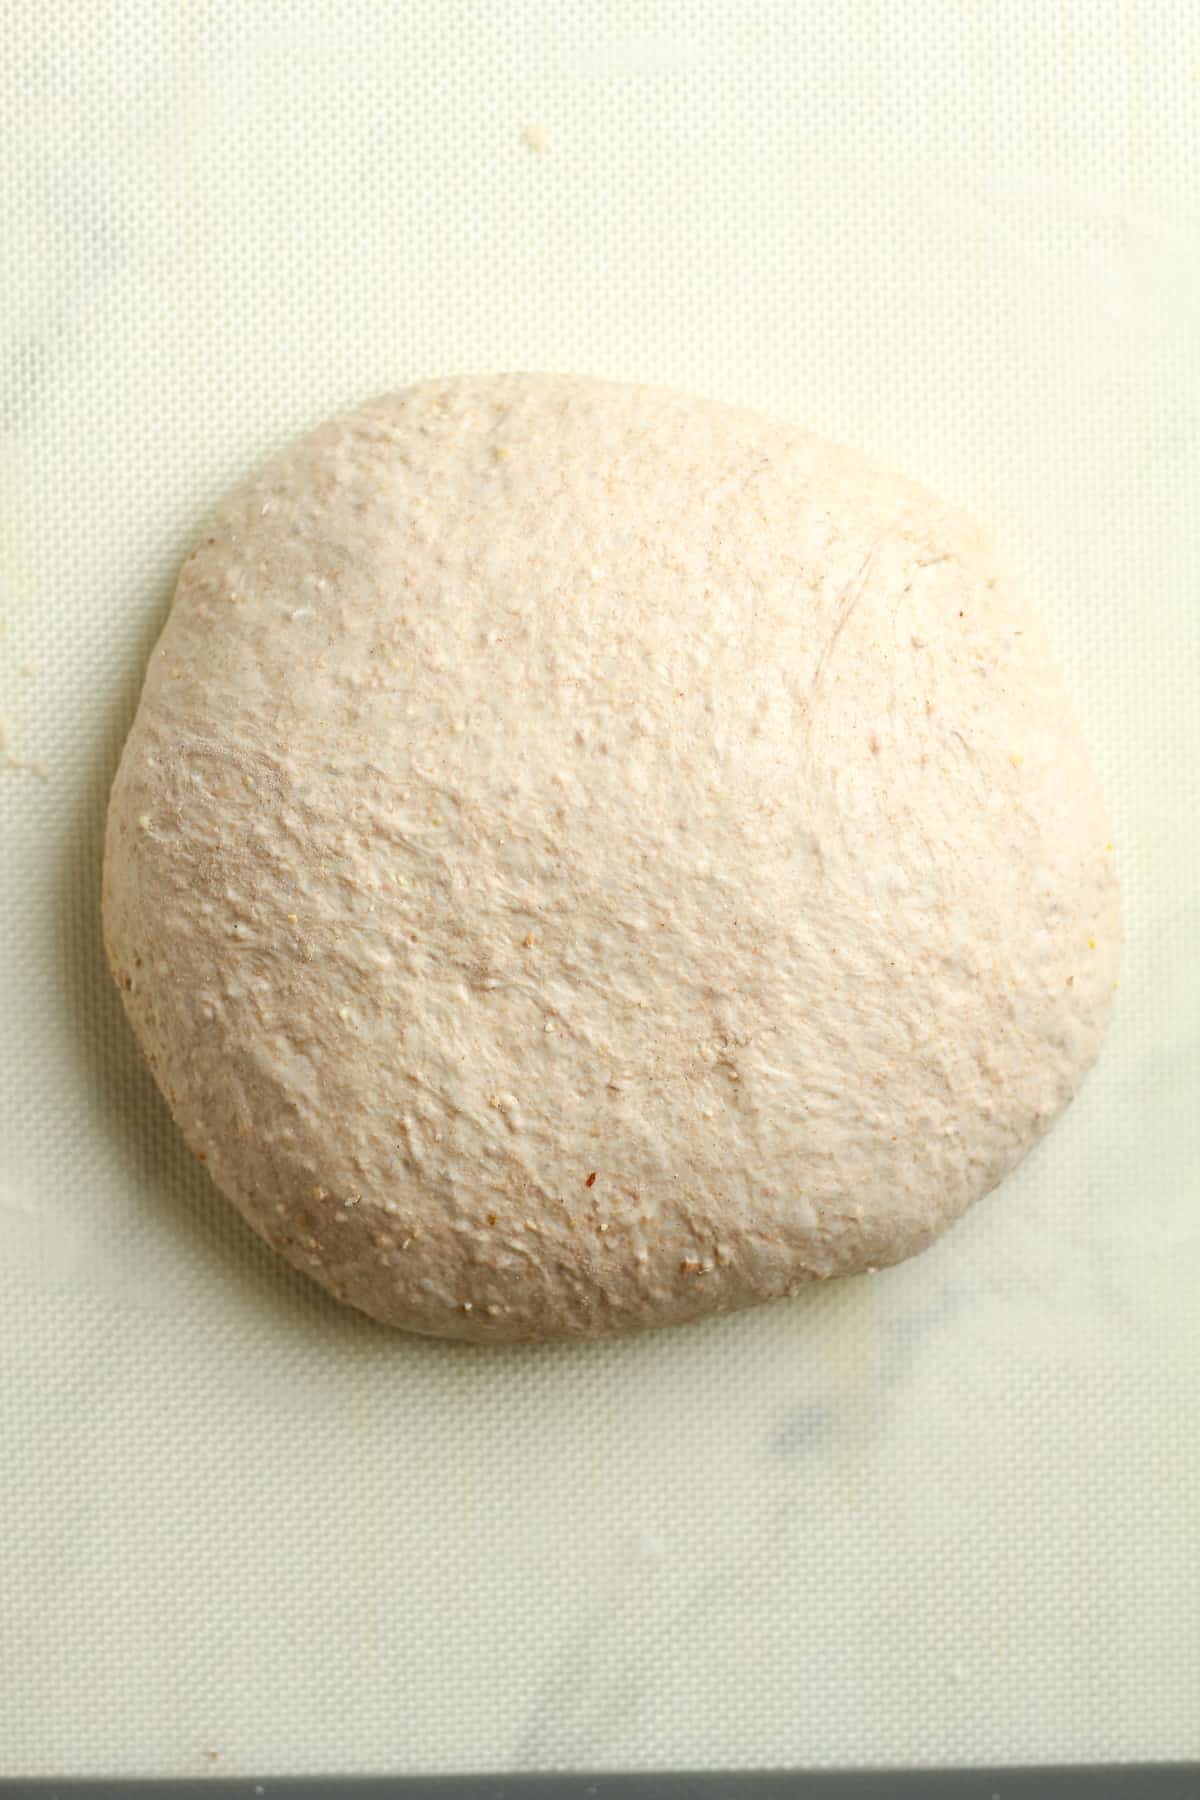
Add a light dusting of flour to a baking mat or clean surface. Remove the dough to the mat and gently form into your desired shape, usually round or oblong. Don’t punch the dough down because you don’t want to remove all the air. Let dough sit for five minutes.
Step 6
After five minutes, use your hands to pull the dough toward you, dragging it along the mat to tighten it up. Repeat in the other directions to tighten. (Make sure you don’t have too much flour on the surface when tightening the dough, so there is some needed friction necessary to tighten it.)
Step 7
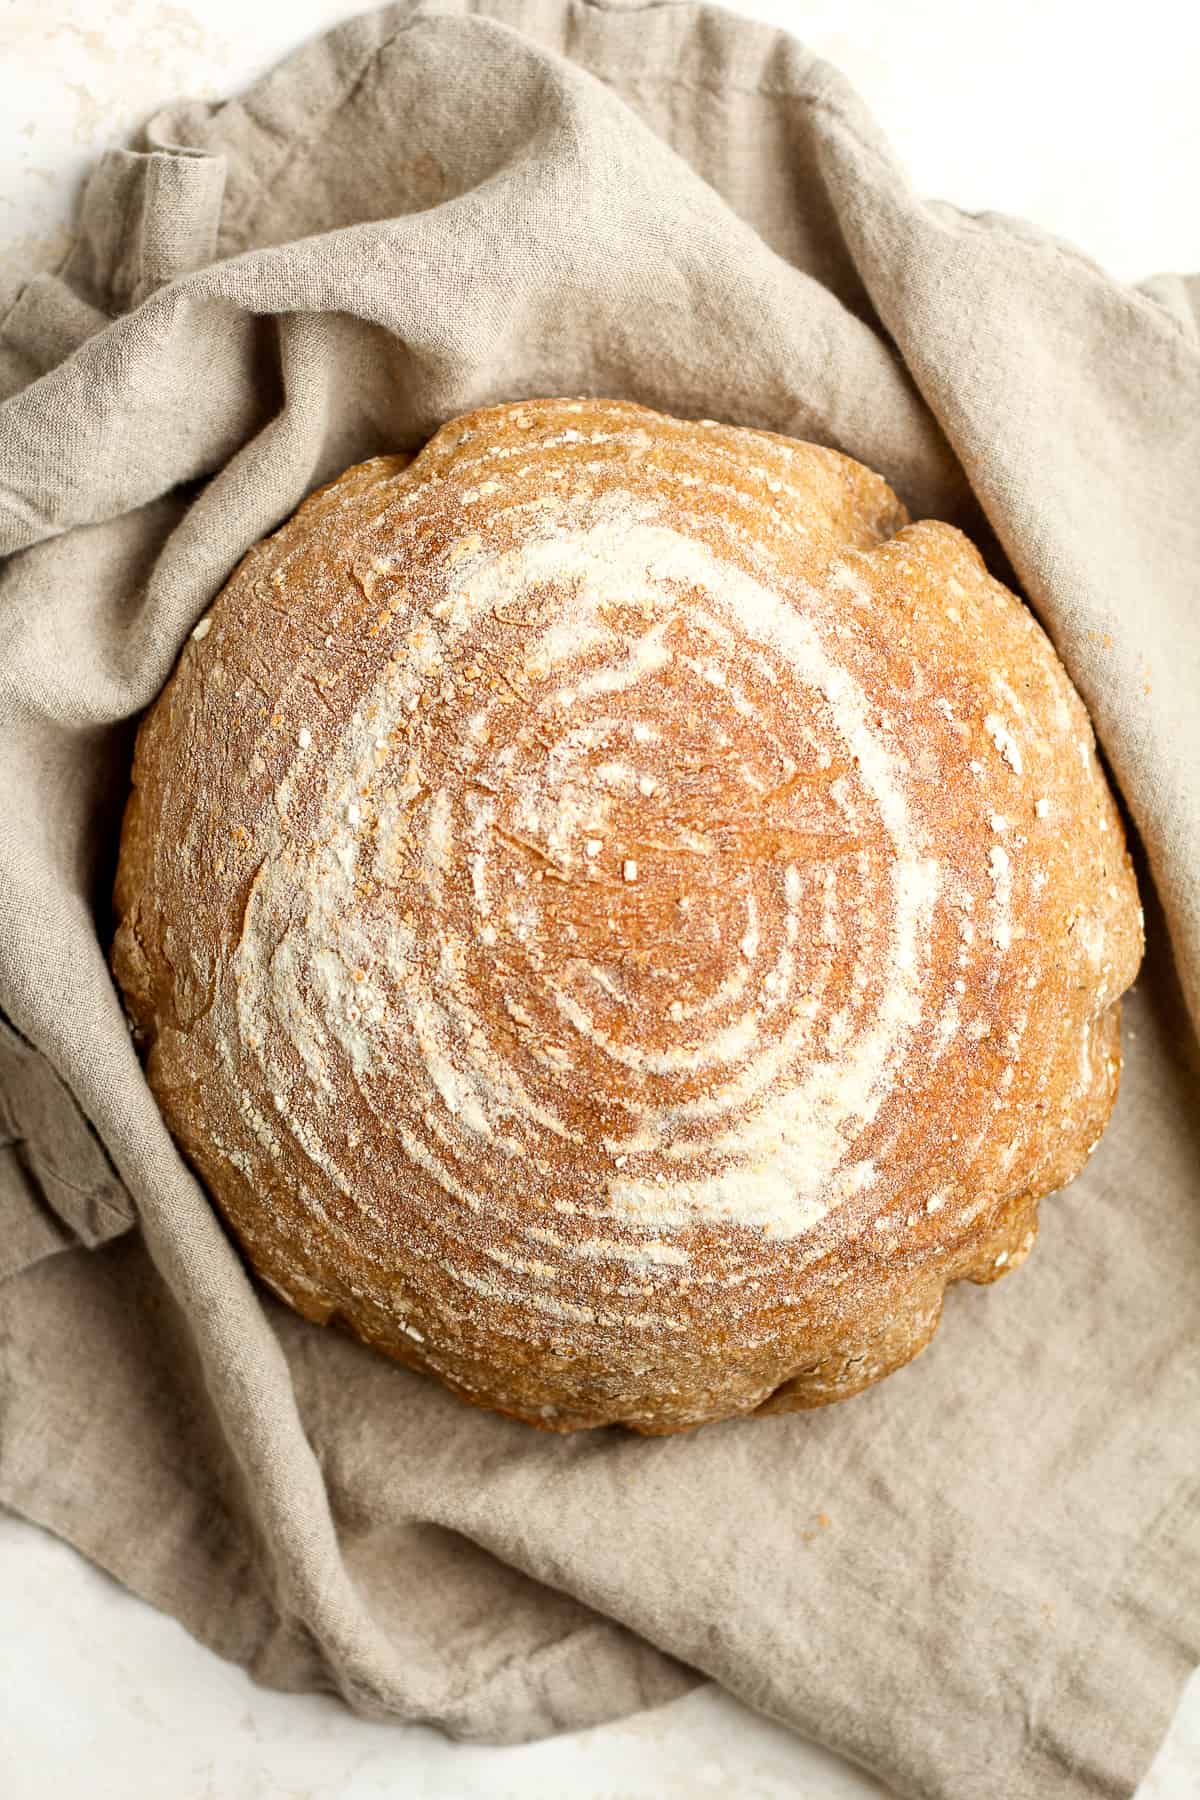
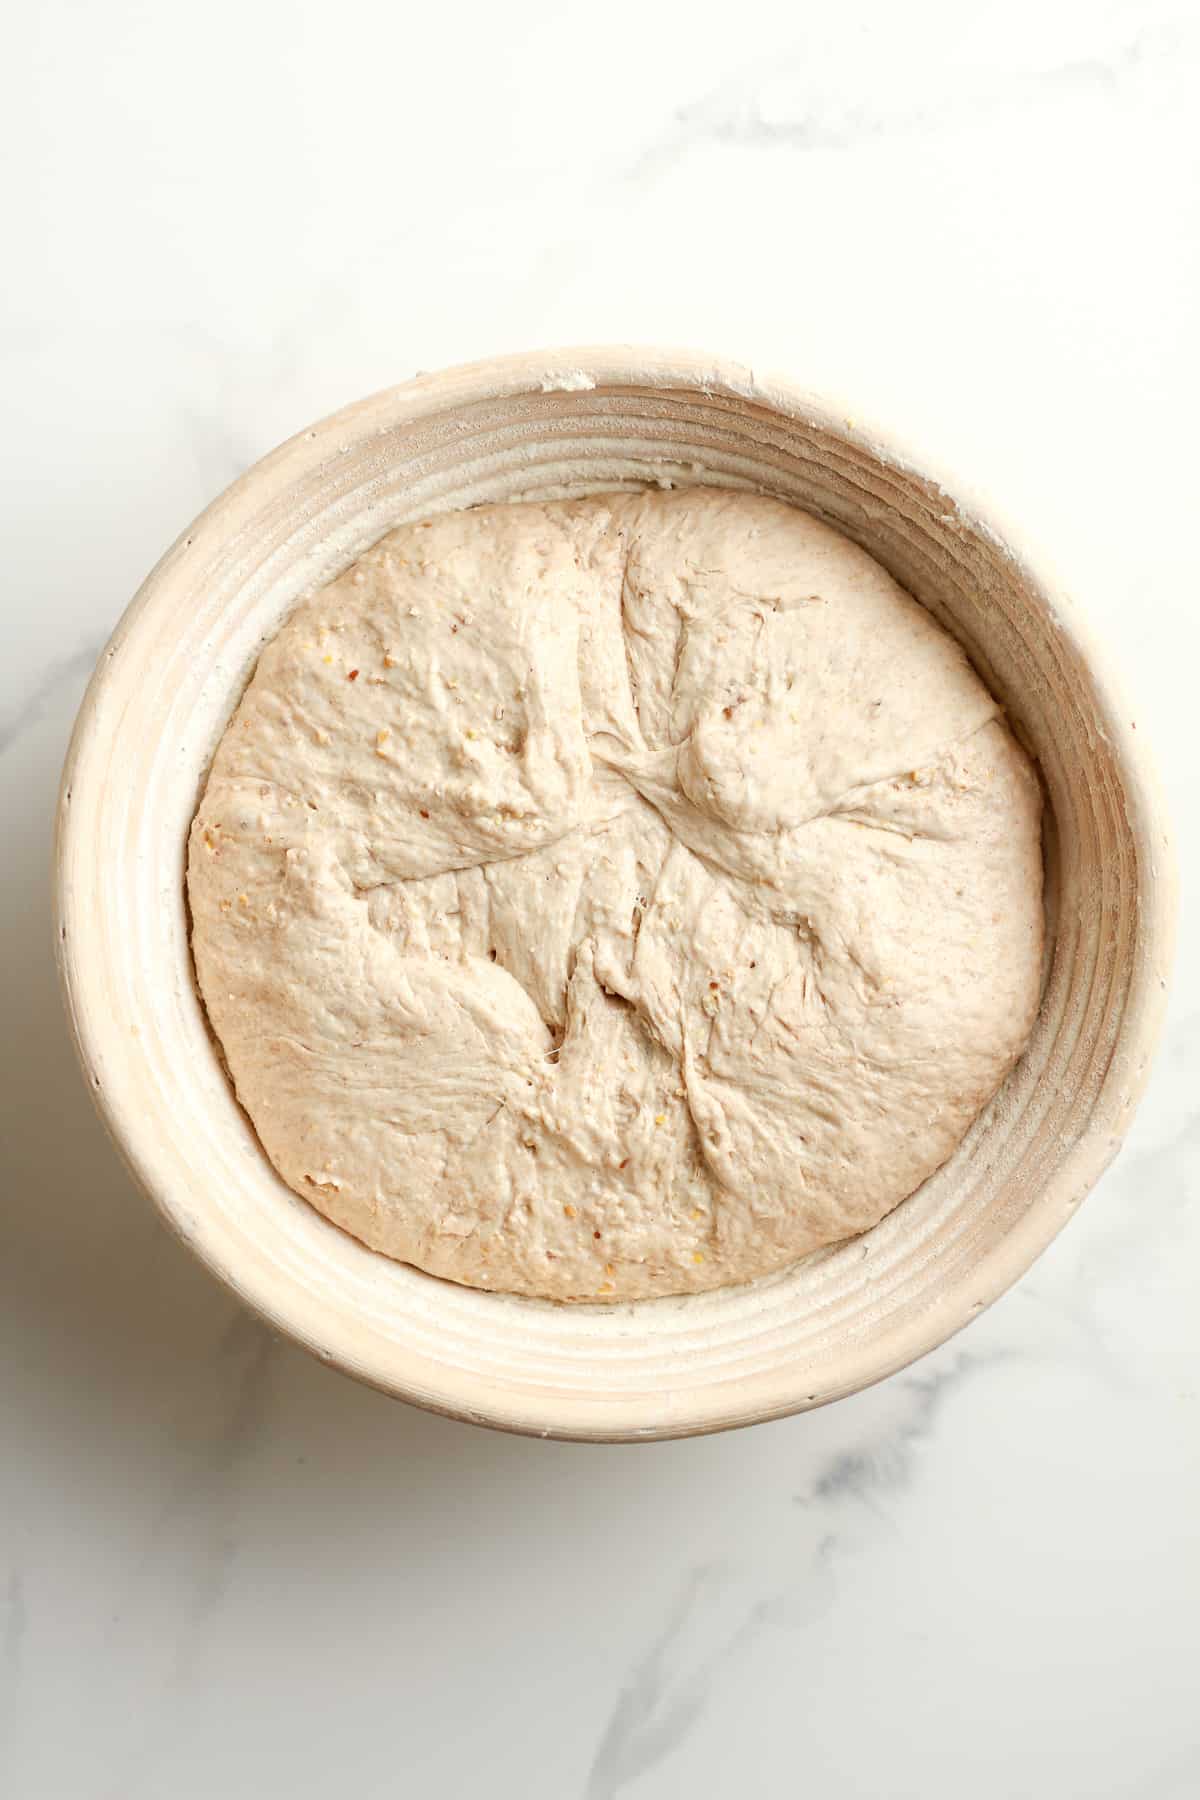
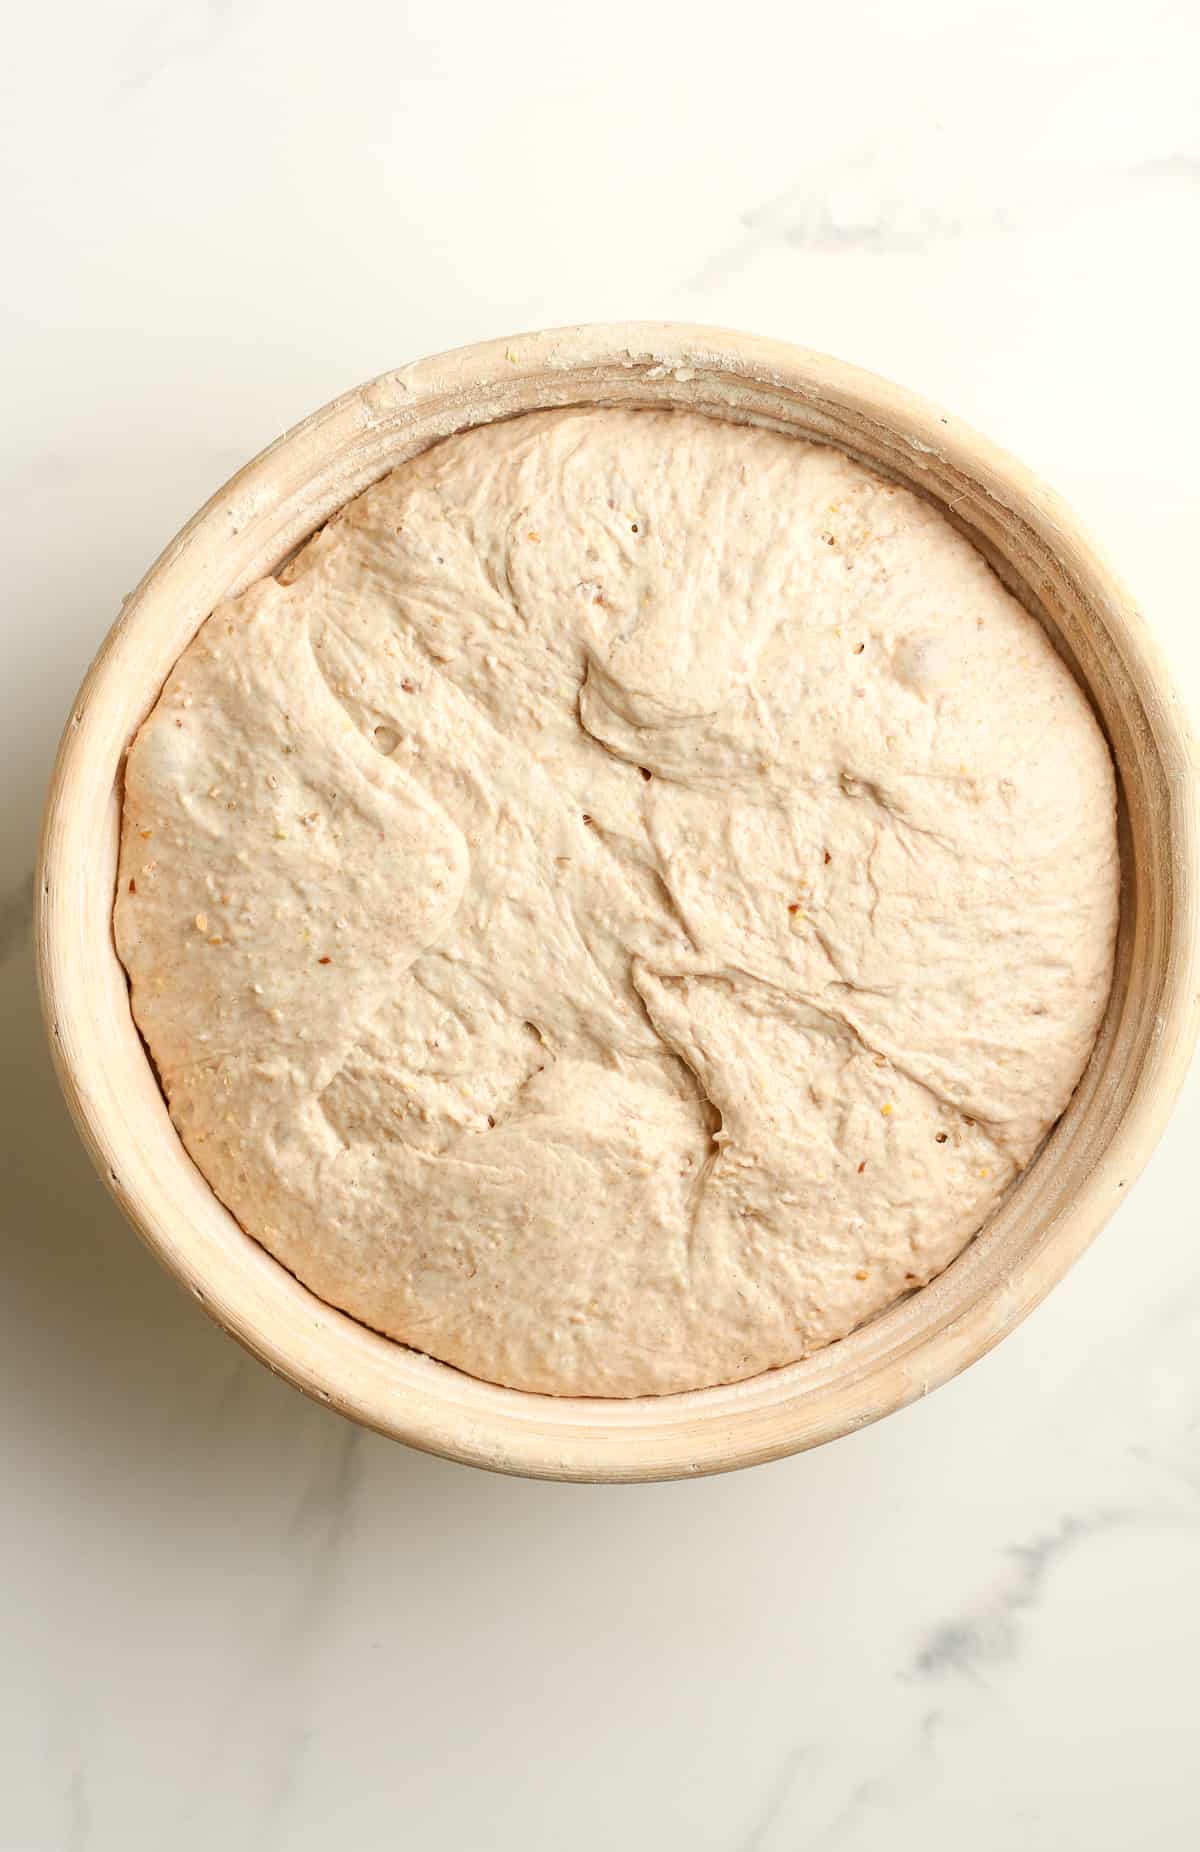
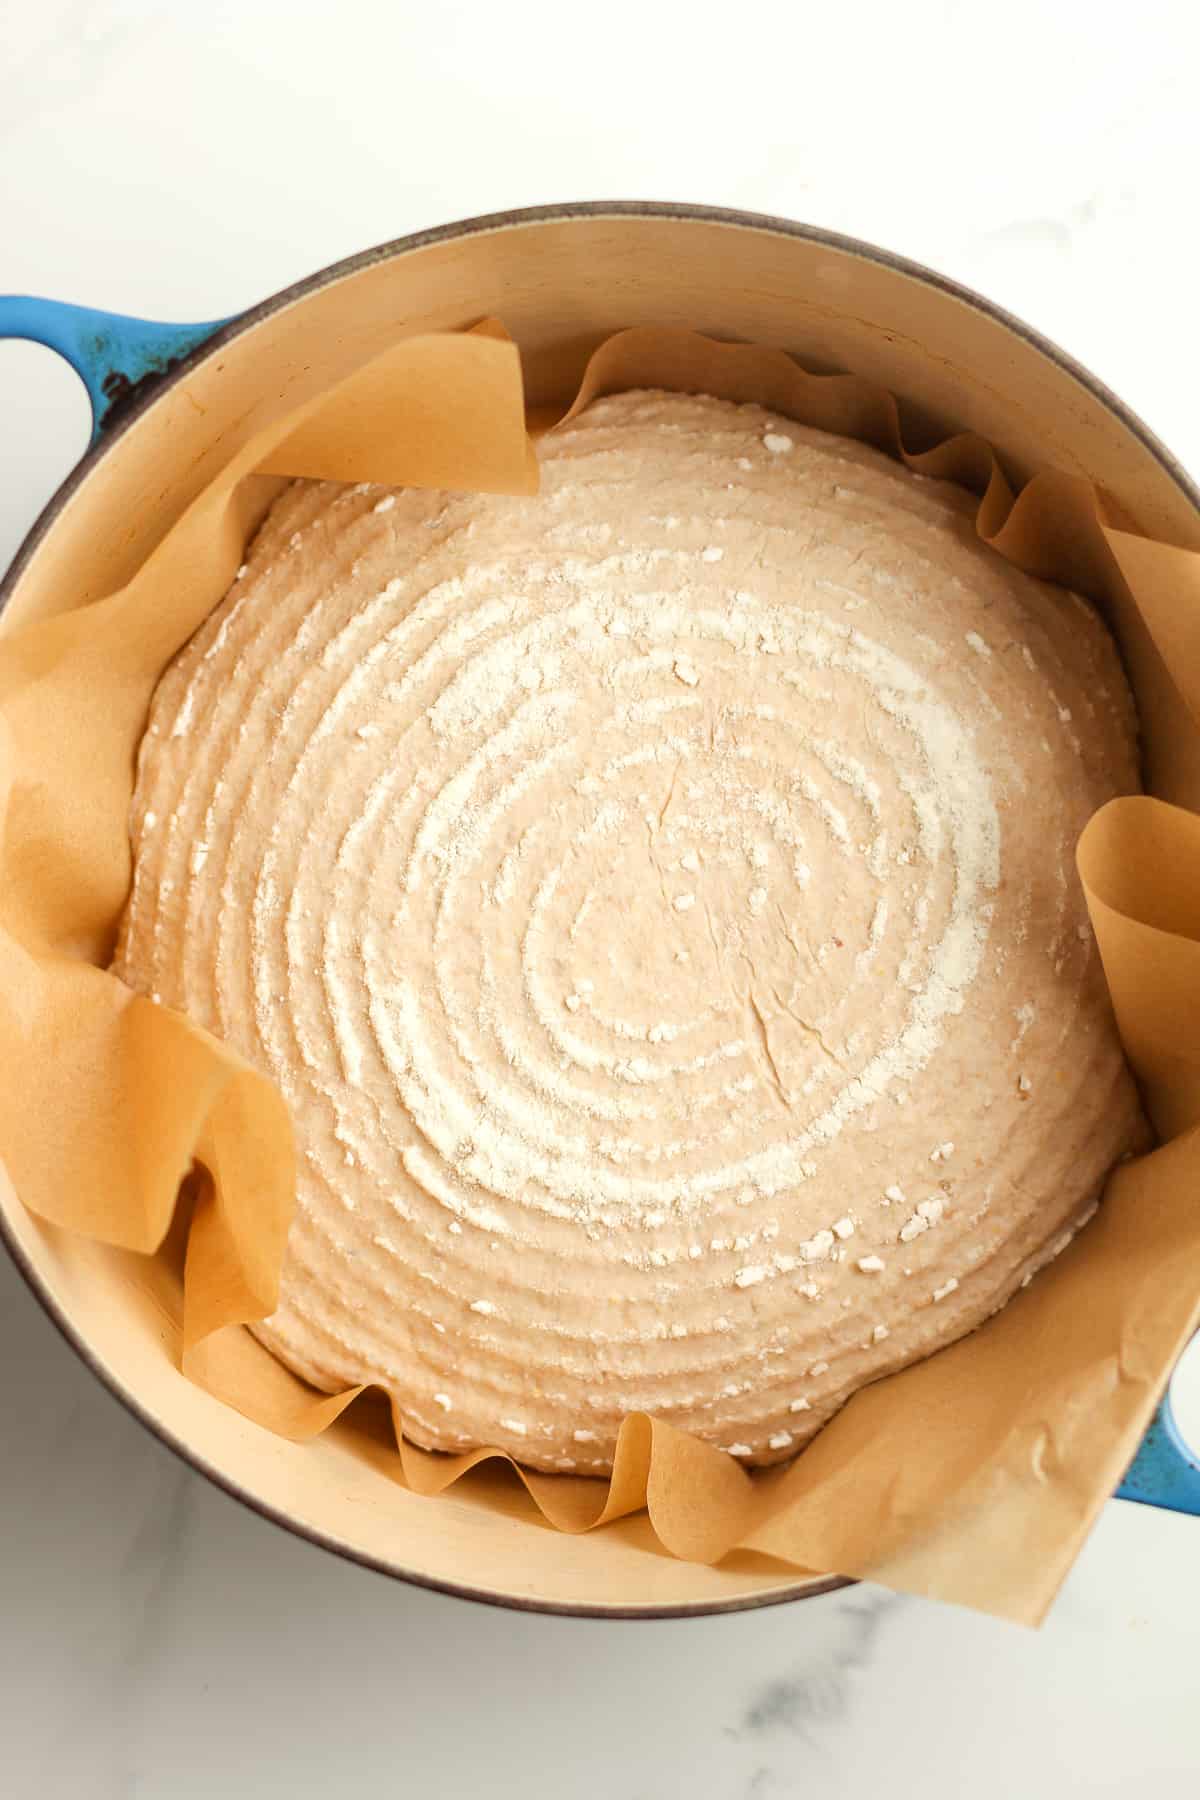
Place the dough, seem side up, in a bowl lined with a towel or a prepared banneton basket (pictured below). Cover with a damp towel and let it sit for about an hour or longer. For this bread, it does not need to double again in size. This is the SECOND RISE.
Note: For both the bowl or banneton basket, you’ll need to prepare them. For a bowl, add a thin tea towel dusted with rice flour (or regular flour will work in a pinch). For the basket, add some rice flour as well. The rice flour will help prevent sticking while regular flour may not do this as well.
Step 8
Prepare for baking. Preheat oven to 425 degrees. Carefully remove the loaf to a piece of parchment paper, smooth side up. Then take a serrated edge knife or a bread lame (linked below), and score the bread a couple of times. Place the bread (including parchment paper) into a dutch oven.
Note: For this batch, I chose not to score the bread thinking it would “blow-out”. It didn’t, but I’ll take note for additional batches and report back.
Step 9
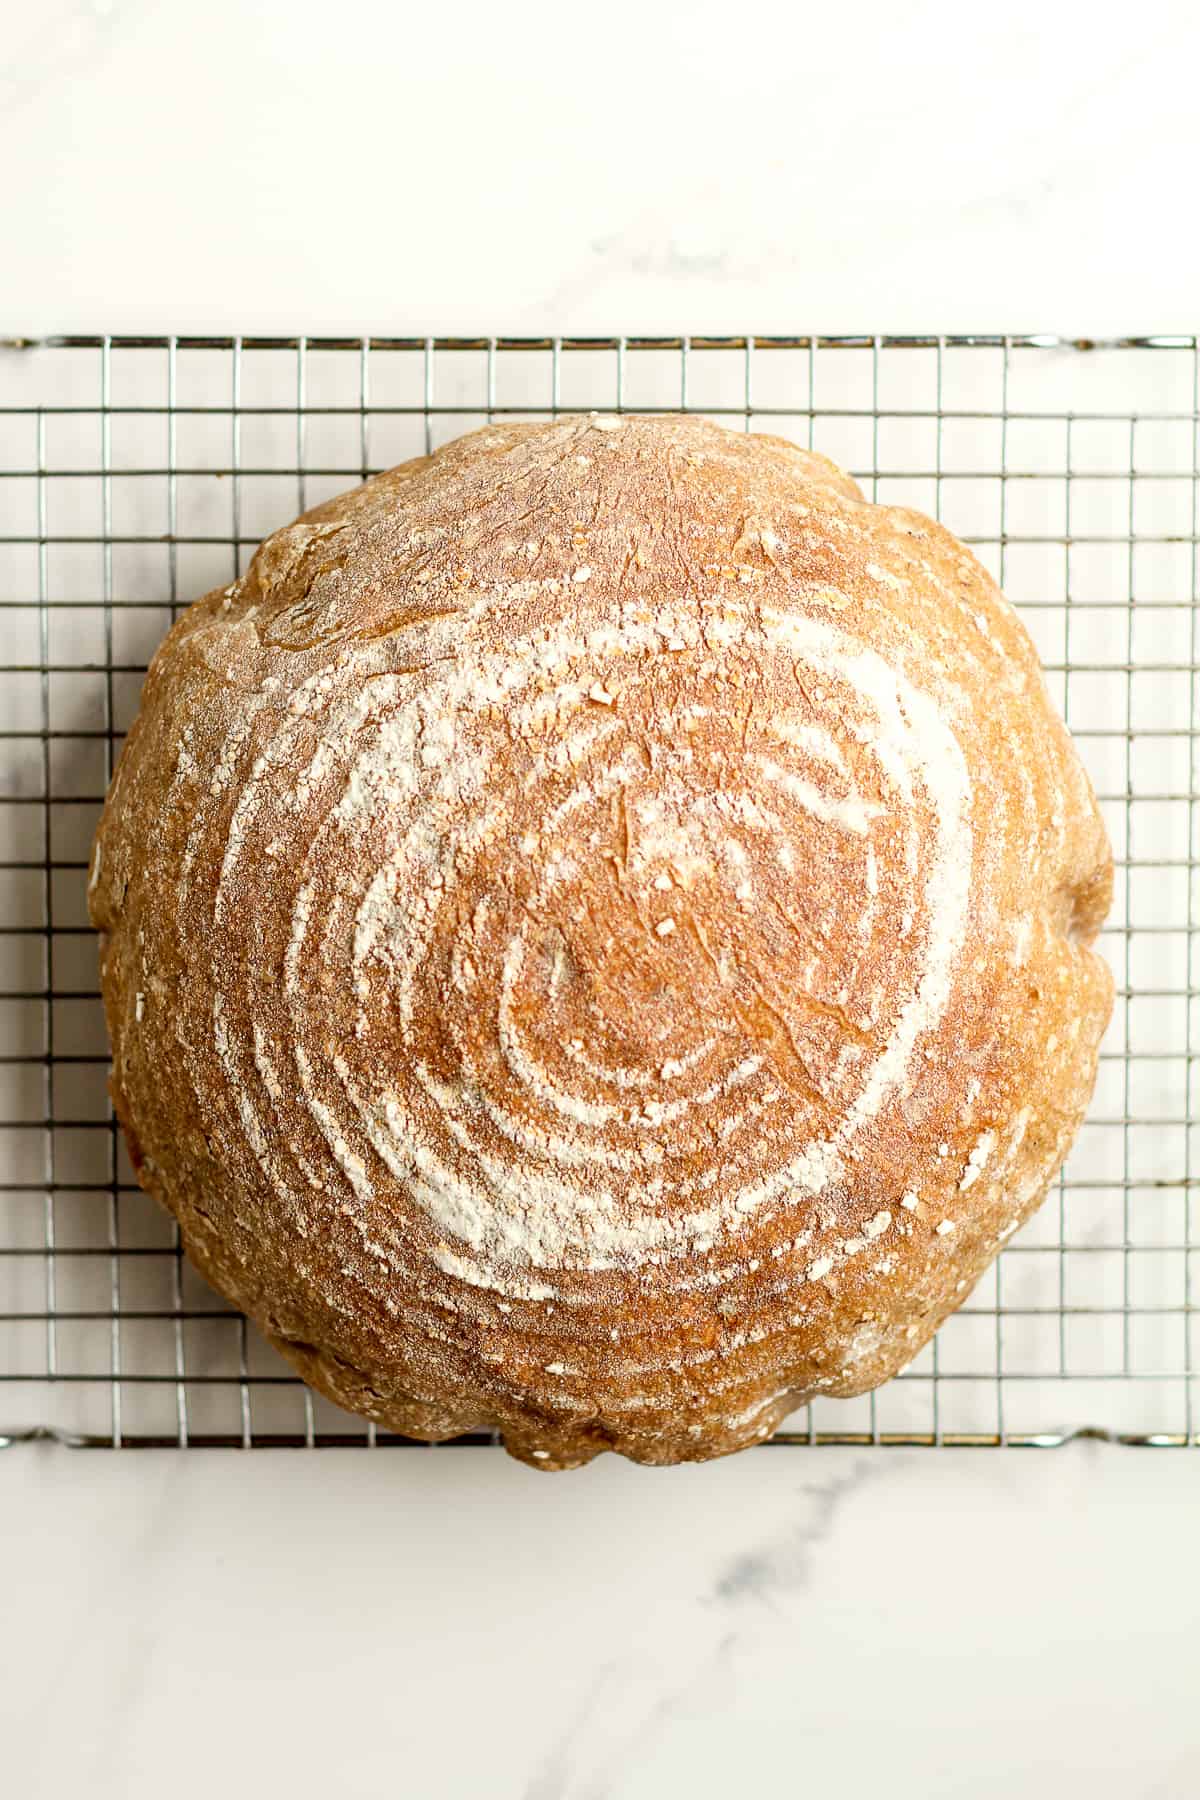
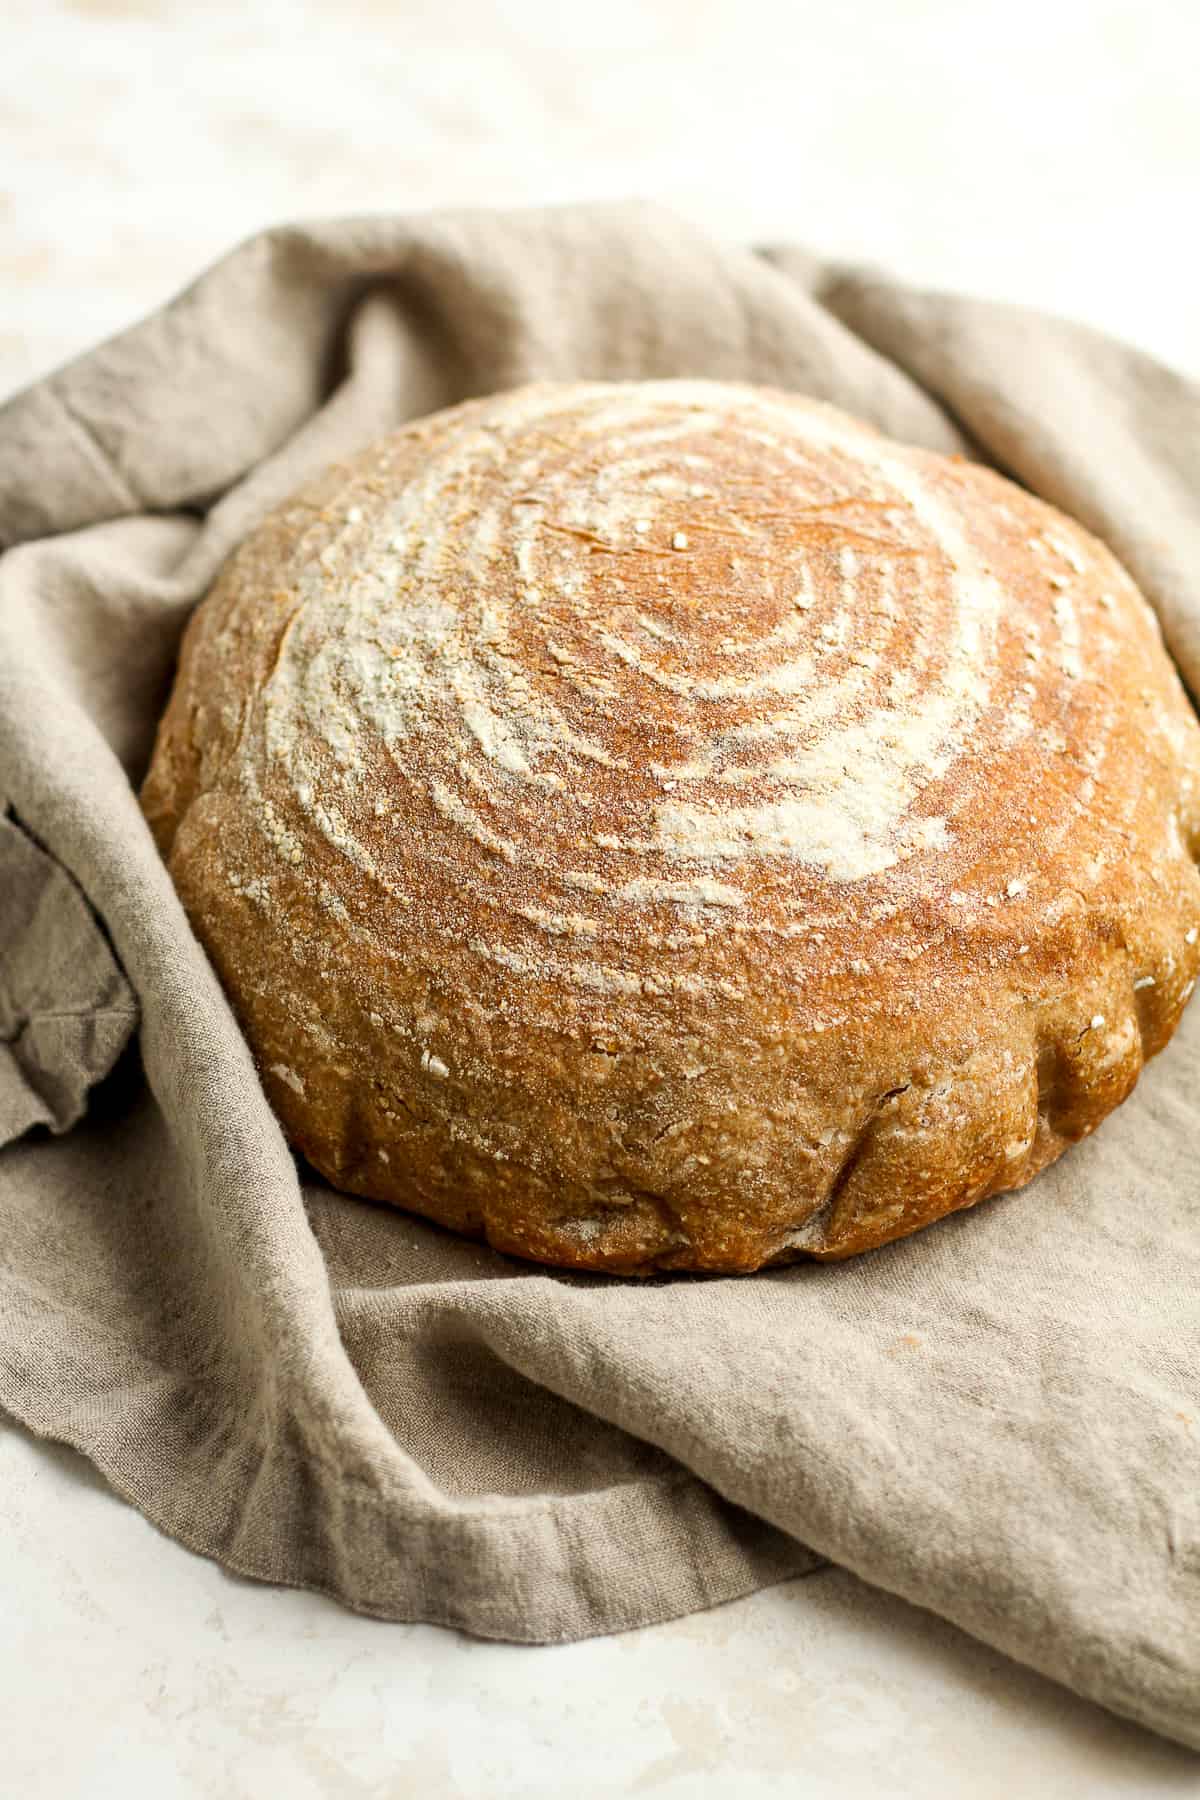
Bake. Add the lid to the pan and bake for 20 minutes. Then remove the lid and bake an additional 30 minutes, or until bread is nice and golden on top and bottom.
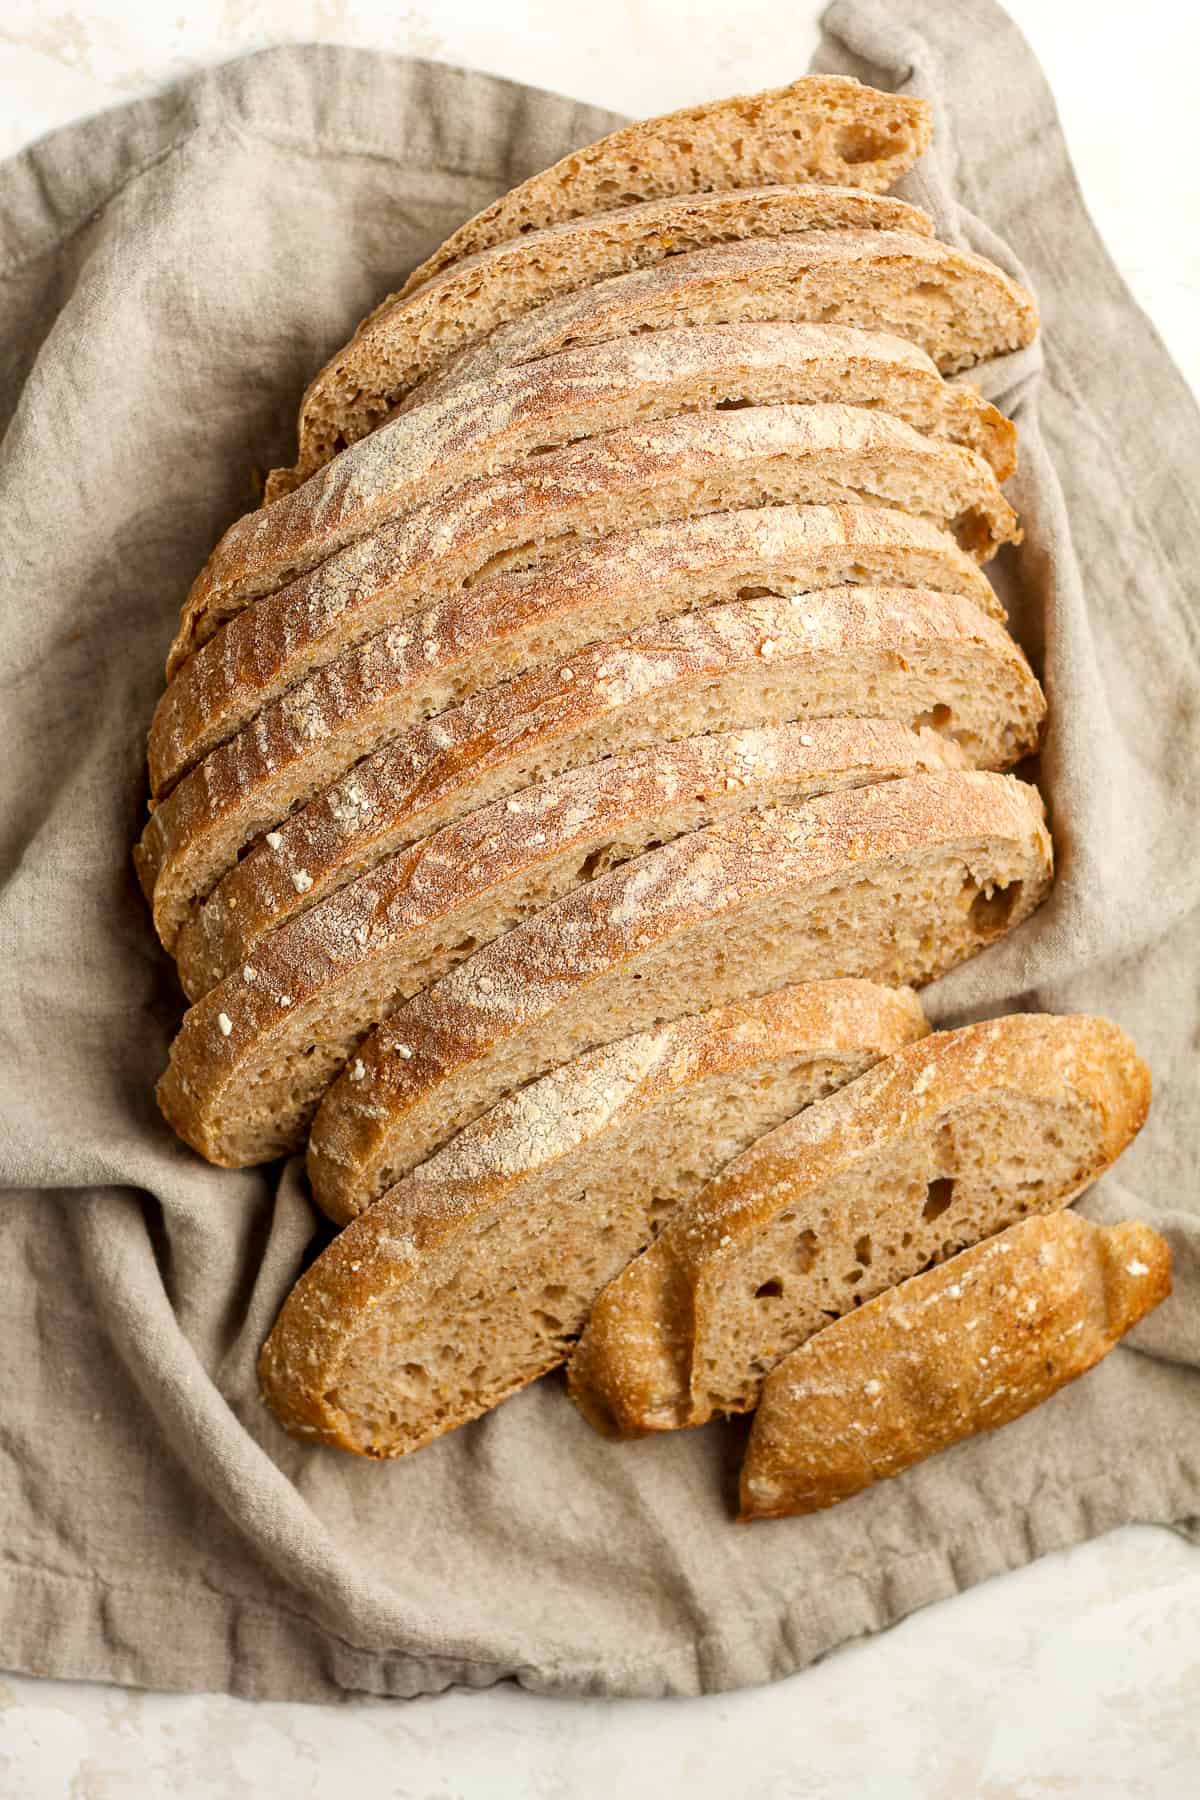
Step 10
Cool. Remove pan and then use parchment paper as handles to lift the bread out of the pan. Place on a cooling rack. Let the bread COMPLETELY COOL before slicing.
See my post on how to store sourdough bread for maximum freshness! Let’s not let our hard work go to waste and savor every single morsel of sourdough.
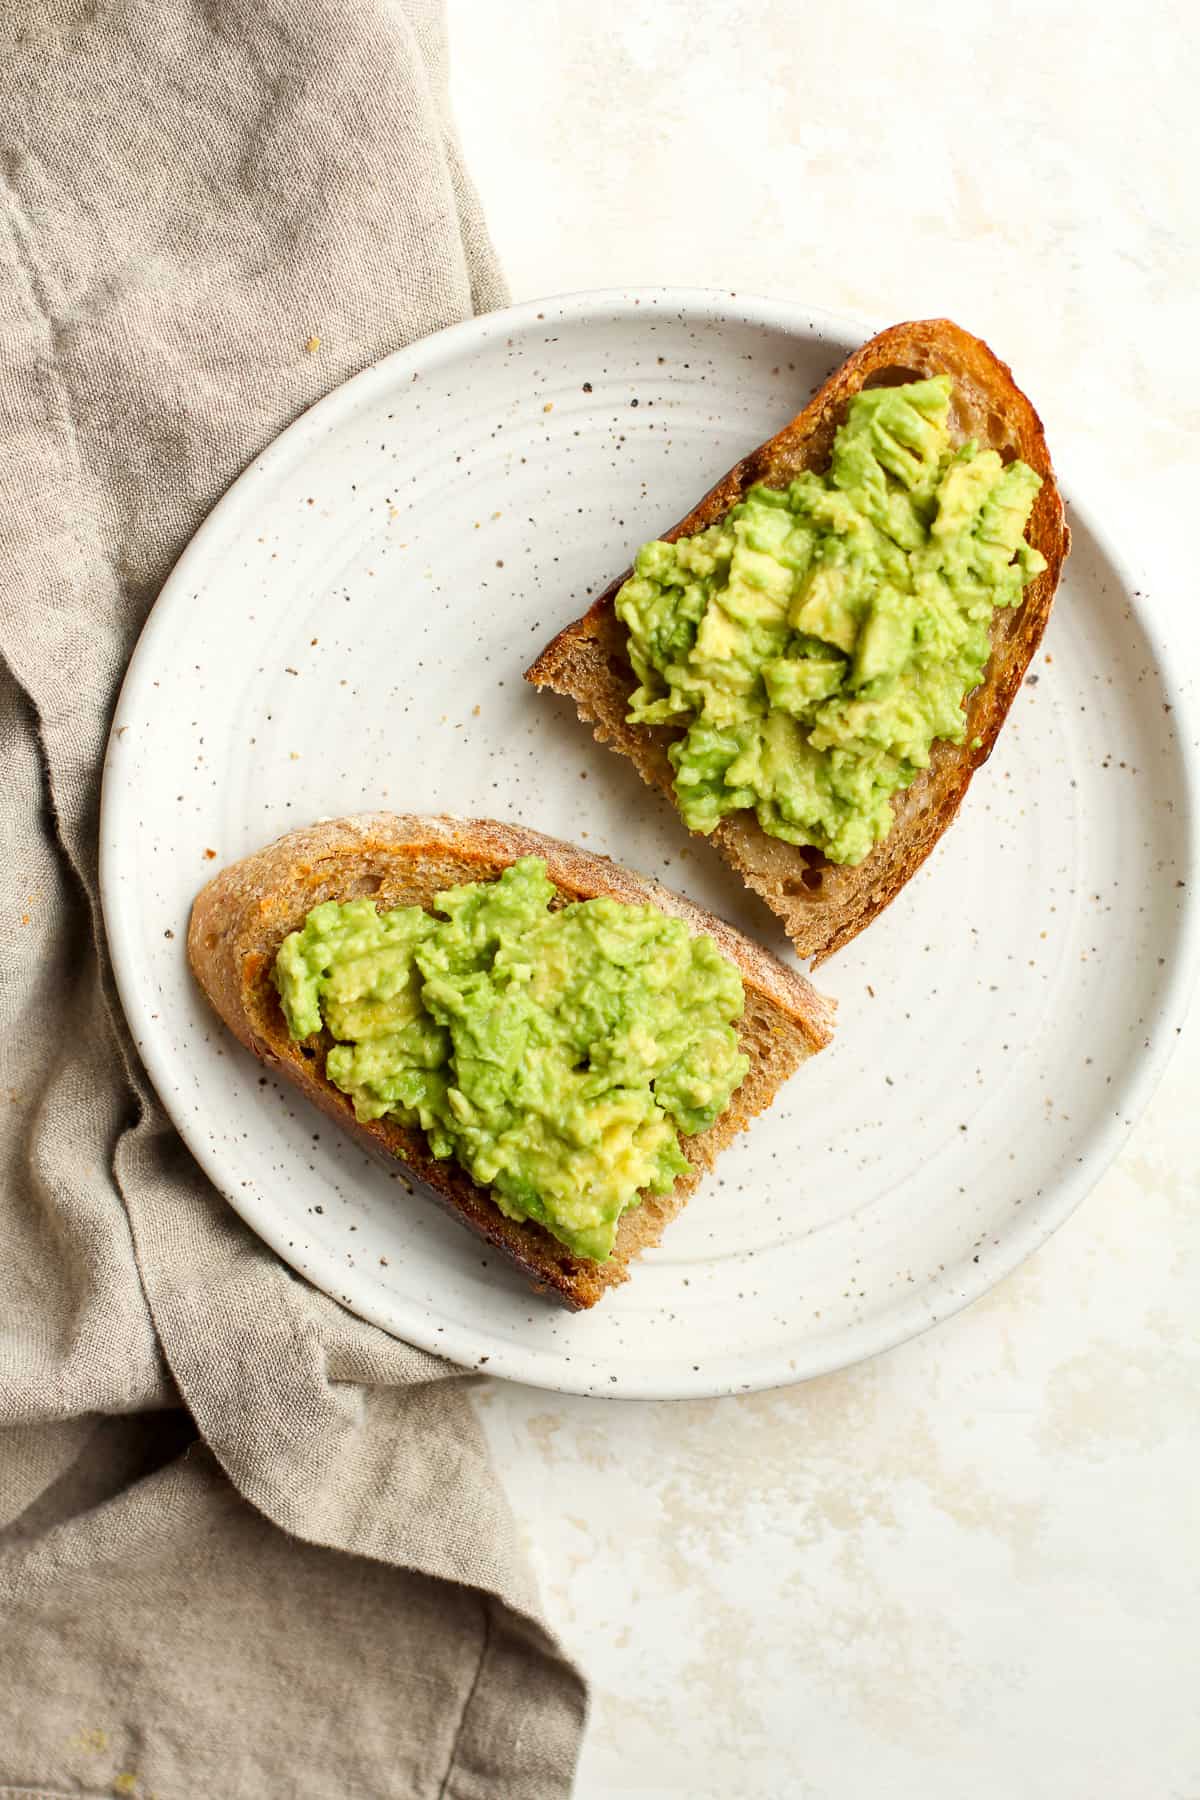
We love toasting this bread and adding butter (always!) plus smashed avocado (plus kosher salt) and a couple of sunny side up eggs (sometimes)! You could also add peanut butter and jelly or use this bread in paninis of any kind.
Sourdough 101 FAQs
- What is sourdough? Sourdough is a slow-fermented bread that doesn’t require store-bought yeast to make it rise. It’s a LIVE fermented culture which creates a natural leavening agent. A starter is required to make sourdough.
- What is a starter? A starter is a live culture made over a series of days, consisting of flour and water. It can be kept alive for years with periodic feeding.
- How do you make a starter? A starter can be created in less than a week with a simple combo of unbleached flour and filtered water. It’s a process of removing half of the starter and then “feeding” it every day, storing in a jar on your countertop, and getting it to a bubbly, sour point where it floats in water. More on this later.
- Is sourdough bread healthy? Sourdough bread is NOT gluten-free, as it contains flour, but its long fermentation helps break down this gluten. It’s easier on the gut because it’s more digestible and easier for the body to absorb. It’s also DELISH!
Try our Cranberry Walnut Sourdough Bread next!
Kitchen Tools Used: (affiliate links)
- Dutch Oven
- Digital Kitchen Scale
- Parchment Paper Sheets for High Heat Baking
- Bread Knife, 10-Inch
- Bread Lame – Made in the USA!
- Round Proofing Basket Banneton 11 inch
- Oval Bread Banneton Proofing Basket – 10 Inch
xoxo ~Sue

Multigrain Sourdough Bread
Ingredients
- 75 grams bubbly, active sourdough starter
- 350 grams warm, filtered water
- 40 grams honey
- 175 grams whole spelt flour
- 325 grams bread flour
- 10 grams fine sea salt
- 75 grams Harvest Grains Blend (soaked in hot water) – or 10-grain cereal
Instructions
- ** READ the blog post in it's entirety before making this sourdough recipe!
- Carefully measure out the starter and water and use a fork and stir. Then proceed adding the other ingredients in the order listed and stir again with a fork.75 grams bubbly, active sourdough starter, 350 grams warm, filtered water, 40 grams honey, 175 grams whole spelt flour, 325 grams bread flour, 10 grams fine sea salt, 75 grams Harvest Grains Blend (soaked in hot water)
- Then use your hands to bring the ingredients together. It will look shaggy. Cover with a damp towel and let it sit for 45 minutes. (Be sure to set a timer.) This is the AUTOLYSE.
- While the dough is sitting in autolyse, soak the multigrain cereal in about 60 grams of hot water.
- After 45 minutes, add the multigrain cereal to the bowl. Then start the stretch and folds. Use your hand and lift the dough up on one side, stretching it upward, and then punch into the center of the dough. Turn the dough and repeat. Continue this process for about 30 seconds. This is the STRETCH AND FOLDS.
- ADDITIONAL STRETCH AND FOLDS: I recommend doing additional stretch and folds if time permits. Do these every 30 minutes for 3-4 more times to further develop the gluten structure.
- Let the dough rise for 6-8 hours, or overnight. It should almost double in size and appear soft on top. Small air bubbles may appear as well. This is the BULK RISE.
- Note: I recommend placing a damp towel on the dough for the overnight rise. You might also add a bit of oil to the top to keep a crust from forming on the dough overnight.
- Add a light dusting of flour to a baking mat or clean surface. Remove the dough to the mat and gently form into your desired shape, usually round or oblong. Don’t punch the dough down because you don’t want to remove all the air. Let dough sit for five minutes.
- After five minutes, use your hands to pull the dough toward you, dragging it along the mat to tighten it up. Repeat in the other directions to tighten. (Make sure you don’t have too much flour on the surface when tightening the dough, so there is some needed friction necessary to tighten it.)
- Place the dough, seem side up, in a bowl lined with a towel or a prepared banneton basket (pictured below). Cover with a damp towel and let it sit for about an hour or longer. For this bread, it does not need to double again in size. This is the SECOND RISE.
- For both the bowl or banneton basket, you’ll need to prepare them. For a bowl, add a thin tea towel dusted with rice flour (or regular flour will work in a pinch). For the basket, add some rice flour as well. The rice flour will help prevent sticking while regular flour may not do this as well.
- Prepare for baking. Preheat oven to 425 degrees. Carefully remove the loaf to a piece of parchment paper, smooth side up. Then take a serrated edge knife or a bread lame (linked below), and score the bread a couple of times. Place the bread (including parchment paper) into a dutch oven.
- Bake. Add the lid to the pan and bake for 20 minutes. Then remove the lid and bake an additional 30 minutes, or until bread is nice and golden on top and bottom.
- Cool. Remove pan and then use parchment paper as handles to lift the bread out of the pan. Place on a cooling rack. Let the bread COMPLETELY COOL before slicing.
Notes
Expert Tips
- Make sure your starter is ready. If you store your starter in the refrigerator between use, make sure it’s active and ready to go before baking with it. I often feed it 2-3 times before using it after resting (i.e. sleeping in the refrigerator).
- Be flexible. If you’re bulk rise is taking longer than normal, or the starter isn’t as bubbly as you’d like it, be flexible. You can add time to either of these, and still make delicious bread. Many factors will come in to play as to when your sourdough is ready. In the summer months, the humidity and heat will make the process shorter. In the winter months, the process may be longer.
- Measure carefully and then adjust as needed. Make sure you use a digital scale to measure your ingredients in grams. This is important. Even with measuring carefully, you MAY need to adjust slightly. When your hands are on the dough doing stretches and folds, you will come to feel if more water/more flour is needed to make the dough pliable and soft. This comes with practice.
- Practice. Like I said above, as you practice making this bread and enjoying the bounties, you’ll learn all the little nuances to the sourdough process. Practice makes perfect!
- Let the bread cool. One of the biggest mistakes you can make is to slice the bread immediately after coming out of the oven. If you do this, it will be doughy tasting. Let the bread completely cool before slicing!
Nutrition
Can I substitute another flour or spelt flour? Thanks
Yes, you could substitute another flour, like all-purpose.
Oroweat makes a delicious bread called Winter Wheat that has been an absolute favorite, however it has a very limited distribution so is not available in most of the country. I’ve wanted to bake something like it since I started sourdough but it has been an elusive flavor. This recipe not only tastes like it but is even better!! The 10 grain cereal adds so much complexity to the flavor, it’s just delicious. For fear of over fermenting I used only 50g starter and overnight fermented in a cool approximately 60 degree basement. Also upped the honey because, well, it’s honey 😆. Truly a great bread that will definitely be in the regular rotation.
What did I do before Sourdough! Amazing recipe!