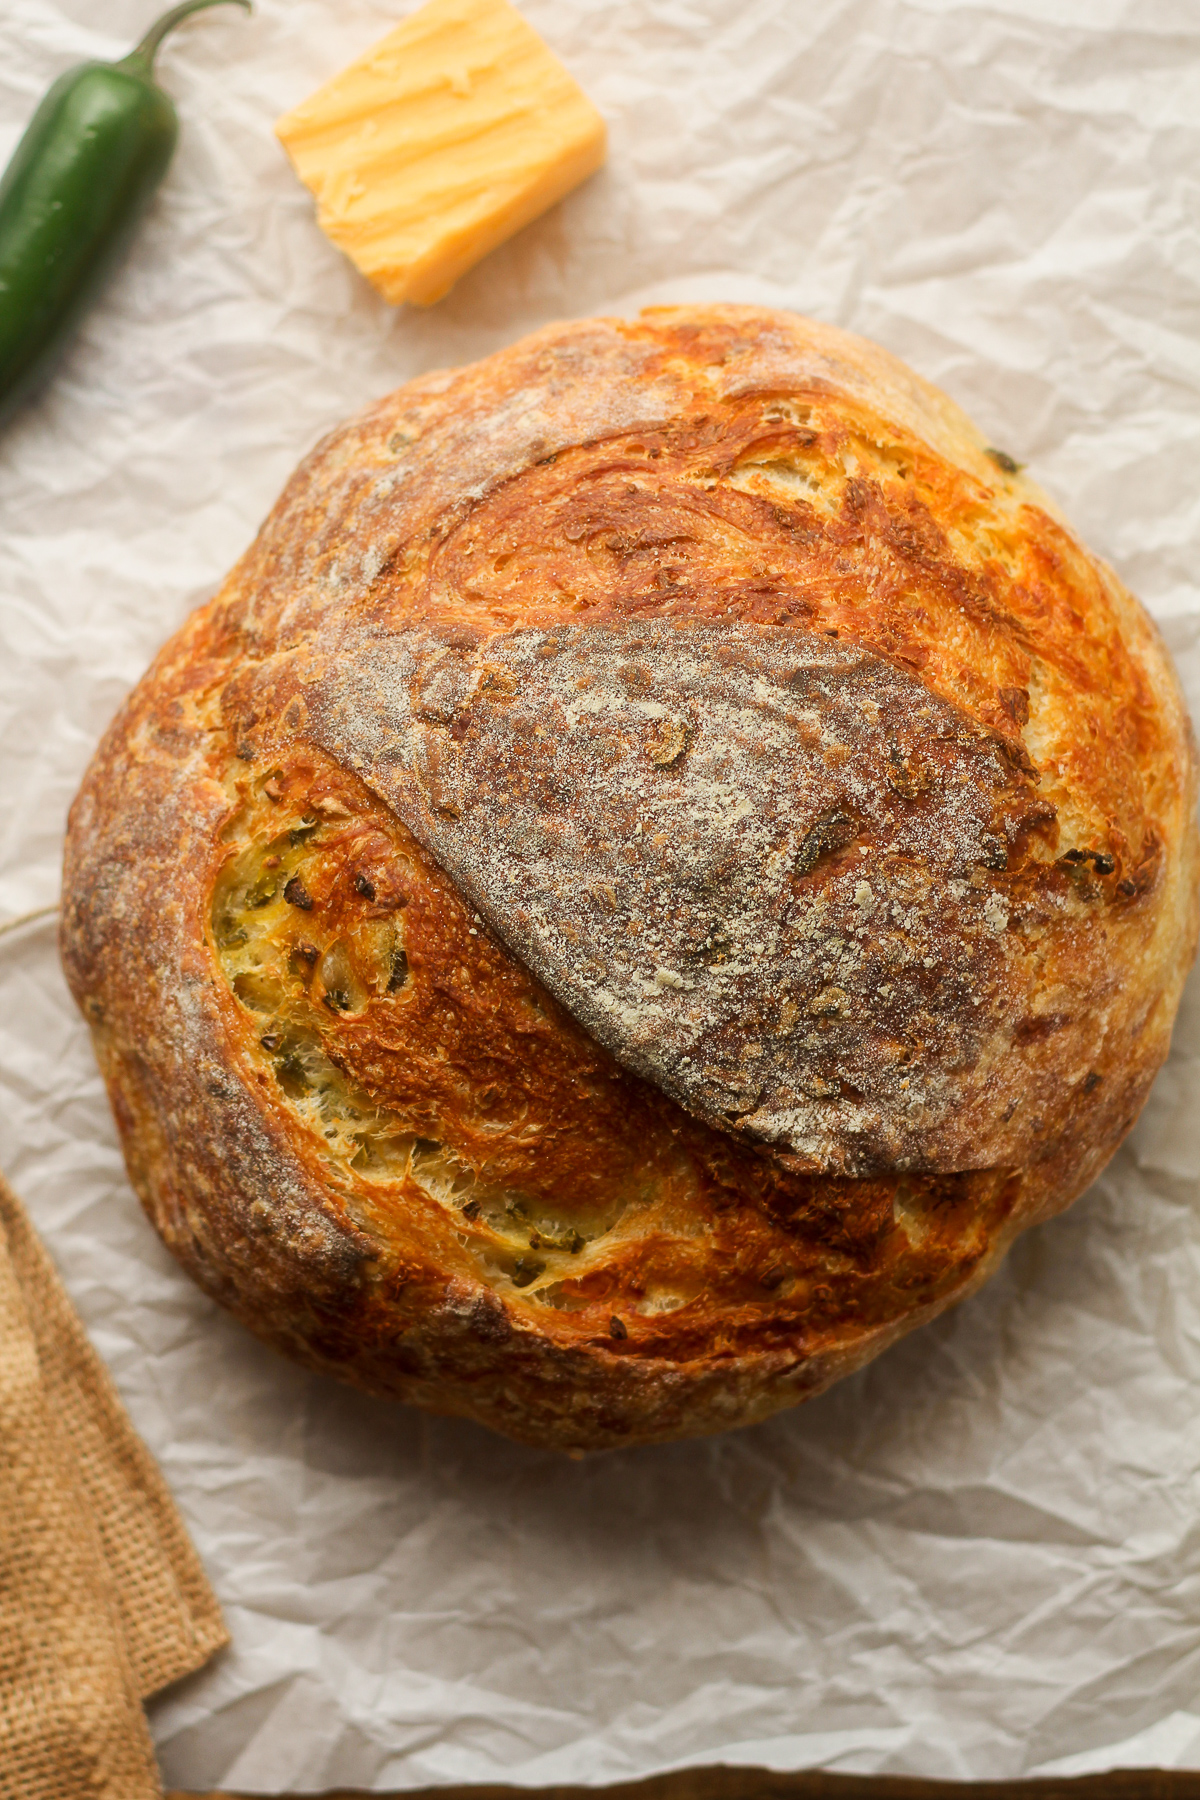
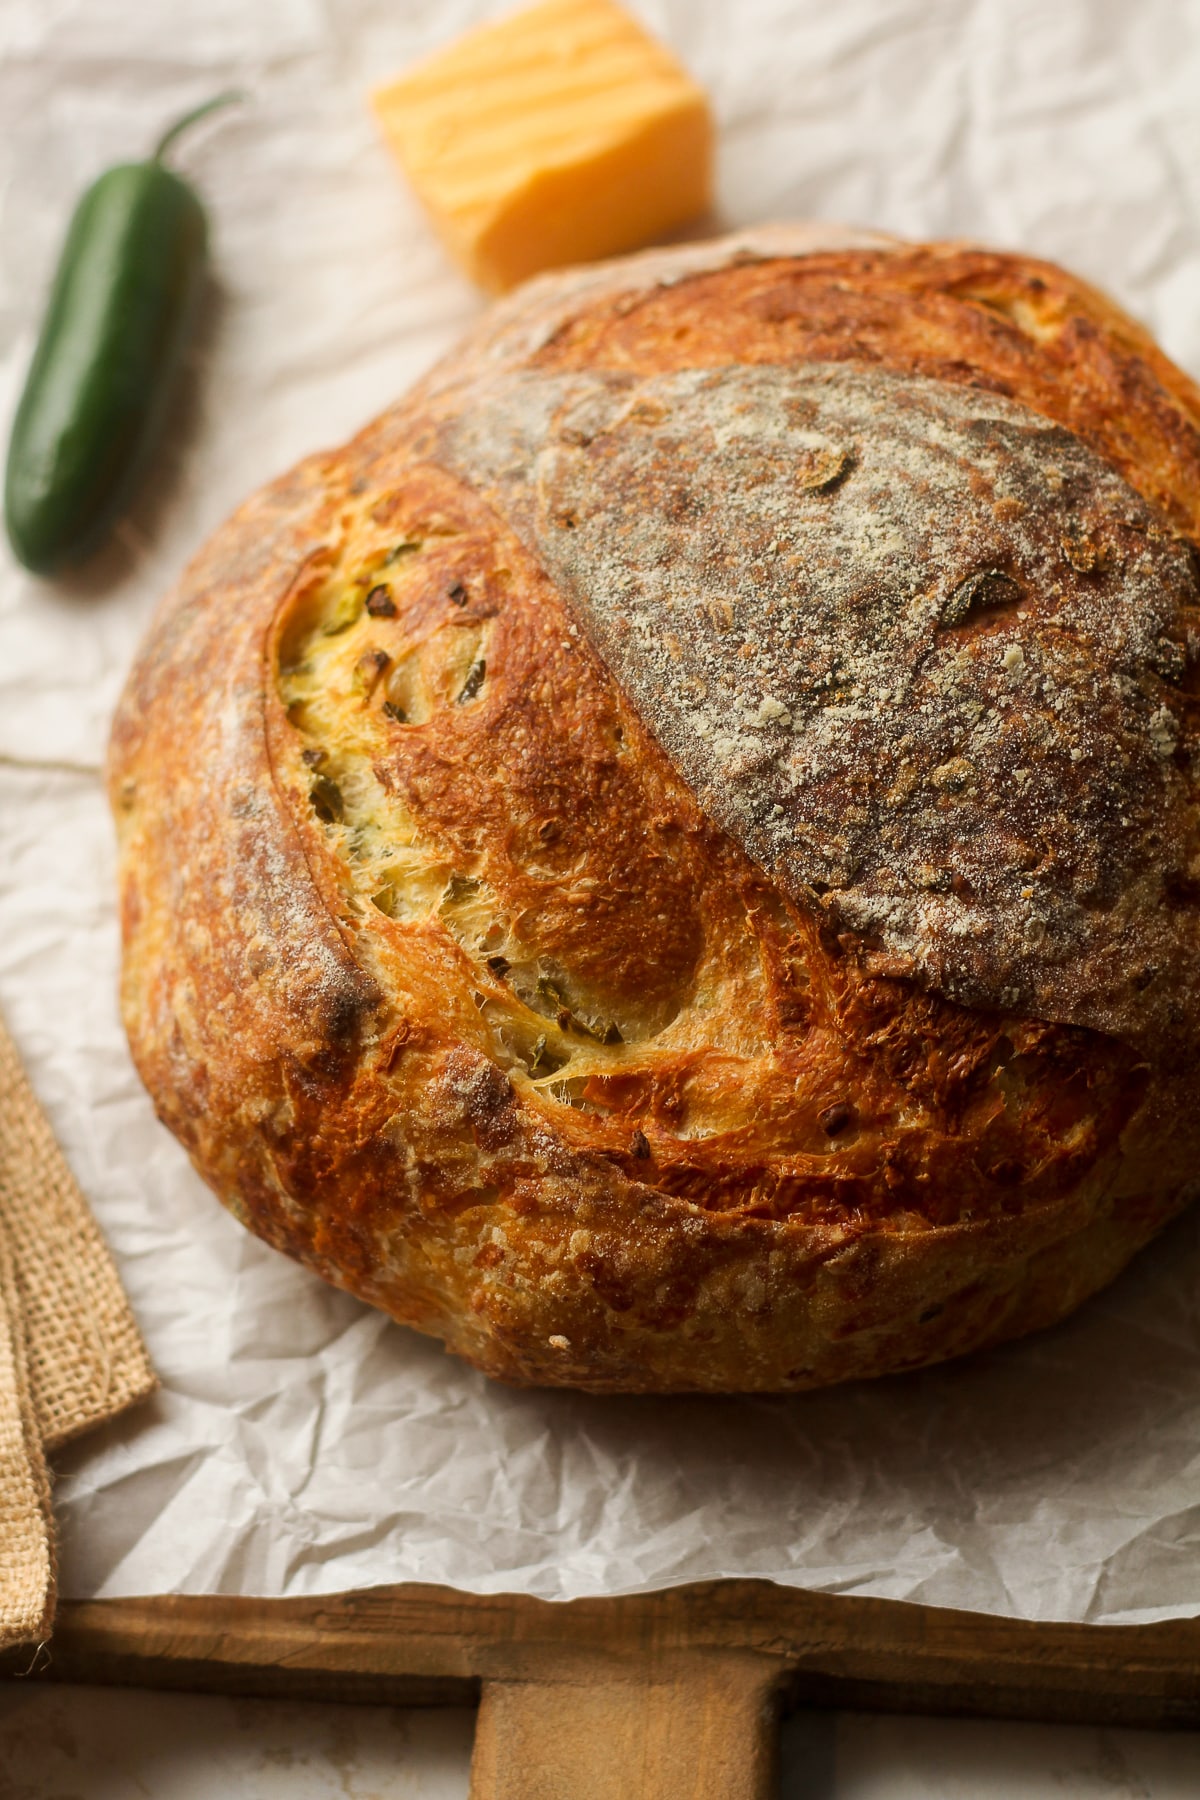
Jalapeño Cheddar Sourdough Bread
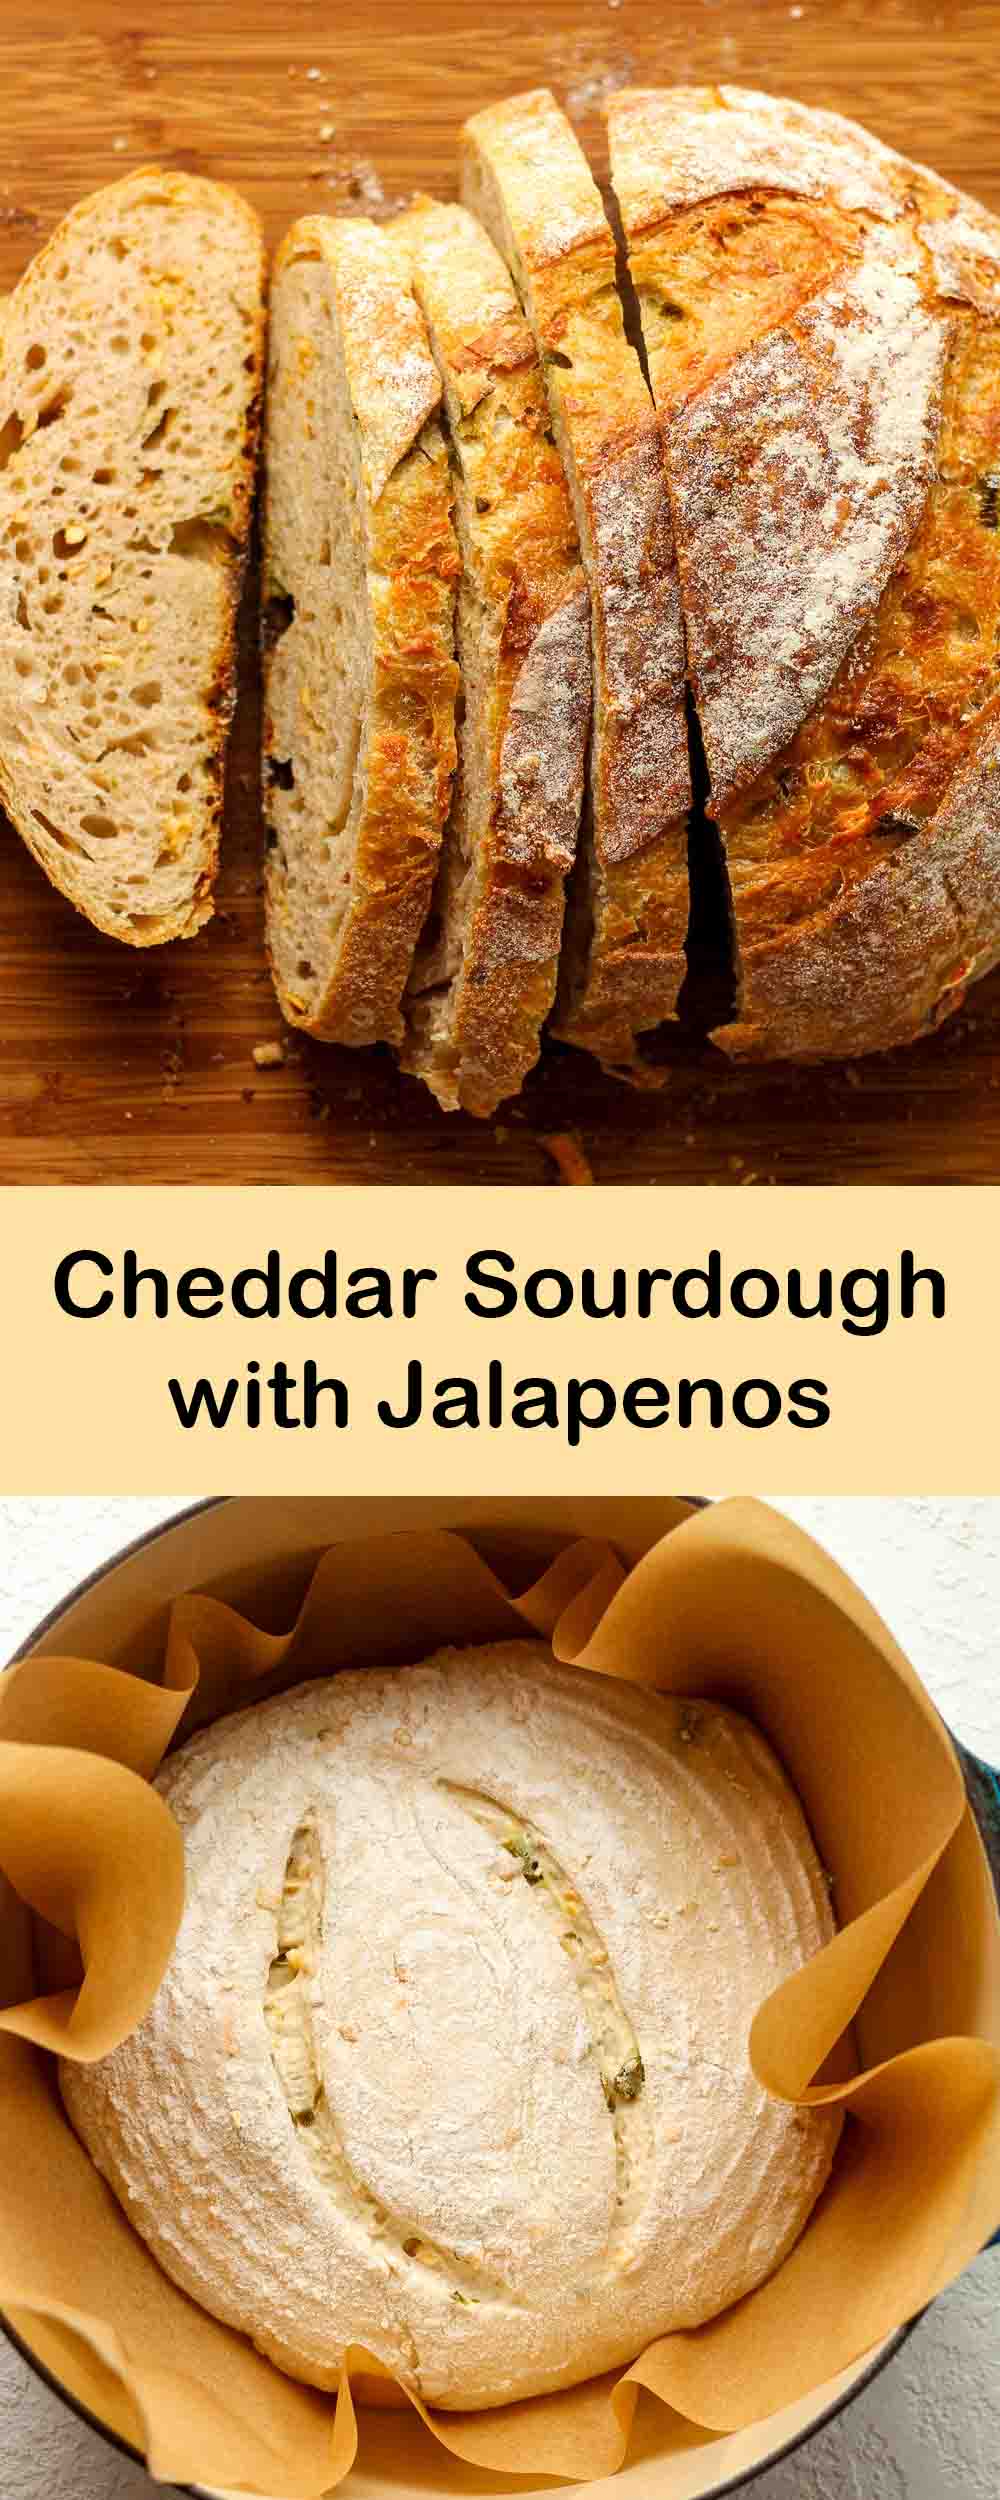
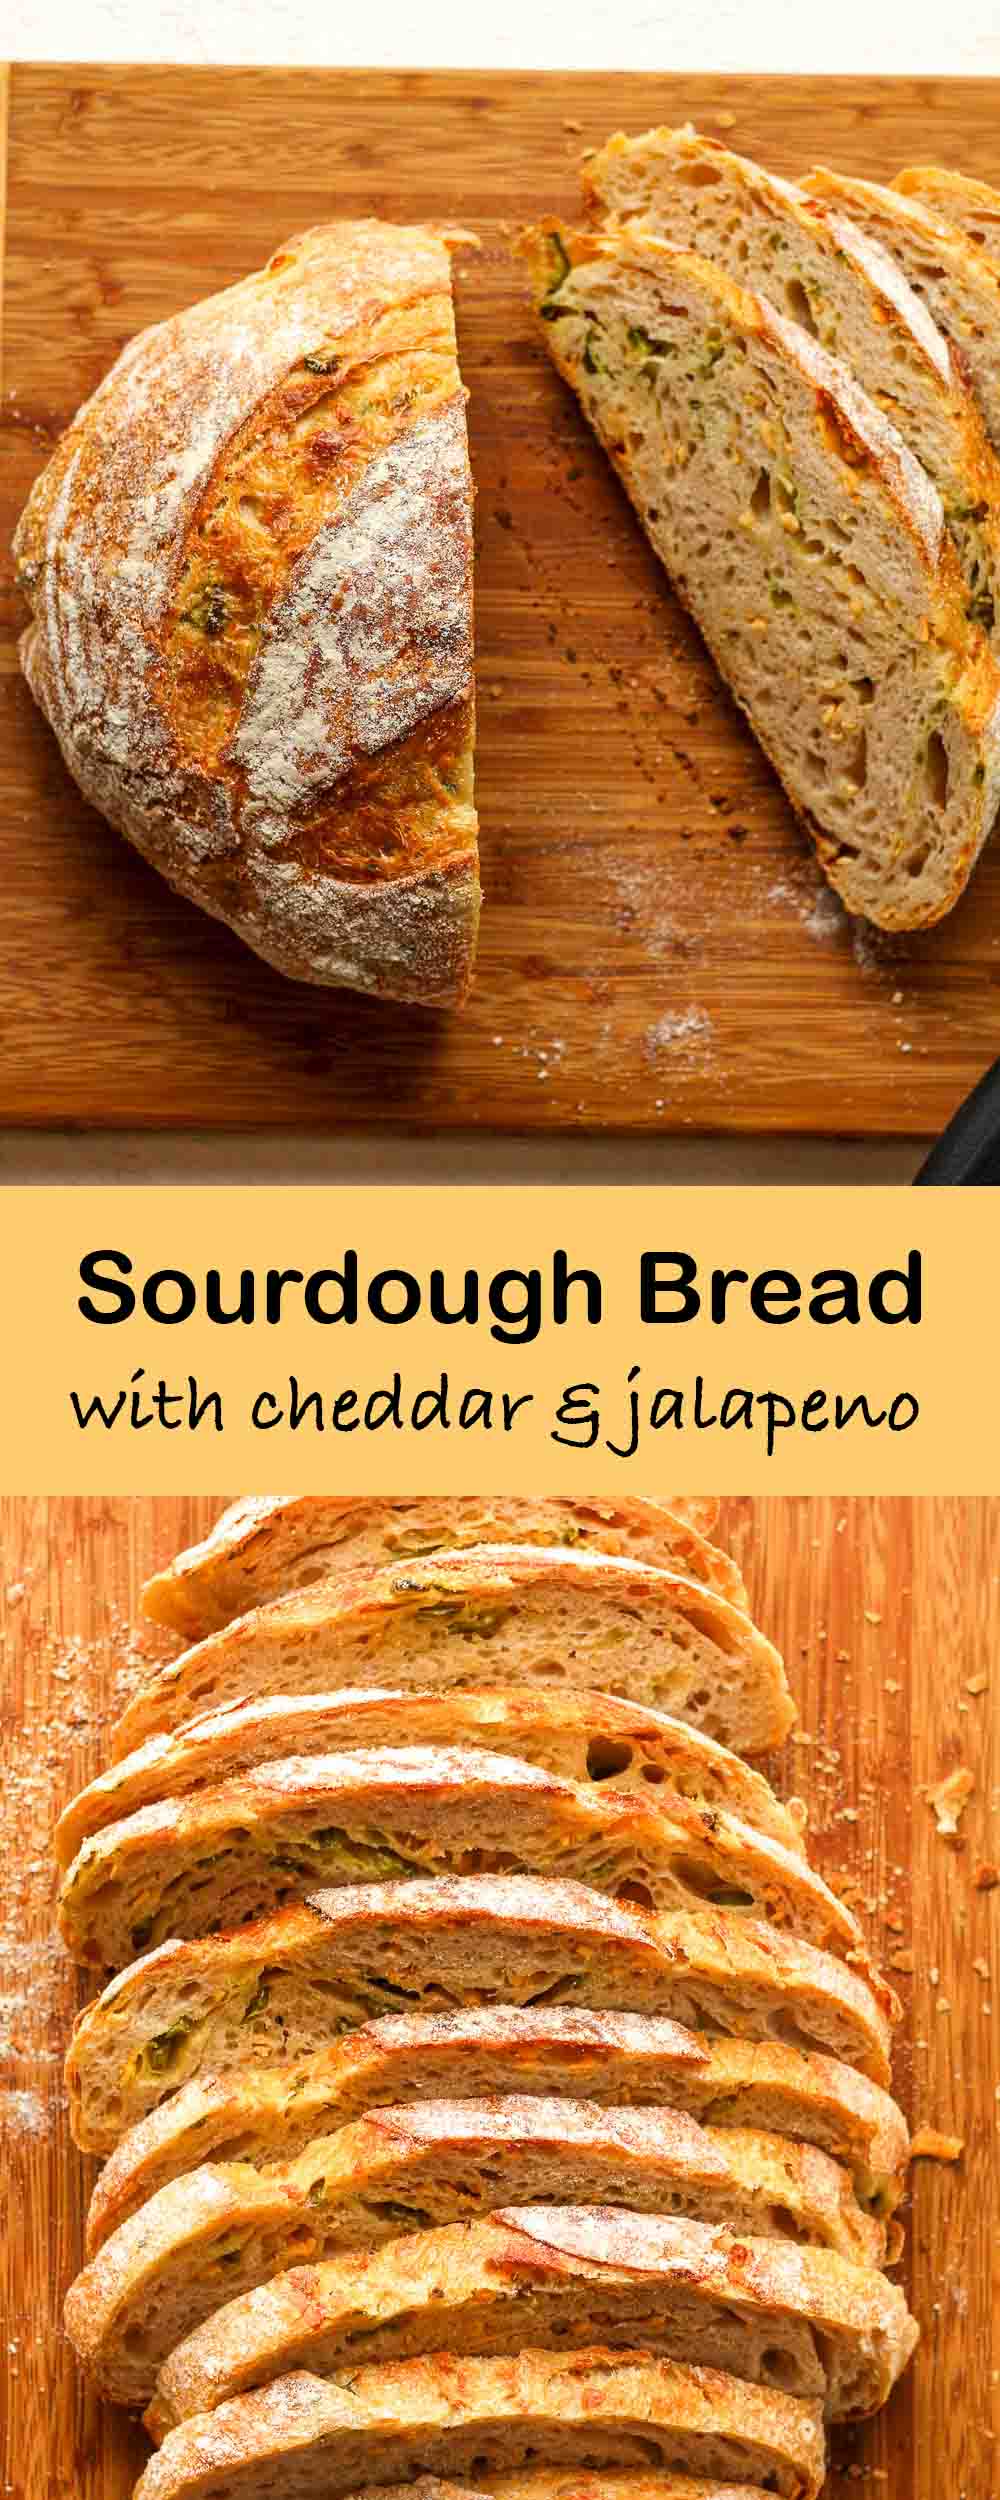
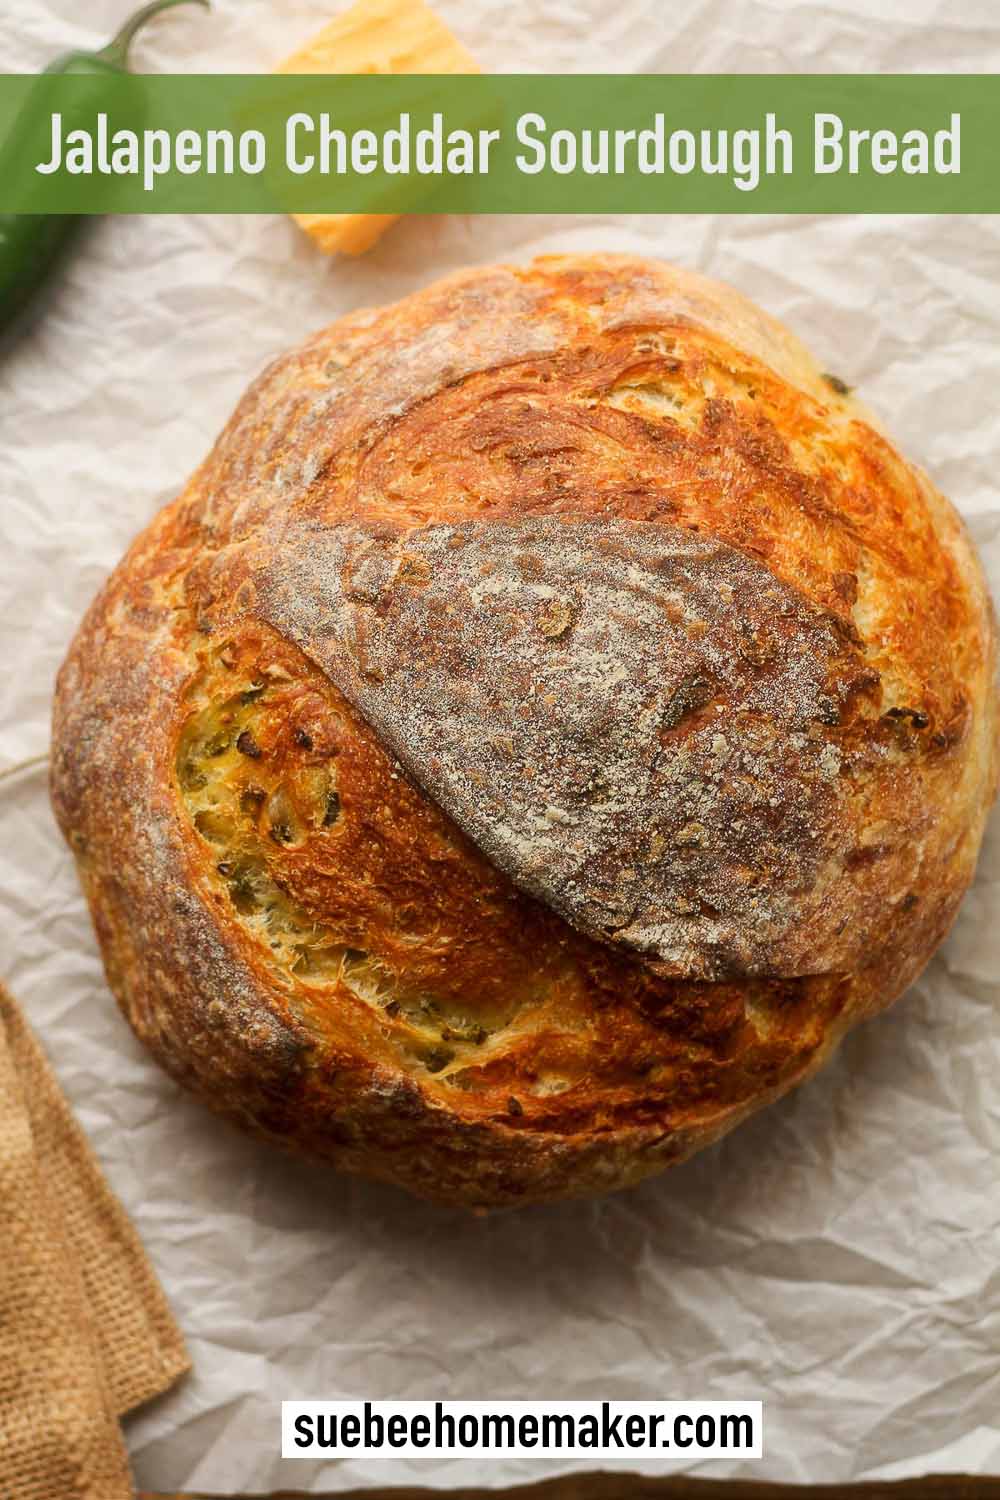
Follow my easy instructions to make the best Jalapeño Cheddar Sourdough Bread! Packed with cheddar cheese and spicy pickled jalapeños, this bread makes delicious toast, grilled cheese, and paninis, and is an accompaniment to soups and pasta!
I’m on the sourdough train and I can’t be stopped! Next, try my Sourdough Bagels, Overnight Sourdough Bread, and some Whole Wheat Sourdough Sandwich Bread!
Jalapeño Cheese Bread
Oh, baby, this is good bread. Like really REALLY good bread.
Every time I “wake up” my sourdough starter (aka take it out of the refrigerator), I make a double batch of this bread. When you have three men in your life who request it on the regular, it’s a must-make. Who can blame them? It’s my favorite too!
In fact, my youngest just said that his big bro gets more sourdough than him, so he recently started growing his own starter. To be fair, Josh lives 30 minutes away while Zach is three hours away. Uh-hum.
Try our Jalapeno Cheddar Focaccia bread next time!
Why this recipe works:
- The TASTE! This bread is PACKED with cheddar cheese chunks and spicy jalapeño slices. When you’re a fan of both of those things, it works really well!
- SIMPLE. Now I know that sourdough seems like a monster to people who don’t make it regularly. But if you do, this bread just involves adding in the cheese and jalapeños. You’re making a crusty loaf with the extra step of adding in the goodies. That’s it!
- Doesn’t require a long second rise. Once you form the loaf, it doesn’t need to sit all day. The bread will puff up a bit, but it won’t need to double in size. Therefore, the second rise is quick.
- Impressive. If you want to impress some guests, make THIS one. It goes well with just about anything – plain butter, cheese slices, pimento cheese spread, etc.

Make your own sourdough starter at home with just a few simple ingredients using Sourdough Starter Basics. In just over a week’s time and a little bit of patience, you’ll be ready to use your active starter to make the best sourdough bread!
Ingredients Used:
Only four base ingredients plus two bonus ingredients (cheese and jalapeños!) are required for this delicious bread! I use three different types of flour, however, but they’re always stocked in my pantry.
- Bubbly Starter – The starter is THE most important part of sourdough bread making. It takes a little time, but you will be rewarded over and over again.
- Filtered Water – Use filtered water, either out of your refrigerator filter system or use bottled water. The water should either be at room temperature or slightly warmed before adding it to the sourdough process.
- Flour – For this recipe, use a combo of unbleached all-purpose flour, unbleached bread flour, and whole wheat flour. Organic is normally unbleached, btw.
- Sea Salt – I recommend using fine sea salt.
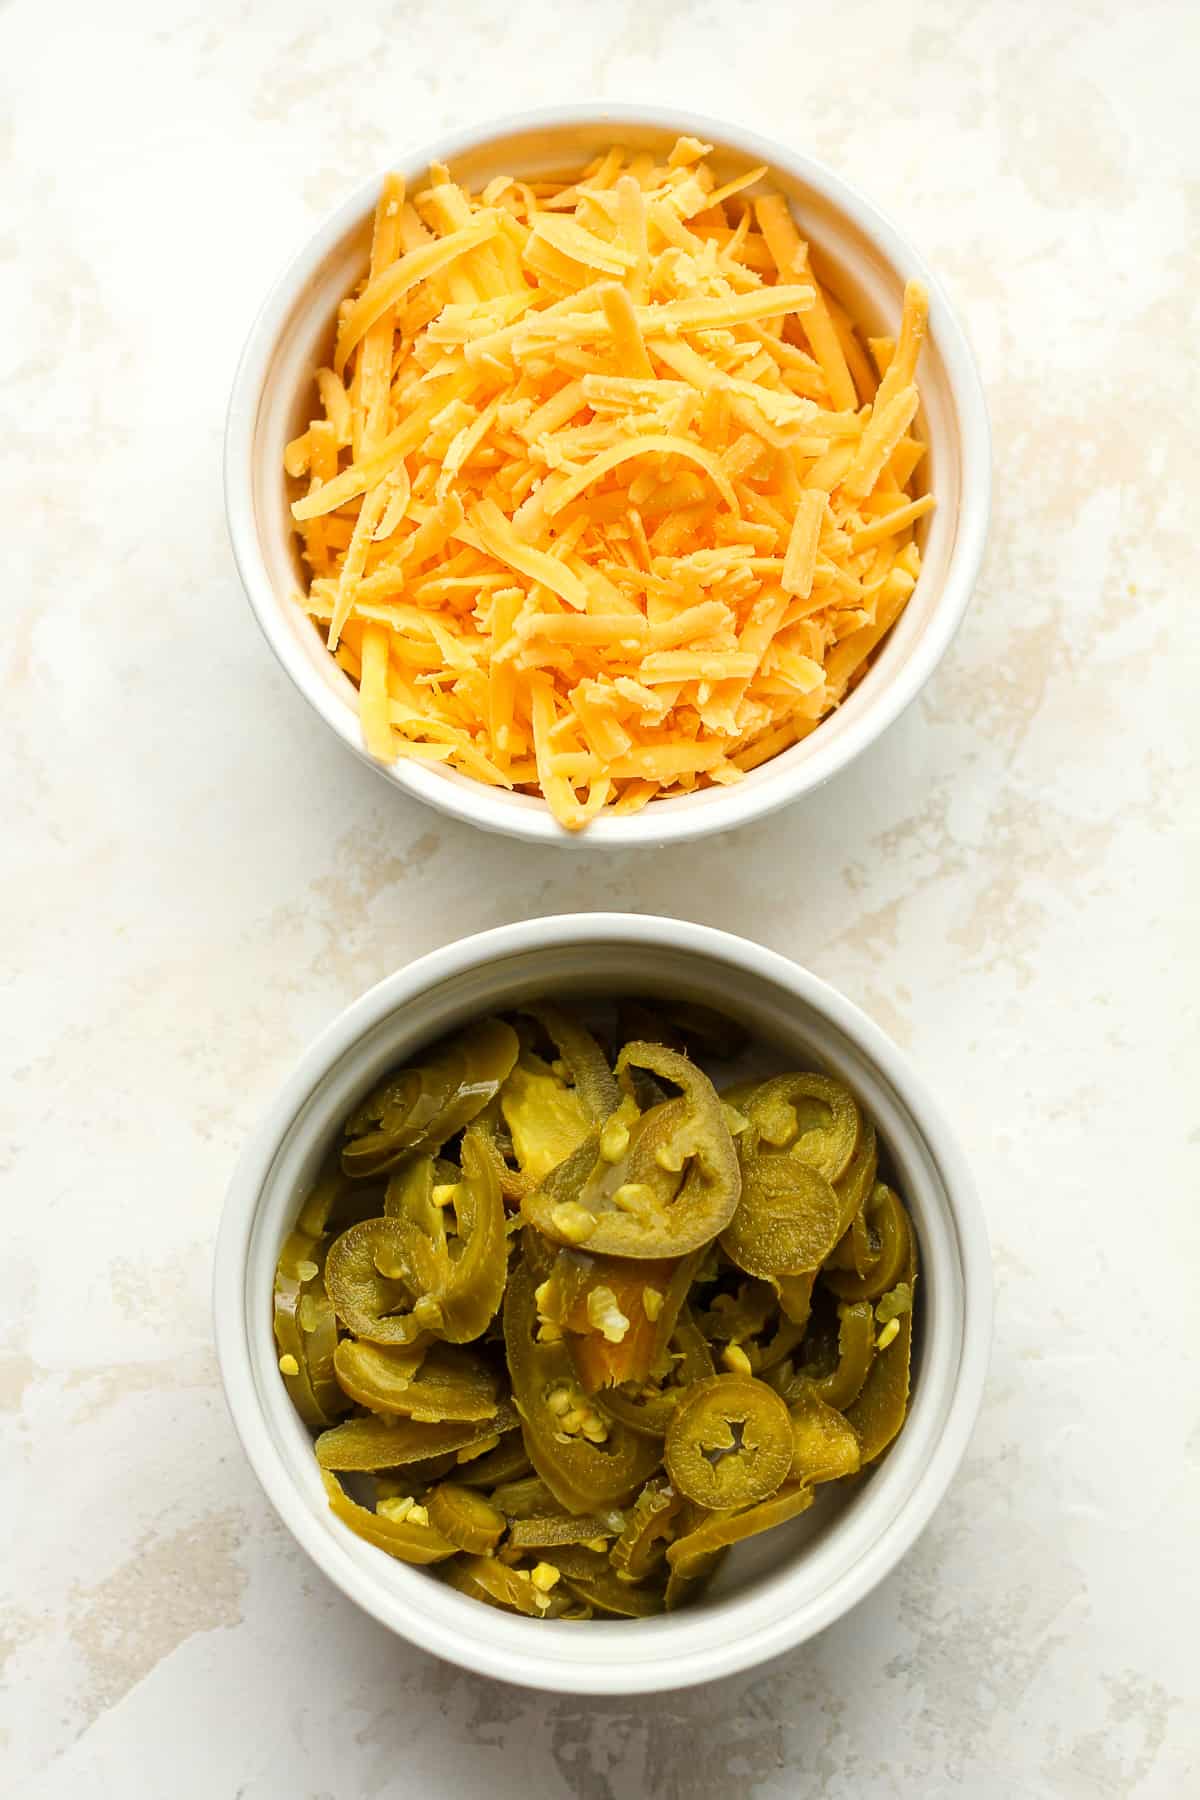
- Cheddar Cheese – I use a sharp cheddar cheese chunk and grate it.
- Jarred Jalapeños – I use jarred and pickled, spicy jalapeños. A little bit spicy, and SO good!
How to make Jalapeño Cheddar Sourdough Bread:
Step 1
Carefully measure out the ingredients in the order listed. Combine filtered water and sourdough starter in a mixing bowl and stir well with a fork. Add the three types of flour and sea salt. Stir again.
Step 2
Then use your hands to bring the ingredients together. It will look shaggy. Cover with a damp towel and let it sit for 30 minutes. (Be sure to set a timer.) This is the AUTOLYSE.
Step 3
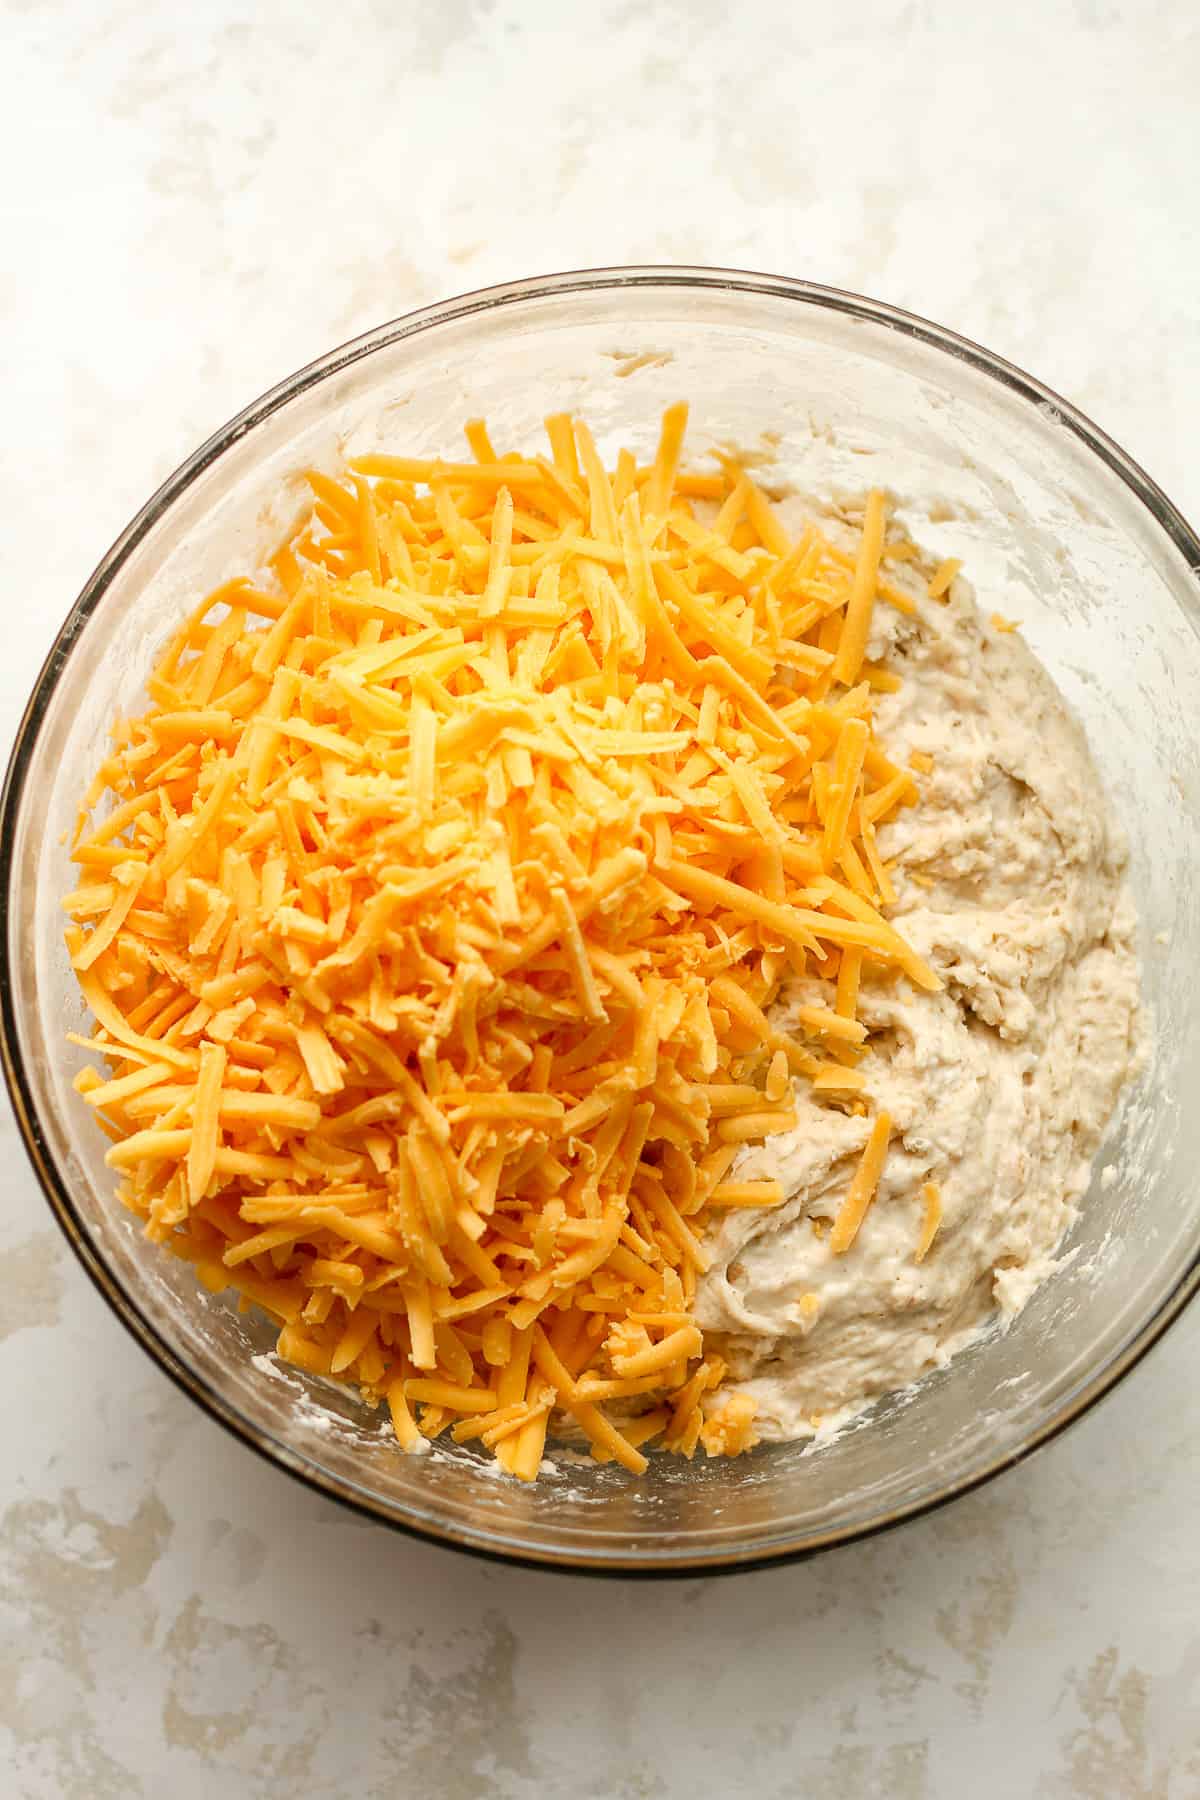
After 30 minutes, add the cheddar cheese. Then start the stretch and folds. Use your hand and lift the dough up on one side, stretching it upward, and then punch into the center of the dough. Turn the dough and repeat. Continue this process for about 30 seconds. This is the STRETCH AND FOLDS.
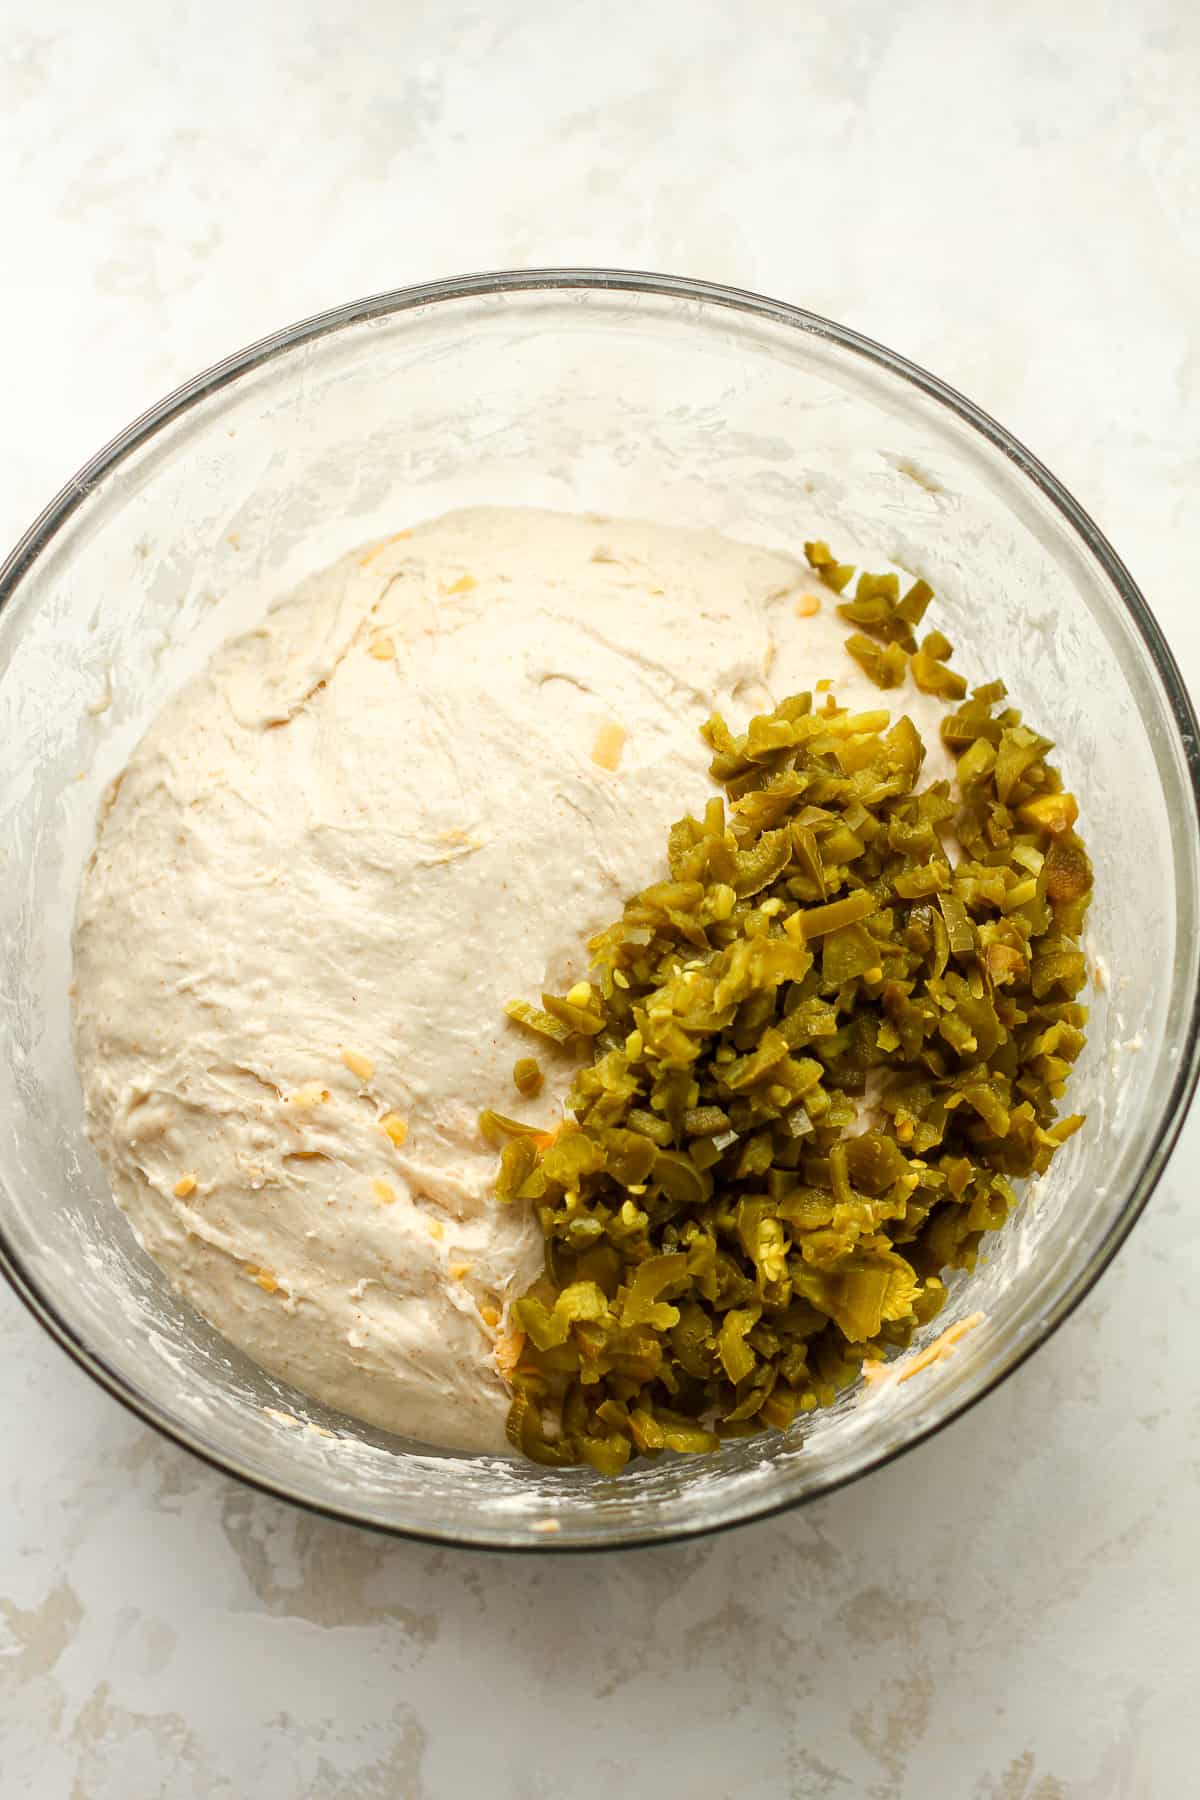
After another 30 minutes, add the diced jalapeños and do another round of stretch and folds.
You’ll want to try to get most of the cheese and jalapeños in the center of the dough during this process. Form the dough into a smooth’ish ball, and place towel back in the bowl.
ADDITIONAL STRETCH AND FOLDS: I recommend doing additional stretch and folds if time permits. Do these every 30 minutes for 2-3 more times to further develop the gluten structure.
Step 4
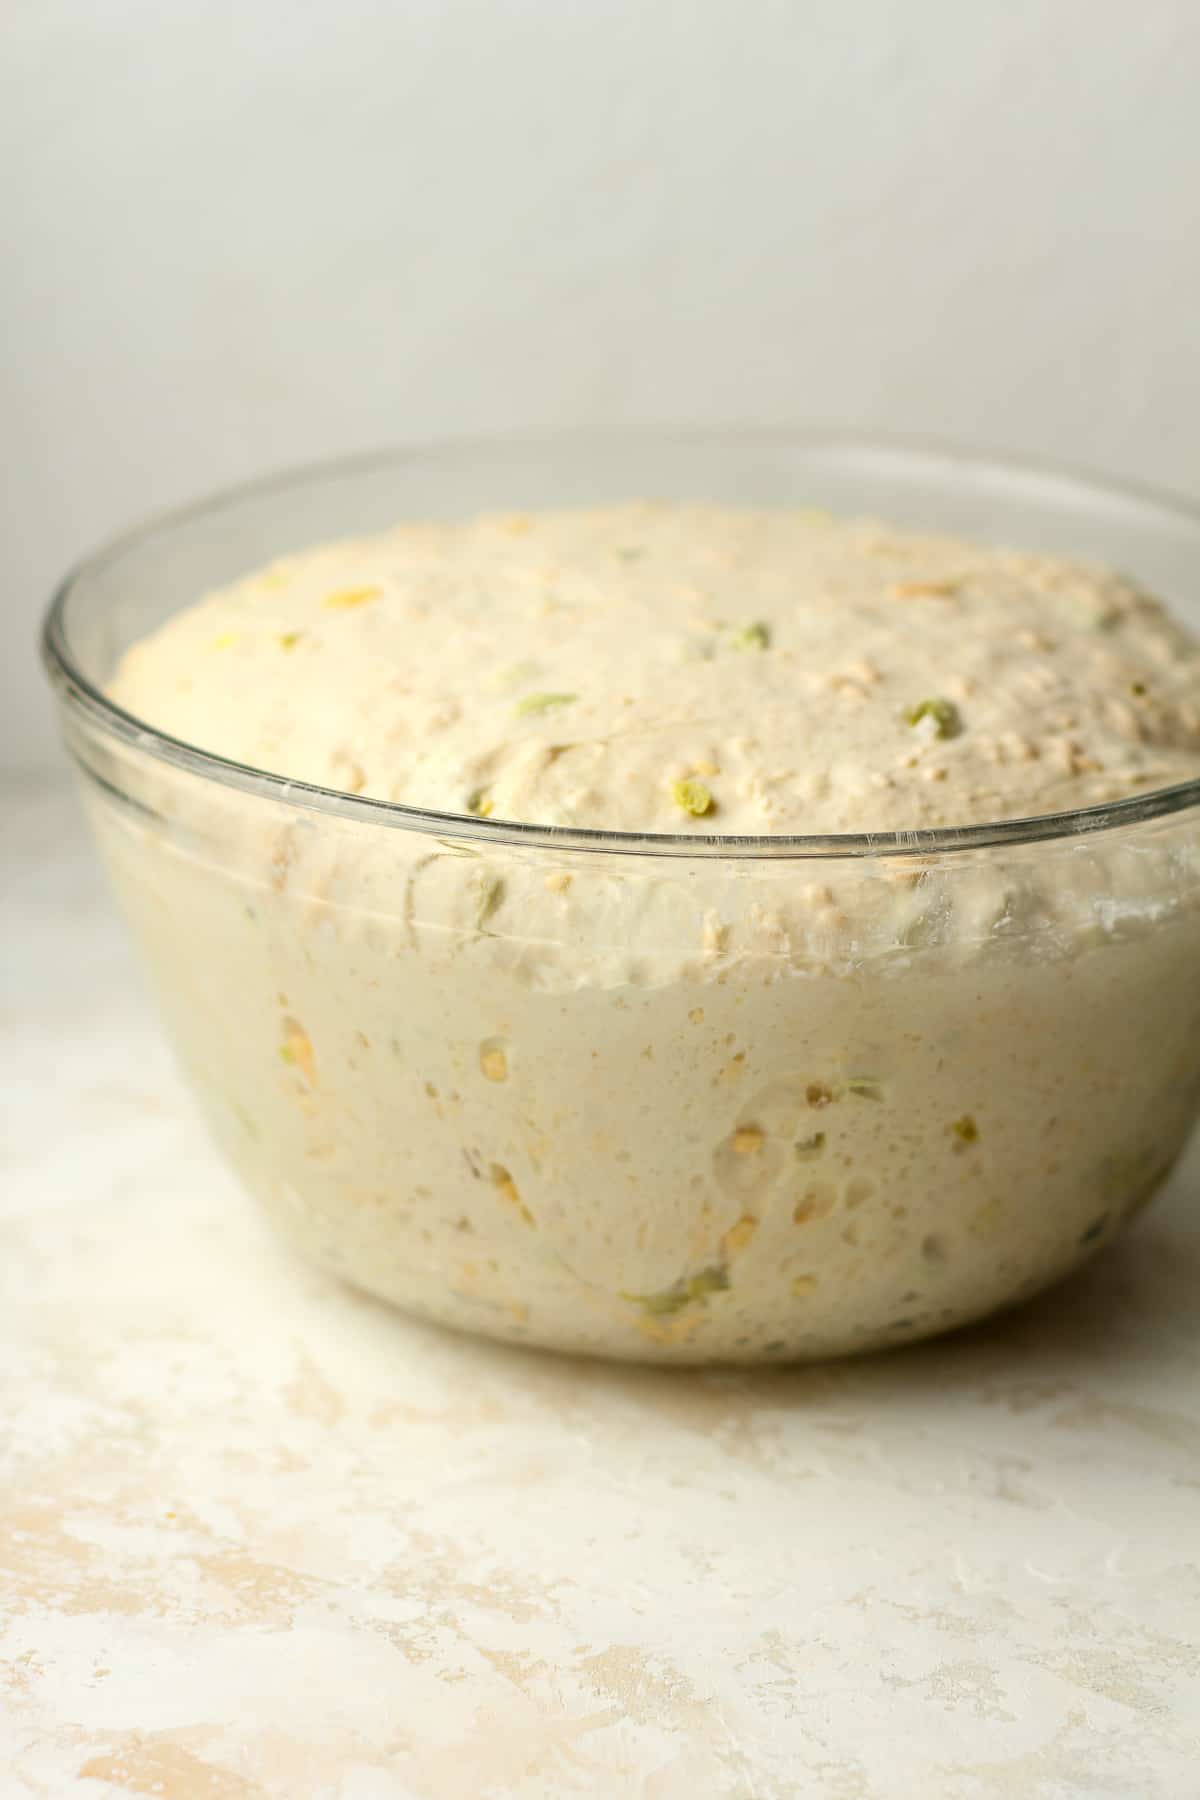
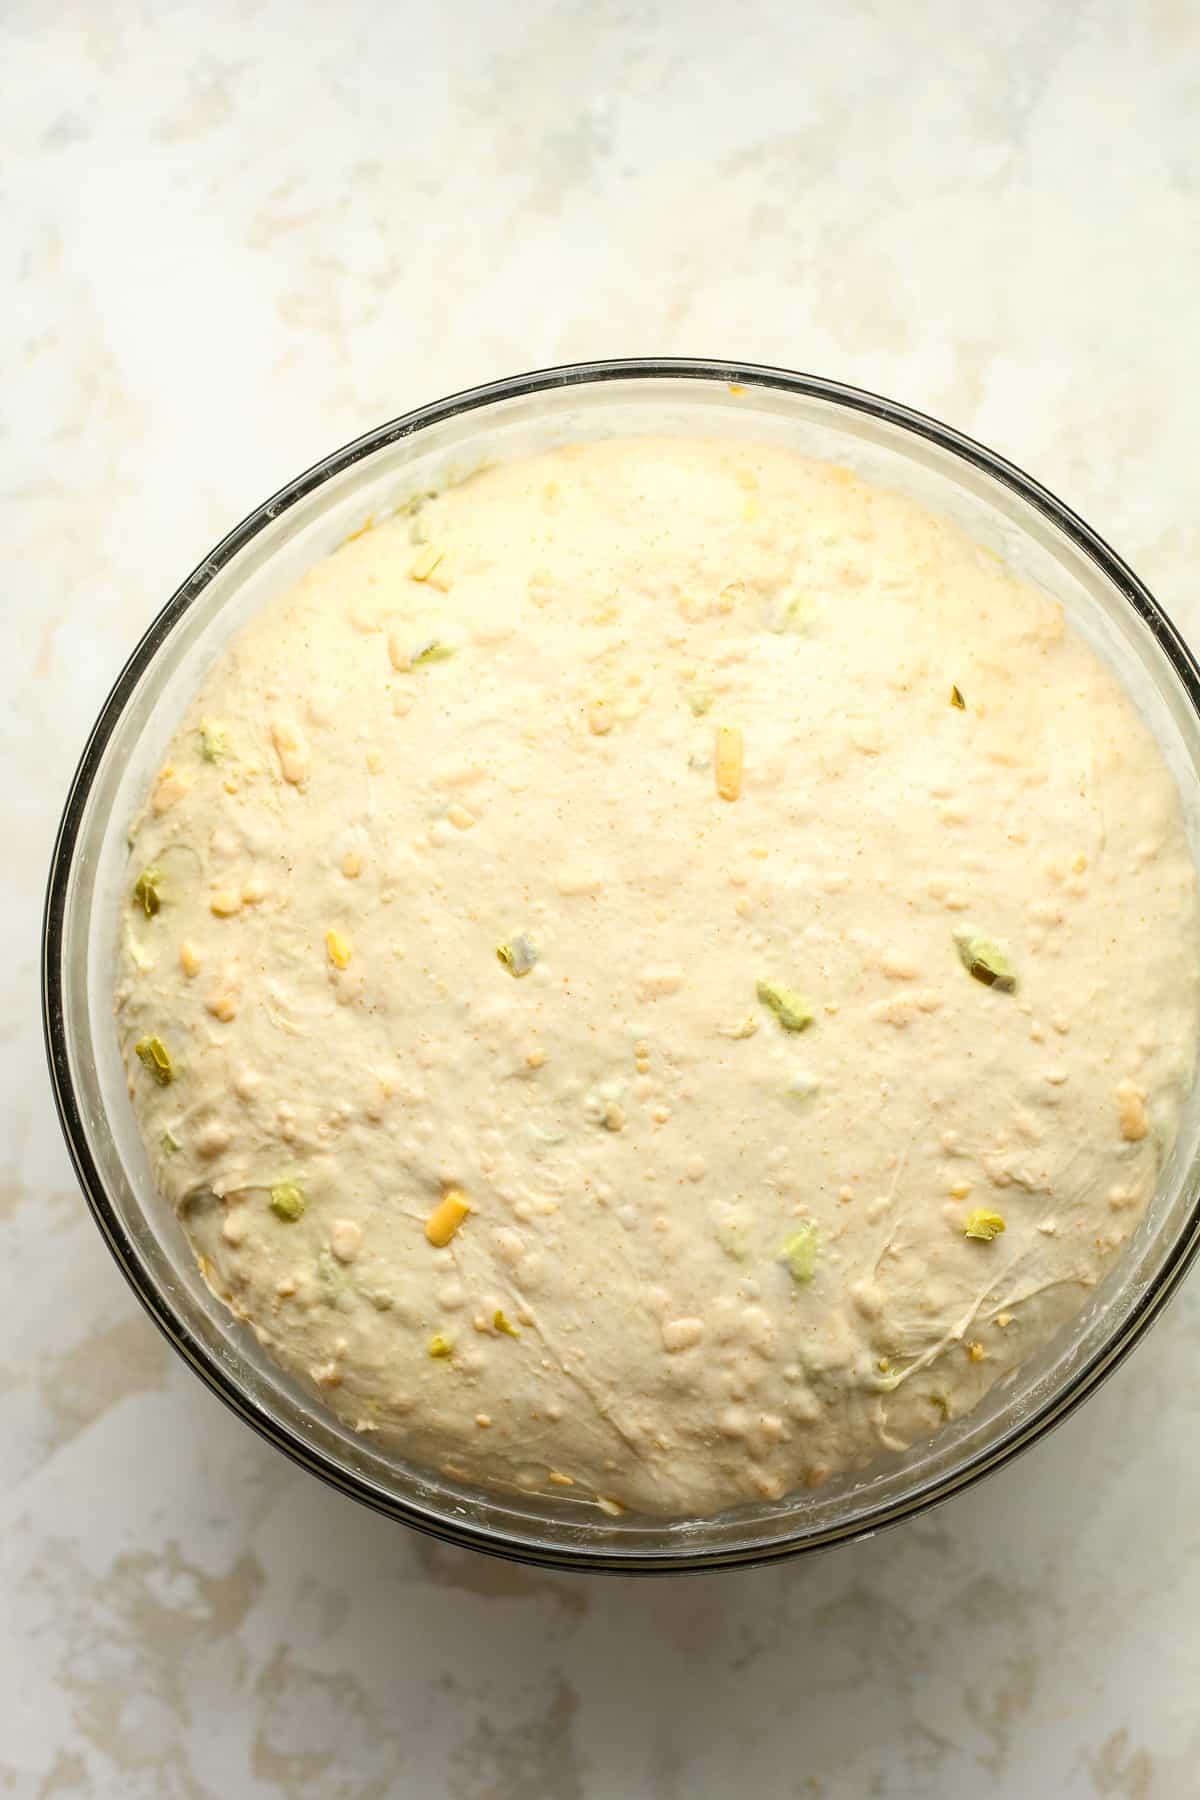
Let the dough rise for 6-8 hours, or overnight. It should almost double in size and appear soft on top. Small air bubbles may appear as well. This is the BULK RISE.
Step 5
Add a light dusting of flour to a baking mat or clean surface. Remove the dough to the mat and gently form into your desired shape, usually round or oblong. Don’t punch the dough down because you don’t want to remove all the air. Let dough sit for five minutes.
Step 6
After five minutes, use your hands to pull the dough toward you, dragging it along the mat to tighten it up. Repeat in the other directions to tighten. (Make sure you don’t have too much flour on the surface when tightening the dough, so there is some needed friction necessary to tighten it.)
Step 7
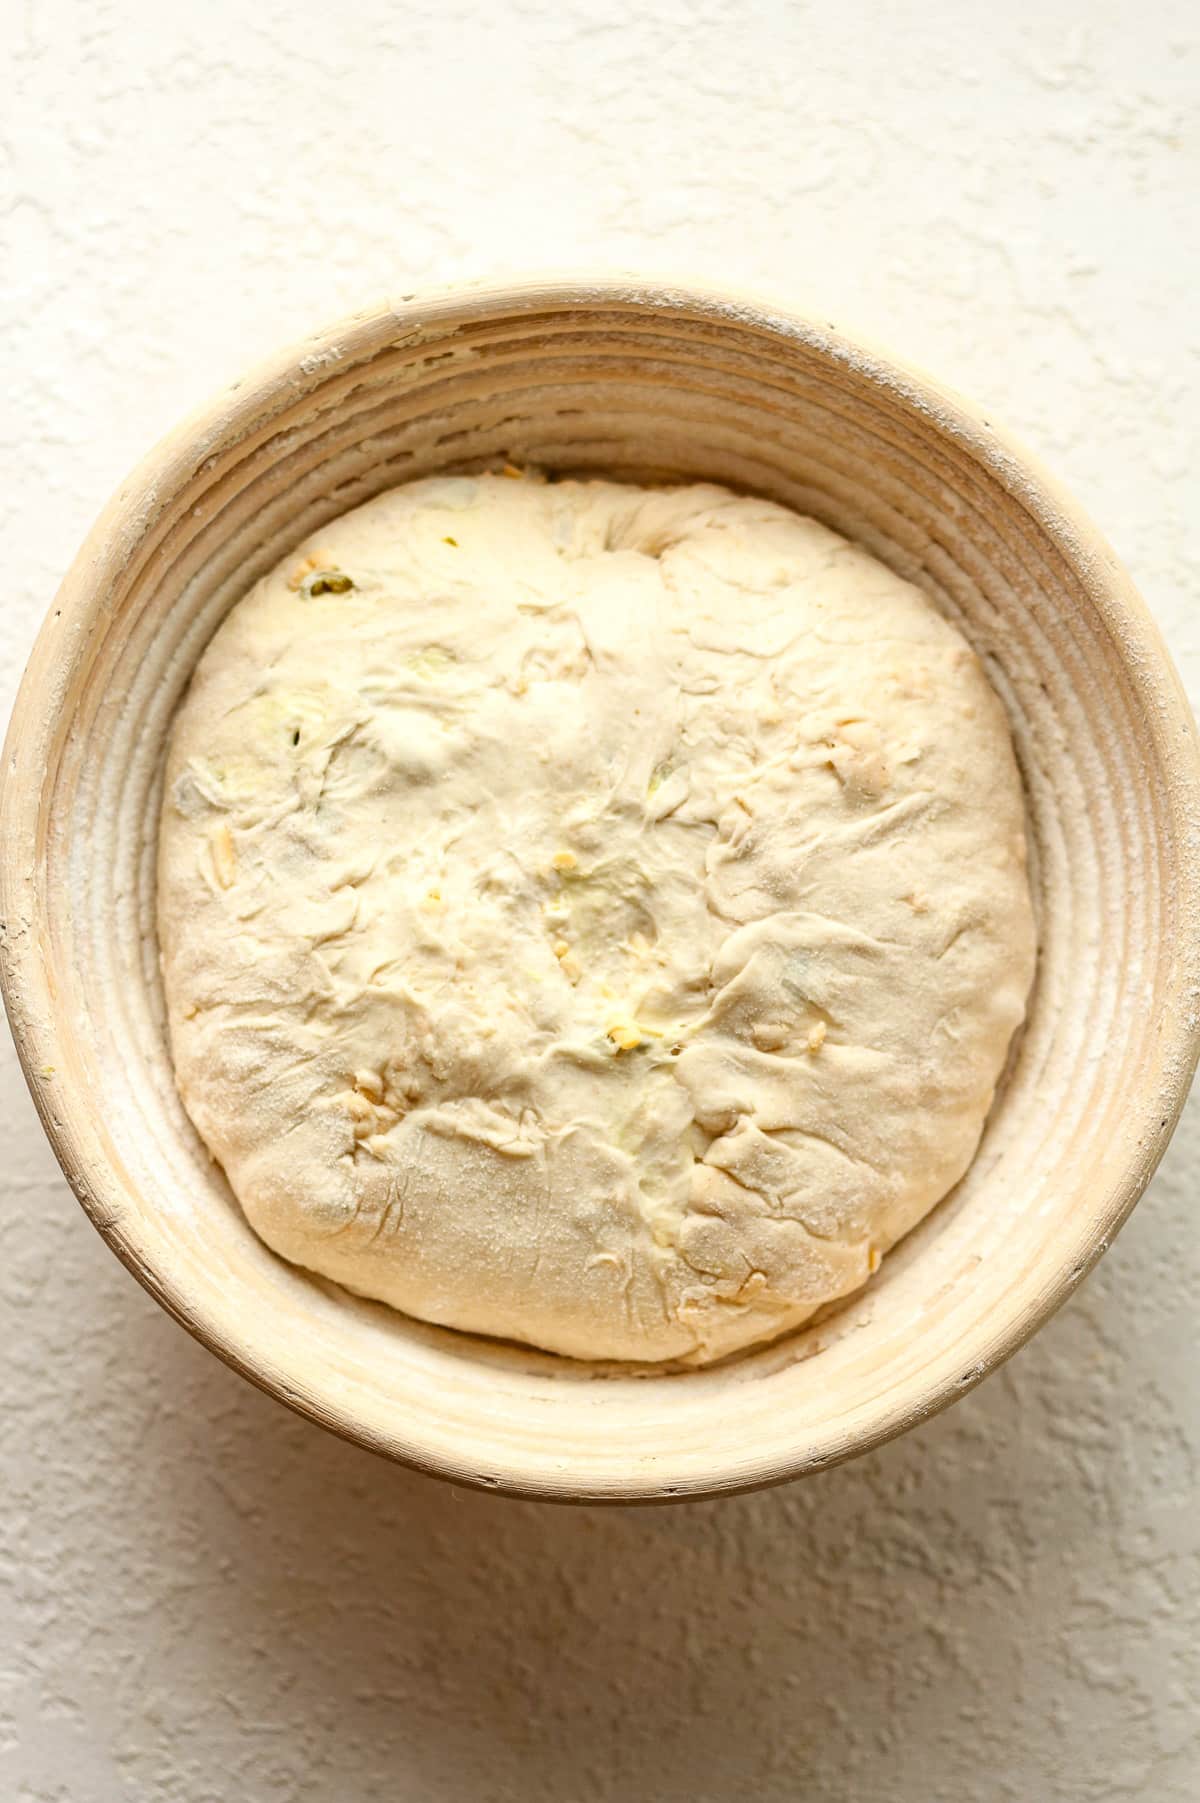
Place the dough, seam side up, in a bowl lined with a towel or a prepared banneton basket (pictured below). Cover with a damp towel and let it sit for two to four hours. For this bread, it does not need to double again in size. This is the SECOND RISE.
For both the bowl and banneton basket, you’ll need to prepare them. For a bowl, add a thin tea towel dusted with rice flour (or regular flour will work in a pinch). For the basket, add some rice flour as well. The rice flour will help prevent sticking while regular flour may not do this as well.
Step 8
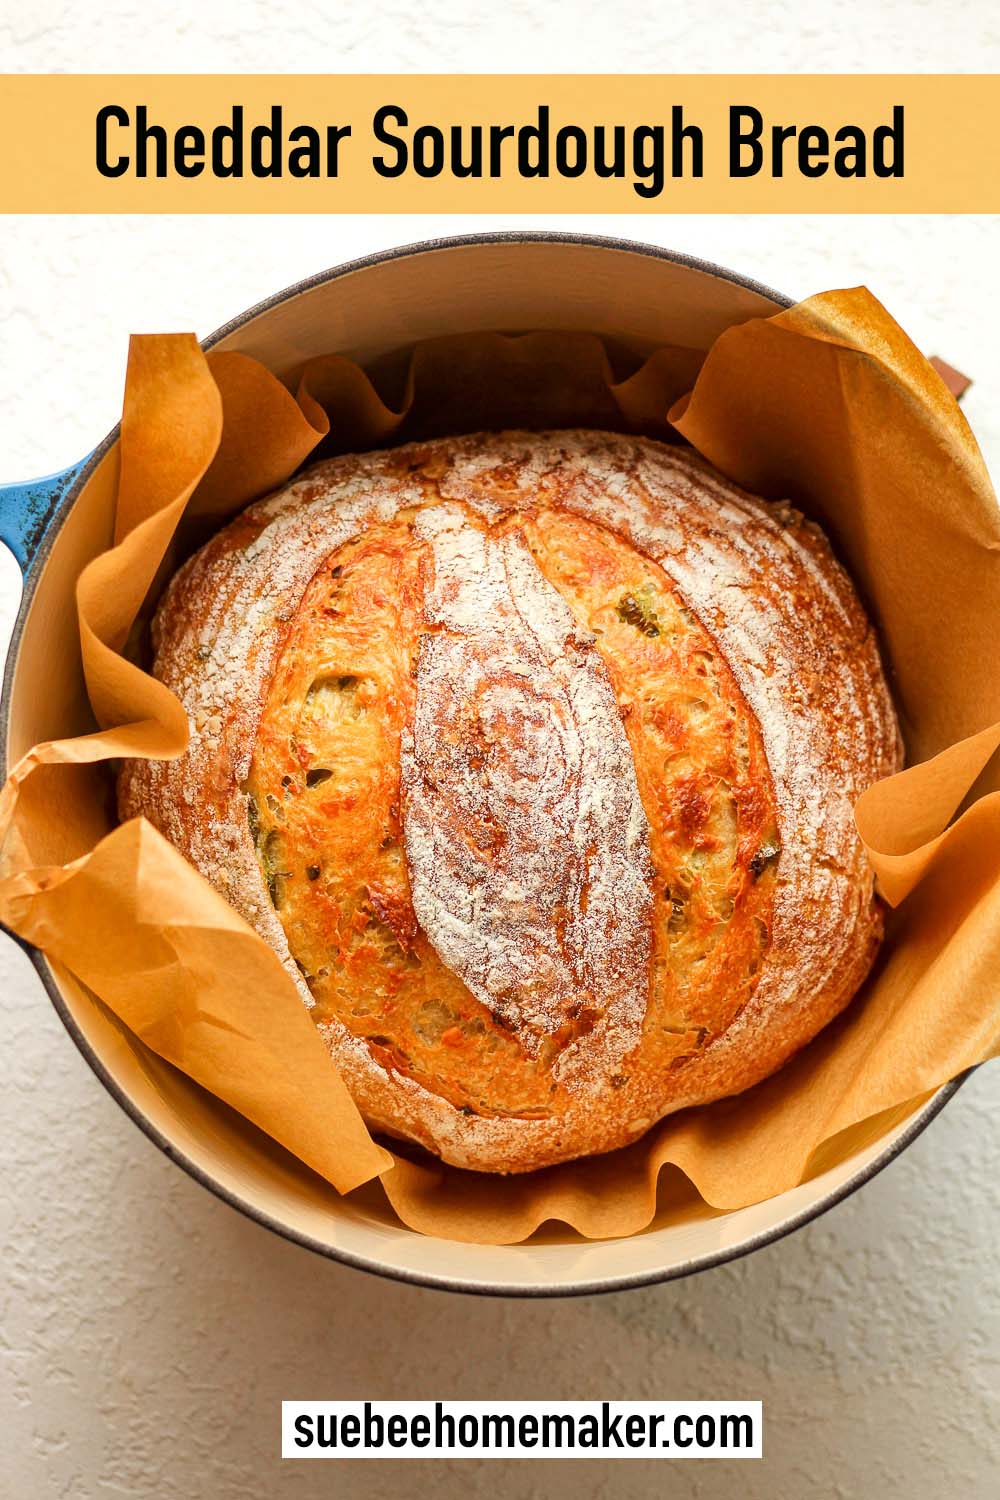
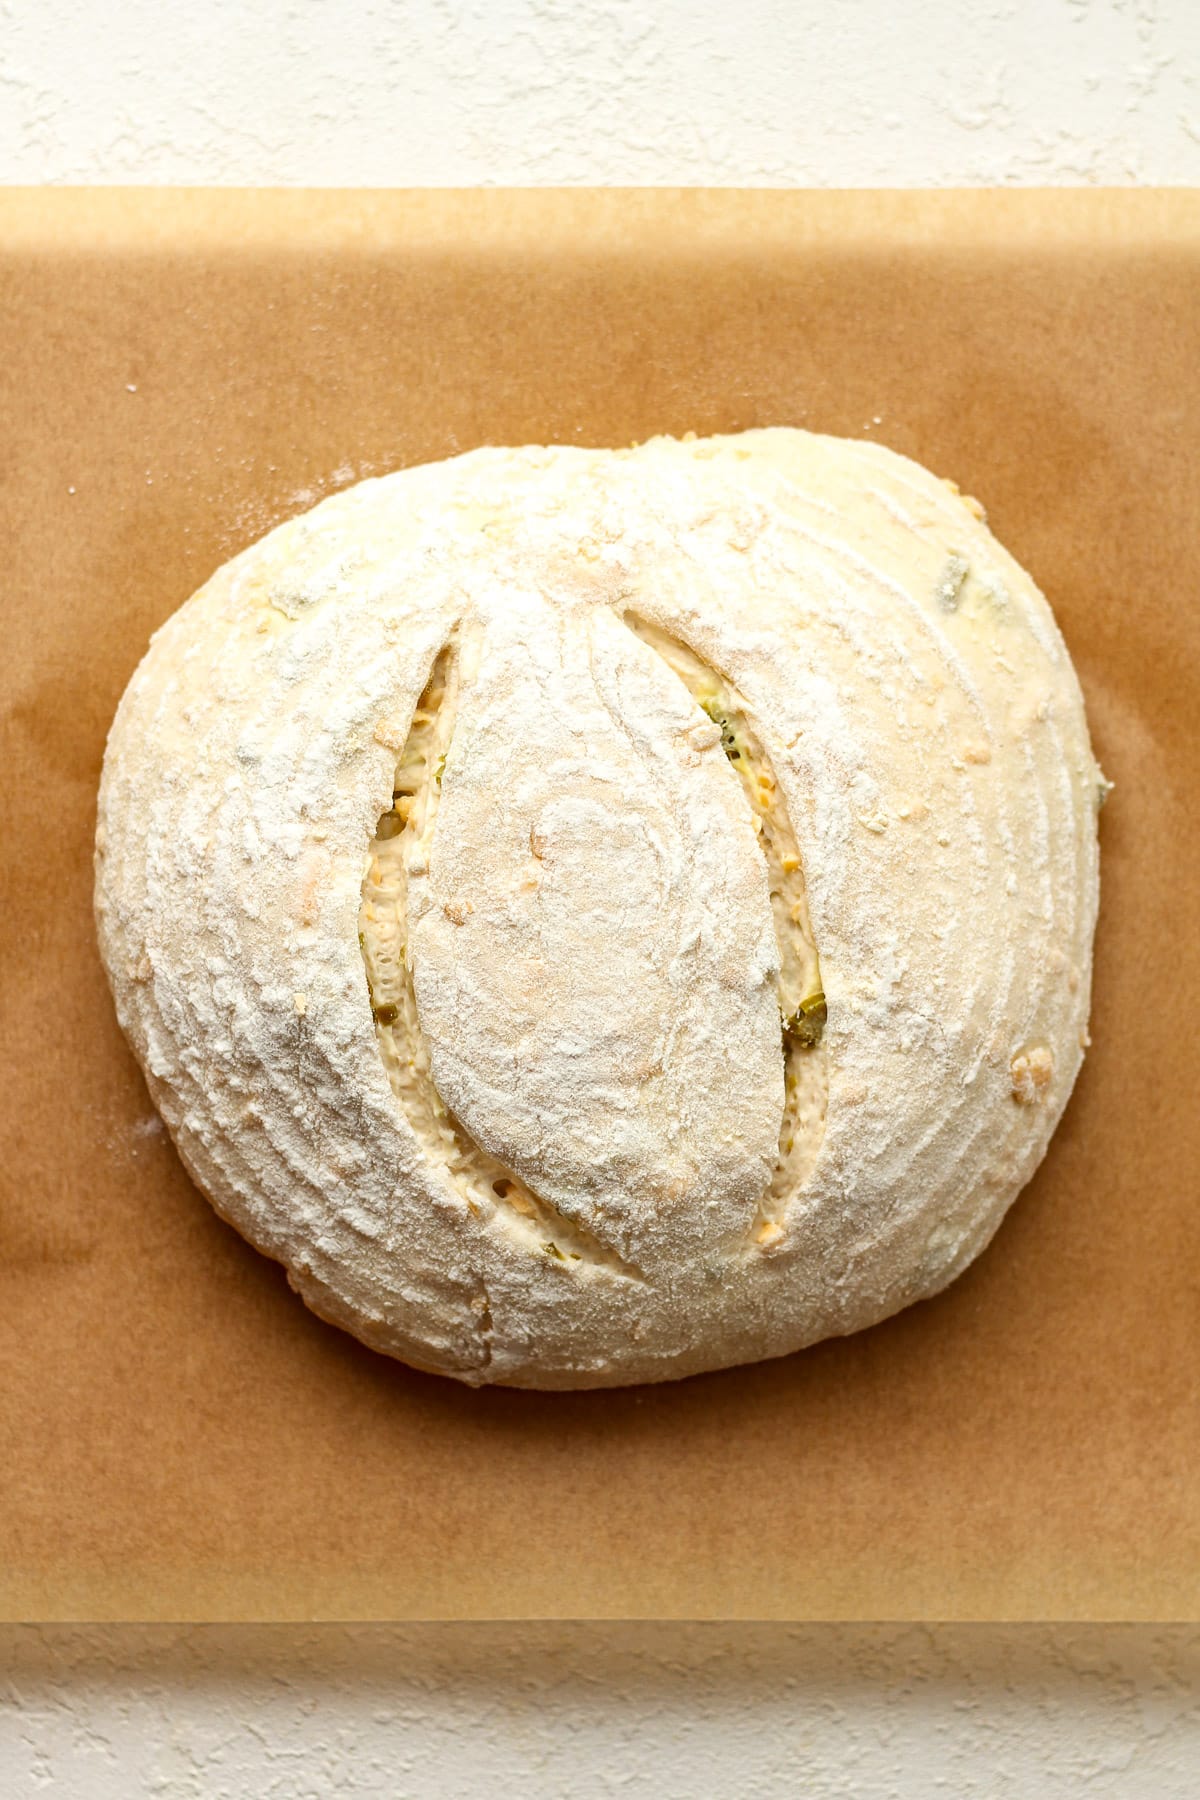
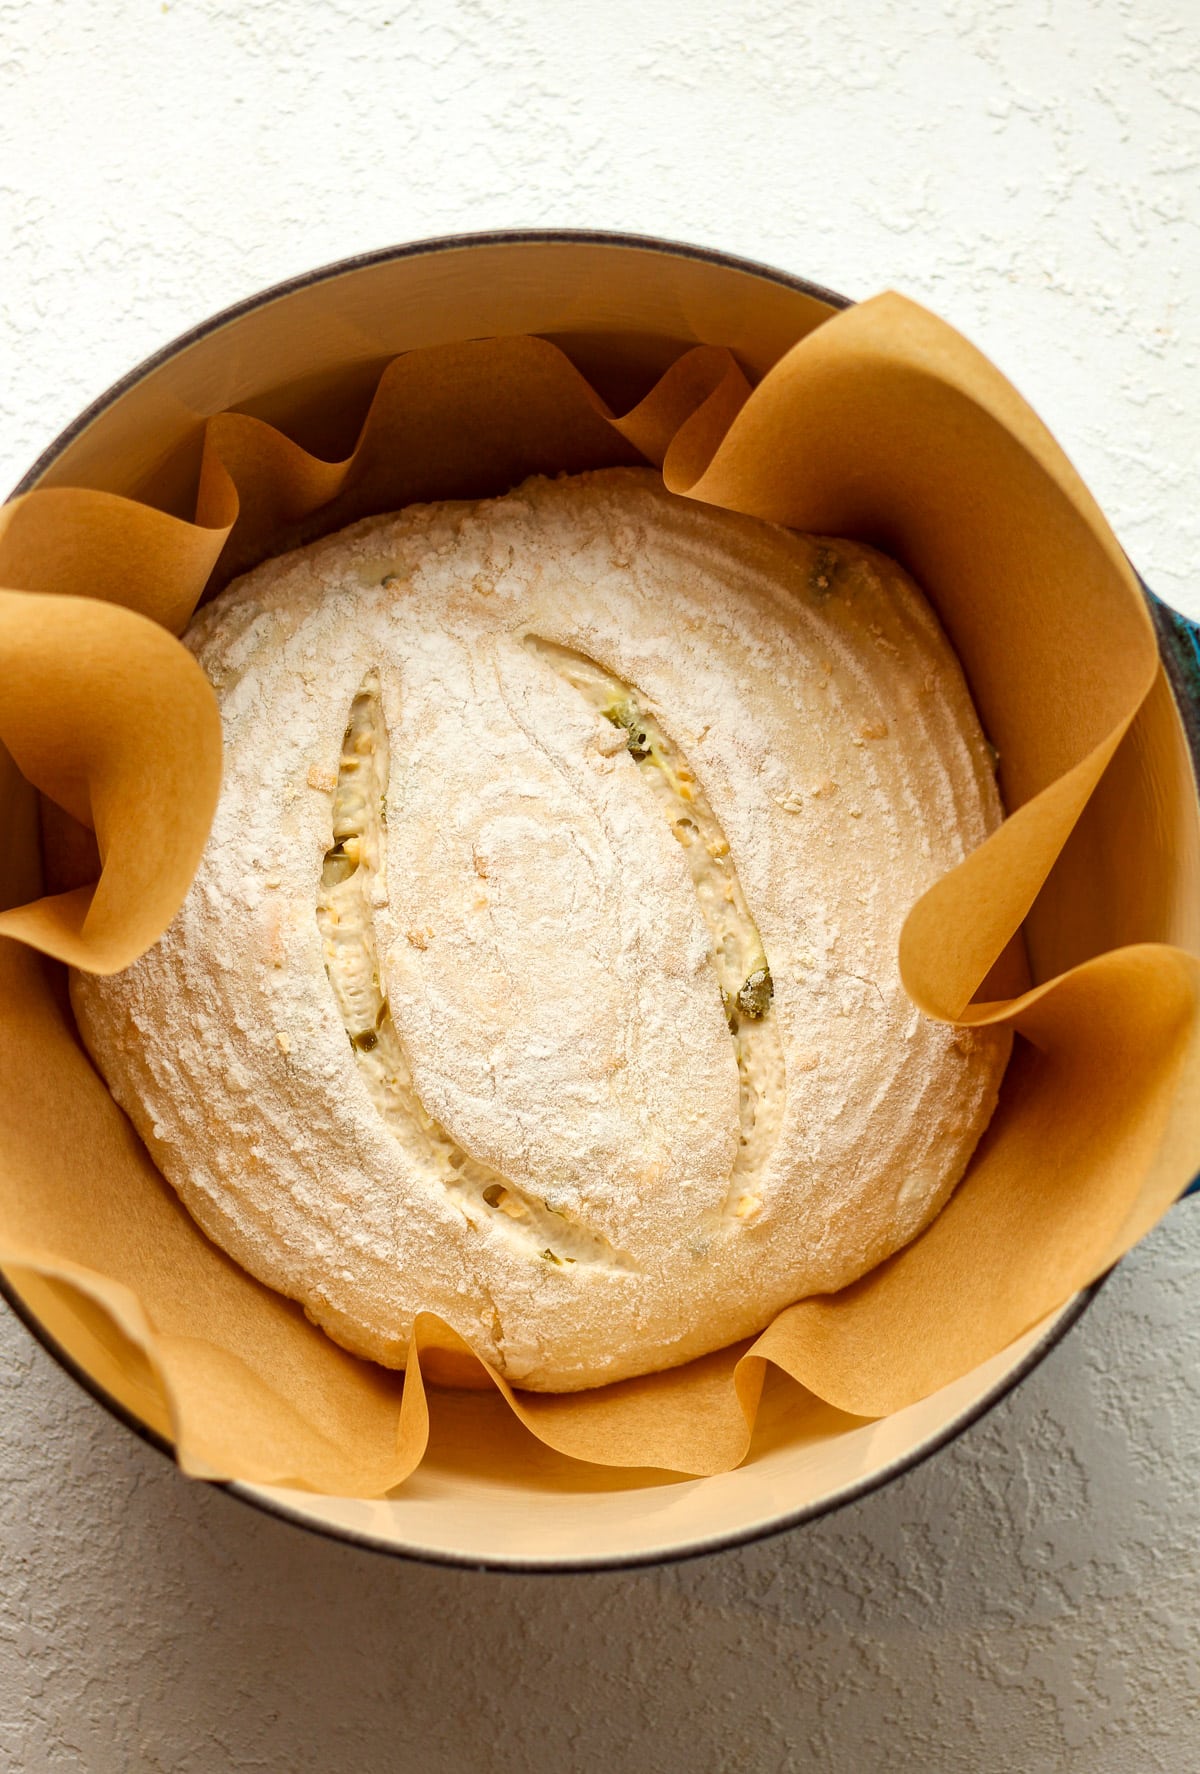
Prepare for baking. Preheat oven to 450 degrees. Carefully remove the loaf to a piece of parchment paper, smooth side up. Then take a serrated edge knife or a bread lame (linked below), and score the bread a couple of times. Place the bread (including parchment paper) into a Dutch oven.
Step 9
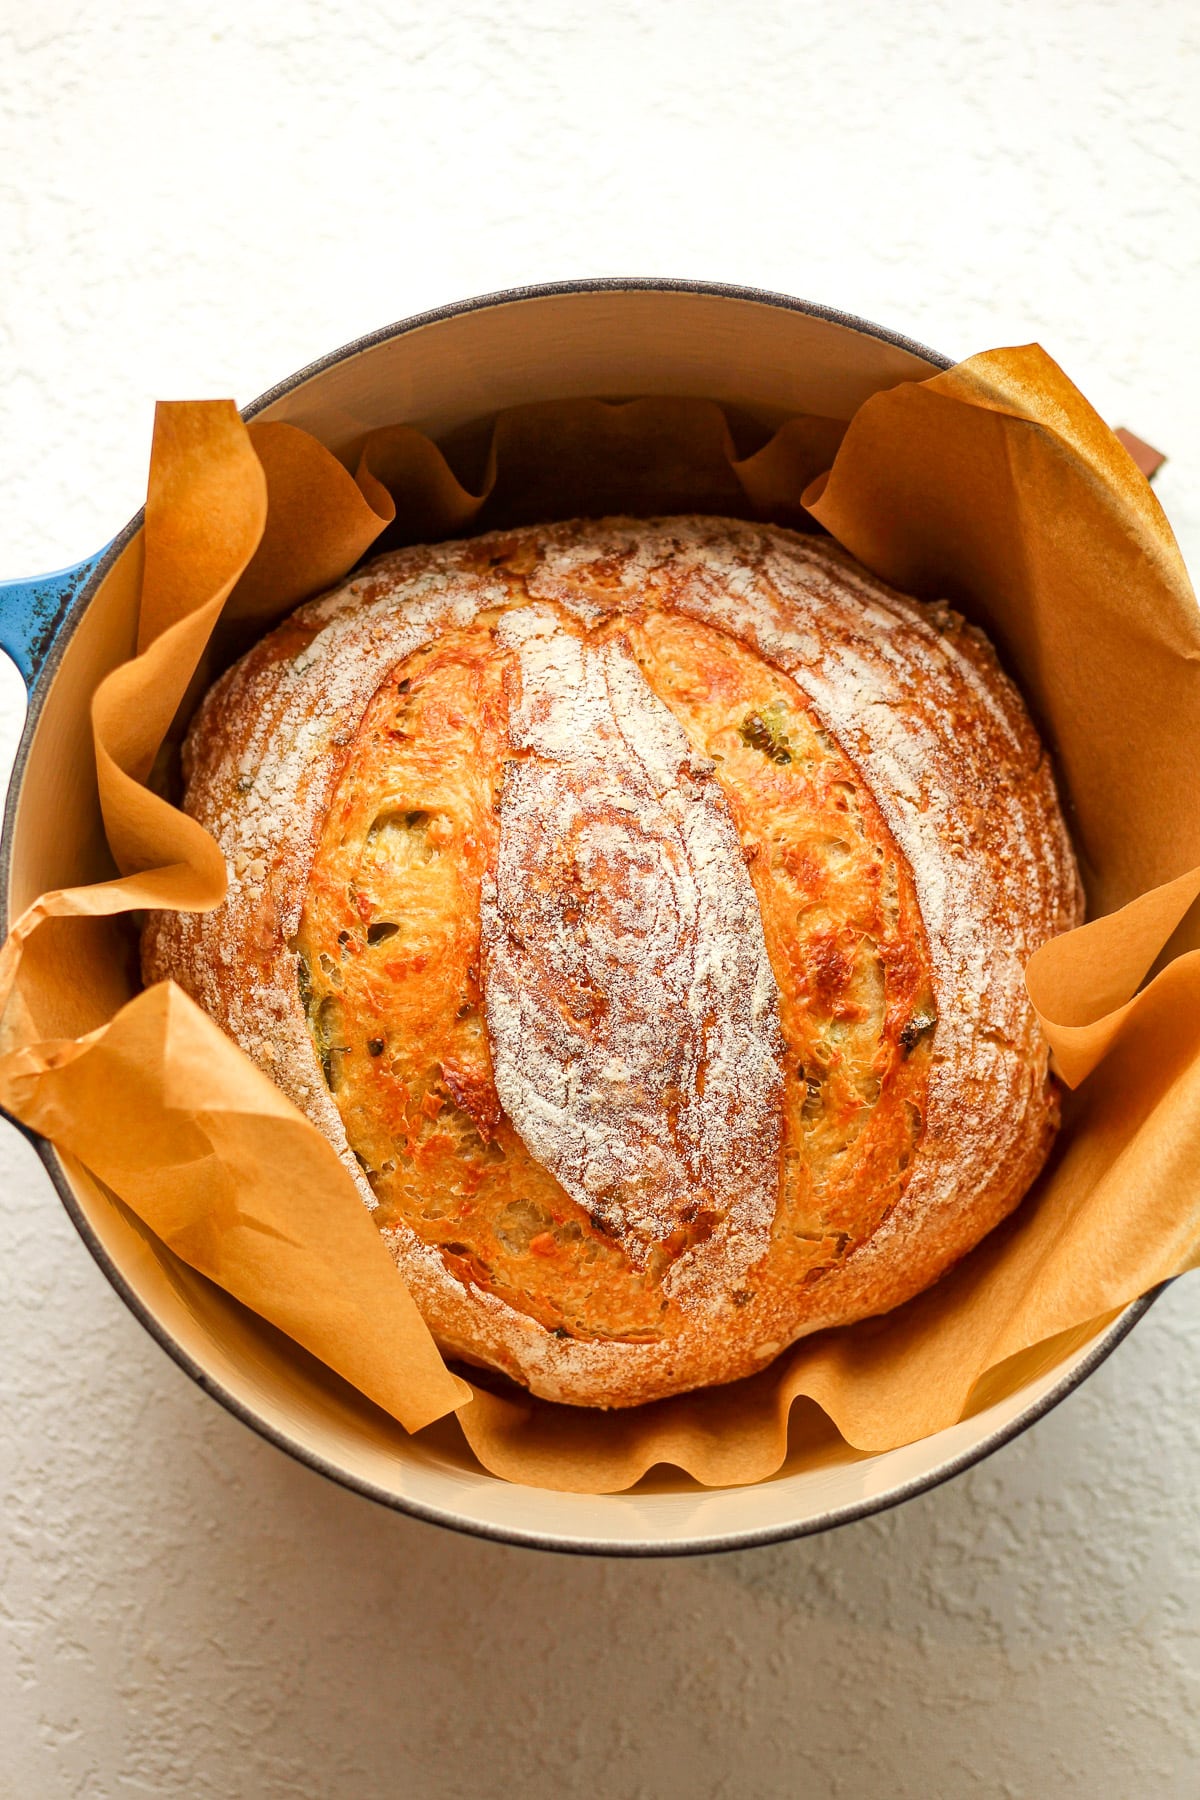
Bake. Add the lid to the pan and bake for 20 minutes. Then remove the lid and bake an additional 30 minutes, or until bread is nice and golden on top and bottom.
Remove pan and then use parchment paper as handles to lift the bread out of the pan. Place on a cooling rack. Let the bread COMPLETELY COOL before slicing.
Frequently Asked Questions
- What is sourdough? Sourdough is a slow-fermented bread that doesn’t require store-bought yeast to make it rise. It’s a LIVE fermented culture that creates a natural leavening agent. A starter is required to make sourdough.
- What is a starter? A starter is a live culture made over a series of days, consisting of flour and water. It can be kept alive for years with periodic feeding.
- How do you make a starter? A starter can be created in less than a week with a simple combo of unbleached flour and filtered water. It’s a process of removing half of the starter and then “feeding” it every day, storing in a jar on your countertop, and getting it to a bubbly, sour point where it floats in water. More on this later.
- Is sourdough bread healthy? Sourdough bread is NOT gluten-free, as it contains flour, but its long fermentation helps break down this gluten. It’s easier on the gut because it’s more digestible and easier for the body to absorb. It’s also DELISH!
How to prepare a banneton basket:
A new banneton basket will need to be prepped for baking. Spray the basket with spritzes of water (or just use your hand to sprinkle water) and then give it a dusting of rice flour. Let the basket completely dry before using it. (You will want to do this at least an hour before you proof your first loaf of bread.)
See my post on how to store sourdough bread for maximum freshness! Let’s not let our hard work go to waste and savor every single morsel of sourdough.
Expert Tips:
- Make sure your starter is ready. If you store your starter in the refrigerator between use, make sure it’s active and ready to go before baking with it. I often feed it 2-3 times before using it after resting (i.e. sleeping in the refrigerator).
- Be flexible. If you’re bulk rise is taking longer than normal, or the starter isn’t as bubbly as you’d like it, be flexible. You can add time to either of these and still make delicious bread. Many factors will come to play as to when your sourdough is ready. In the summer months, the humidity and heat will make the process shorter. In the winter months, the process may be longer.
- Measure carefully and then adjust as needed. Make sure you use a digital scale to measure your ingredients in grams. This is important. Even with measuring carefully, you MAY need to adjust slightly. When your hands are on the dough doing stretches and folds, you will come to feel if more water/more flour is needed to make the dough pliable and soft. This comes with practice.
- Practice. As I said above, as you practice making this bread and enjoying the bounties, you’ll learn all the little nuances of the sourdough process. Practice makes perfect!
- Let the bread cool. One of the biggest mistakes you can make is to slice the bread immediately after coming out of the oven. If you do this, it will be doughy/gummy tasting. Let the bread completely cool before slicing!
This bread is 67% hydration. The higher the hydration, the more open crumb. However, higher hydration dough is harder to handle, but doable!

xoxo ~Sue

Jalapeno Cheddar Sourdough Bread Recipe
Ingredients
- 75 grams bubbly sourdough starter
- 350 grams filtered water – warmed slightly
- 300 grams bread flour – unbleached
- 200 grams all-purpose flour – unbleached
- 20 grams whole wheat flour – unbleached
- 10 grams fine sea salt
- 130 grams sharp cheddar cheese – grated
- 50 grams jarred jalapeno slices – patted dry
Instructions
- Carefully measure out the ingredients in the order listed. Combine filtered water and sourdough starter in a mixing bowl and stir well with a fork. Add the three types of flour and sea salt. Stir again.75 grams bubbly sourdough starter, 350 grams filtered water, 300 grams bread flour, 200 grams all-purpose flour, 20 grams whole wheat flour, 10 grams fine sea salt
- Then use your hands to bring the ingredients together. It will look shaggy. Cover with a damp towel and let it sit for 30 minutes. (Be sure to set a timer.) This is the AUTOLYSE.
- After 30 minutes, add the cheddar cheese. Then start the stretch and folds. Use your hand and lift the dough up on one side, stretching it upward, and then punch into the center of the dough. Turn the dough and repeat. Continue this process for about one minute. This is the STRETCH AND FOLDS.130 grams sharp cheddar cheese
- After 30 minutes, add the diced jalapeños and do another round of stretch and folds50 grams jarred jalapeno slices
- You’ll want to try to get most of the cheese and jalapeños in the center of the dough during the stretch and folds. Form the dough into a smooth’ish ball, and place towel back in the bowl.
- ADDITIONAL STRETCH AND FOLDS: I recommend doing additional stretch and folds if time permits. Do these every 30 minutes for 2-3 more times to further develop the gluten structure.
- Let the dough rise for 6-8 hours, or overnight. It should almost double in size and appear soft on top. Small air bubbles may appear as well. This is the BULK RISE.
- Add a light dusting of flour to a baking mat or clean surface. Remove the dough to the flour and gently form into your desired shape, usually round or oblong. Don’t punch the dough down because you don’t want to remove all the air. Let dough sit for five minutes.
- After five minutes, use your hands to pull the dough toward you, dragging it along the mat to tighten it up. Repeat in the other directions to tighten.
- Place the dough in a bowl (lined with a floured towel) or a prepared banneton basket (smooth side down). Cover with a damp towel and let it sit for about two to four hours. For this bread, it does not need to double again in size. This is the SECOND RISE.
- Prepare for baking. Preheat oven to 450 degrees. Carefully remove the loaf to a piece of parchment paper, smooth side up. Then take a serrated edge knife (linked below) or a bread lame, and score the bread a couple of times. Place the bread (including parchment paper) into a dutch oven.
- Add the lid to the pan and bake for 20 minutes. Then remove the lid and bake an additional 30 minutes or until bread is golden brown on the top and bottom.
- Remove pan and then use parchment paper as handles to lift the bread out of the pan. Place on a cooling rack. Let the bread COMPLETELY COOL before slicing.
I’ve been learning to make sourdough for about a year now and this is the only recipe I’ve found that turns out perfect every single time. My family asks for it every time we get together. I use a block of medium or sharp cheddar that I shred and chopped candied jalapenos from a local market. Thank you for sharing!
This makes me so happy! Thank you Sara!
Question!! Can I add my jalapeño and cheddar cubes during my inital shaping instead of my stretch and folds? Thanks!
Yes, you can add everything in your initial shaping. It’s just a little more difficult to handle but doable.
I love this recipe. I am new to sourdough bread. This recipe was my second attempt at sourdough bread. Turned out beautifully. I now bake several weekly for my husbands lunch sandwiches and friends. I have used this recipe for several different inclusions not just the jalapeno and cheddar. Thank you!
I love hearing this, Benda!
Gah!! What an amazing bread, and your instructions, Sue, are so easy to follow; it was my first try at something besides plain sourdough! AH-MAZING toasted with butter!
This is our favorite sourdough bread recipe!
Is there a way to see your recipes in oz., cups, etc instead of grams? I’m old school and like to use that formula best
You can use a unit converter to see the measurements in ounces. It will be far less precise, however.
I love the sourdough train and this beautiful loaf was so much fun to put together and my family loved it.
Holy Jalapeno! This is outstanding…perfect for chili night.
I made this last night with some chili and it was incredible!! Thank you for the recipe! It was so light and perfect warm with butter!
I’m in the first steps of making this bread and want to make sure that I should be covering with a damp towel in between stretch and folds. I think that’s the case but would appreciate knowing for sure!
Yes, cover it between stretch and folds!
This was delicious!! It turned out amazing. I made a double batch, one loaf in the dutch oven and two loaves in regular uncovered loaf pans with added steam. Both turned out perfect! I like spice so I made a jalapeno compound butter to go with it as well. Can’t stop eating it!
This bread was so good! I shredded my cheese straight off the block, chopped my jalapeños, and added them both into the last 3 of my 6 stretches and folds. Baked up beautifully and I’m excited to make some sandwiches with it this week!
Thanks so much for trying this recipe, Lynn! Our favorite sourdough recipe!
This bread is like crack cocaine (I really wouldn’t know). But I know that I could sit down and eat half a loaf without getting up. It’s that good.
I followed Sue’s instructions for making my own starter (Mr. Jimmy) and now I’m hooked. I have the big Emile Henry ceramic bread pan so I can make double loaves and I’m using the bread to bribe neighbors and friends. The neighbor across the street is a doctor and he was able to hook me up with some… oh, I probably can’t talk about this.
Get on the band wagon. This stuff is crazy good and fun too!
Ha! You make me laugh! Mr. Jimmy and you make a great team! 🙂
My sister SueBeeHomemaker (yes, she’s my sis) brought this to Cali for a visit and bread will never be the same for me. We both love spicy, cheesy things and OMG,this is the ultimate. Toasted with more cheese on top, delicious!! I think I’ll have to go to Texas to visit just to have more please!!!
I love the bread, but how do you keep it from burning on the bottom? I have an LG stove, and the elements are on the top of the stove. It has a big fan in the back. I first used a Saladmaster Dutch Oven, but it was too broad, and the bread spread out. So, I purchased a Pioneer Woman enamel cast iron one (5 quarts), which still got too burnished. Then a friend brought me over a smaller one, and I will try that one tomorrow with my Cranberry Nut bread. If I had time, I would have made the Jalapeno Cheddar Sourdough Bread again. It is fabulous. However, I used fresh jalapenos because my husband did not care for the spice, and I had to take out the seeds and membrane. Sigh…. I wish I could keep them in!
If anyone has an idea of the bottom getting too hot and crispy-burned, please let me know. I was looking at a different Dutch Oven, but they are so costly. I thought it would work so well with the Pioneer Woman cast-iron, with an enamel overtop. My thoughts are that it is my oven.
Nanc
I was with the understanding that if you put a baking sheet or a pizza stone on the rack below your DO it prevents the bottom from burning. Another option is using a silicone sling in your DO rather than parchment paper or both.
I LOOOVVVVEEEW this bread. This was my very first sourdough recipe to ever make, and it was surprisingly easy – and so DELICIOUS. Just enough cheese and spice, and not too dense or dry. I especially love it toasted and it also makes a typical ham sandwich over the top yummy. Thank you, Sue, for teaching me the sourdough “ropes” and sharing this amazing recipe. It is quickly becoming a staple in our home.
You are an A+ student, Traci! I love seeing how much you are enjoying the best bread ever! 🙂
If you want to try something yummy with the Jalapeno Bread, try grilled cheese! You talk about fabulous! I used pepper jack cheese because I like it hot, and I thought I was in heaven! Thank you for the wonderful recipe!
Nanc
Your boys are so right! This is the very BEST bread you will EVER put in your mouth!! My hubby and teen daughter agree!! Almost finished the whole loaf in one night!
Yay! I’m so glad they enjoyed the bread, Cathy!
Mom, you’ve outdone yourself with this recipe. I mean – you’re simply amazing! This bread is my favorite, and I think you should send me a truckload and not give any to Josh. Now that would be funny! I can taste this bread all the way from Abilene!
Well, thank you Zachary! 🙂
This is probably my favorite recipe on the blog… and that’s saying something! This bread makes for a panini of a lifetime. My all time favorite combination is this bread, with SueBee’s pesto for a sauce, with the spatchcock turkey as a protein.
The recipe lifts my soul to places I never dreamed of. Warning – store bought sourdough will never be the same!!
I know you love it, Josh! Making more for you soon! 🙂