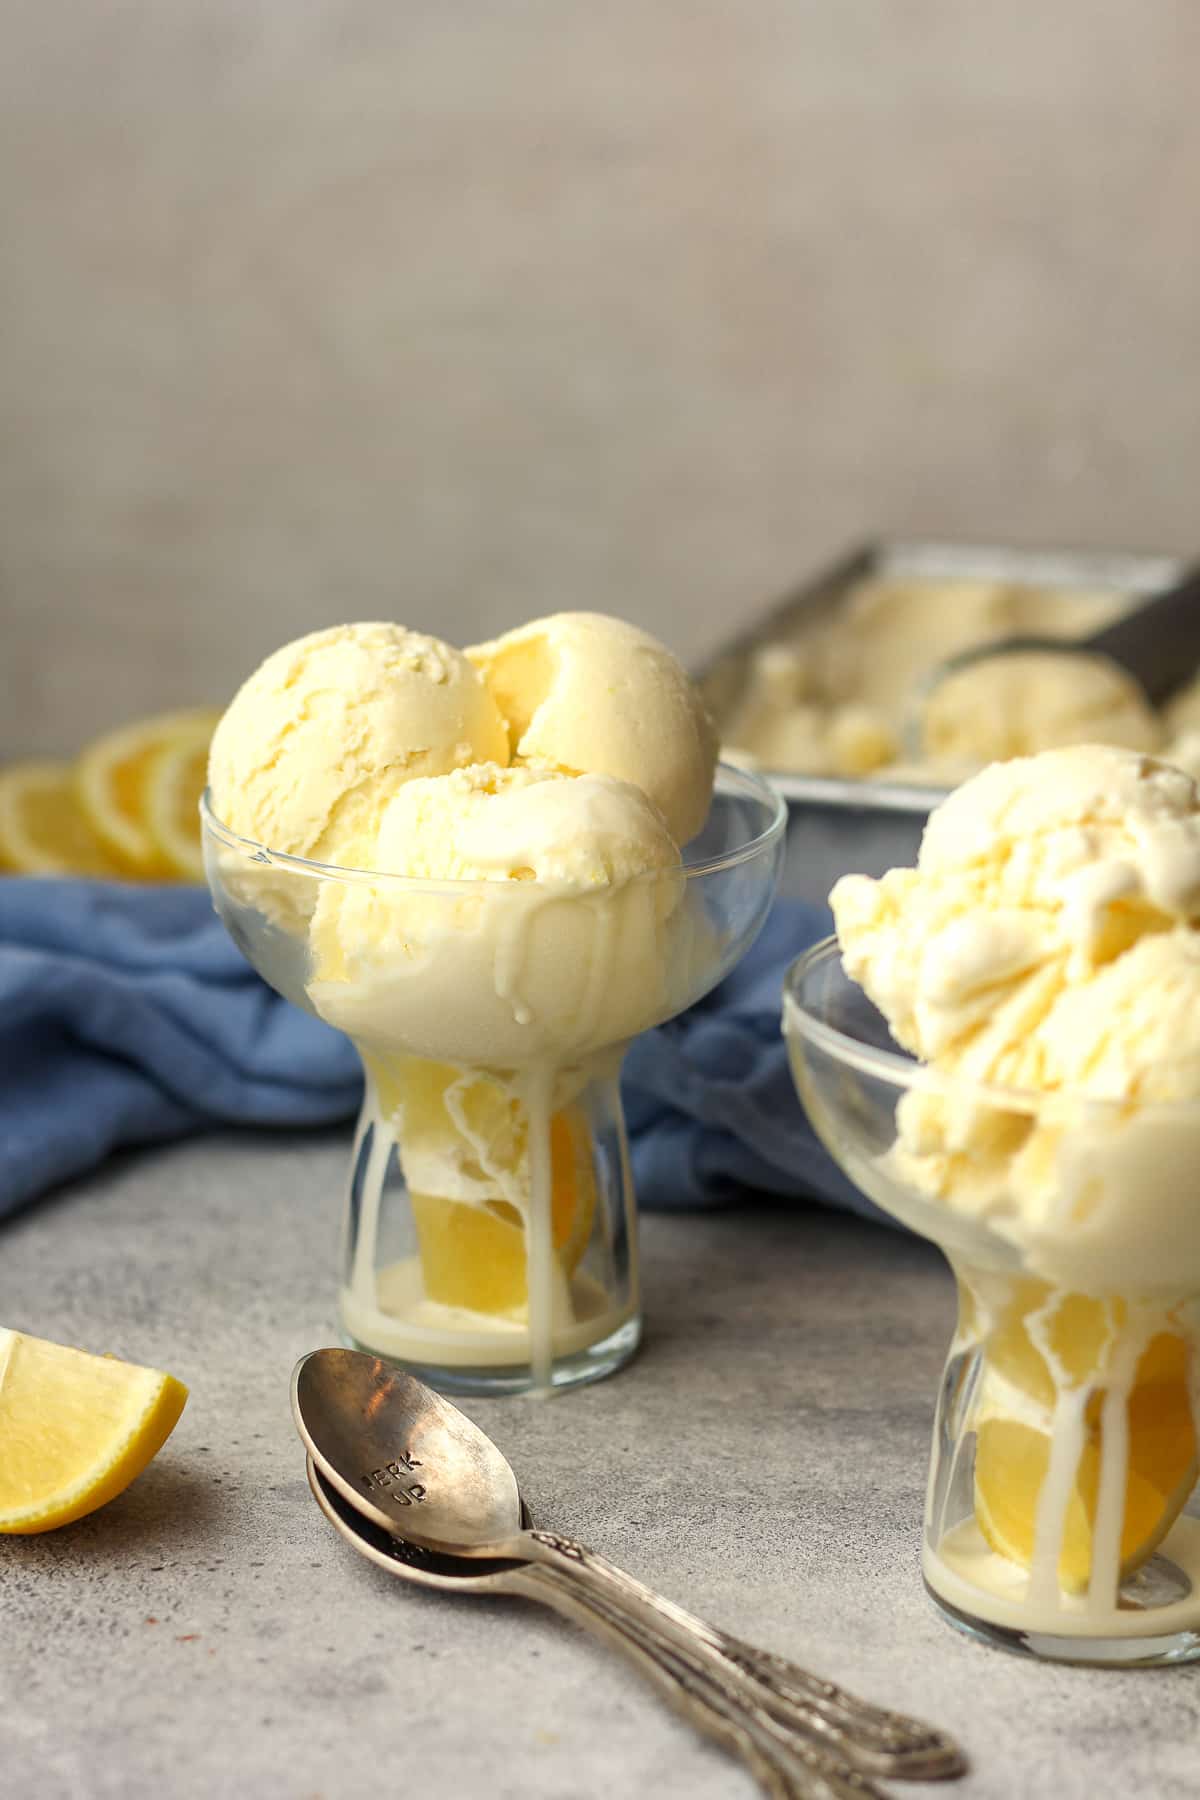
Lemon Custard Ice Cream
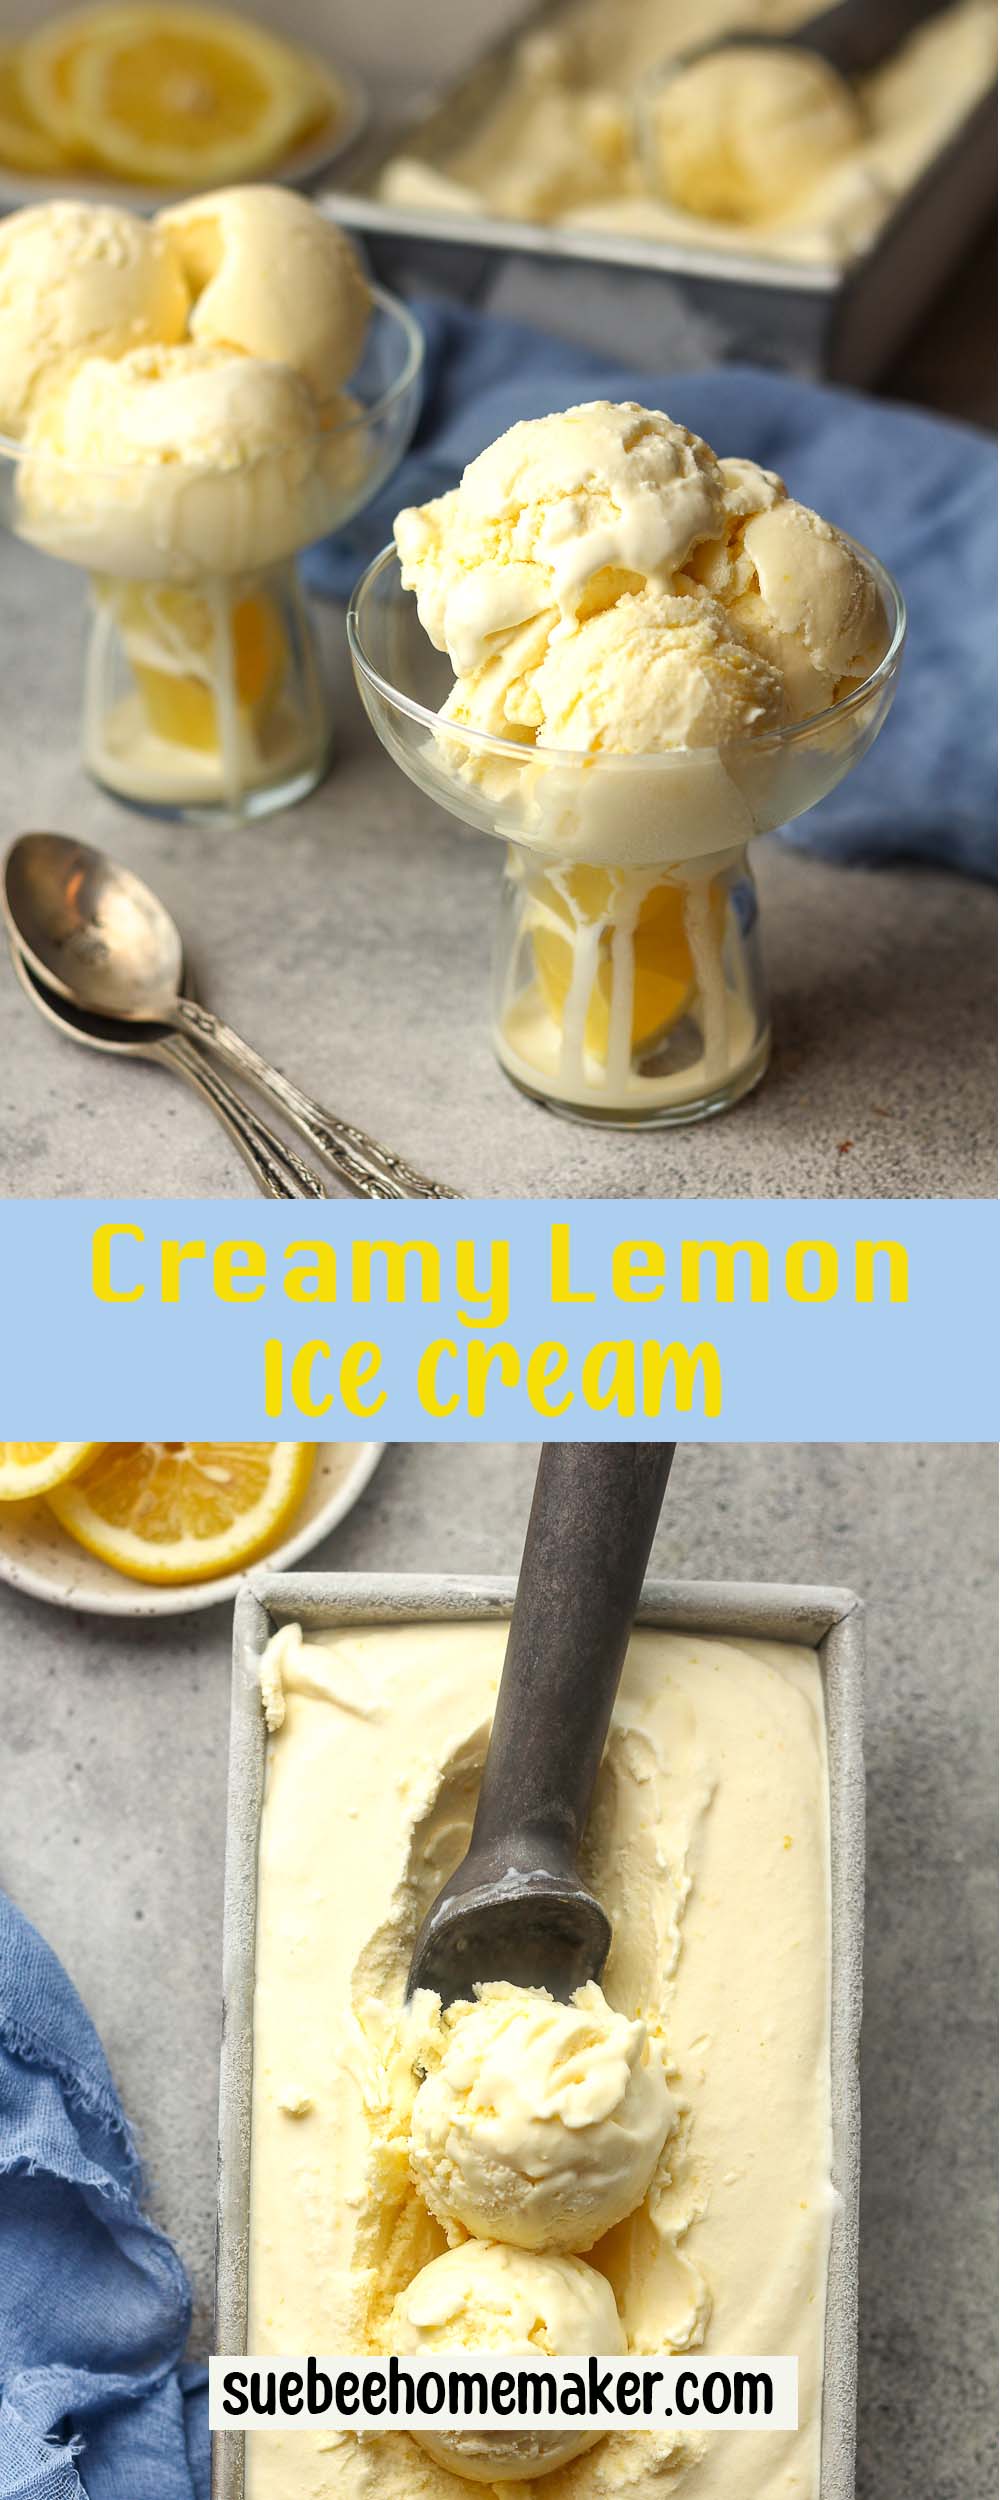
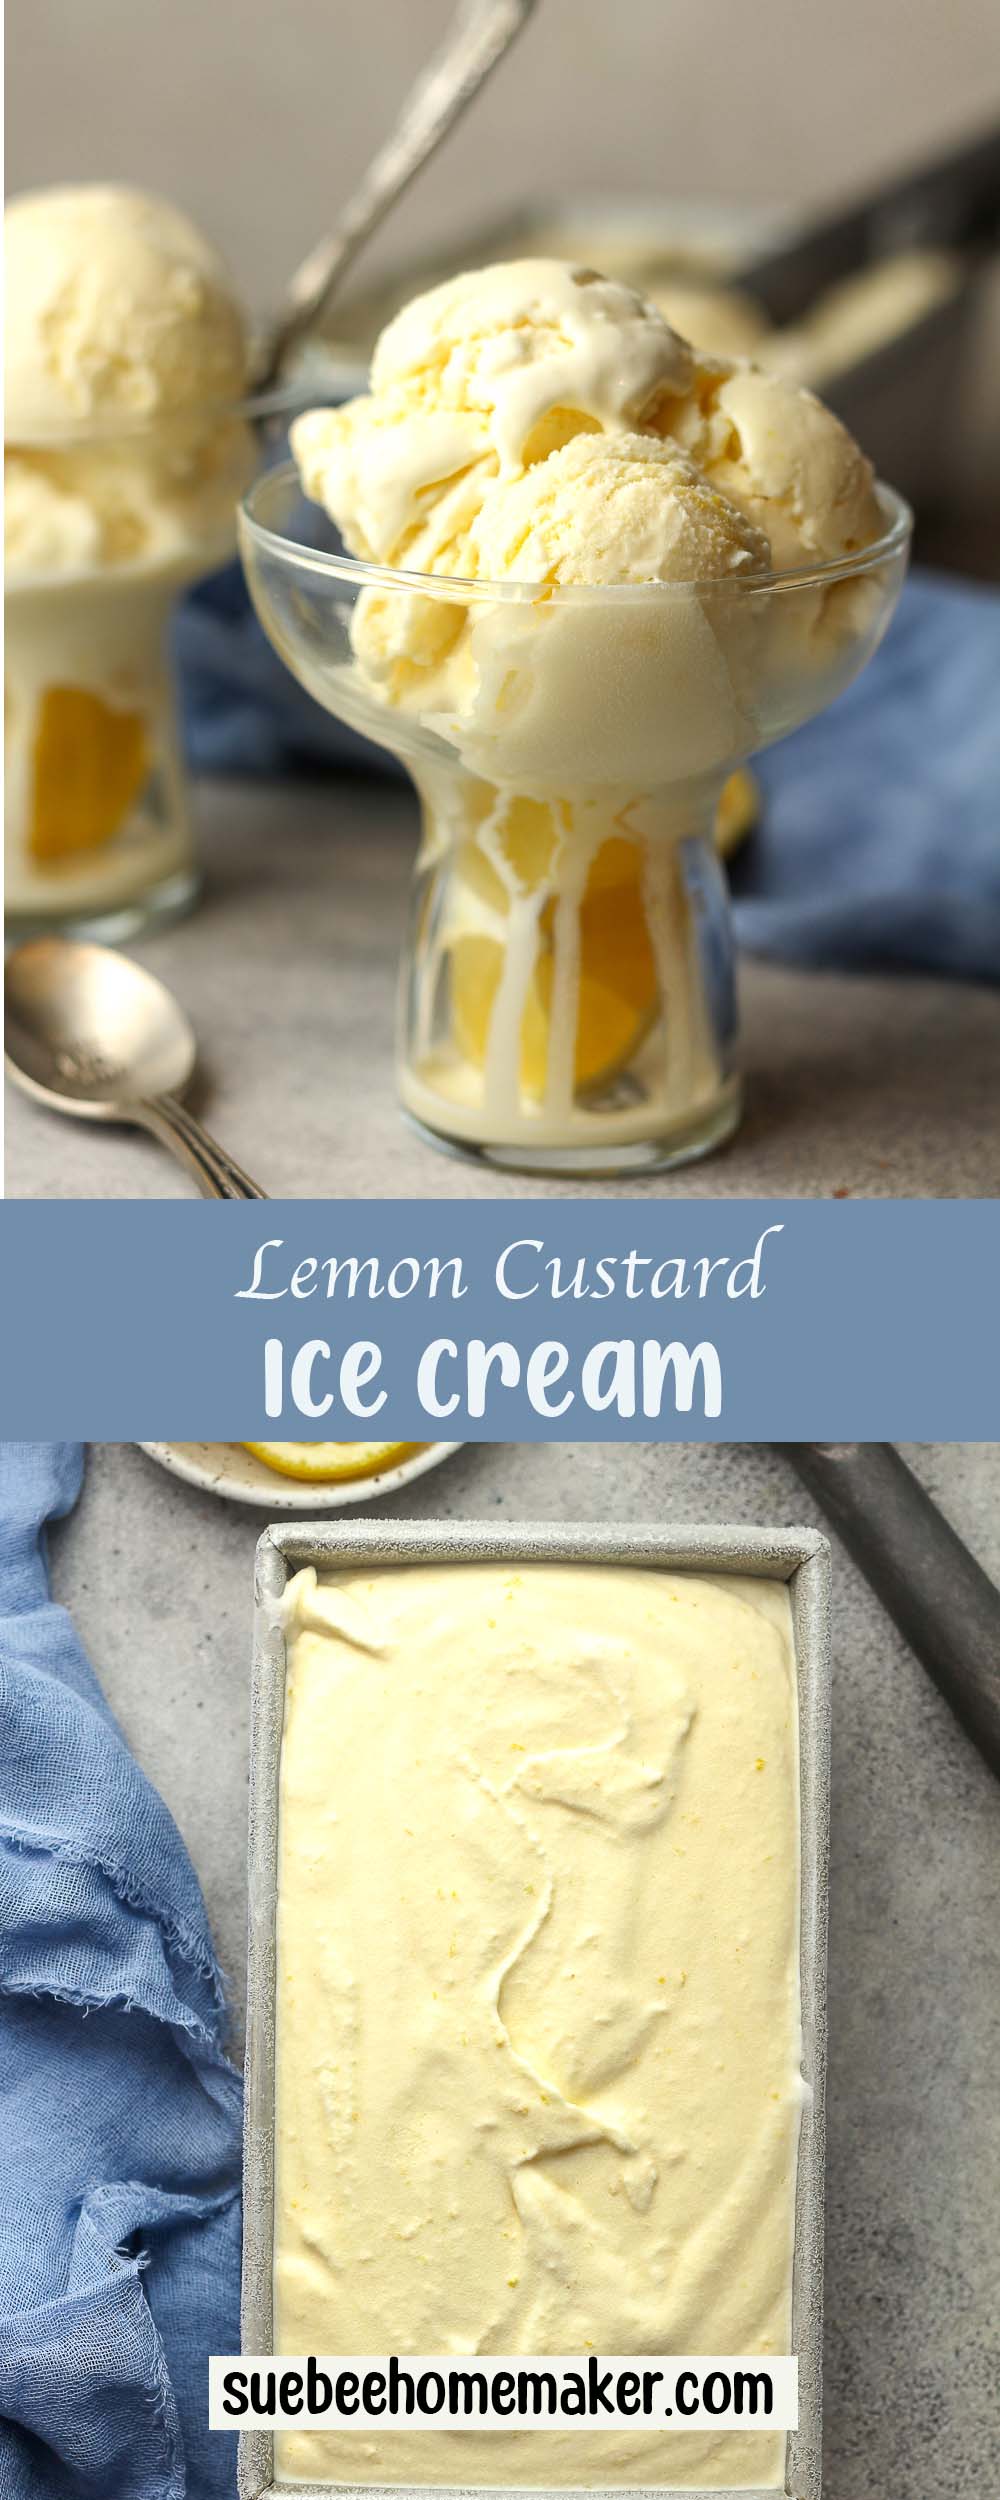
Lemon Custard Ice Cream is a delicious frozen treat that combines the bright and zesty flavor of fresh lemons with the rich and creamy goodness of custard. This ice cream offers a perfect balance of citrusy tang and velvety smooth texture in every spoonful!
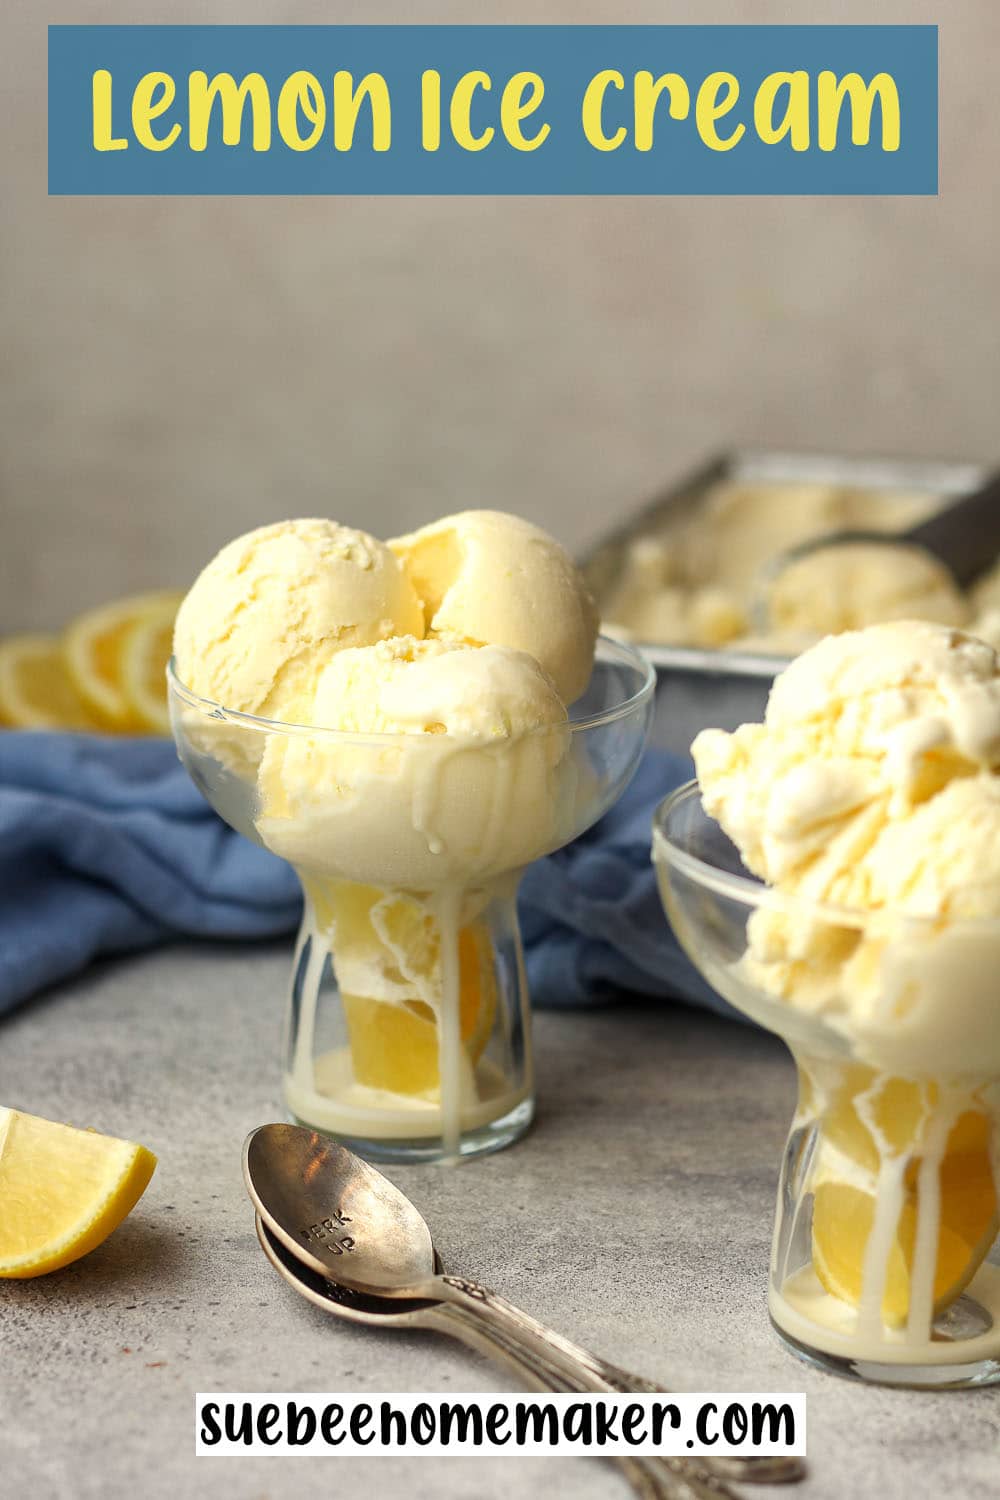
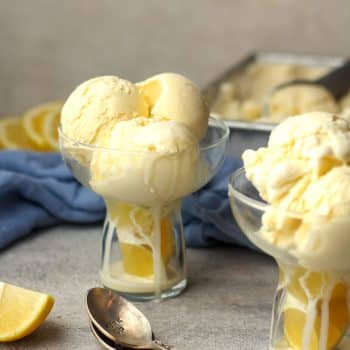
Lemon Ice Cream
Our KitchenAid Ice Cream Recipes have gotten a lot of attention lately, and I get a ton of messages requesting a certain flavor of ice cream. Recently, I had a request for lemon ice cream and I said YES! Today’s recipe uses fresh ingredients with tons of lemon flavor.
I’m a lemon lover, as seen from the many lemon desserts (and other things) on the blog. From Glazed Lemon Bundt Cake to Blueberry Lemon Coffee Cake to Lemon Sugar Cookies, you’ve got lots of choices. Which will you try first?
Why This Recipe Works:
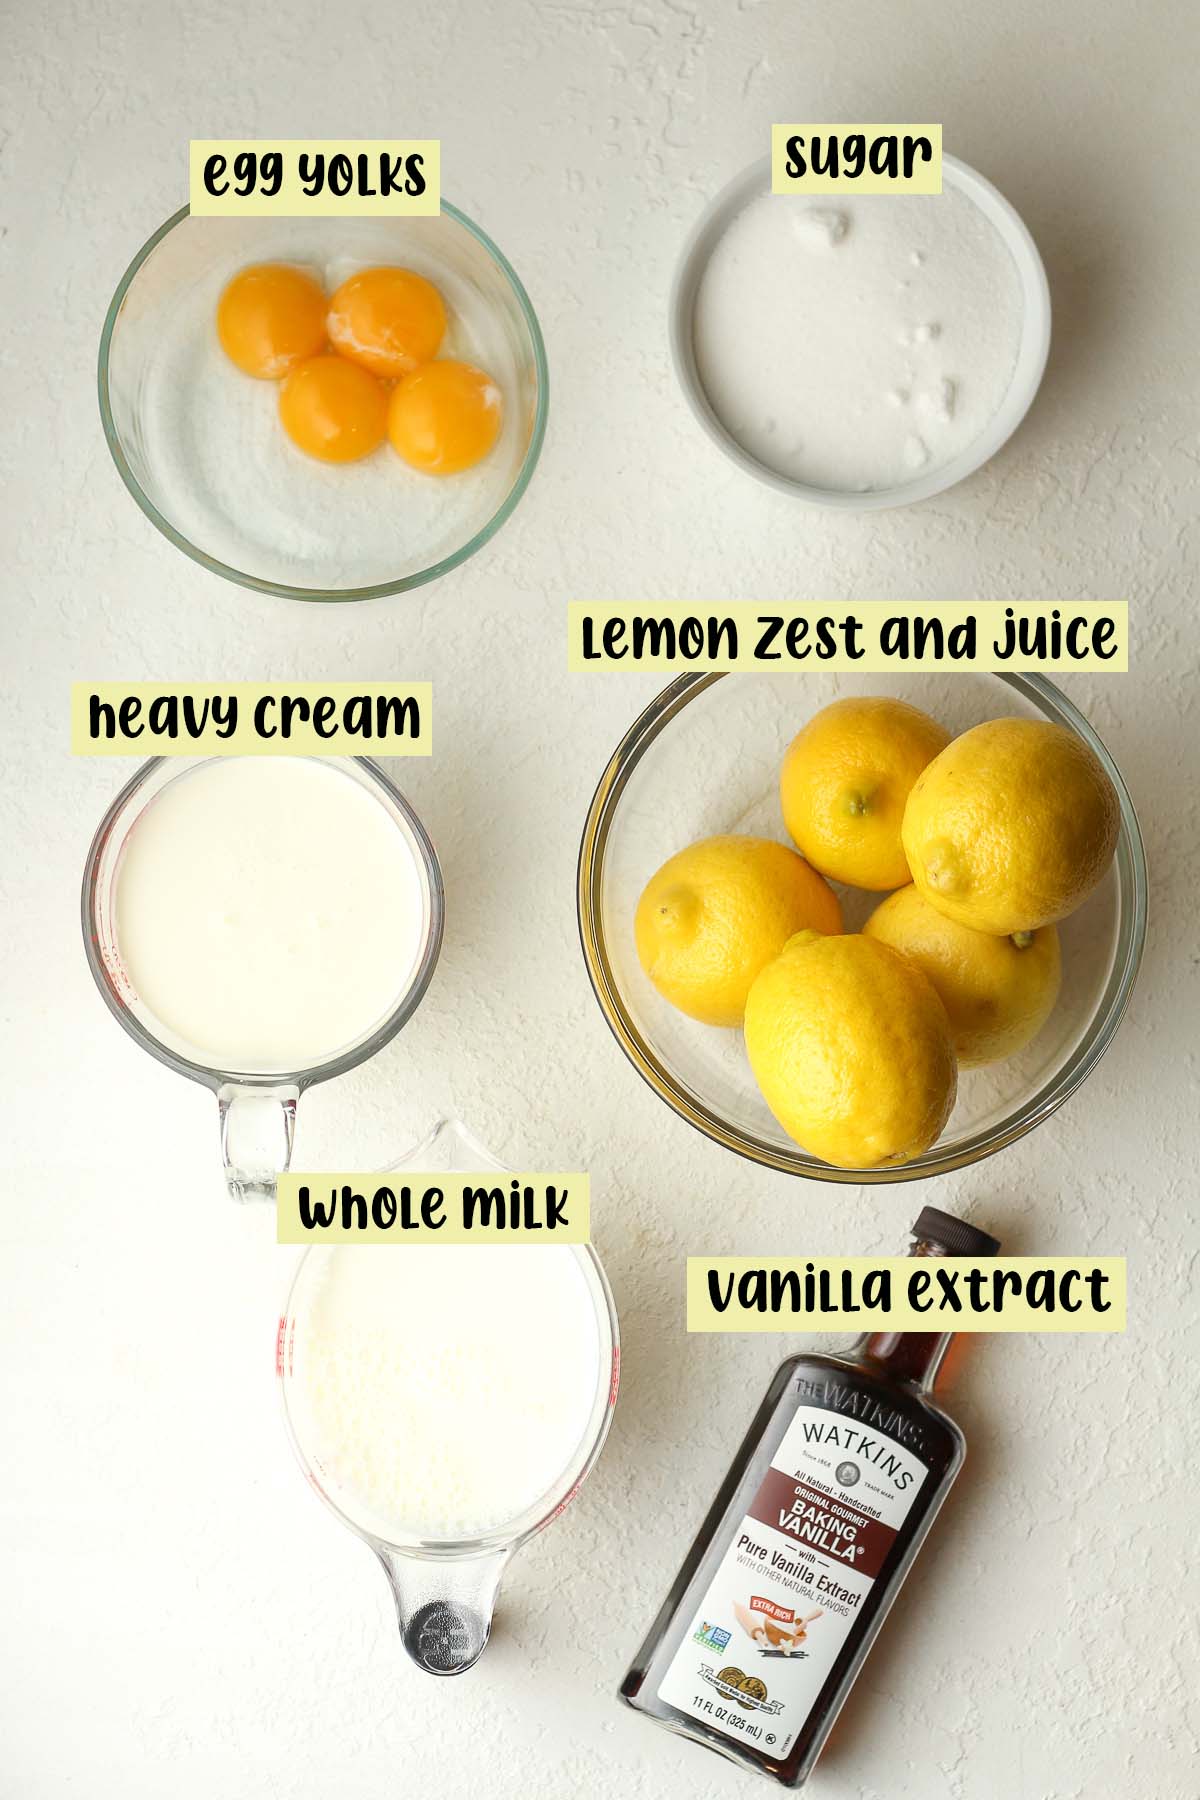
- SIMPLE INGREDIENTS – You’ll need six simple ingredients plus a pinch of salt for this lemon ice cream recipe. All of these are easily found in your local grocery store.
- CREAMY TEXTURE – Using egg yolks for the sweet cream base results in a super creamy texture. This is the BEST ice cream!
- FULL OF ZESTY FLAVOR – This homemade lemon ice cream recipe requires lots of zest and fresh lemon juice.
What You’ll Need:
Hey fellow lemon lovers! Let’s make frozen custard packed with lemon zest and lemon juice!
- Fresh Lemons – You’ll need 4-5 large lemons (depending on the size) for this ice cream recipe. We’re going to zest and juice the lemons.
- Dairy – A combo of whole milk and heavy cream.
- Granulated Sugar
- Eggs – You’ll use large egg yolks for this custard base.
- Vanilla Extract – There is no need for lemon extract because we’re packing the recipe with fresh lemons.
- Salt – A pinch of kosher salt.
How to make Creamy Lemon Ice Cream:
Step 1
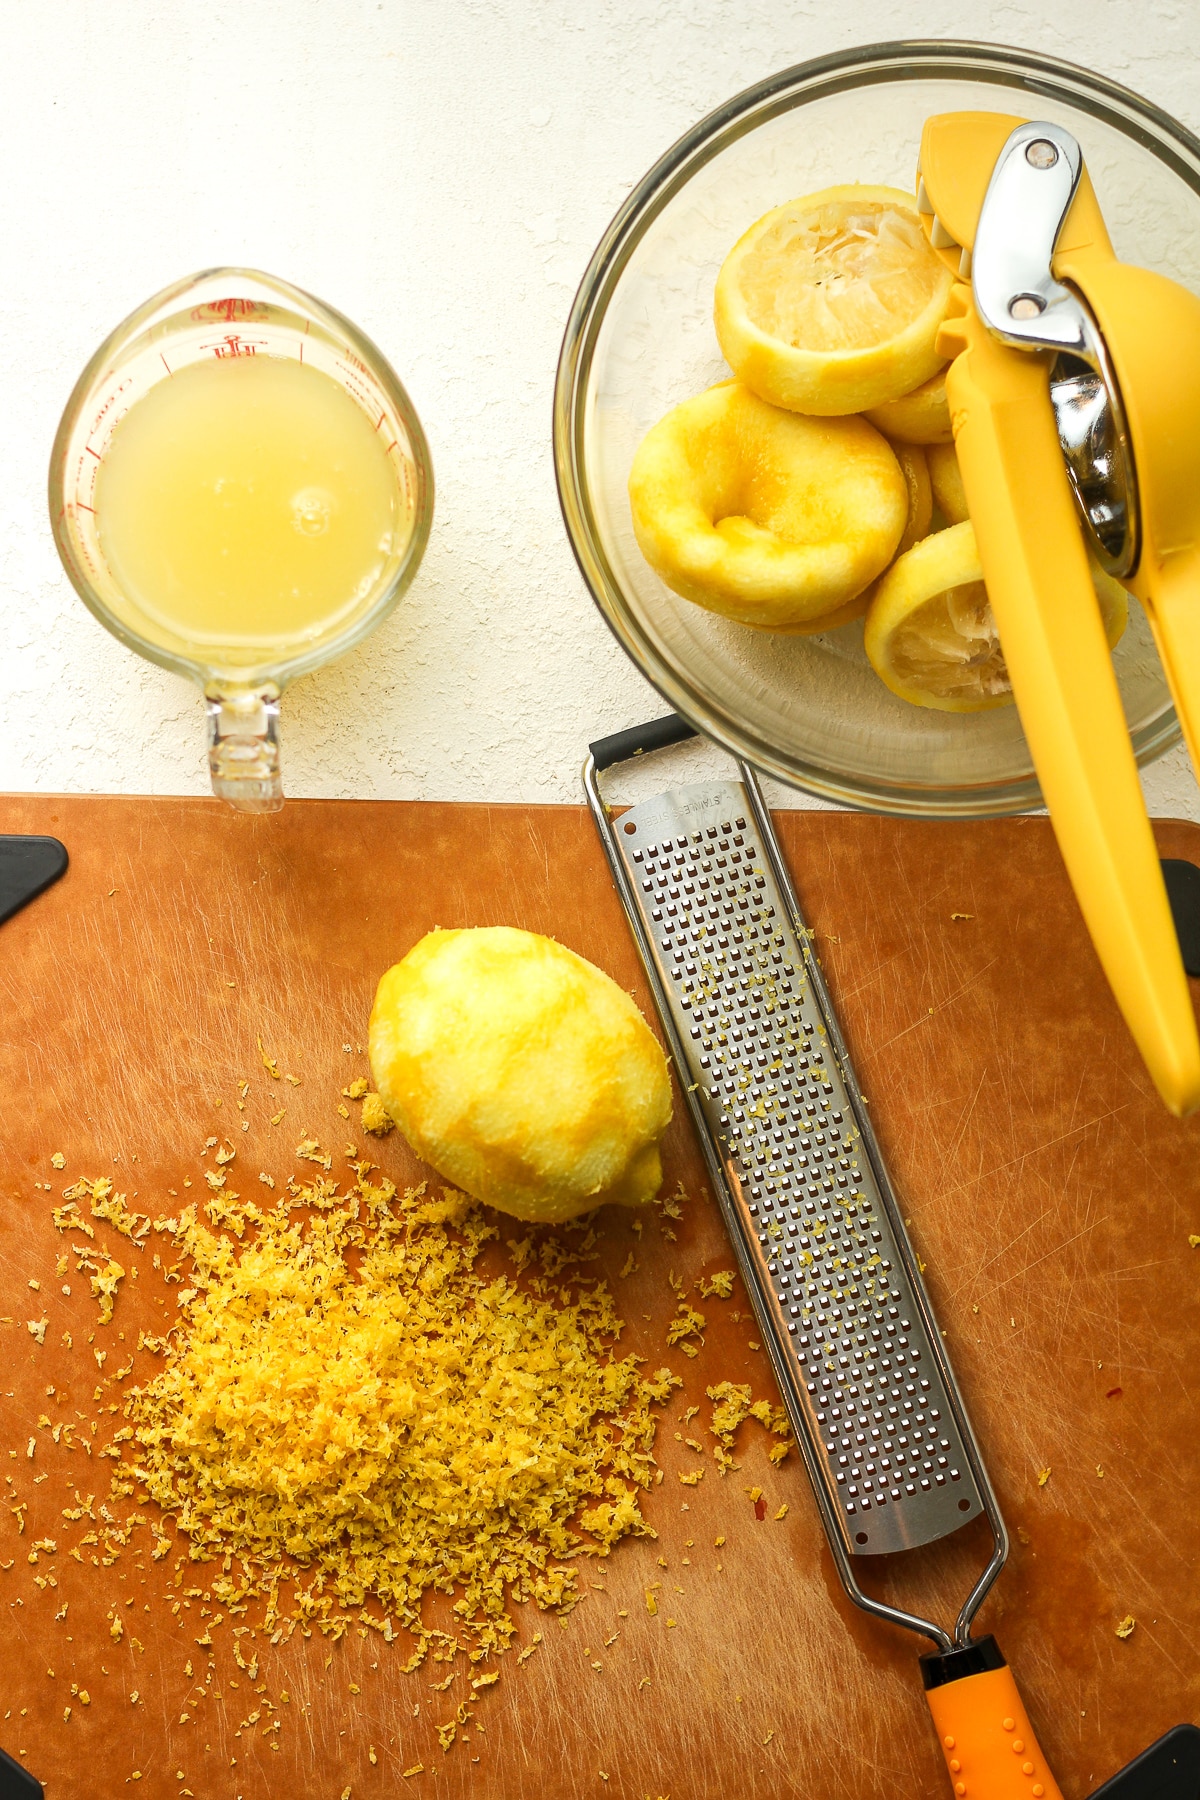
Zest and squeeze the lemons. Rinse and dry 4-5 large lemons. Use a microplane to zest the limes (yes, it’s a LOT of zesting!) and then use a citrus press to juice the lemons. You’ll need one cup of fresh lemon juice.
Step 2
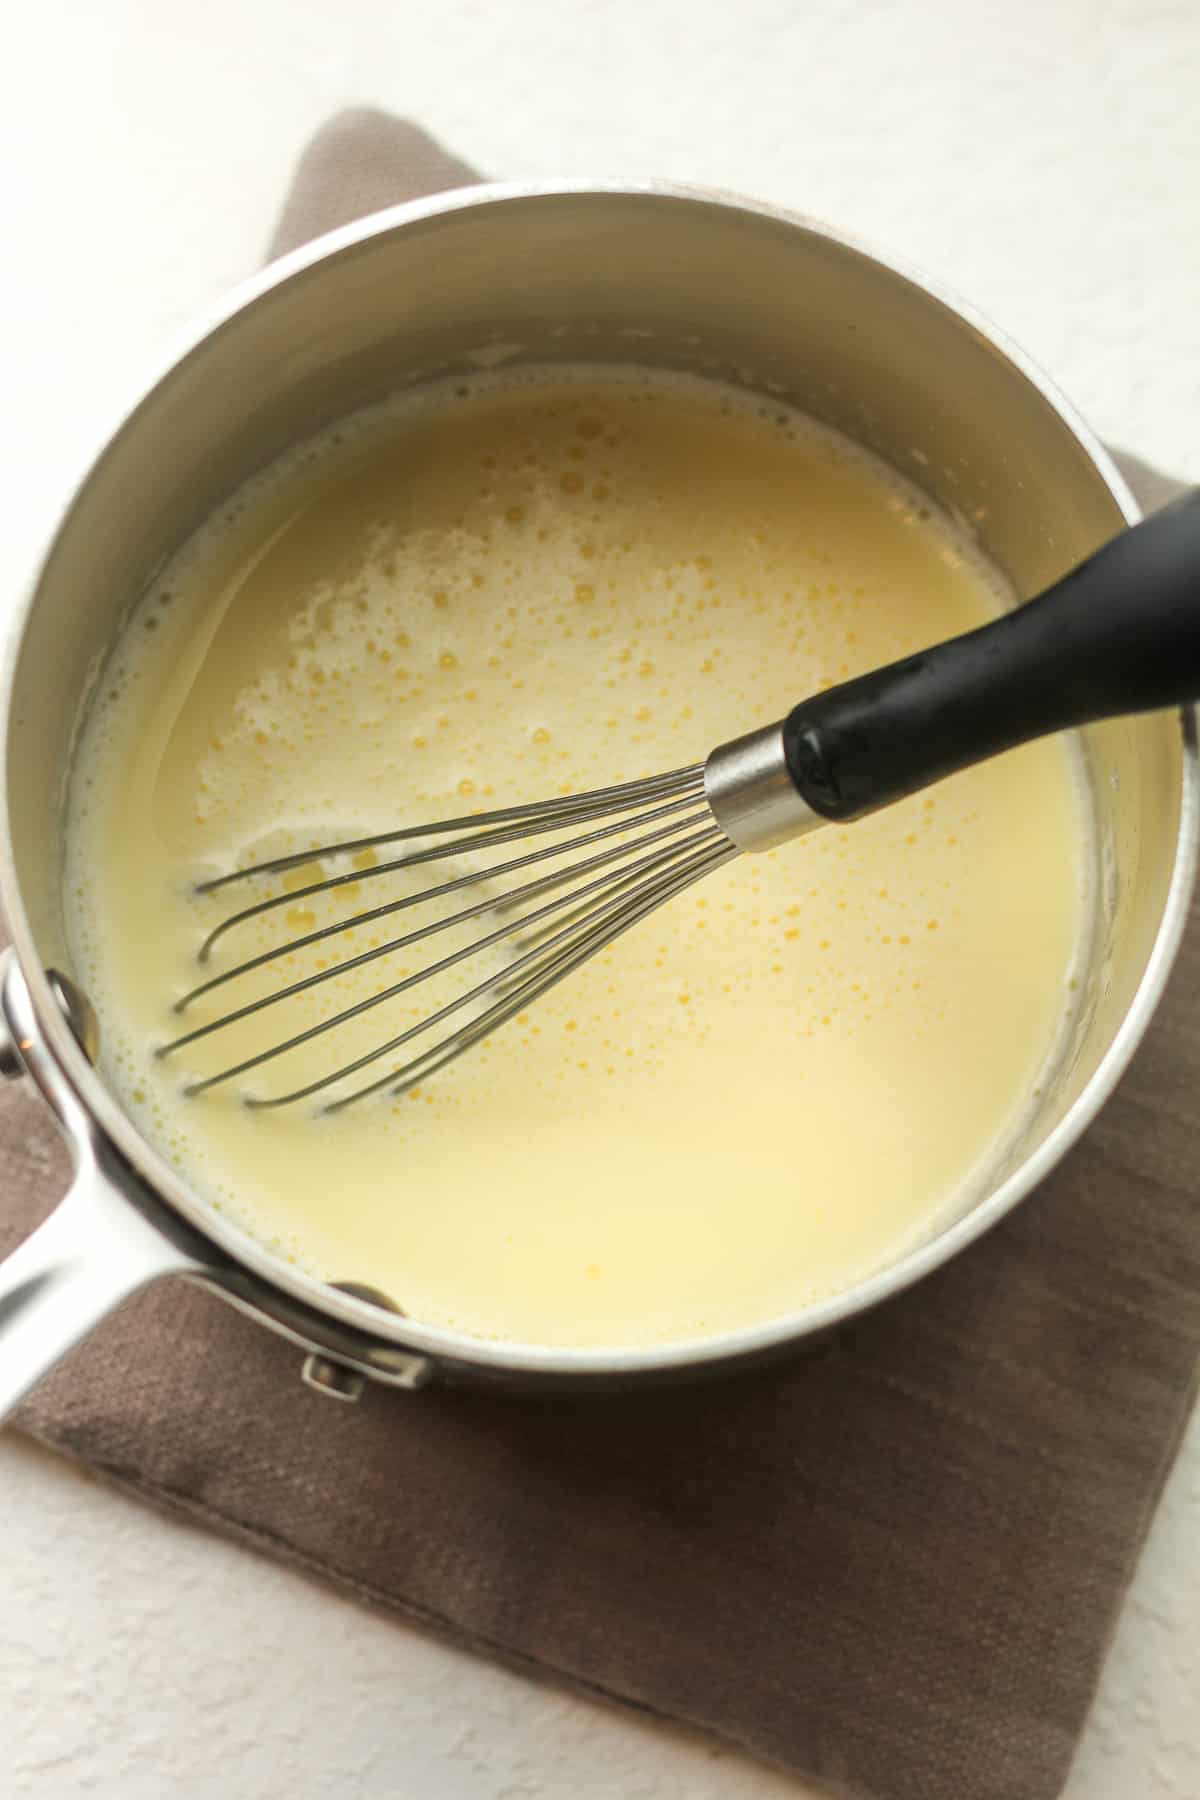
Temper eggs. Combine the egg yolks and 1/4 cup of sugar in a mixing bowl. Add the whole milk to a saucepan and heat over medium heat to a temperature of 165 degrees. (Do not boil.)
When the milk is hot, drizzle about one cup of it into the eggs/sugar mixture, whisking constantly. Then pour the egg mixture back into the pan, the remaining sugar, and heat to 165 degrees. The mixture should be thick and easily coat the back of a spoon.
NOTE: If needed, pass the tempered egg mixture through a fine-mesh sieve or cheesecloth into another bowl to remove any potential lumps or bits, resulting in a smoother ice cream base. This step helps achieve a silky texture and eliminates any undesirable elements from the tempered eggs before incorporating them into the ice cream recipe.
Step 3
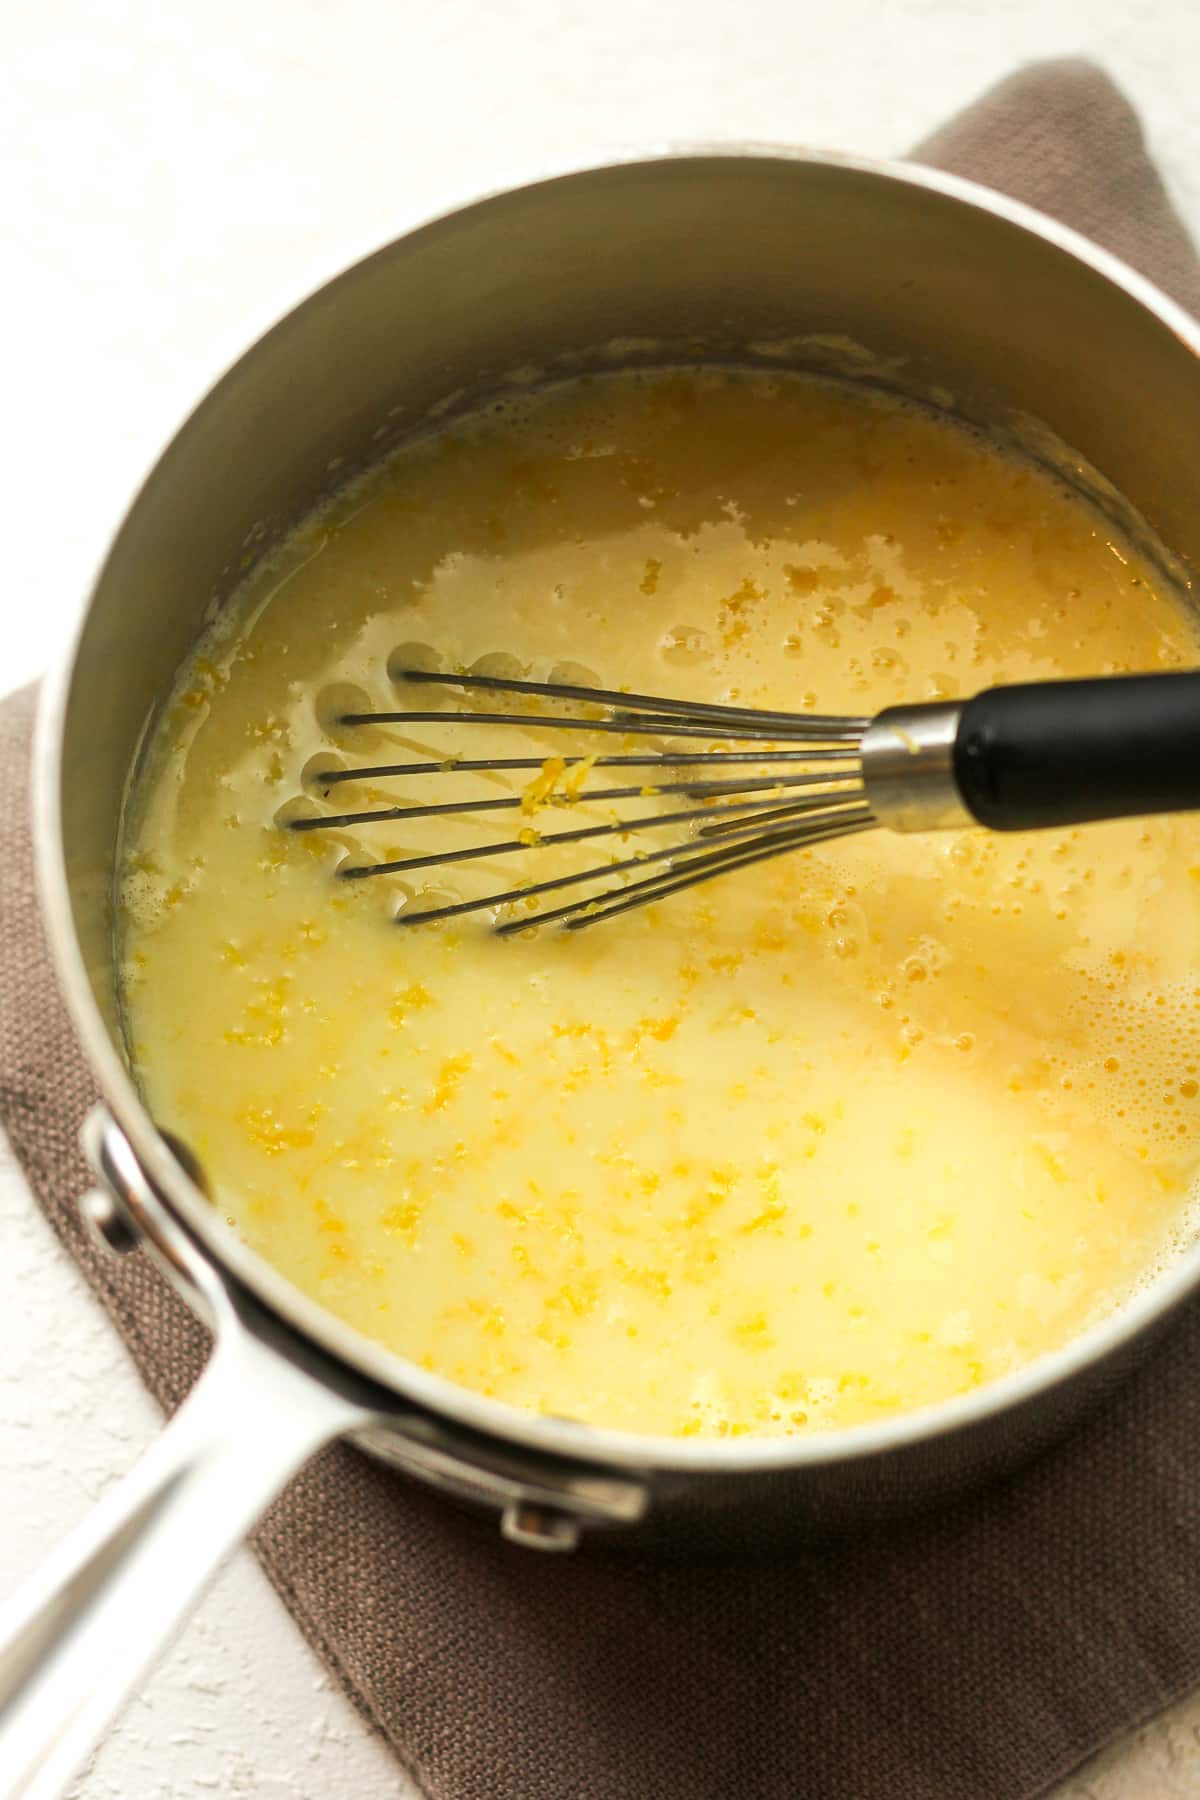
Add the lemon juice and zest. Add the lemon juice and zest to the pan and heat again – over medium heat – for 3-4 minutes, stirring constantly. Let cool slightly.
Step 4
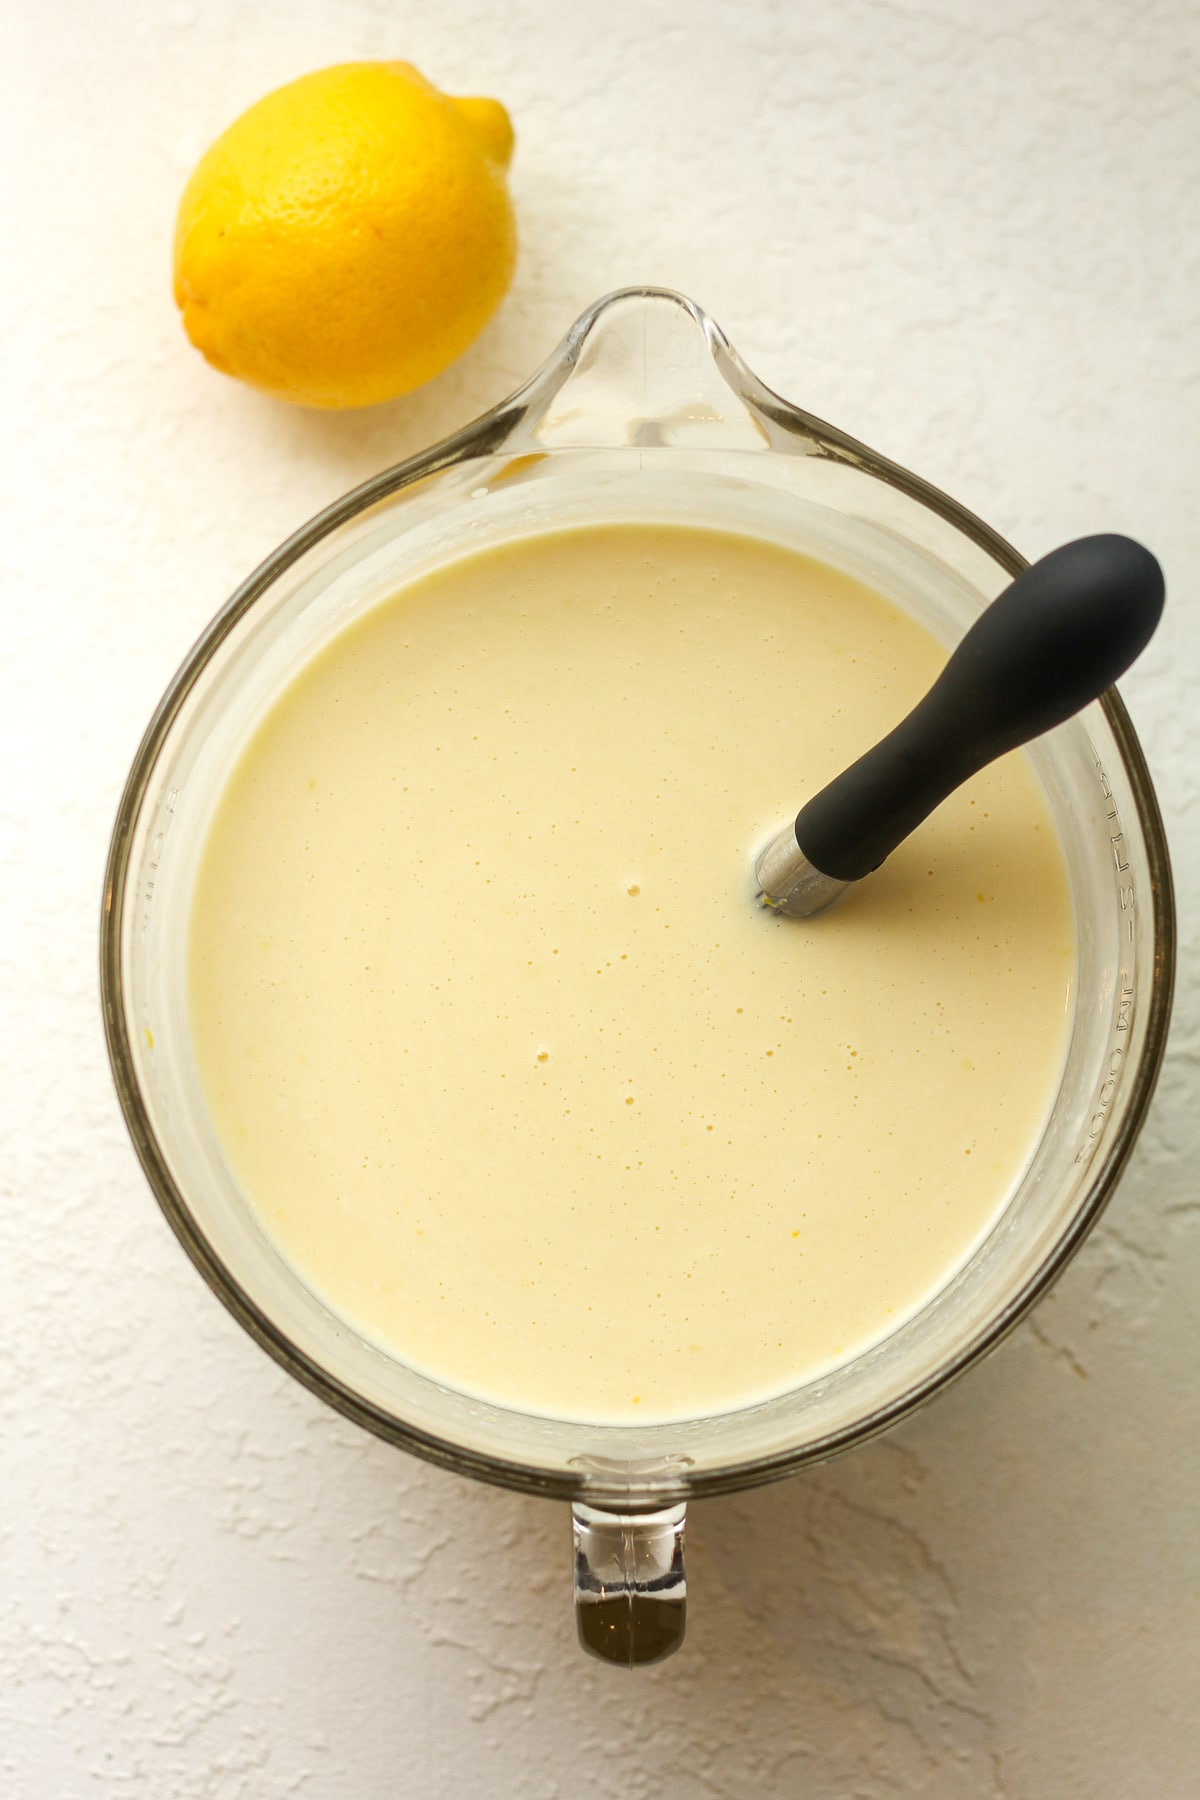
Combine all ingredients. In an 8-cup measuring cup or large bowl, combine all the ingredients – the tempered egg mixture with lemon juice and zest, heavy cream, vanilla extract, and a pinch of salt. Use a wire whisk to combine the liquid ingredients.
Step 5
Chill. Place the liquid mixture (covered in plastic wrap) in your refrigerator for at least four hours to chill completely. We often let the mixture chill overnight if time allows.
Step 6
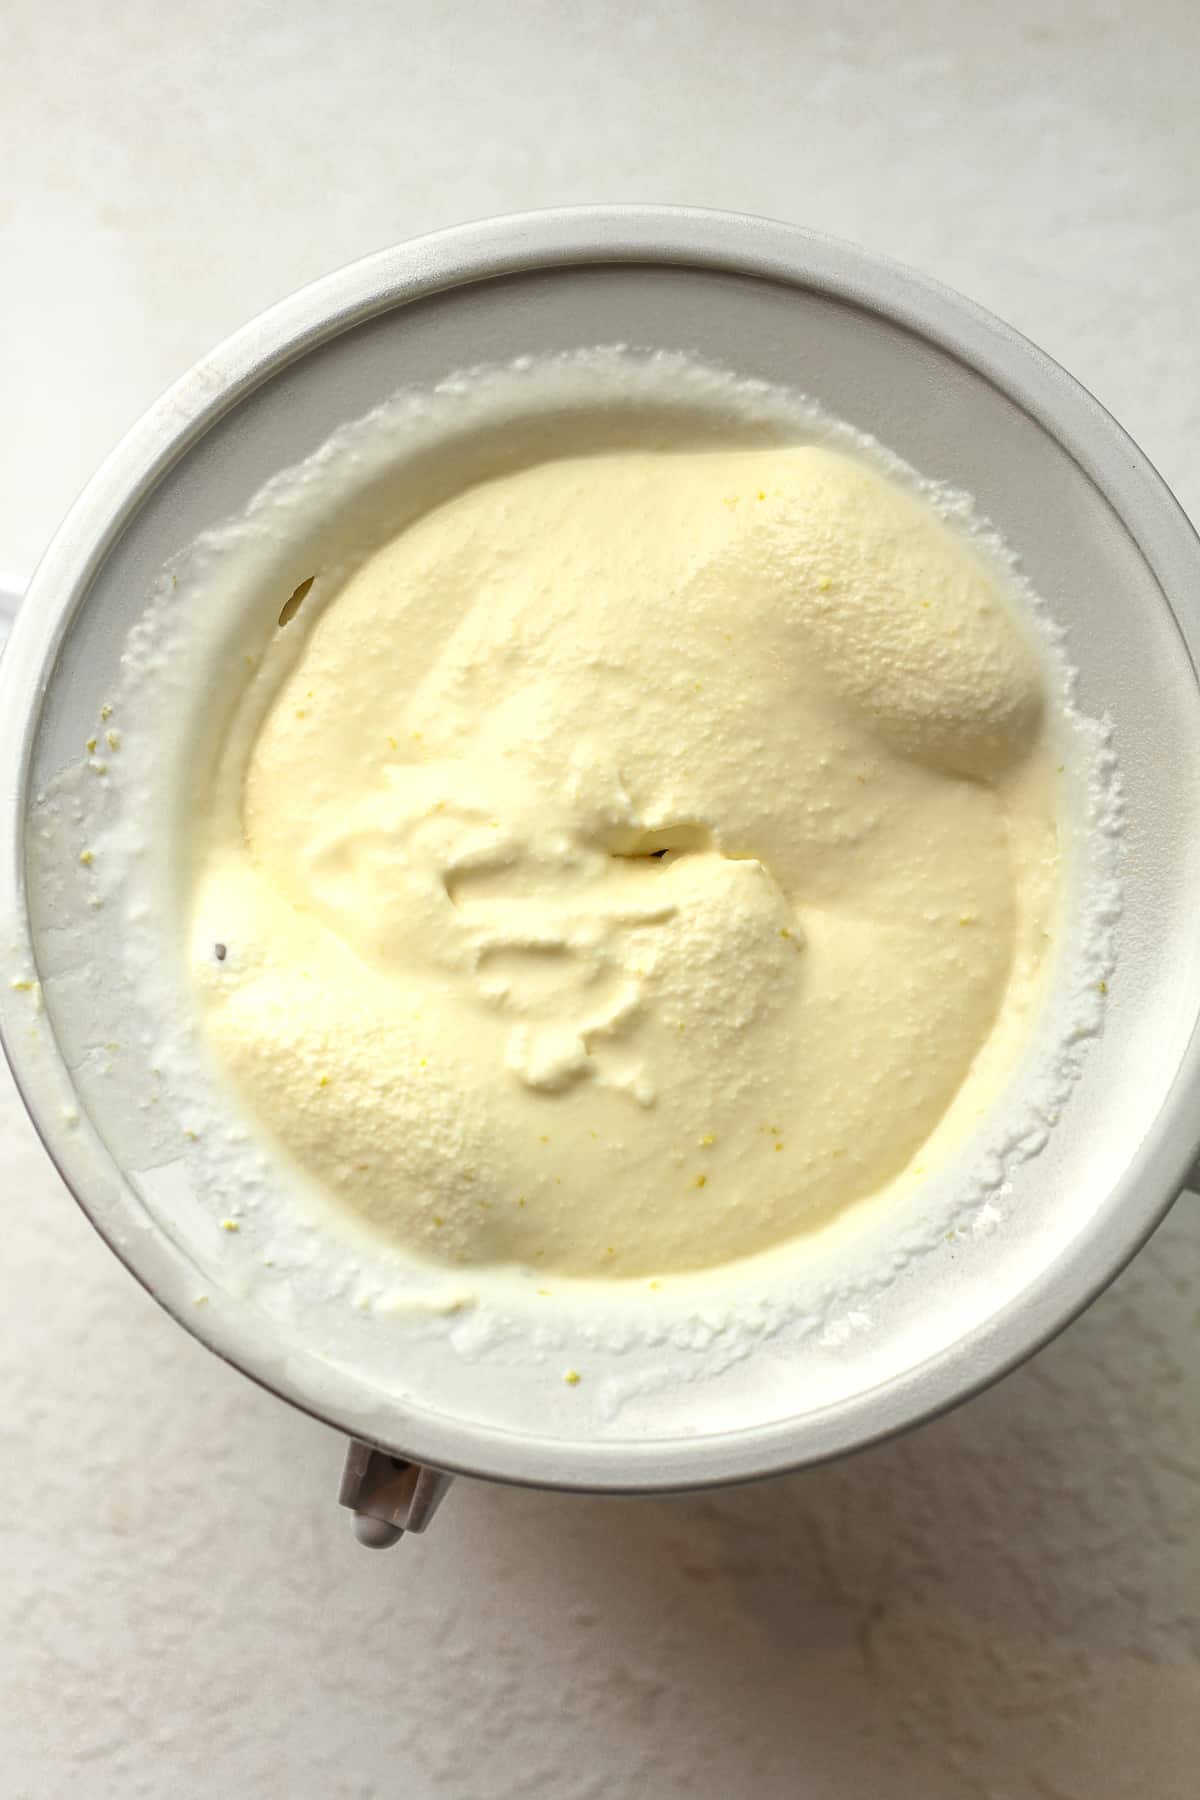
Churn ice cream. Start your 2-quart ice cream churner (I use a KitchenAid Attachment with a stand mixer – linked below.) and pour the chilled ice cream mixture into the bowl (the attachment) while it’s running. Churn the ice cream until it becomes thick and creamy.
You’ll see the ice cream thicken and rise toward the top of the bowl. The mixer may slow down slightly. (This should take 25-35 minutes or so.)
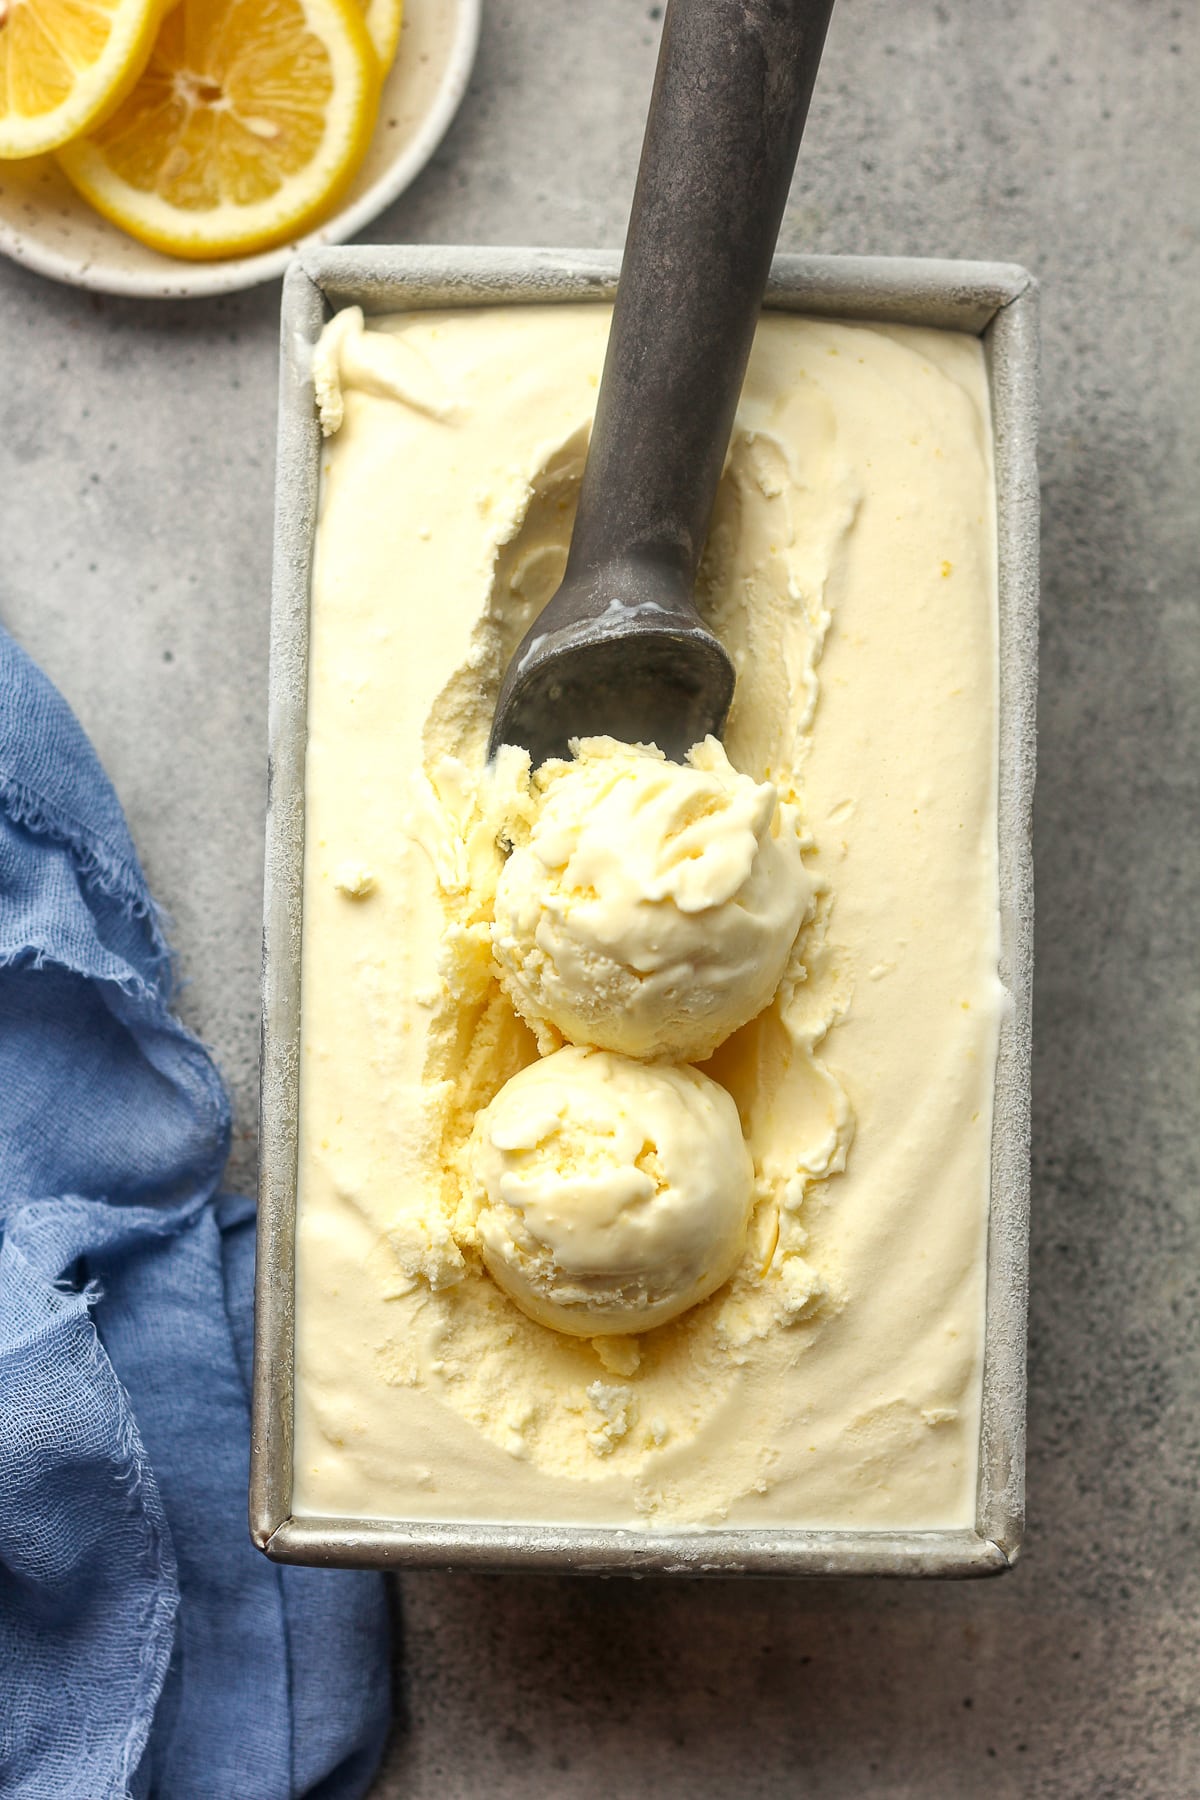
Step 7
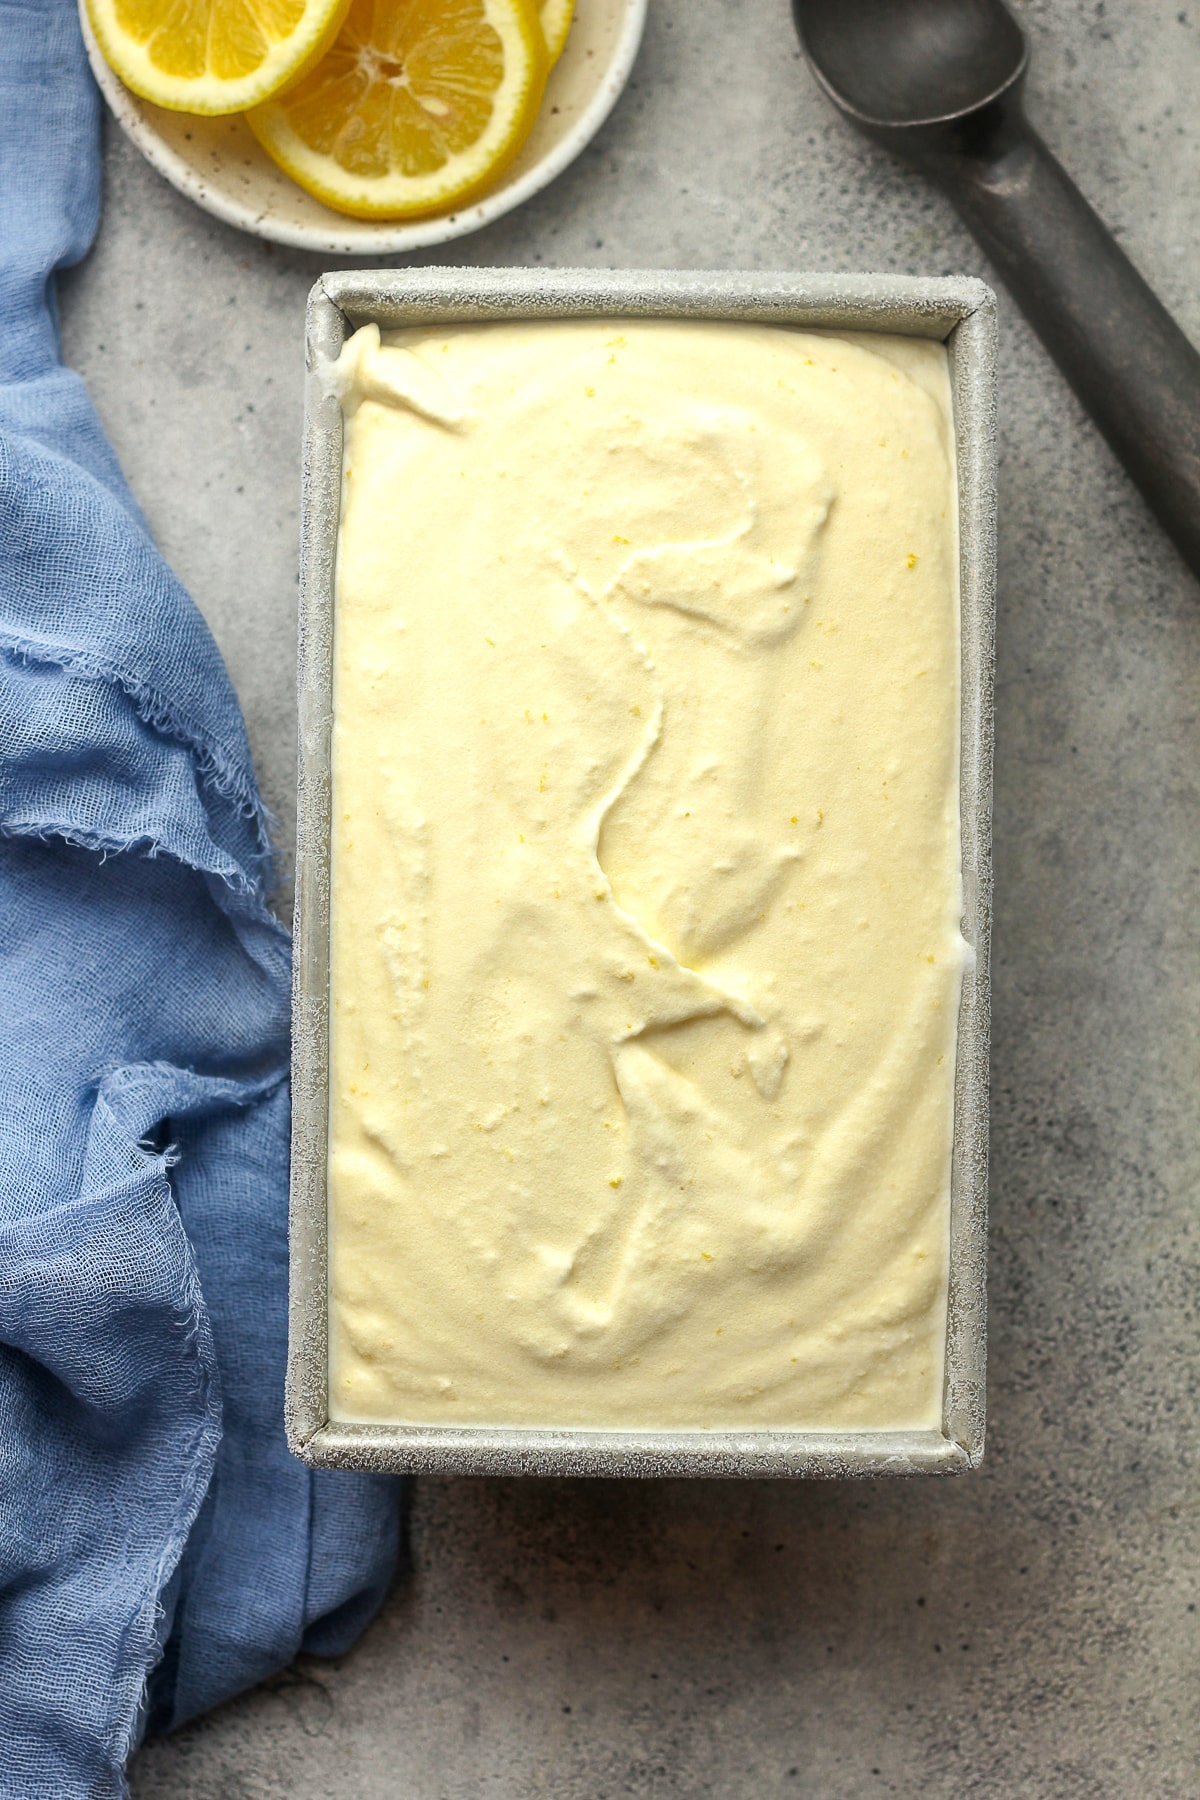
Add to a freezer-safe container (or a loaf pan) and freeze. Add the churned ice cream into an ice cream container. Place the airtight container in the freezer to set up further. Initially, the ice cream will be very soft so freezing it for a couple of hours helps firm it up.
Step 8
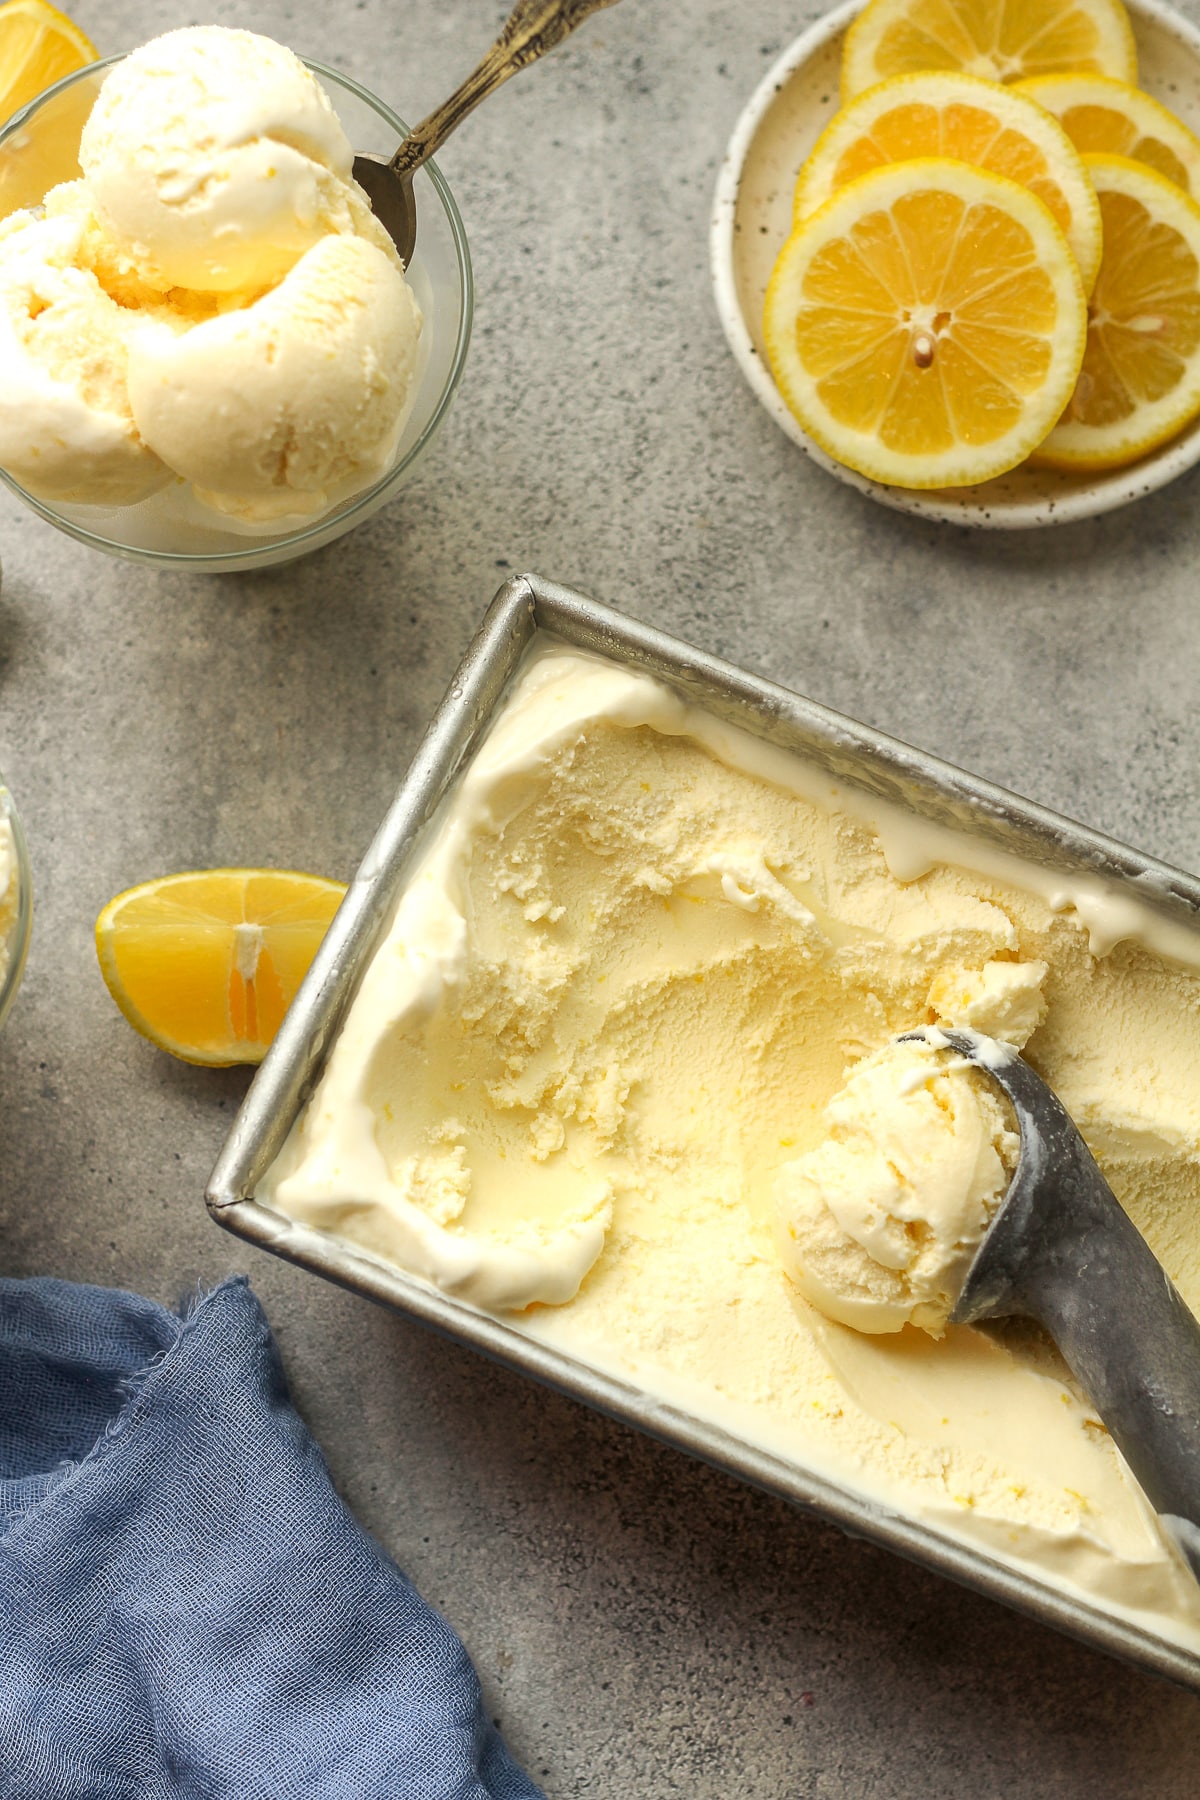
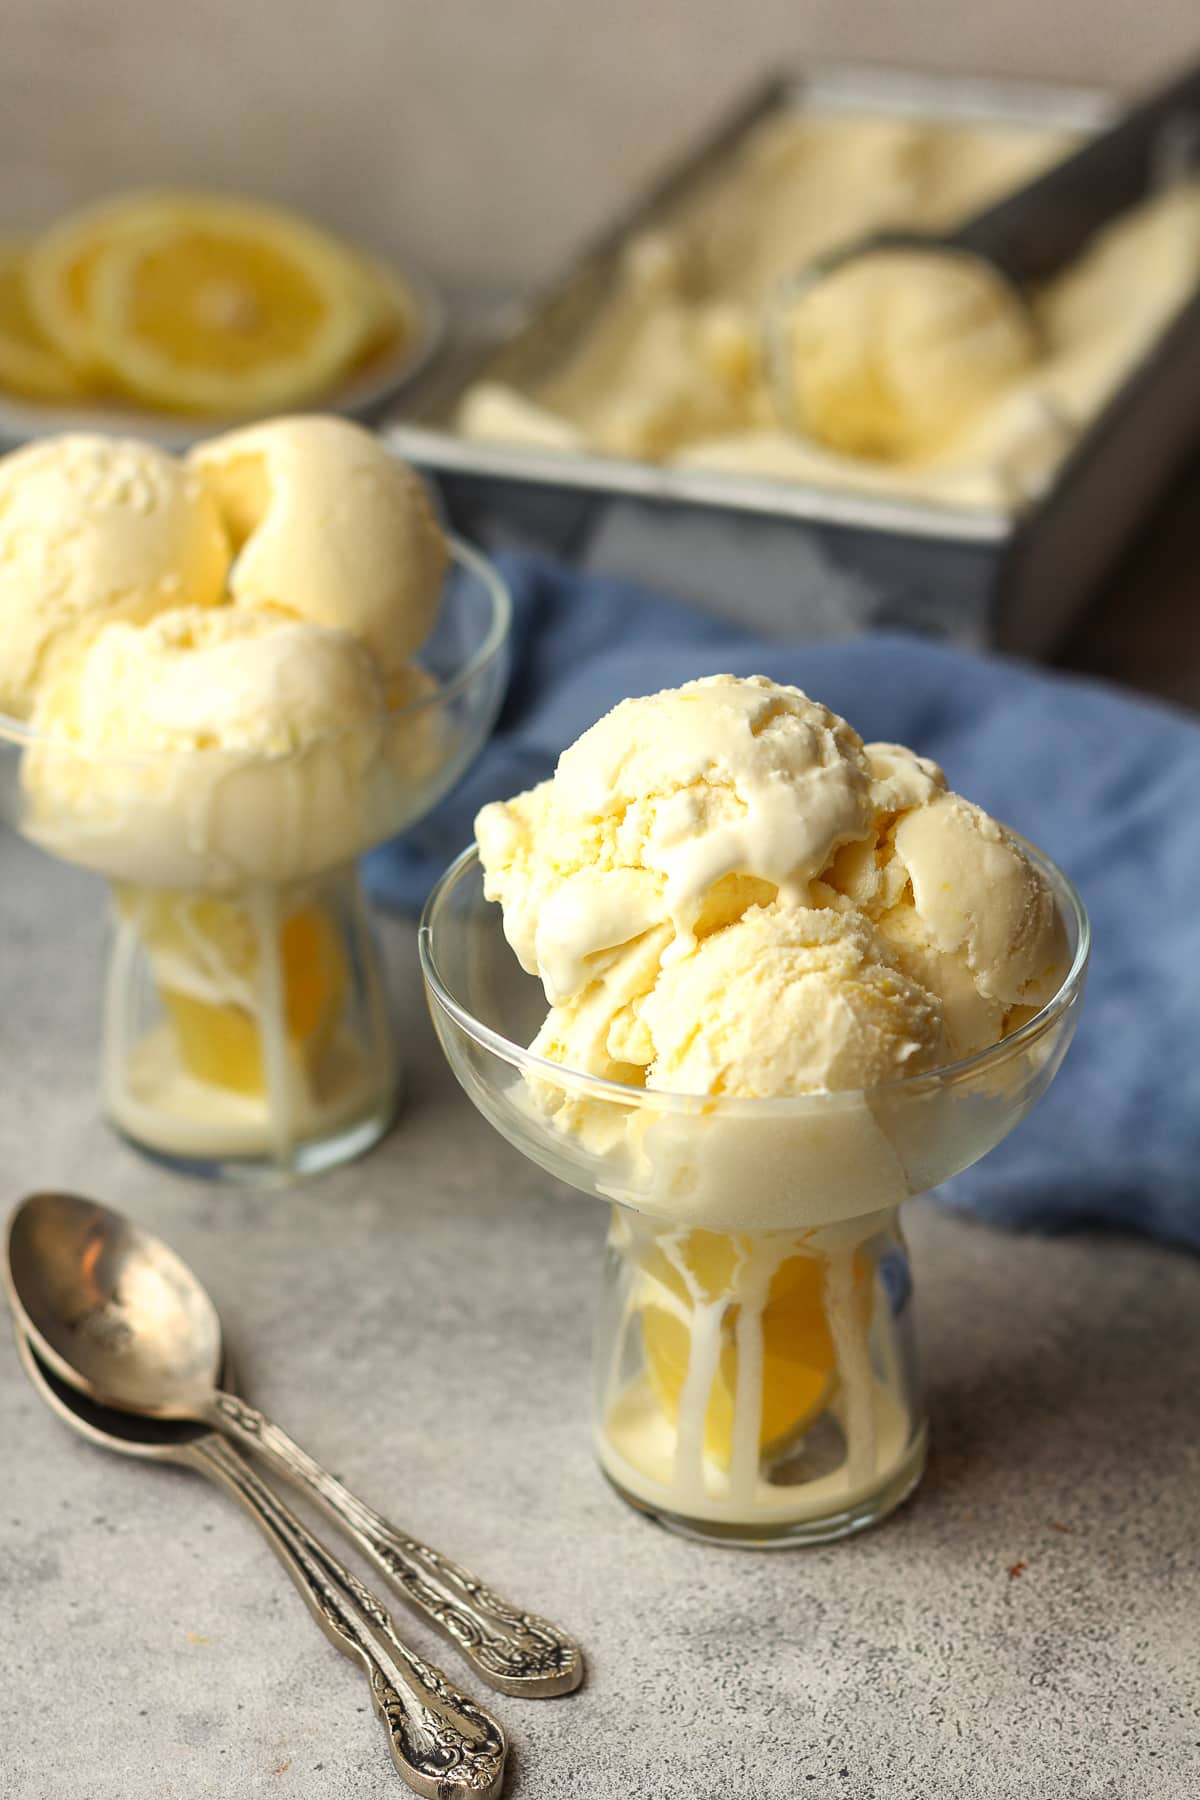
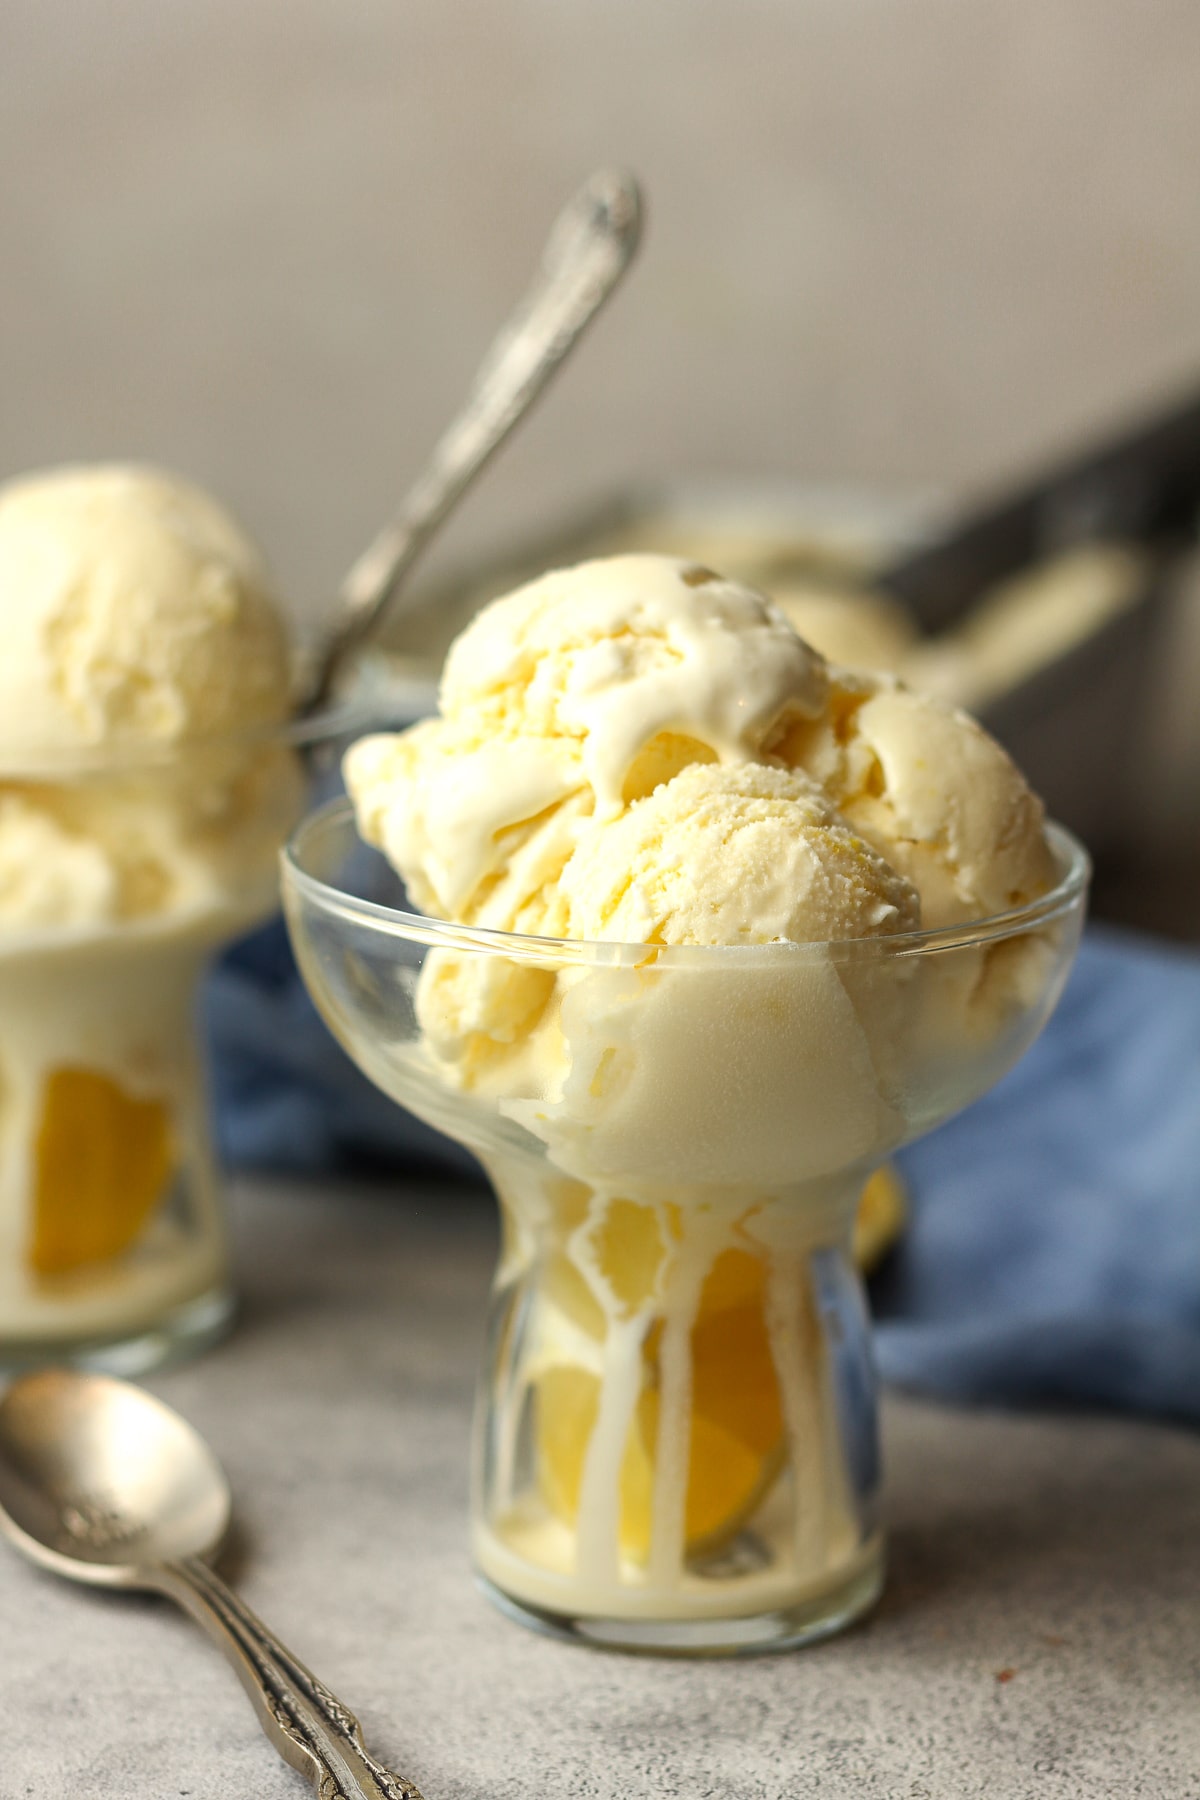
Serve. Use an ice cream scoop to serve the ice cream in individual serving bowls or ice cream cones.
NOTE: You can use this recipe in another 2-quart machine. If you have a different size machine, you’ll need to adjust the quantity of the liquid mixture.
Tips for using a KitchenAid Ice Cream Attachment:
- Freeze the bowl ahead of time: The Kitchenaid ice cream maker attachment comes with a freezer bowl that needs to be frozen before use. Make sure to freeze it for at least 15 hours prior to making your ice cream.
- Chill your ingredients: Before making your ice cream mixture, make sure to chill all the ingredients, including the milk, cream, and any mix-ins you plan to use. This will help the mixture freeze faster and prevent ice crystals from forming.
- Don’t overfill the bowl: Make sure not to overfill the freezer bowl with the ice cream mixture, as this can prevent it from churning properly. Leave at least one inch of space (or more) at the top.
- Start the mixer on a low speed: When you’re ready to start churning your ice cream, begin with the mixer on a low speed. You can gradually increase the speed as the mixture thickens.
- Be patient: Churning ice cream can take anywhere from 20 to 40 minutes, depending on the recipe and the consistency you’re looking for. Be patient and don’t be tempted to stop the mixer too early, as this can result in a soupy texture.
- Add mix-ins at the end: If you plan to add any mix-ins, such as chocolate chips or nuts, wait until the ice cream is almost fully churned before adding them in. This will ensure that they’re evenly distributed throughout the mixture.
- Transfer to a container and freeze: Once the ice cream is fully churned, transfer it to a freezer-safe container and freeze it for at least 4 hours, or until it’s firm enough to scoop. Enjoy your homemade ice cream!
Recipe FAQs:
Tempering eggs for ice cream is an important step in the ice cream-making process that helps to ensure a smooth, creamy texture and prevent the formation of scrambled egg bits in the final product.
It is important to note that consuming raw or undercooked eggs can pose a risk of foodborne illness, as they may contain harmful bacteria such as salmonella. This is why it is important to cook eggs to the recommended temperature of 160°F (71°C) to ensure that any potential bacteria are killed.
A custard-based ice cream, often referred to as French-style or Philadelphia-style ice cream, is made by creating a custard as the base for the ice cream. The custard typically consists of egg yolks, sugar, and a combination of milk and cream. This style of ice cream is known for its rich and creamy texture.
Yes, you can make the ice cream a few days in advance and store it in the freezer. For best results, allow it to soften for a few minutes at room temperature before serving for a softer consistency.
Other Homemade Ice Cream Recipes:
Do you have a favorite ice cream? What kind will you try next?
- Something fruity? Peach | Blueberry | Strawberry | Creamsicle | Strawberry Cheesecake | Raspberry
- Chocolatey? Chocolate Peanut Butter | Nutella | Chocolate Fudge Brownie | Dark Chocolate
- Classic? Vanilla Bean | Butter Pecan | Mint Chip | Oreo | Caramel Swirl | Moose Tracks
- Something different? Peppermint Stick | Pumpkin | Coffee Toffee | Reese’s PB | S’mores | Butterscotch | Cinnamon Ice Cream | Cookie Monster
Kitchen Tools Used: (affiliate links)
xoxo ~Sue
Lemon Custard Ice Cream Recipe
Ingredients
- 3-4 Tablespoons lemon zest – from 4-5 fresh lemons
- 1 cup lemon juice – from 4-5 fresh lemons
- 1 ¾ cups whole milk
- 5 large egg yolks
- 1 ¼ cups granulated sugar – divided
- 2 ¼ cups heavy cream
- 2 Tablespoons vanilla extract
- pinch of salt
Instructions
- Zest and squeeze the lemons. Rinse and dry 4-5 large lemons. Use a microplane to zest the limes (yes, it's a LOT of zesting!) and then use a citrus press to juice the lemons. You'll need one cup of fresh lemon juice.
- Temper eggs. Combine the egg yolks and 1/4 cup of sugar in a mixing bowl. Add the whole milk to a saucepan and heat over medium heat to a temperature of 165 degrees. (Do not boil.) When the milk is hot, drizzle about 1 cup of it into the eggs/sugar mixture, whisking constantly. Then pour the egg mixture back into the pan, the remaining sugar, and heat to 165 degrees. The mixture should be thick and easily coat the back of a spoon.5 large egg yolks, 1 ¼ cups granulated sugar, 1 ¾ cups whole milk
- NOTE: If needed, pass the tempered egg mixture through a fine-mesh sieve or cheesecloth into another bowl to remove any potential lumps or bits, resulting in a smoother ice cream base.
- Add the lemon juice and zest. Add the lemon juice and zest to the pan and heat again – over medium heat – for 3-4 minutes, stirring constantly. Let cool slightly.3-4 Tablespoons lemon zest, 1 cup lemon juice
- Combine all ingredients. In an 8-cup measuring cup or large bowl, combine all the ingredients – the tempered egg mixture with lemon juice and zest, heavy cream, vanilla extract, and a pinch of salt. Use a wire whisk to combine the liquid ingredients.2 ¼ cups heavy cream, 2 Tablespoons vanilla extract, pinch of salt
- Chill. Place the liquid mixture (covered in plastic wrap) in your refrigerator for at least four hours to chill completely. We often let the mixture chill overnight if time allows.
- Churn ice cream. Start your 2-quart ice cream churner (I use a KitchenAid Attachment with a stand mixer – linked below.) and pour the chilled ice cream mixture into the bowl (the attachment) while it’s running. Churn the ice cream until it becomes thick and creamy.You’ll see the ice cream thicken and rise toward the top of the bowl. The mixer may slow down slightly. (This should take 25-35 minutes or so.)
- Add to a freezer-safe container (or a loaf pan) and freeze. Add the churned ice cream into an ice cream container. Place the airtight container in the freezer to set up further. Initially, the ice cream will be very soft so freezing it for a couple of hours helps firm it up.
- Serve. Use an ice cream scoop to serve the ice cream in individual serving bowls or ice cream cones.
Notes
- The Kitchenaid ice cream maker attachment comes with a freezer bowl that needs to be frozen before use. Make sure to freeze it for at least 15 hours prior to making your ice cream.
- Before making your ice cream mixture, make sure to chill all the ingredients, including the milk, cream, and any mix-ins you plan to use. This will help the mixture freeze faster and prevent ice crystals from forming.
- When you’re ready to start churning your ice cream, begin with the mixer on a low speed. You can gradually increase the speed as the mixture thickens.
Can I use non-fat milk instead of whole milk?
You can if you’d like, however, I highly recommend sticking with whole milk. With less fat, the mixture freezes harder and forms larger ice crystals, making the ice cream icier rather than creamy.
If I were to make this in a 1.5 quart Cuisinart stand mixer ice cream attachment, how many servings would you recommend adjusting to?
I’d probably adjust to 9 servings.
I had 3 large lemons instead of 4-5 small. This was way too much lemon zest I believe as it turned out very bitter.
I’m sorry to hear this. I’m wondering if it was the quality of your lemons? We’ve had excellent results with this recipe.
Worth the effort! Served with fresh blueberries, it was a hit! Looking forward to trying more of your ice cream recipes!
I’m so happy to hear this, Donna! Thank you for your feedback!
I am usually a chocolate kind of guy, but I was surprised by this recipe and glad that I tried it!
Me too!