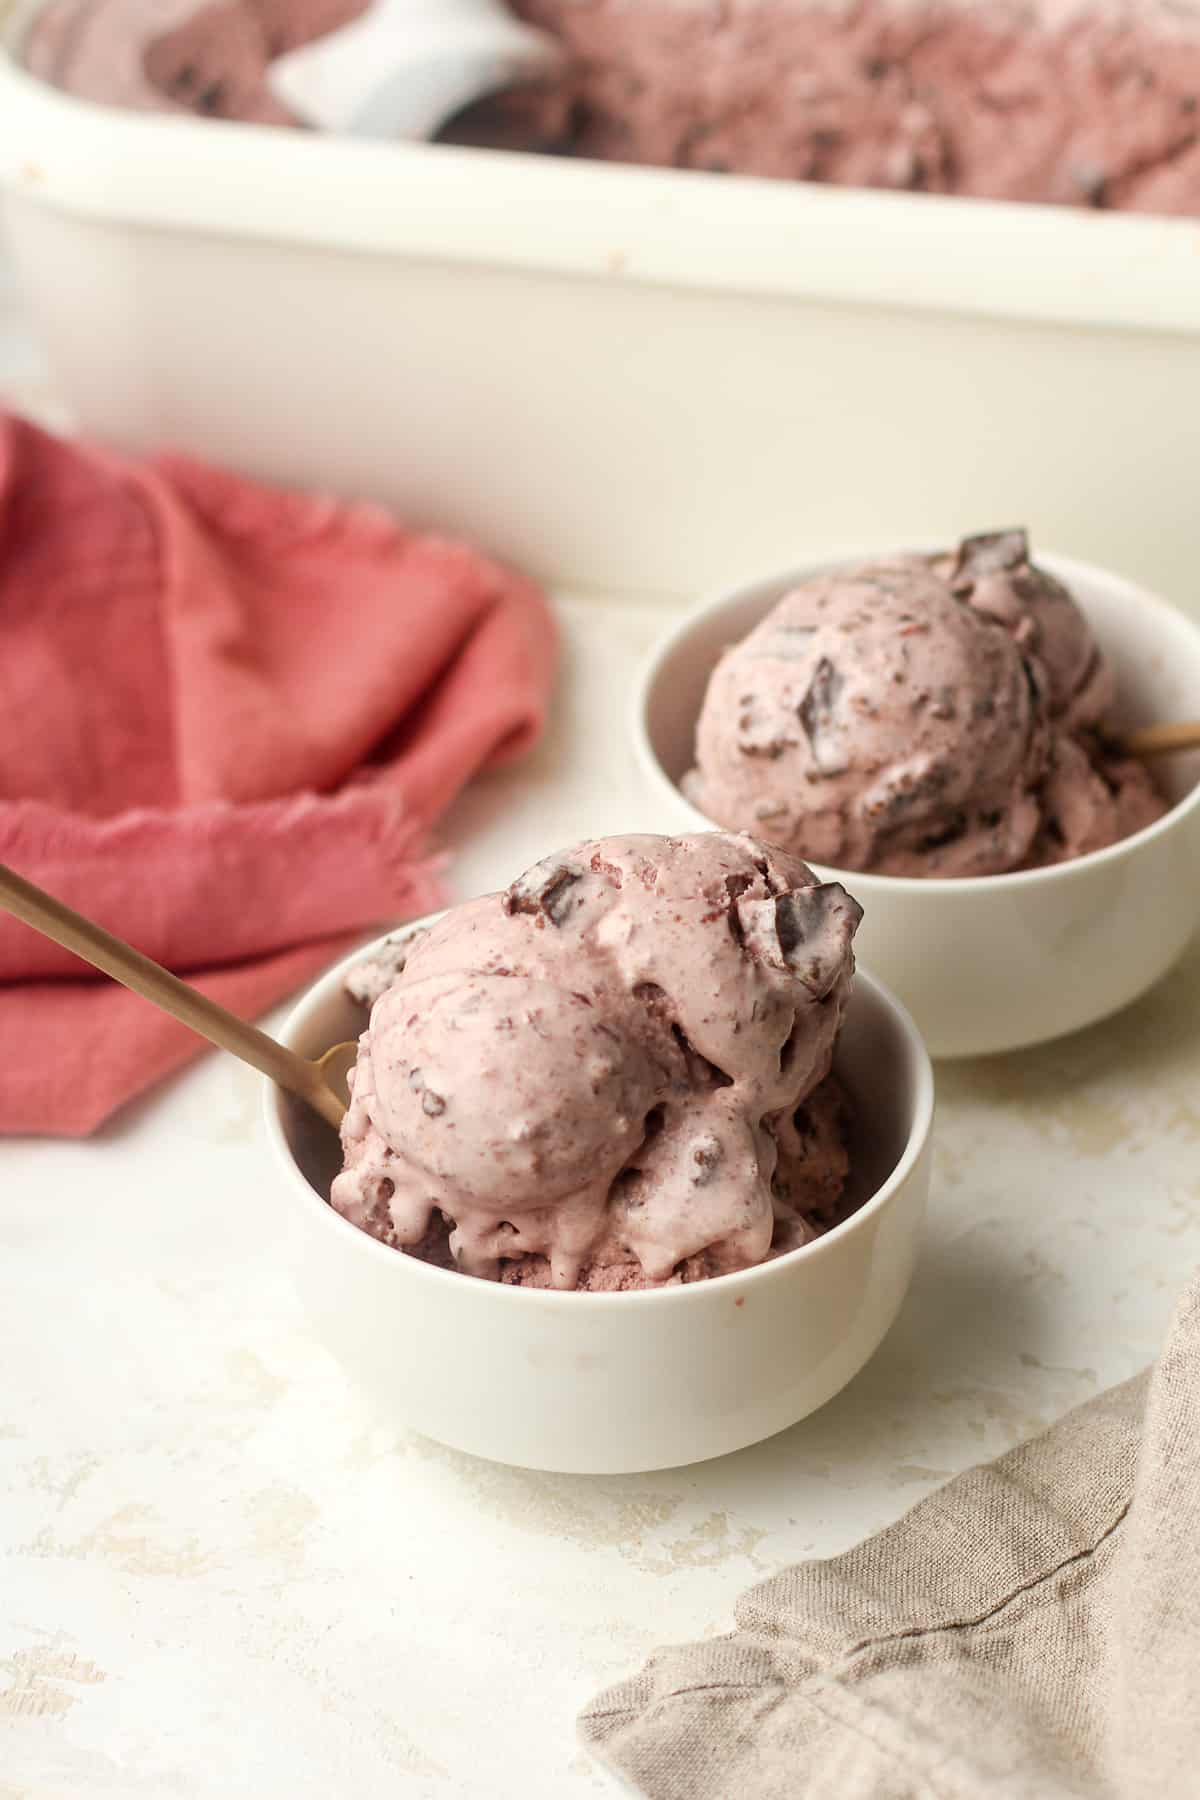
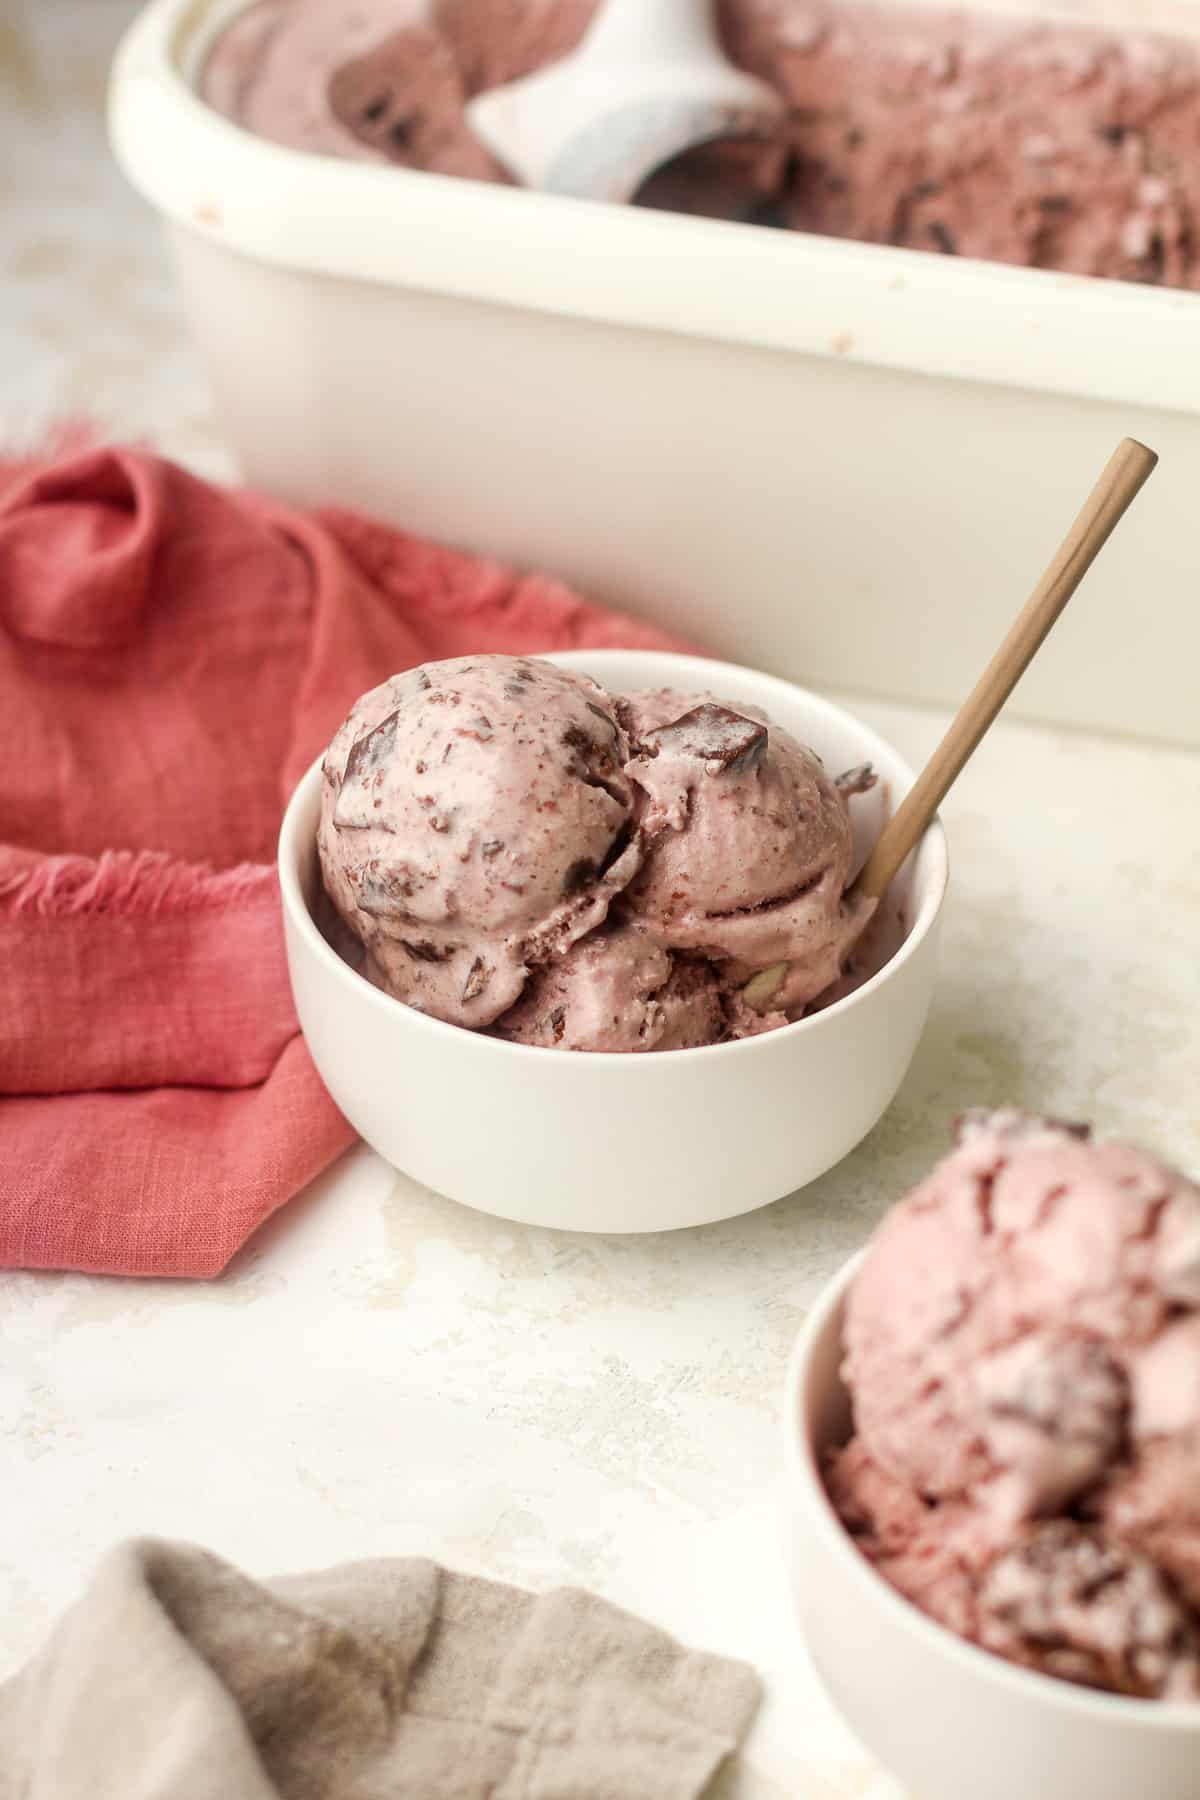
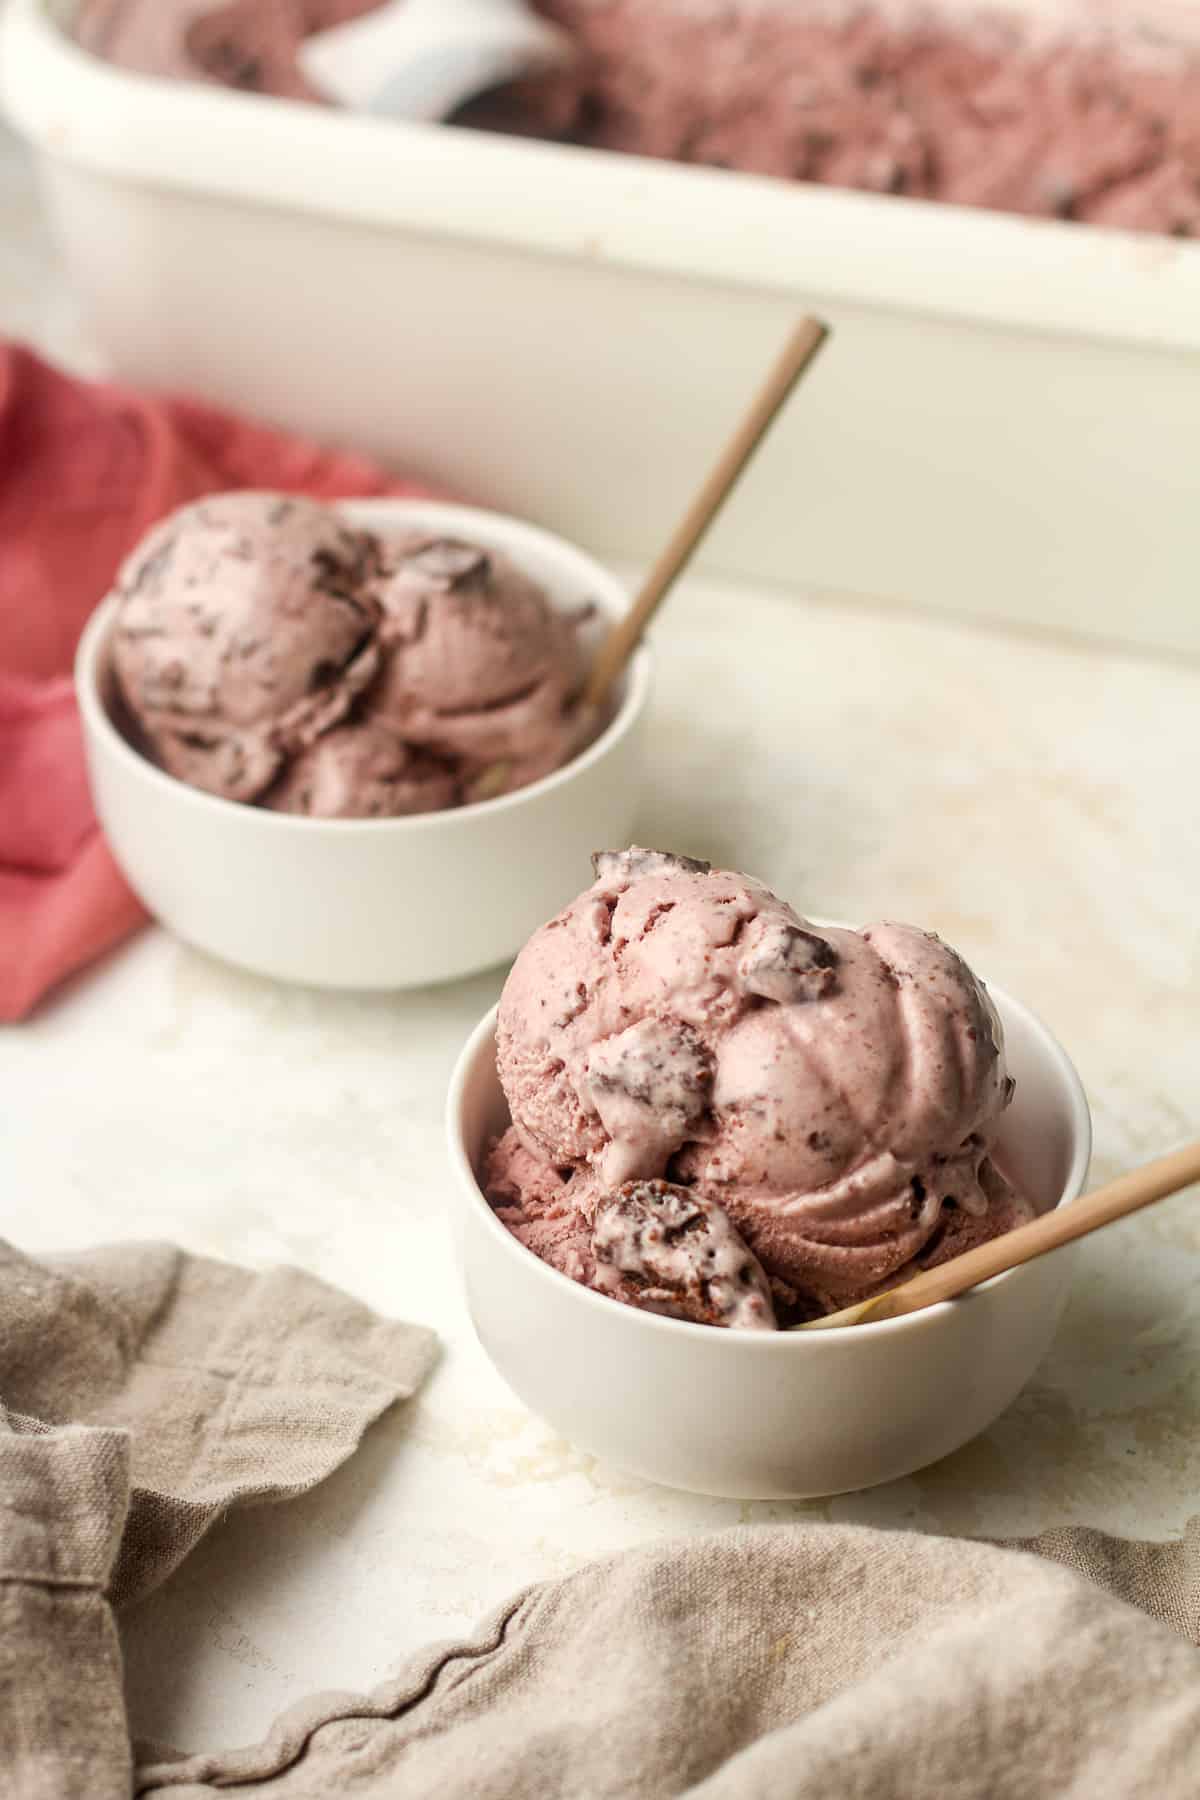
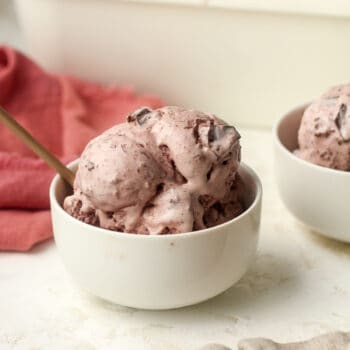
Black Forest Ice Cream
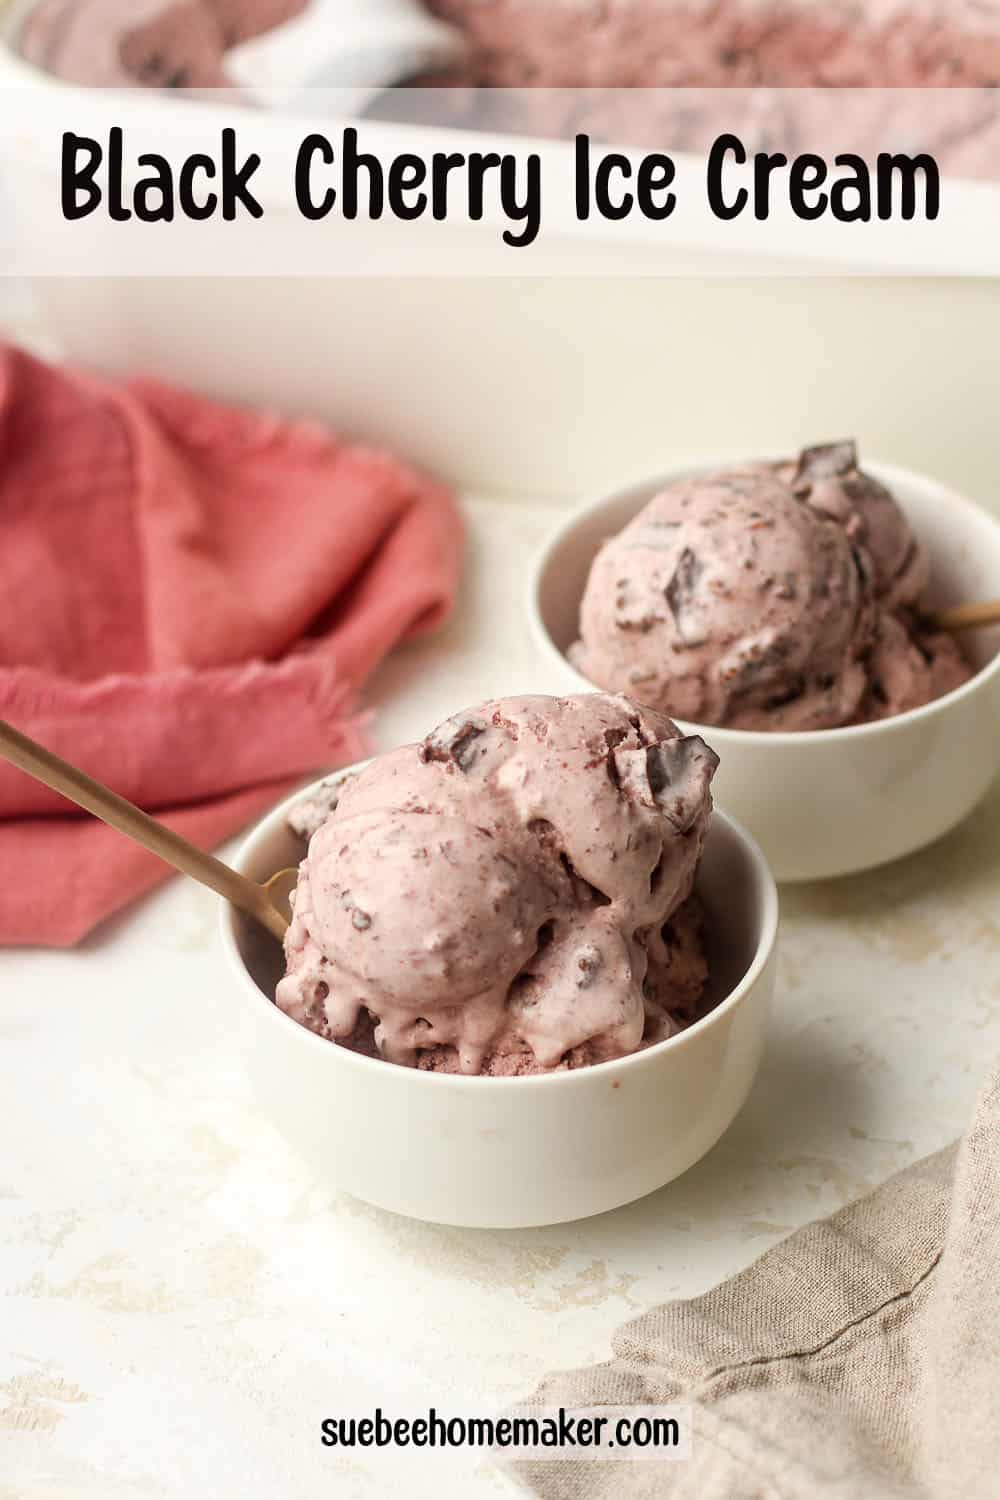
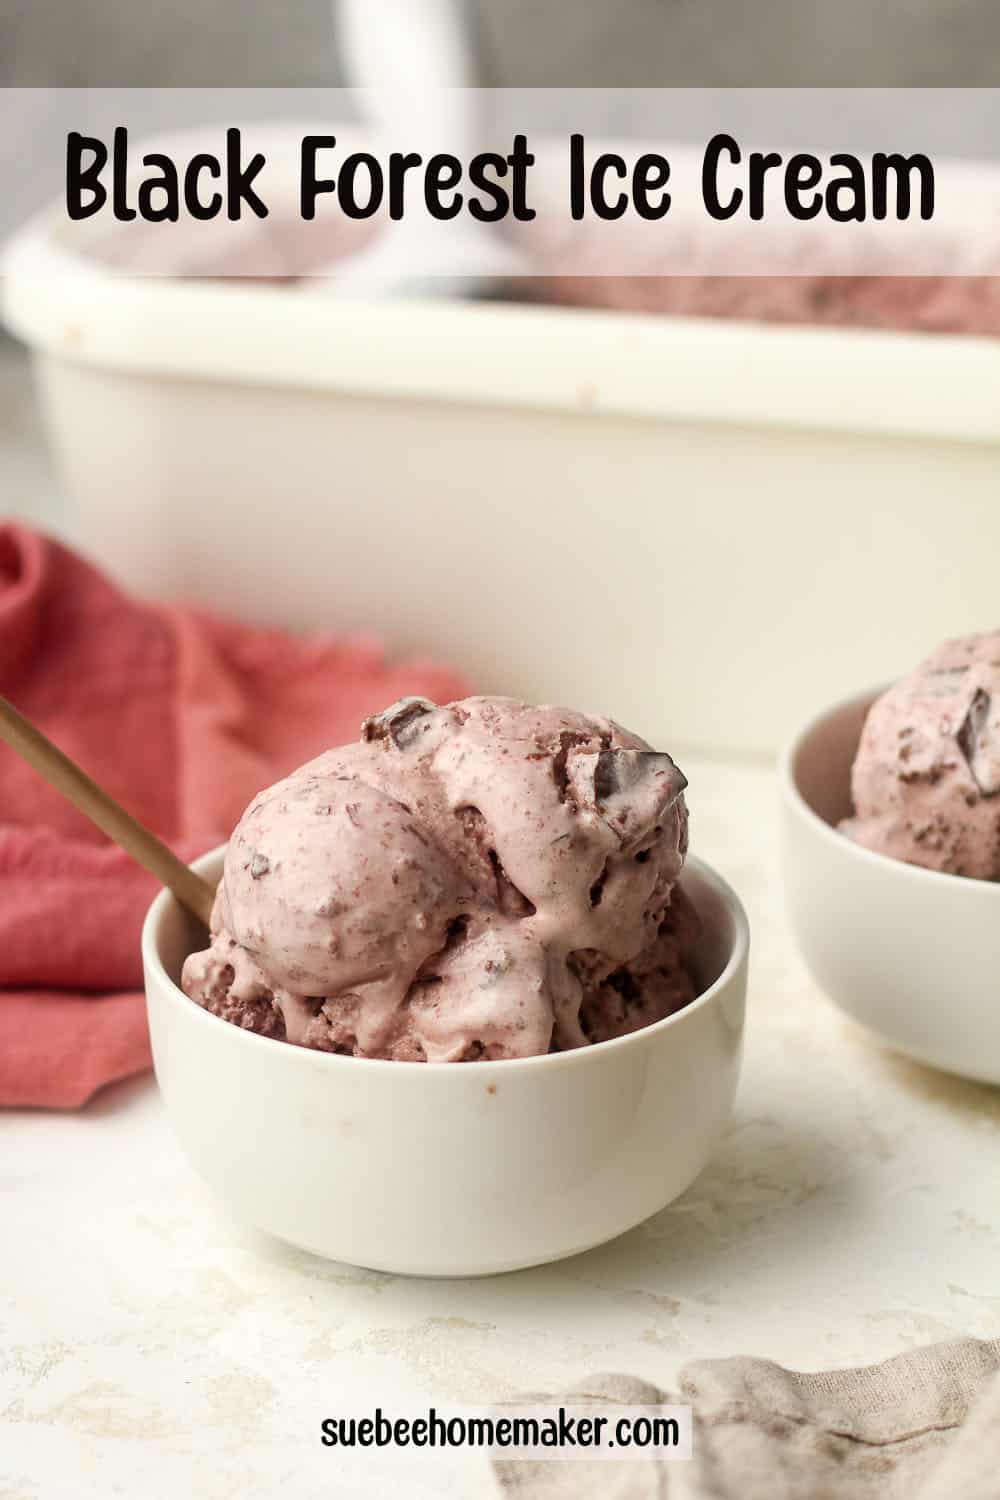
Black Forest Ice Cream combines rich dark cherry ice cream and chocolate brownie chunks. This decadent frozen treat is both sweet and tart and will definitely be your new go-to ice cream!
Take a look at all my KitchenAid Ice Cream Recipes!
Black Cherry Ice Cream
My ice cream obsession continues and I’m taking you along on my journey. Are you ready?
While Black Forest ice cream occasionally starts with a chocolate base, we’re starting off with a cherry base instead. But never fear, the creamy base is then studded with bits of brownies and dark chocolate. There is really nothing better than that, my friends.
Why This Recipe Works:
- EASY TO PREP AHEAD – The cherry ice cream base can be refrigerated a day in advance of churning. You can also make the brownies ahead of time too.
- FULL OF FLAVOR – This black forest ice cream recipe beats a plain ole vanilla ice cream any day of the week.
- IMPRESSIVE FOR GUESTS – We love making this creamy ice cream for company! It’s always a fun and delicious dessert.
What you’ll need to make Cherry Ice Cream:
Simple ingredients for the most delicious dessert.
- Dairy – An equal ratio of whole milk to heavy cream.
- Eggs – We’re using four egg yolks for this ice cream.
- Sugar – Some granulated sugar is included for sweetness.
- Pure Vanilla Extract – Some vanilla extract adds incredible flavor, as usual. We love Watkin’s brand.
- Cherry Extract – I purchased a high quality cherry extract on Amazon (linked below).
- Frozen Cherries – You can use frozen sweet cherries or fresh cherries for this delicious treat. If using fresh cherries, you’ll need to remove the pits before making the compote.
- Brownie Chunks – We went with a simple box brownie mix and used about 1/3 of it for this recipe.
- Dark Chocolate – An optional ingredient but delicious in this recipe.
How to make Black Forest Ice Cream:
Step 1
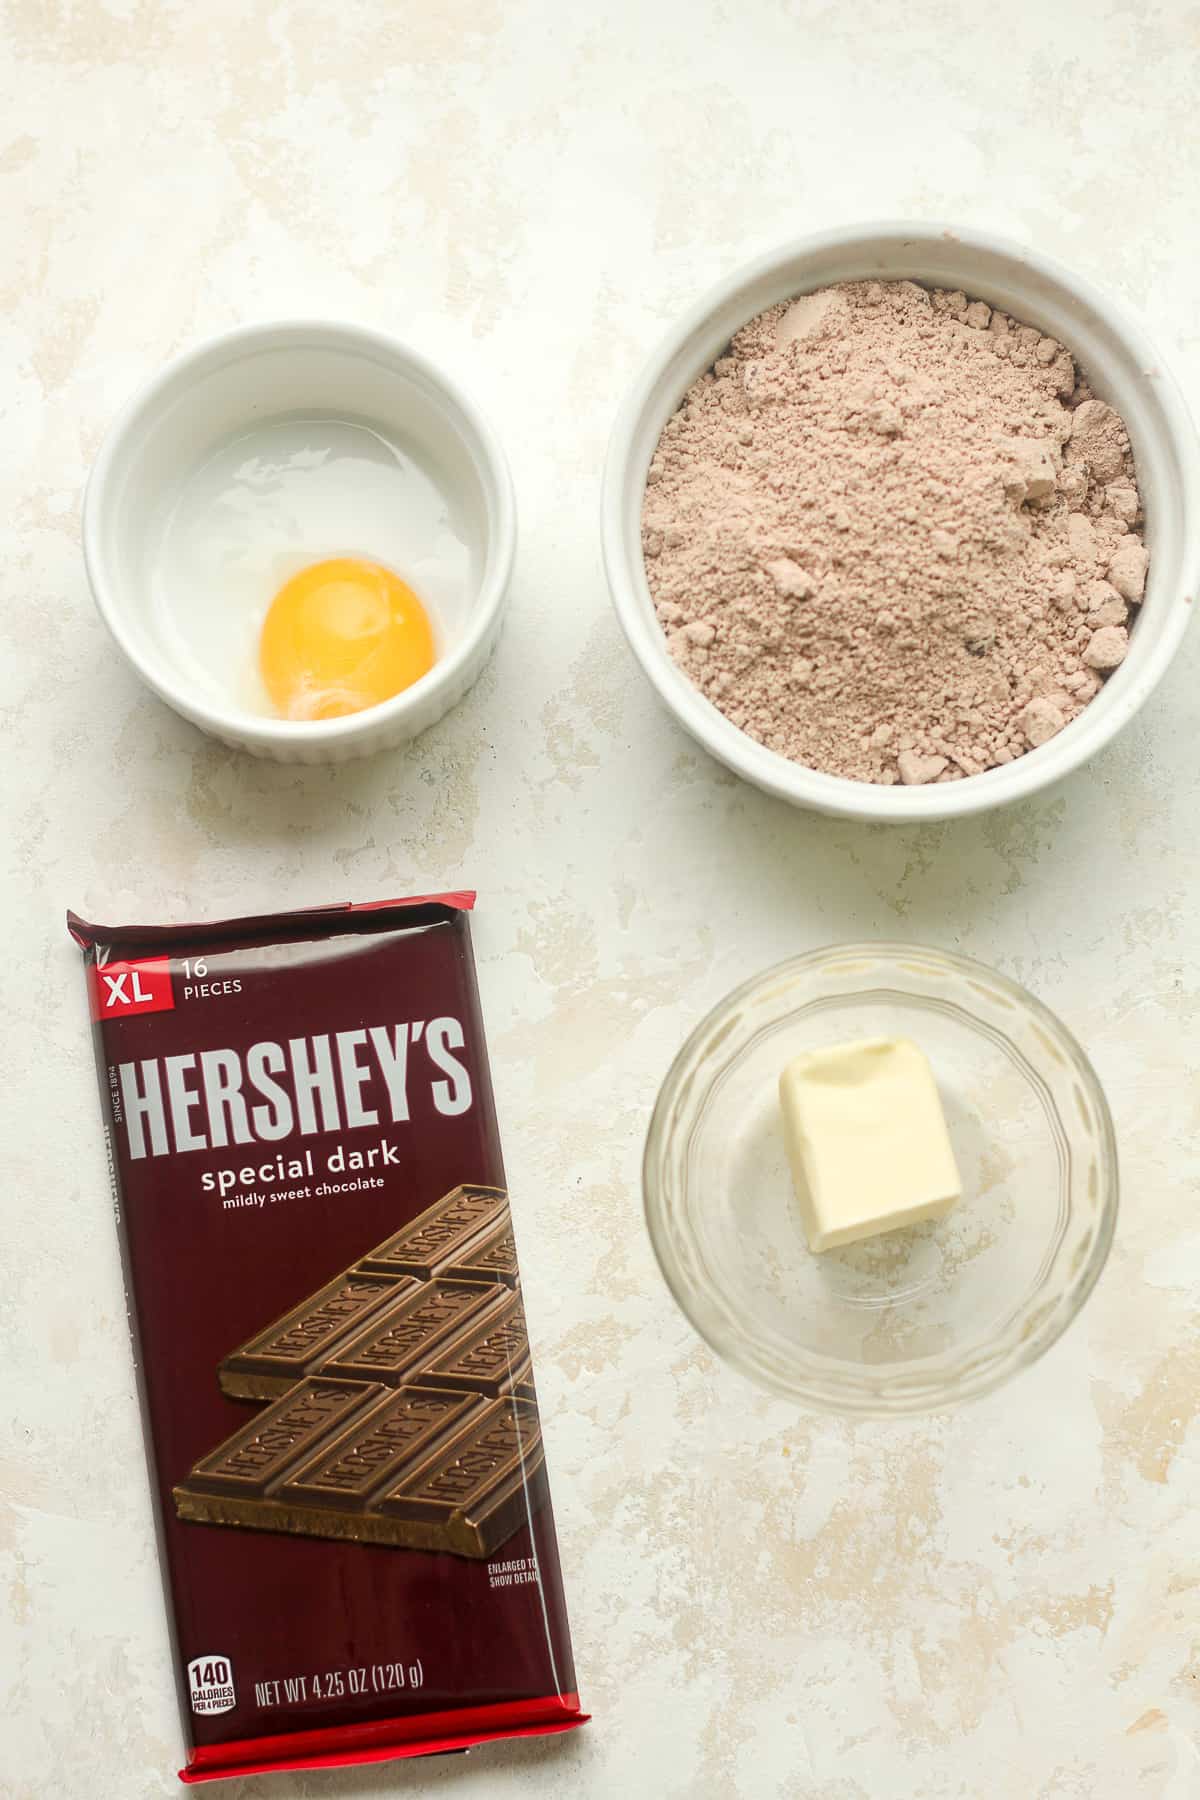
Combine brownie batter. In a small bowl, combine the brownie mix, melted butter, egg yolk, and a couple of tablespoons of hot water. Stir to combine.
Step 2
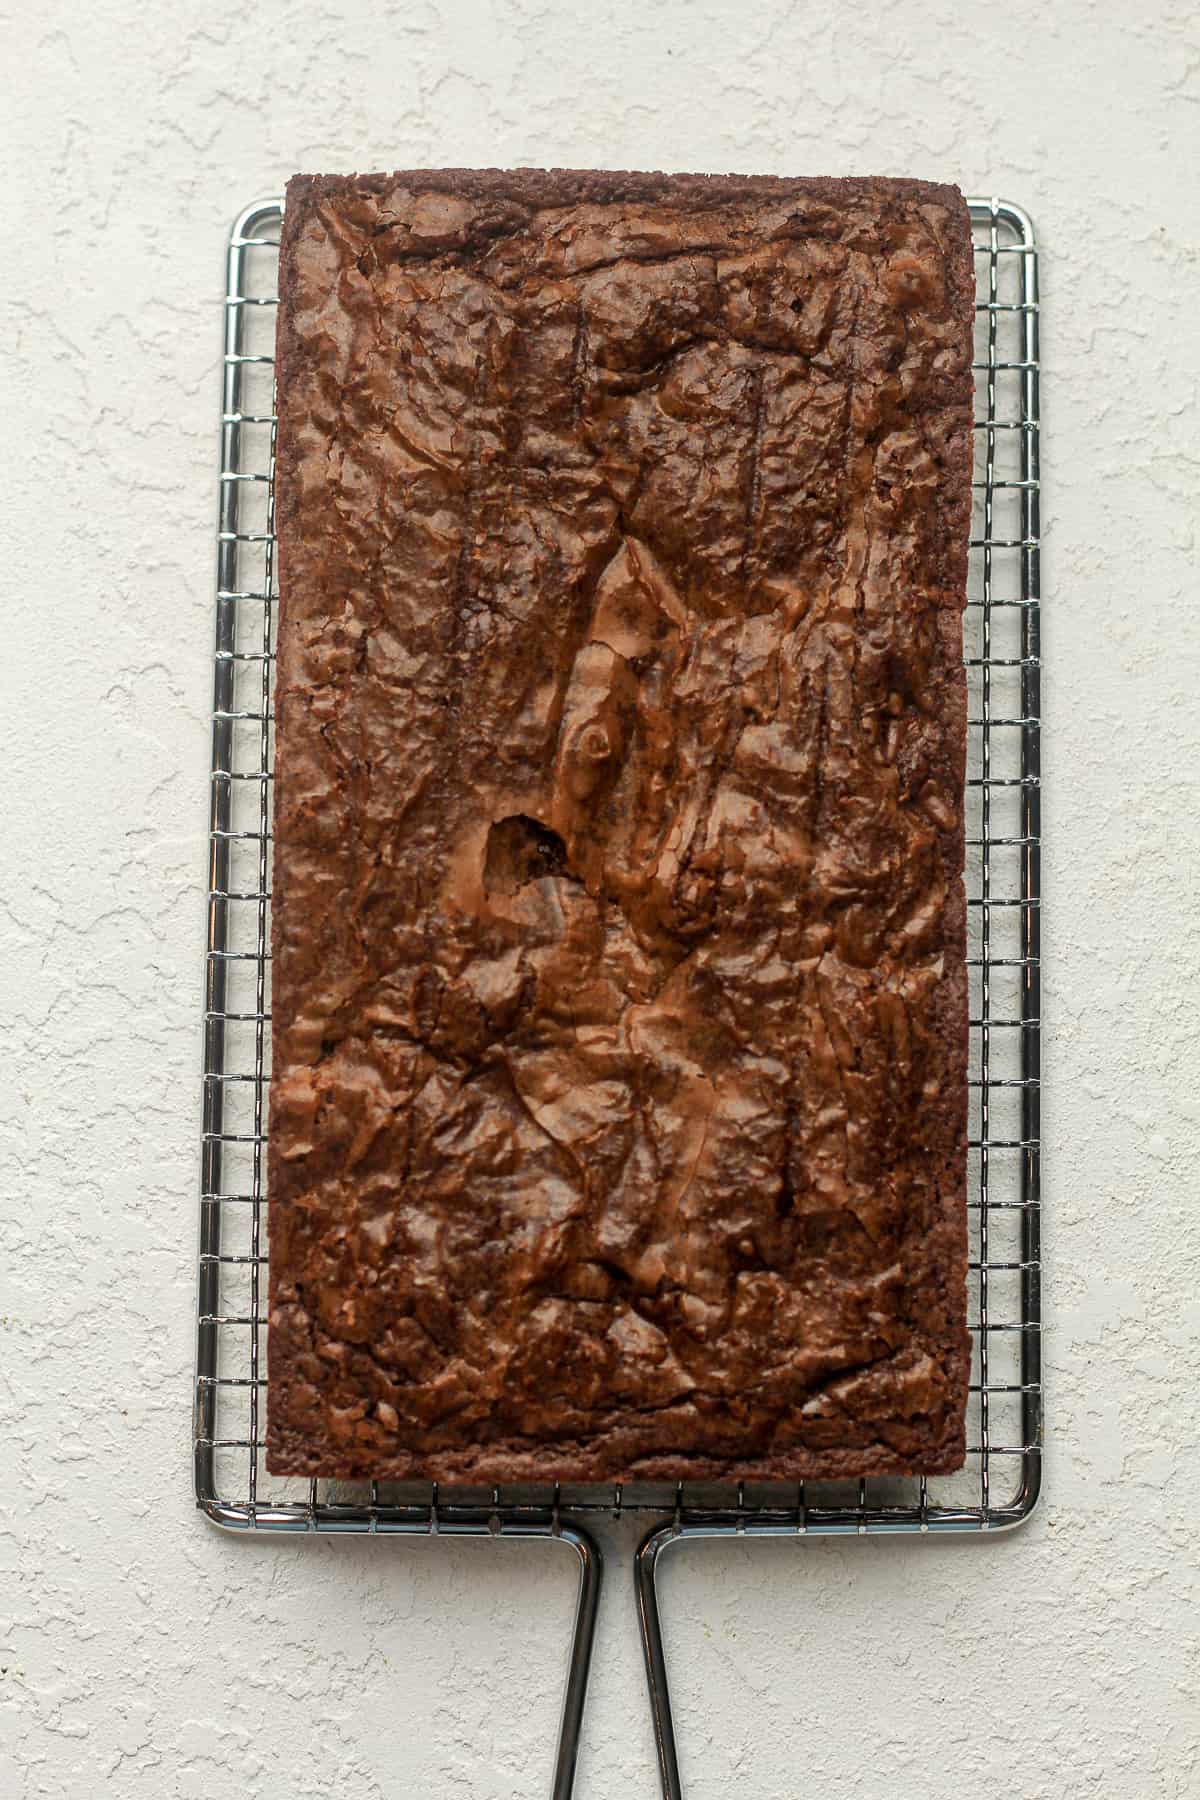
Bake brownies. Pour brownie batter into a greased one-pound bread pan, and smooth to all sides of the pan. Bake in a 350-degree F oven for 16-18 minutes, or until done in the center.
Let brownies cool and then slice them into small pieces.
Step 3
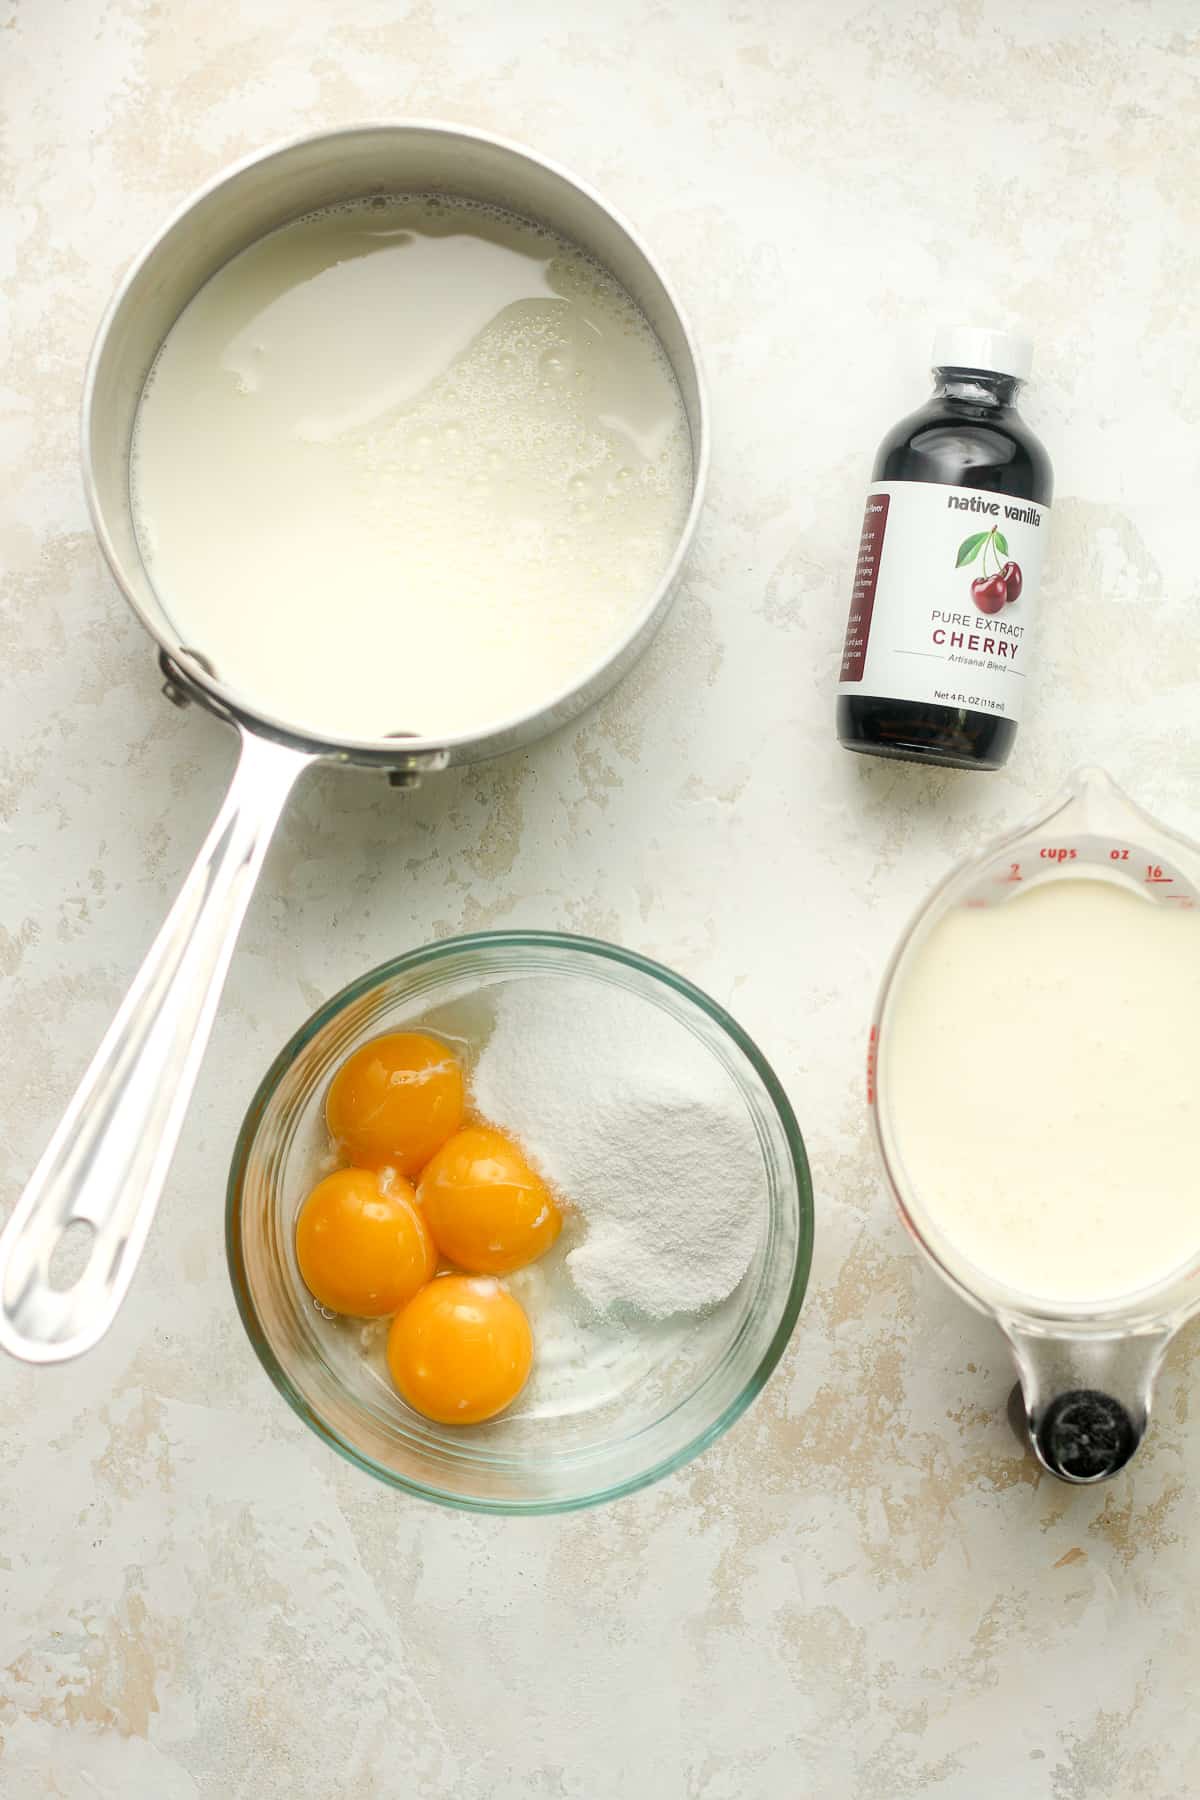
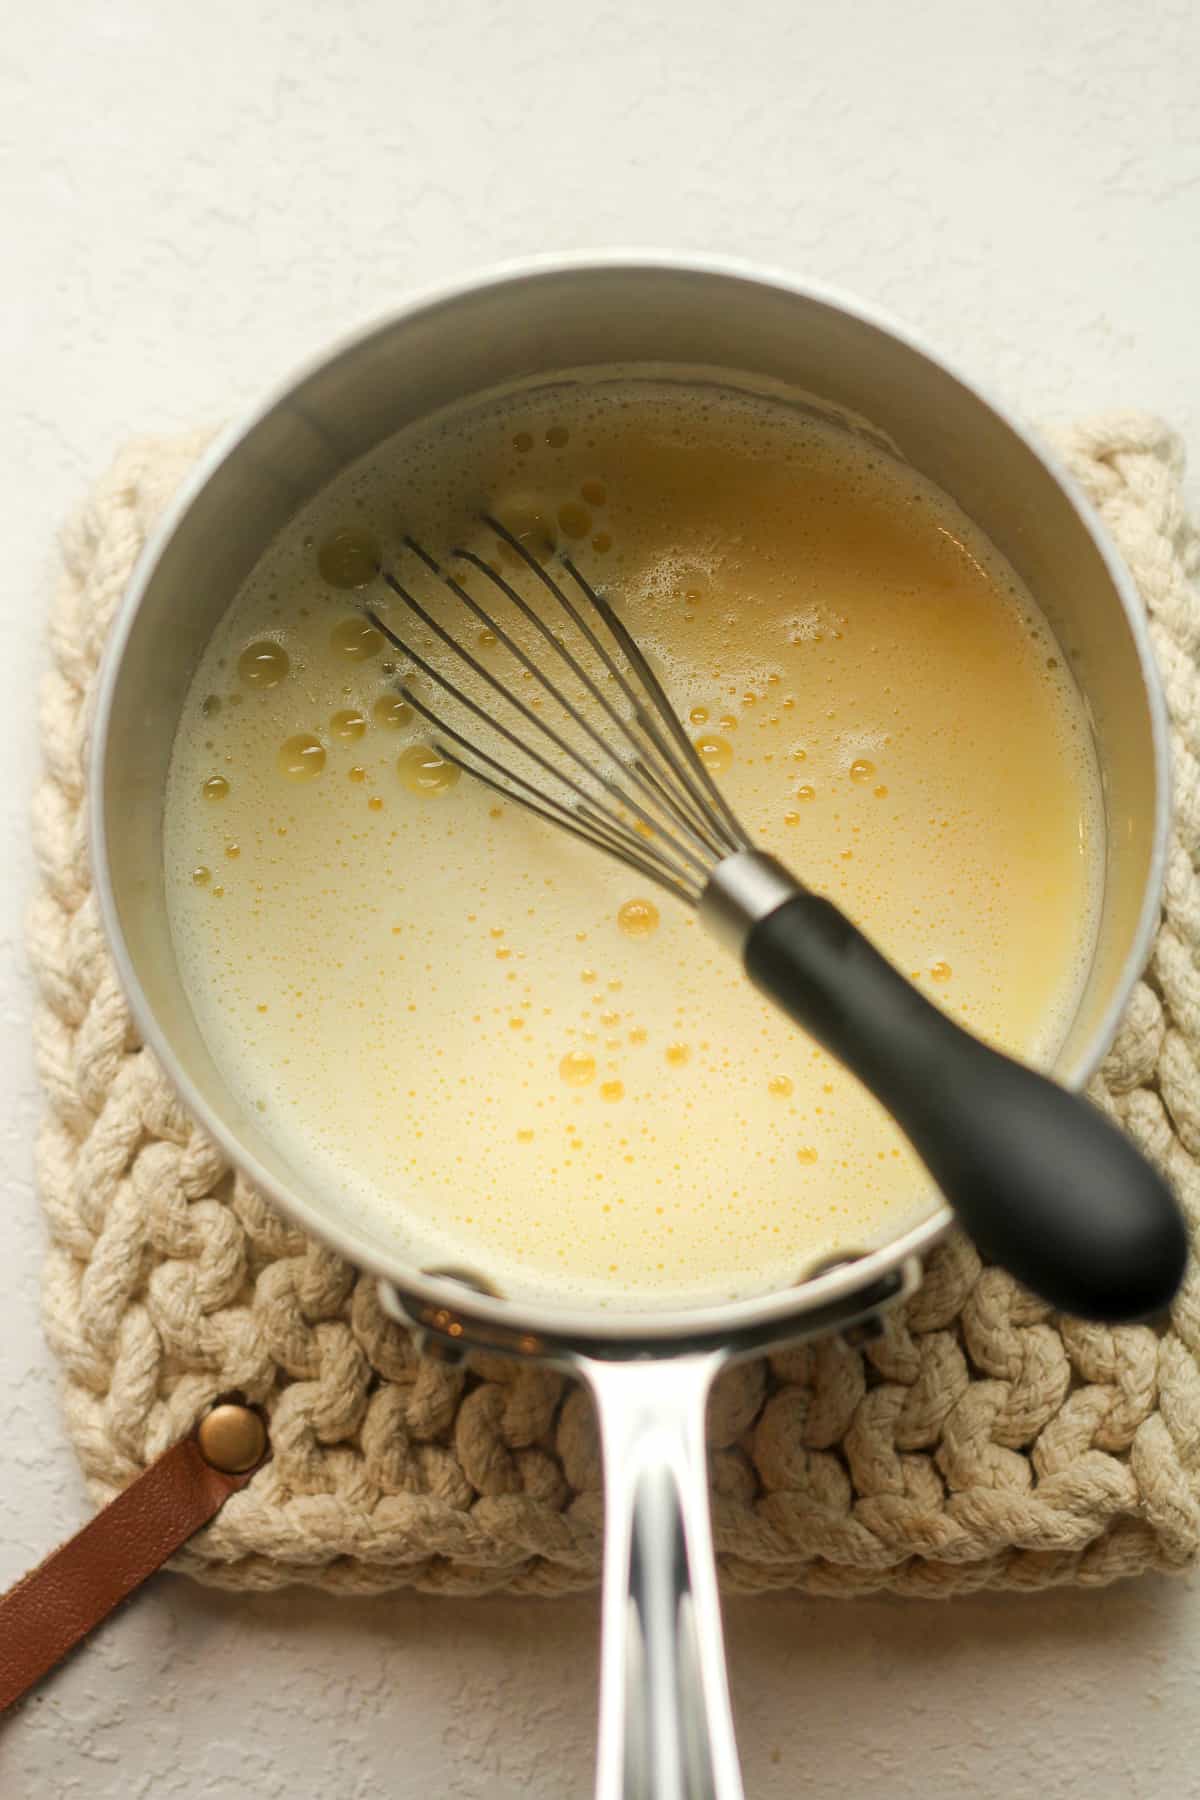
Temper eggs. Combine the egg yolks and 1/4 cup of sugar in a mixing bowl. Add the whole milk to a saucepan and heat over medium heat to a temperature of 165 degrees. (Do not boil.)
When the milk is hot, pour 1/2 cup at a time into the eggs/sugar mixture, whisking constantly. Then pour the egg mixture back into the pan and heat to 165 degrees.
Step 4
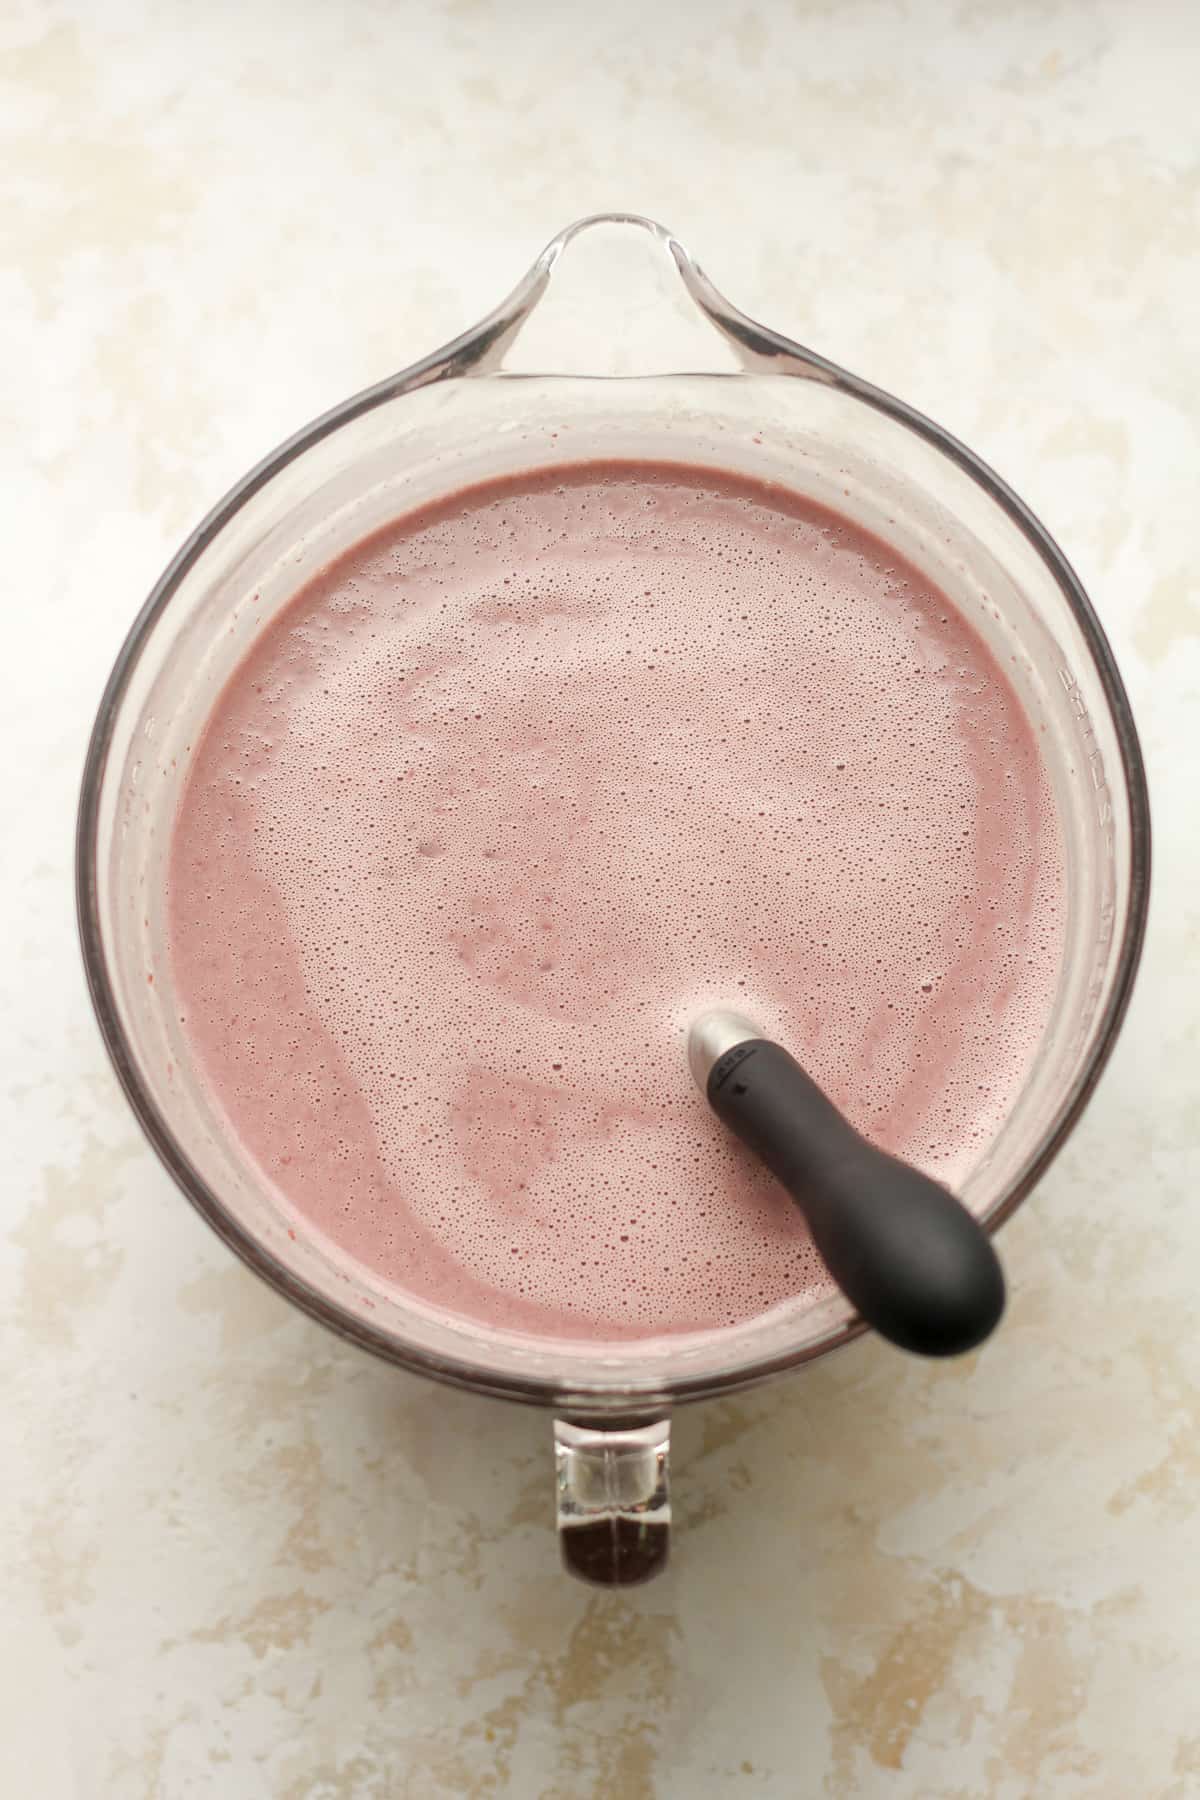
Add remaining ingredients. Pour the hot mixture into an 8-cup measuring cup or large bowl. After it cools off slightly, add the heavy cream, vanilla extract, cherry extract, and a pinch of salt. Whisk well.
Step 5
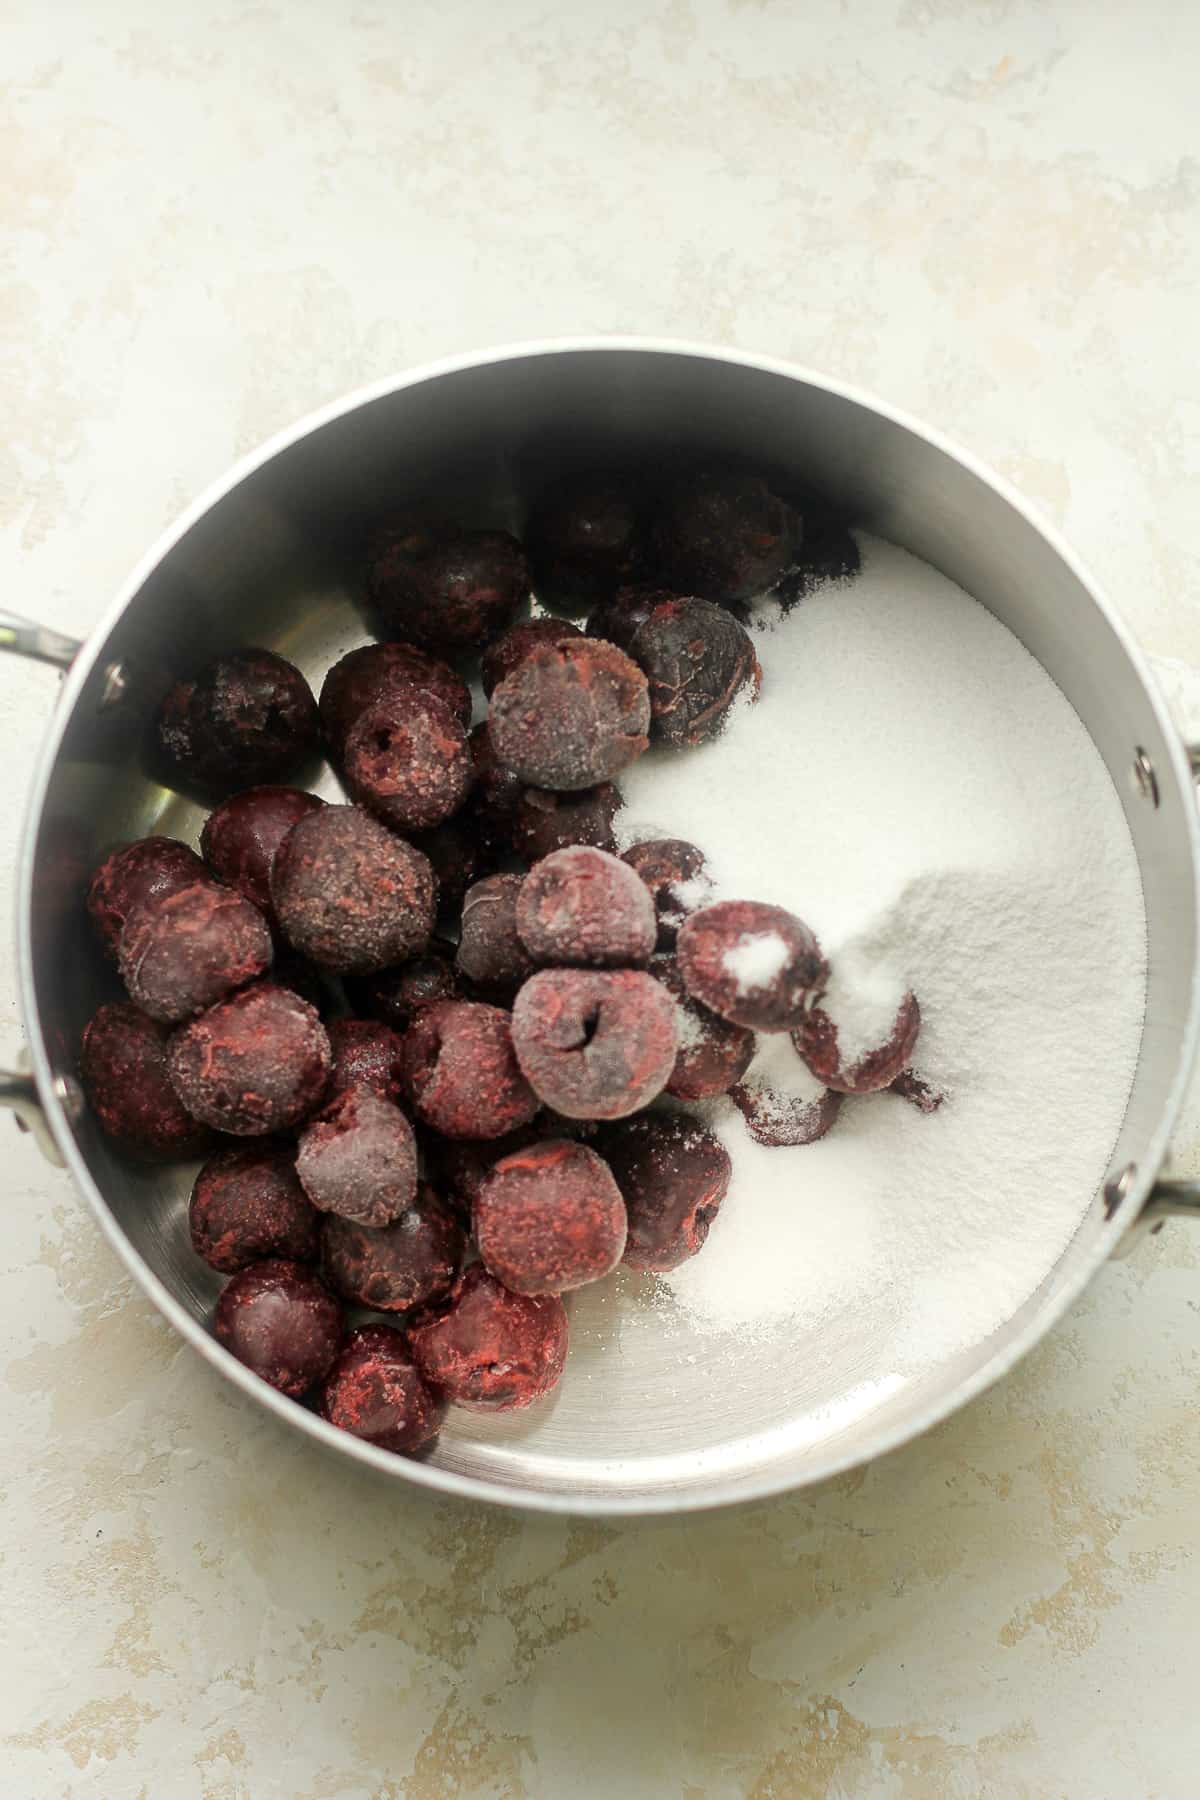
Make cherry compote. Combine the frozen cherries, 3/4 cup of sugar, and a dash of water in a small saucepan. Cook over medium heat for about 10 minutes, stirring frequently. Let cool slightly.
Step 6
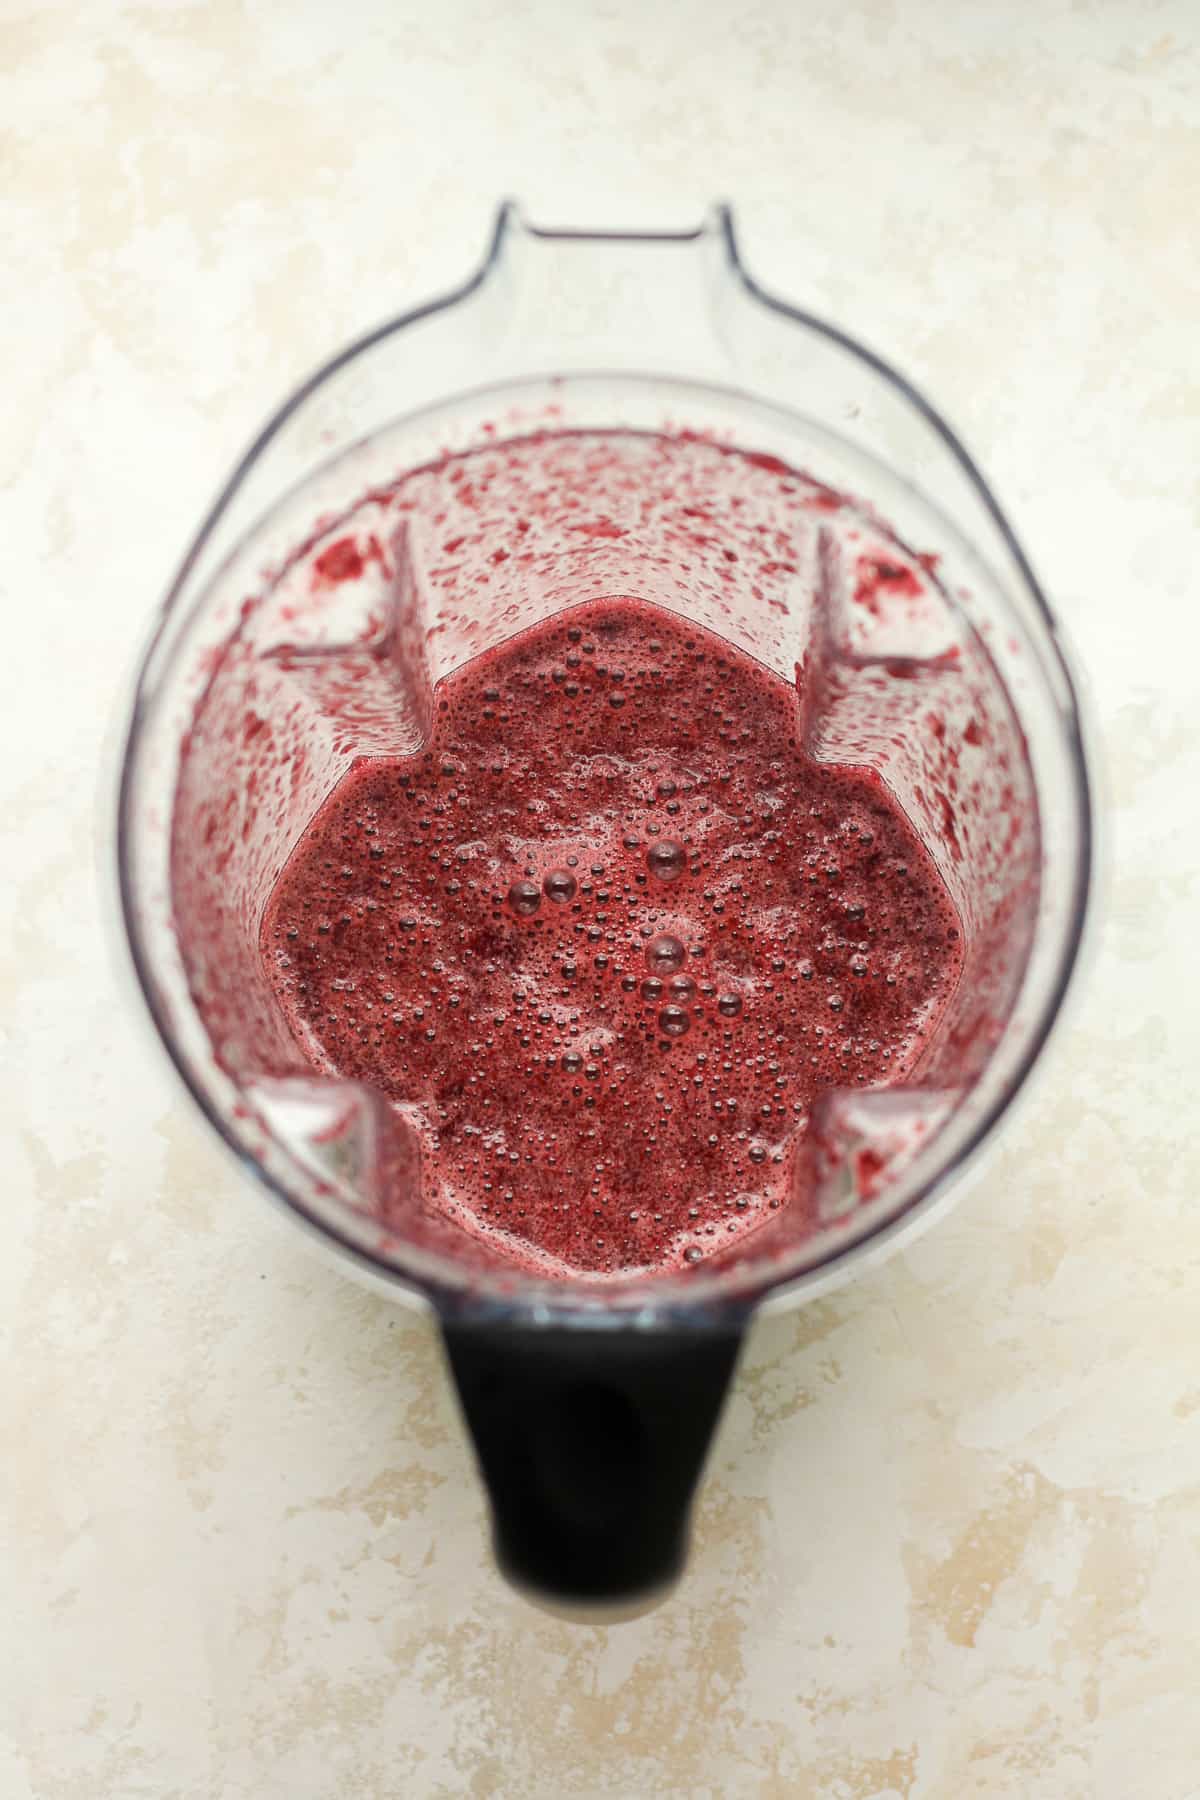
Blend. Pour cherry mixture into a high-powered blender. Blend at high speed until well combined. Pour the cherry compote into the measuring cup with the other ingredients.

Step 7
Chill. Cover the liquid mixture with plastic wrap, and refrigerate for at least four hours before churning. The mixture should be VERY COLD!
Step 8
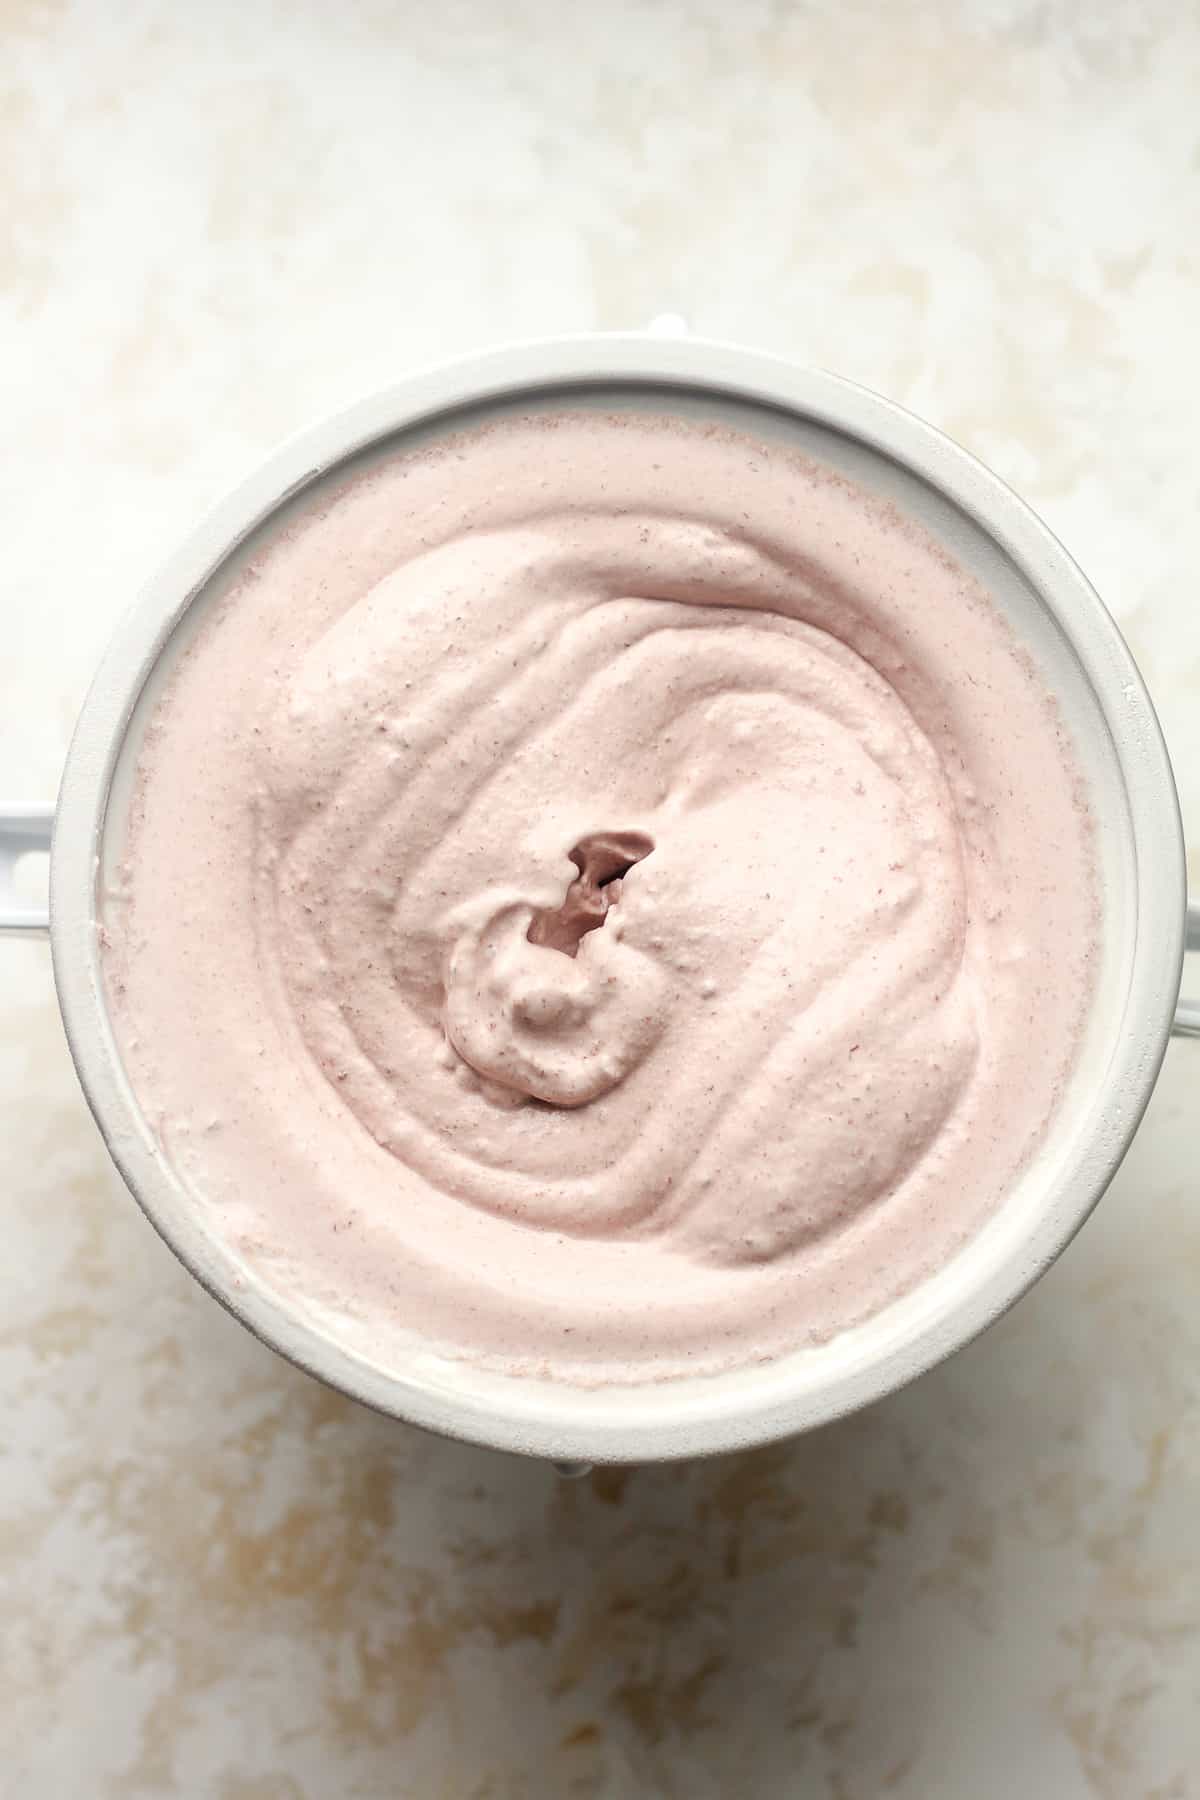
Churn ice cream. Start your 2-quart ice cream churner (I use a KitchenAid Attachment with a stand mixer – linked below.) and pour the chilled ice cream mixture into the bowl (the attachment) while it’s running. Churn cherry ice cream until it becomes thick and creamy.
You’ll see the ice cream thicken and rise toward the top of the bowl. The mixer may slow down slightly. (This should take 25-35 minutes or so.)
Step 9
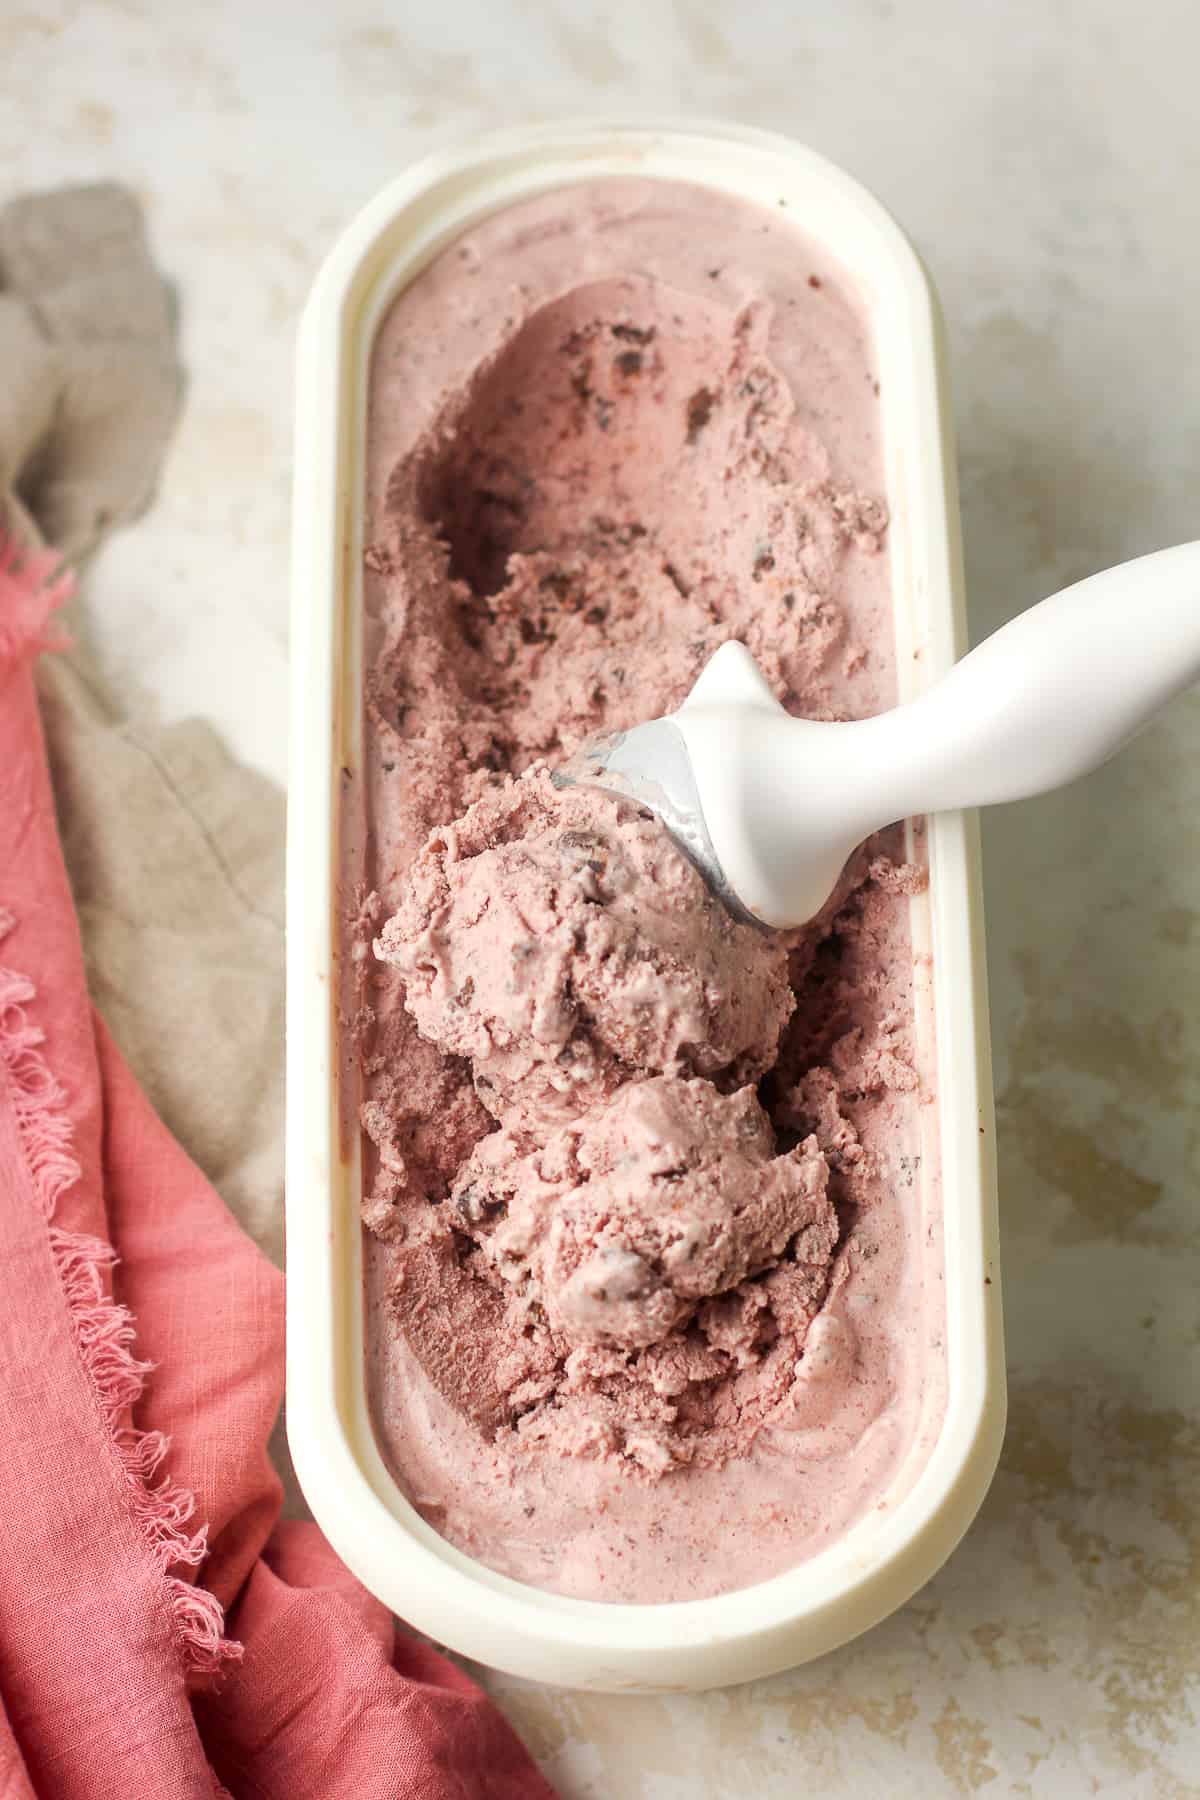
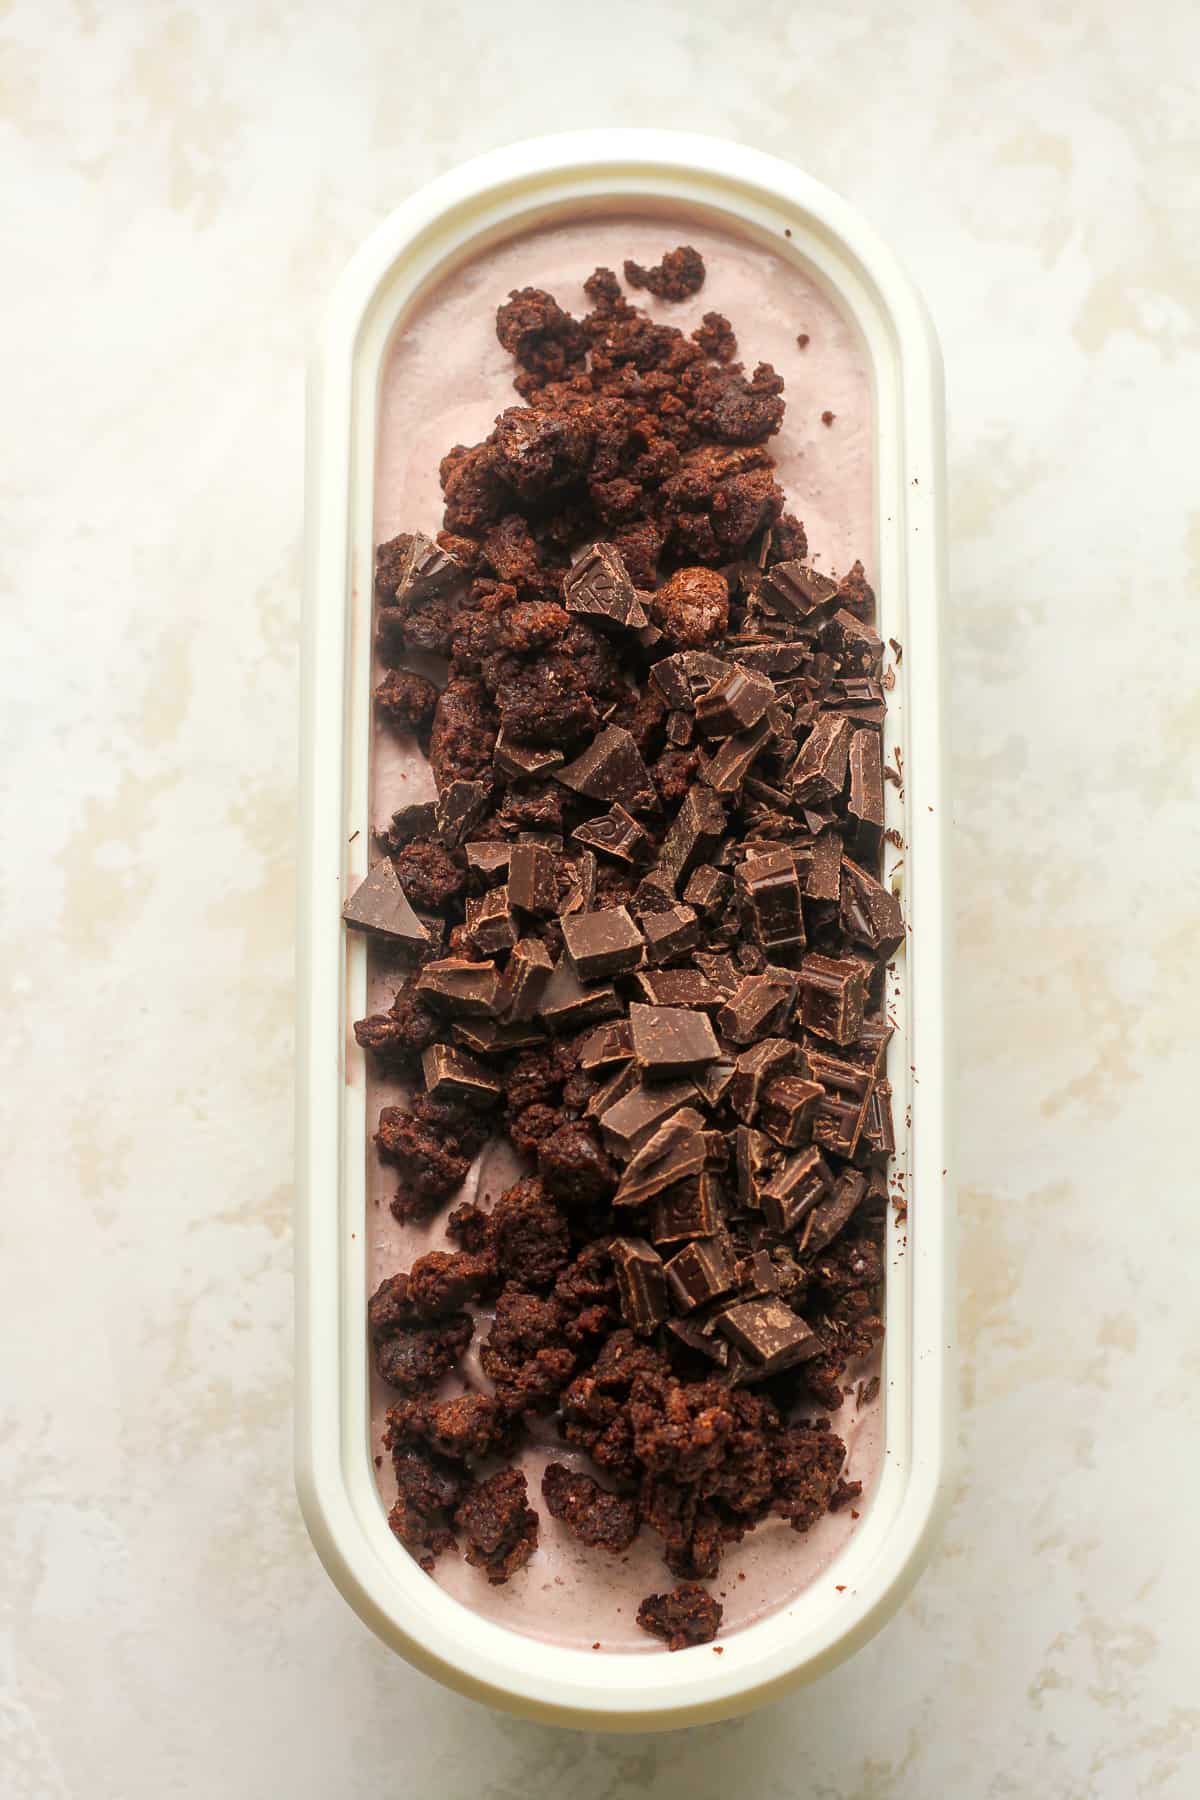
Add chocolate. Use a rubber spatula to spoon the ice cream into an ice cream storage container. Add the brownie chunks and some chopped chocolate chunks (optional).
Step 10
Freeze. Place the airtight container in the freezer to set up further. Initially, the ice cream will be very soft so freezing it for a couple of hours helps firm it up.
Pro-Tip: This ice cream would be great served with a drizzle of chocolate sauce!
More Ice Cream Flavors:
There are so many ice cream flavors to love. The following are a few of our favorites!
Tips for using a KitchenAid Ice Cream Attachment:
- Freeze the bowl ahead of time: The Kitchenaid ice cream maker attachment comes with a freezer bowl that needs to be frozen before use. Make sure to freeze it for at least 15 hours prior to making your ice cream.
- Chill your ingredients: Before making your ice cream mixture, make sure to chill all the ingredients, including the milk, cream, and any mix-ins you plan to use. This will help the mixture freeze faster and prevent ice crystals from forming.
- Don’t overfill the bowl: Make sure not to overfill the freezer bowl with the ice cream mixture, as this can prevent it from churning properly. Leave about 1 inch of space at the top.
- Start the mixer on a low speed: When you’re ready to start churning your ice cream, begin with the mixer on a low speed. You can gradually increase the speed as the mixture thickens.
- Be patient: Churning ice cream can take anywhere from 20 to 40 minutes, depending on the recipe and the consistency you’re looking for. Be patient and don’t be tempted to stop the mixer too early, as this can result in a soupy texture.
- Add mix-ins at the end: If you plan to add any mix-ins, such as chocolate chips or nuts, wait until the ice cream is almost fully churned before adding them in. This will ensure that they’re evenly distributed throughout the mixture.
- Transfer to a container and freeze: Once the ice cream is fully churned, transfer it to a freezer-safe container and freeze it for at least 4 hours, or until it’s firm enough to scoop. Enjoy your homemade ice cream!
Kitchen Tools Used: (affiliate links)
You may also want to purchase some pure cherry extract for this ice cream recipe.
xoxo ~Sue
Black Forest Ice Cream
Ingredients
For the brownies:
- 6 oz. Double Chocolate Ghirardelli brownie mix
- 1 large egg yolk
- 3 Tablespoons unsalted butter – melted
- a splash of hot water
For the cherry sauce:
- 1 pound frozen dark cherries
- 3/4 cup granulated sugar
For the ice cream base
- 4 large egg yolks
- 1/4 cup granulated sugar
- 1 ¾ cups whole milk
- 1 ¾ cup heavy cream
- 1 Tablespoon vanilla extract
- 2 teaspoons cherry extract
- pinch of salt
- 2 oz. dark chocolate
Instructions
- Combine brownie batter. In a small bowl, combine the brownie mix, melted butter, egg yolk, and a couple of tablespoons of hot water. Stir to combine.6 oz. Double Chocolate Ghirardelli brownie mix, 3 Tablespoons unsalted butter, 1 large egg yolk, a splash of hot water
- Bake brownies. Pour brownie batter into a greased one-pound bread pan, and smooth to all sides of the pan. Bake in a 350-degree F oven for 16-18 minutes, or until done in the center. Let brownies cool and then slice them into small pieces.
- Temper eggs. Combine the egg yolks and 1/4 cup of sugar in a mixing bowl. Add the whole milk to a saucepan and heat over medium heat to a temperature of 165 degrees. (Do not boil.) When the milk is hot, drizzle about one cup of it into the eggs/sugar mixture, whisking constantly. Then pour the egg mixture back into the pan and heat to 165 degrees.4 large egg yolks, 1/4 cup granulated sugar, 1 ¾ cups whole milk
- Add remaining ingredients. Pour the hot mixture into an 8-cup measuring cup or large bowl. After it cools off some, add the heavy cream, vanilla extract, cherry extract, and a pinch of salt. Whisk well.1 ¾ cup heavy cream, 1 Tablespoon vanilla extract, 2 teaspoons cherry extract, pinch of salt
- Make cherry compote. Combine the frozen cherries, 3/4 cup of sugar, and a splash of water in a small saucepan. Cook over medium heat for about 10 minutes, stirring frequently. Let cool slightly.1 pound frozen dark cherries, 3/4 cup granulated sugar
- Blend. Pour cherry mixture into a high-powered blender. Blend at high speed until well combined. Pour the cherry compote into the measuring cup with the other ingredients.
- Chill. Cover the liquid mixture with plastic wrap, and refrigerate for at least four hours before churning. The mixture should be VERY COLD!
- Churn ice cream. Start your 2-quart ice cream churner (I use a KitchenAid Attachment with a stand mixer – linked below.) and pour the chilled ice cream mixture into the bowl (the attachment) while it’s running. Churn cherry ice cream until it becomes thick and creamy.
- You’ll see the ice cream thicken and rise toward the top of the bowl. The mixer may slow down slightly. (This should take 25-35 minutes or so.)
- Add chocolate. Use a rubber spatula to spoon the ice cream into an ice cream storage container. Add the brownie chunks and some chopped chocolate chunks (optional).2 oz. dark chocolate
- Freeze. Place the airtight container in the freezer to set up further. Initially, the ice cream will be very soft so freezing it for a couple of hours helps firm it up.
- Pro-Tip: This ice cream would be great served with a drizzle of chocolate sauce!
Notes
- Freeze the bowl ahead of time: The Kitchenaid ice cream maker attachment comes with a freezer bowl that needs to be frozen before use. Make sure to freeze it for at least 15 hours prior to making your ice cream.
- Chill your ingredients: Before making your ice cream mixture, make sure to chill all the ingredients, including the milk, cream, and any mix-ins you plan to use. This will help the mixture freeze faster and prevent ice crystals from forming.
- Don’t overfill the bowl: Make sure not to overfill the freezer bowl with the ice cream mixture, as this can prevent it from churning properly. Leave about 1 inch of space at the top.
- Start the mixer on a low speed: When you’re ready to start churning your ice cream, begin with the mixer on a low speed. You can gradually increase the speed as the mixture thickens.
- Be patient: Churning ice cream can take anywhere from 20 to 40 minutes, depending on the recipe and the consistency you’re looking for. Be patient and don’t be tempted to stop the mixer too early, as this can result in a soupy texture.
- Add mix-ins at the end: If you plan to add any mix-ins, such as chocolate chips or nuts, wait until the ice cream is almost fully churned before adding them in. This will ensure that they’re evenly distributed throughout the mixture.
- Transfer to a container and freeze: Once the ice cream is fully churned, transfer it to a freezer-safe container and freeze it for at least 4 hours, or until it’s firm enough to scoop. Enjoy your homemade ice cream!
LOve your recipes – but not sure – are the brownie bits put in at the last minute along with the chocolate? Have read and reread the recipe – just don’t see ????
Yes, add the brownie chunks and chocolate at the very end after the ice cream is churned.
Step 5 says to add “remaining sugar”… what remaining sugar?
I’m sorry, Emily. There is no remaining sugar and I just fixed it. Thanks.
We are an ice cream family and homemade is always the best. Cherry is my favorite flavor so this was extra good to me. I love the combo with chocolate because who wouldn’t?!!
Outstanding! Your homemade ice cream recipes are the best and I love choices!
Yes sir!