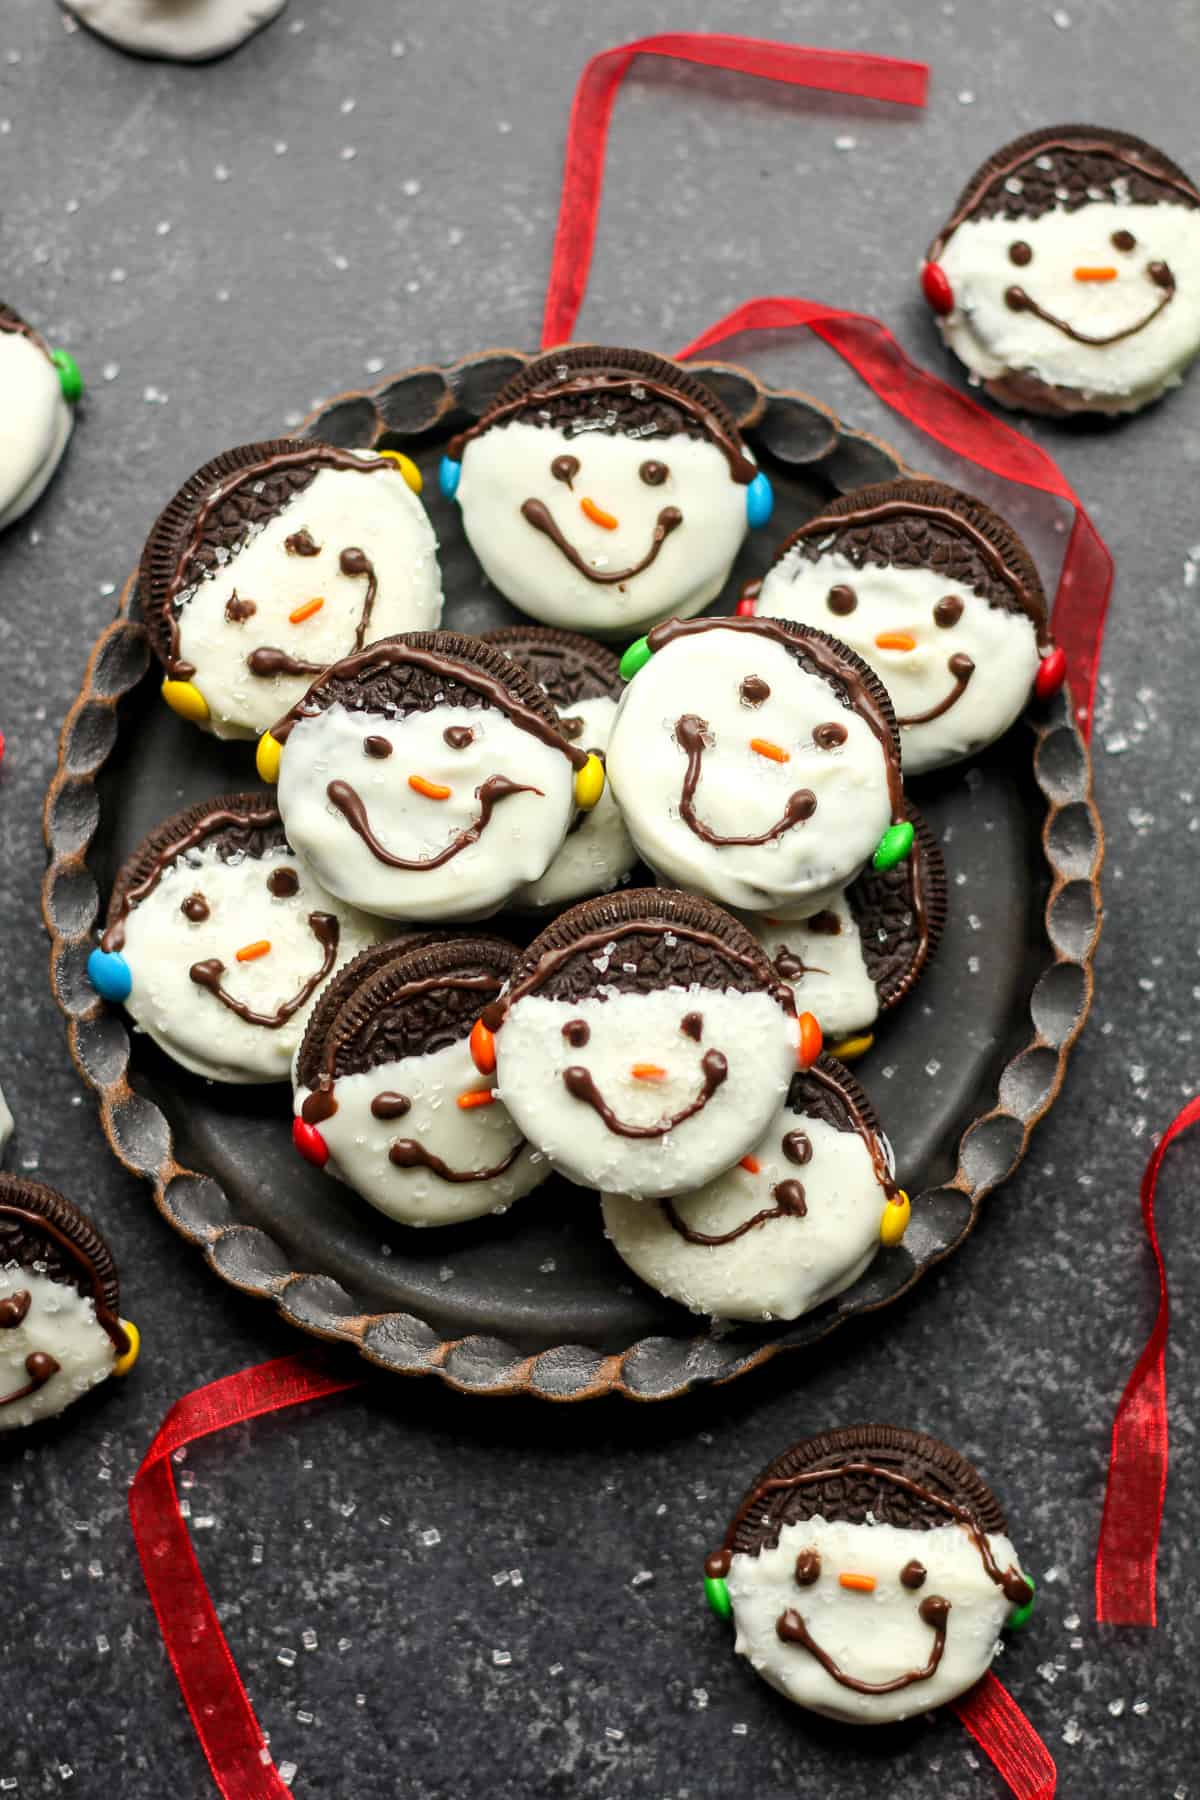
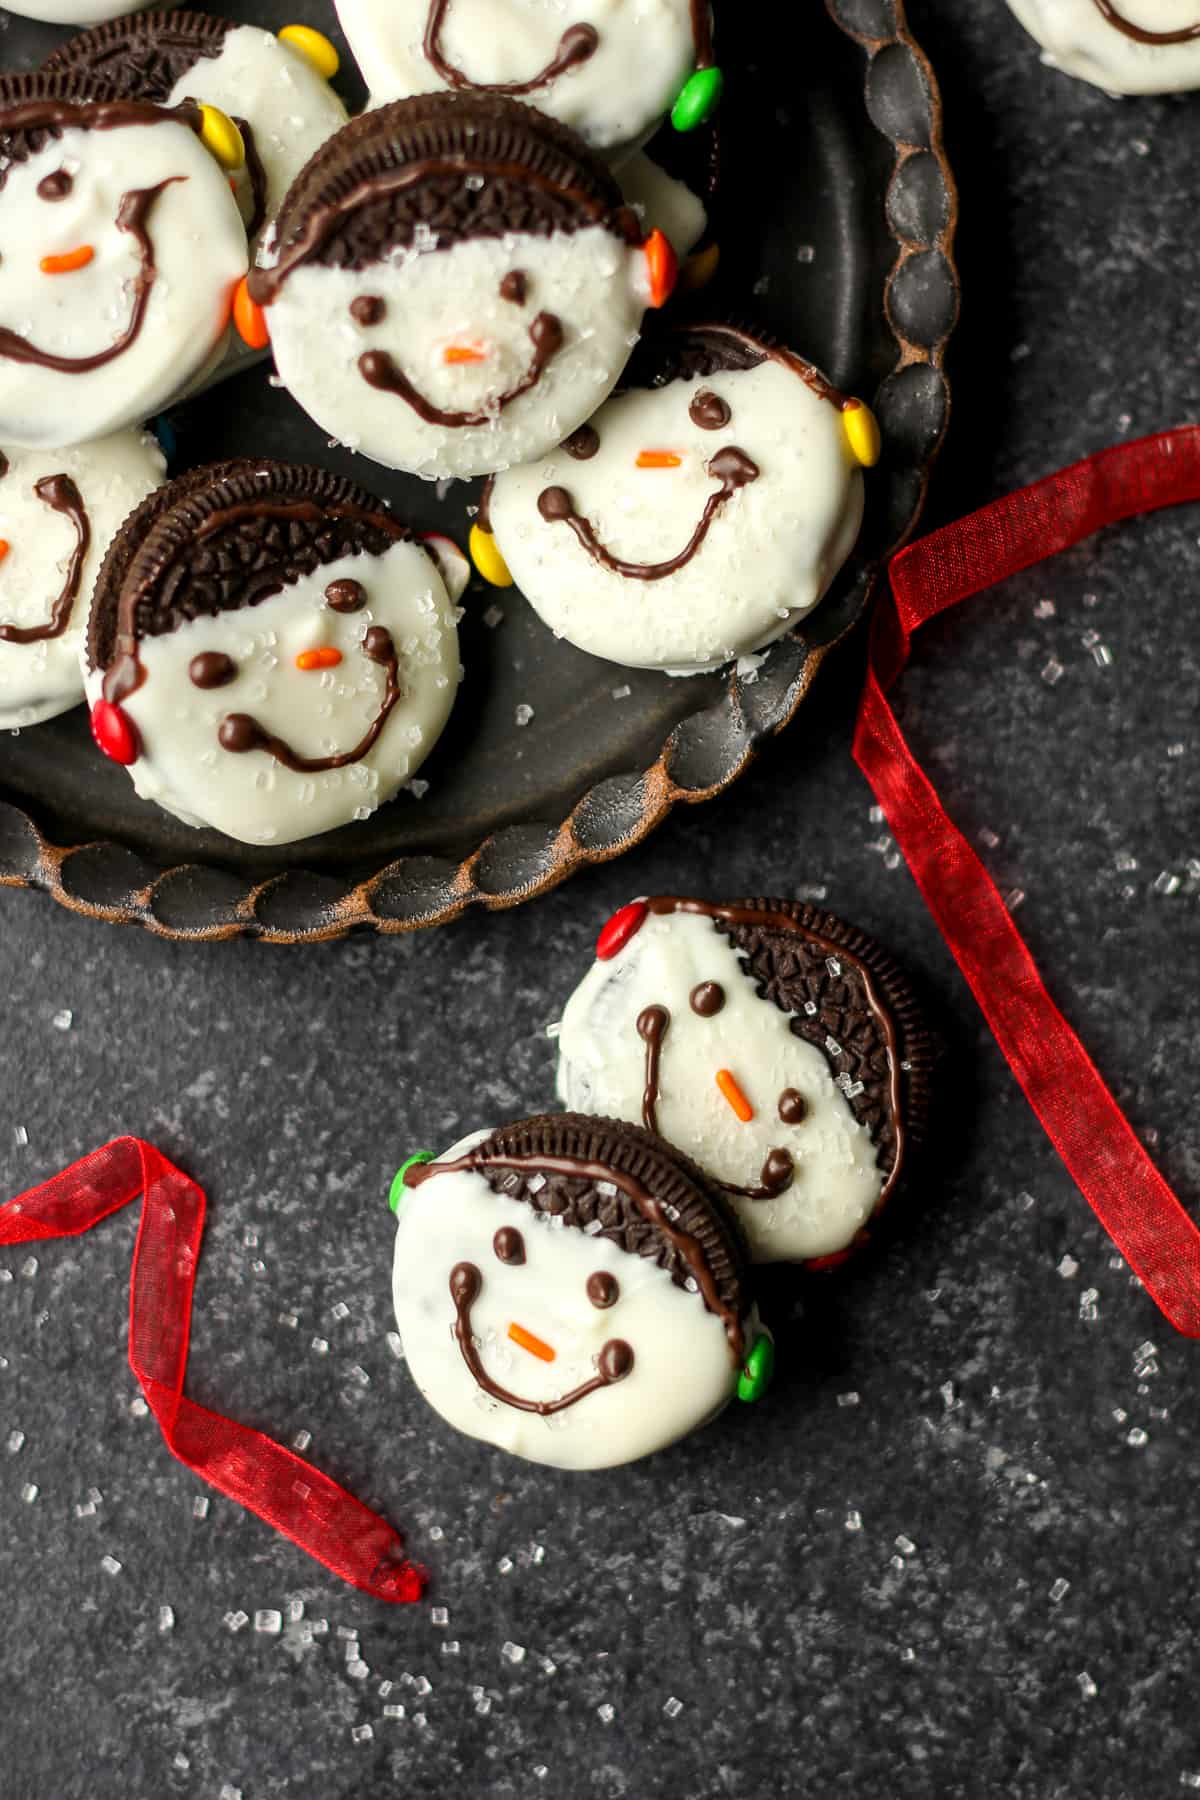
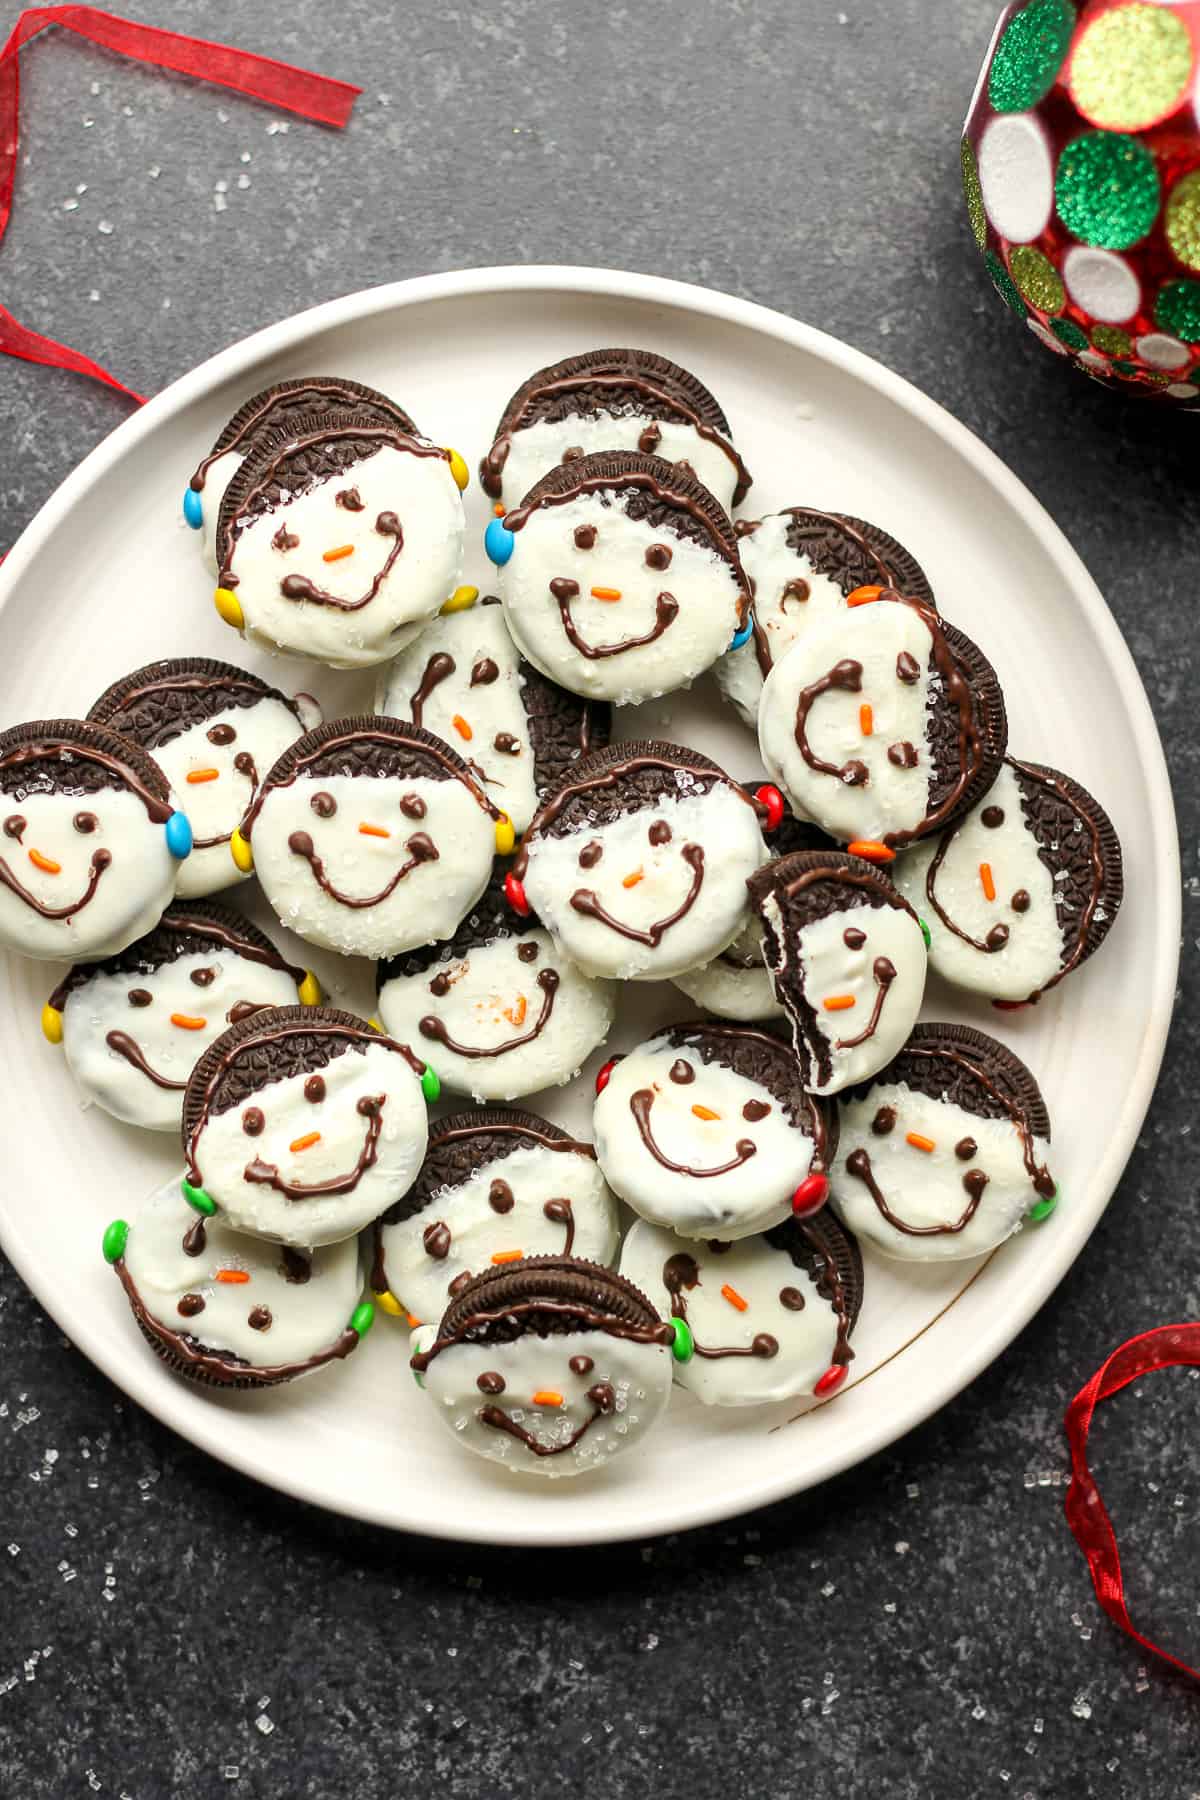
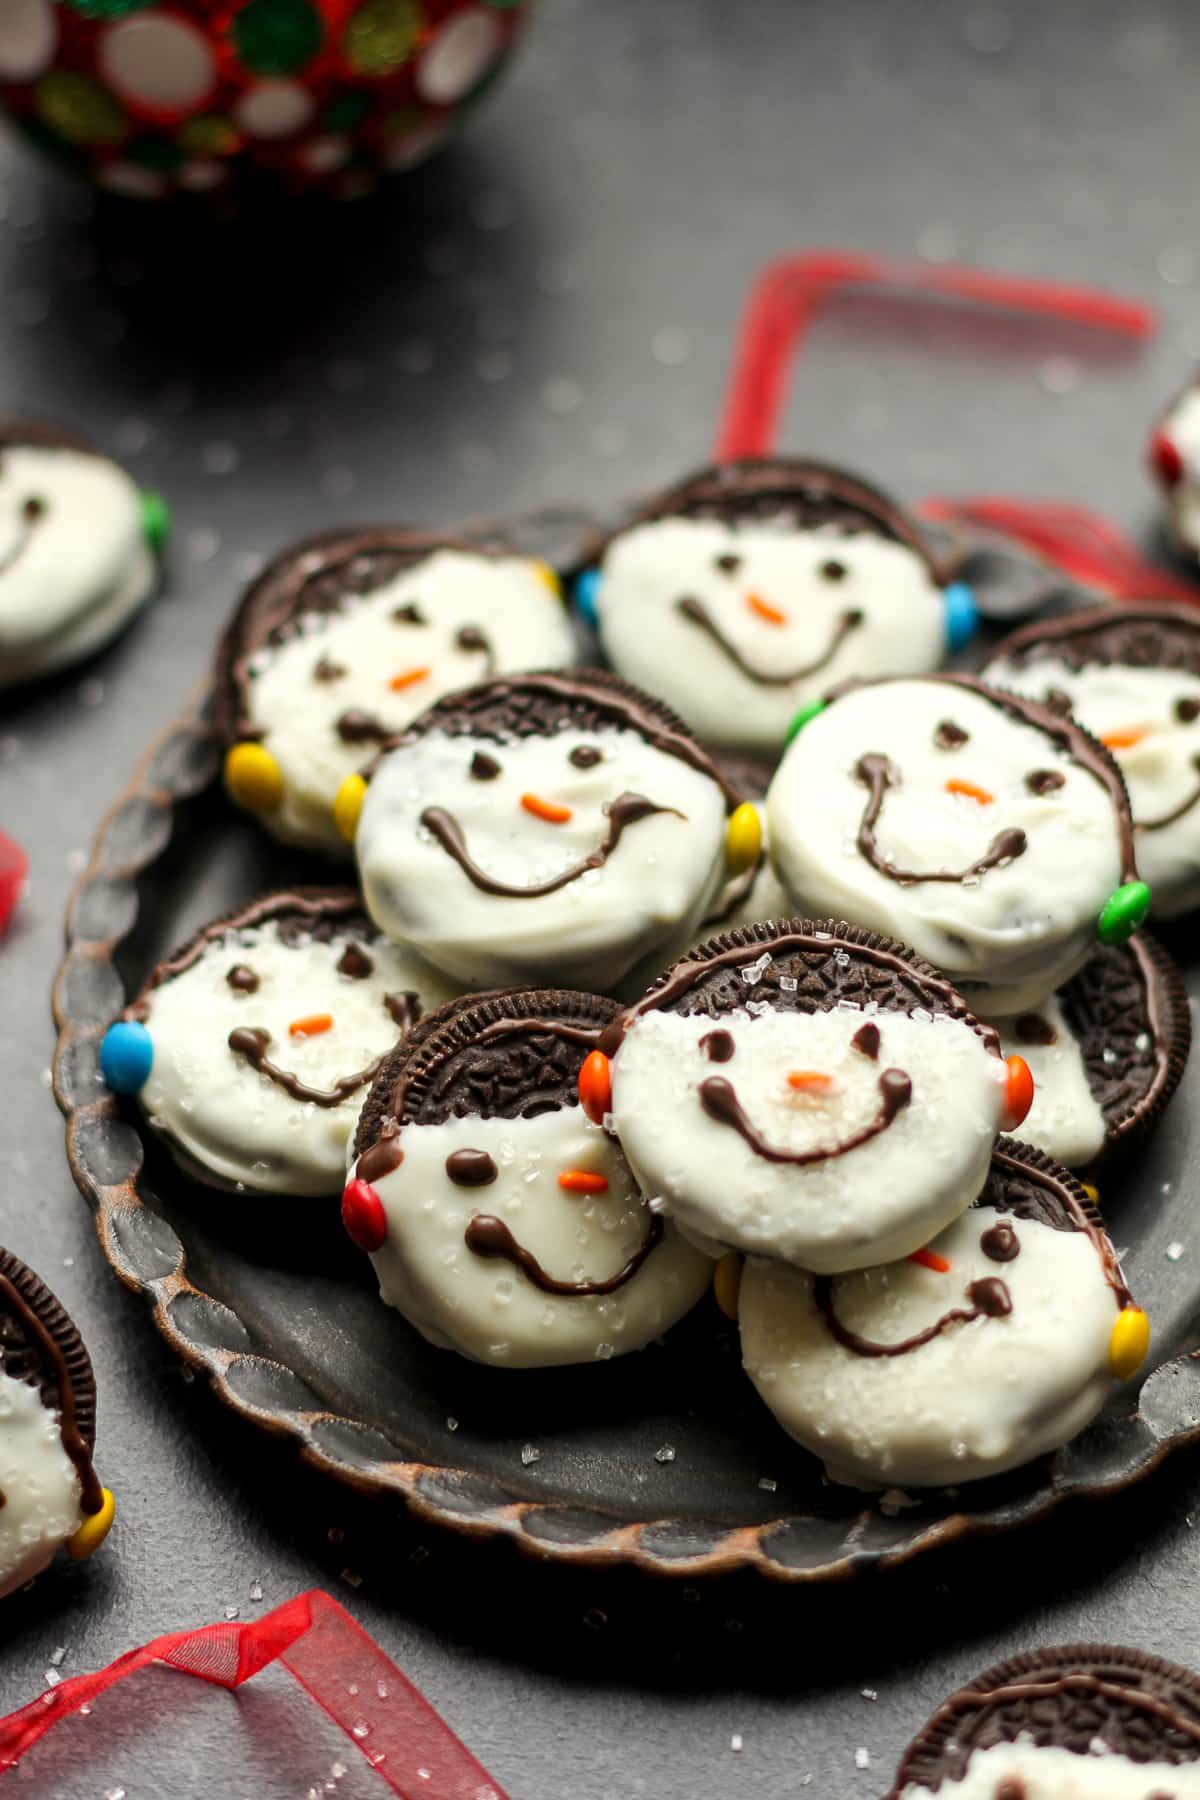
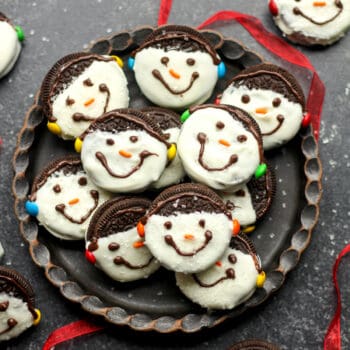
Snowman Oreos
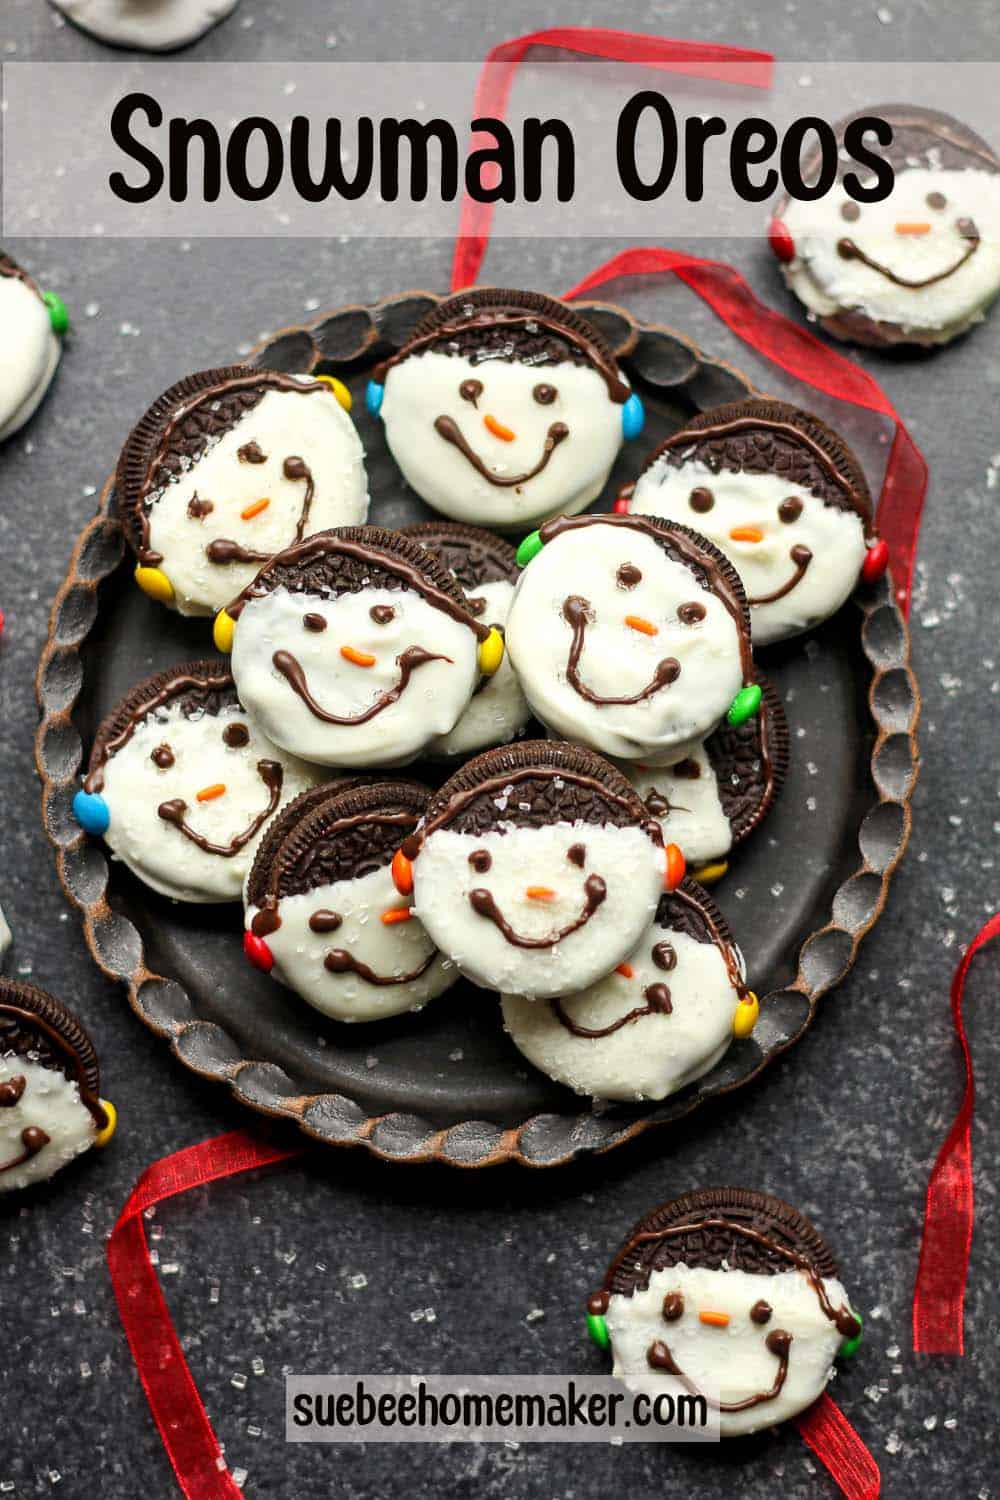
These delightful Snowman Oreos are the perfect holiday treat! Store-bought Oreo cookies are dipped into melted white chocolate and then decorated with a simple snowman face using mini candies plus melted dark chocolate. Simple, delicious, and a perfect treat!
For other no-bake holiday desserts, try our No Bake Peanut Butter Balls or some White Chocolate Oreo Truffles!
Cute Oreo Snowman Cookies
I’m not sure if I’ve ever met someone who didn’t love an Oreo cookie. How could you NOT? I mean, they are the BEST (and that’s coming from someone who only got homemade cookies growing up – poor me)!
We also love Oreos in our Oreo Ice Cream, Oreo Brownie Cookies, and Easy Oreo Ice Cream Pie!
Why This Recipe Works:
- SIMPLE – A no-bake cookie that’s super simple to make using just a handful of ingredients!
- TASTY – Oreos plus chocolate = YUM! Trust me, they’re really good.
- CUTE – Little snowman faces – can we get any cuter? No top hat needed! P.S. These would also be a great addition to your homemade Christmas gifts.
- KID-APPROVED – These are definitely kid-approved but adults also love them! A fun treat for all (especially little hands) and perfect for your next holiday party..
Want to add another fun spin on these? Attach lollipop sticks for an Oreo lollipop!
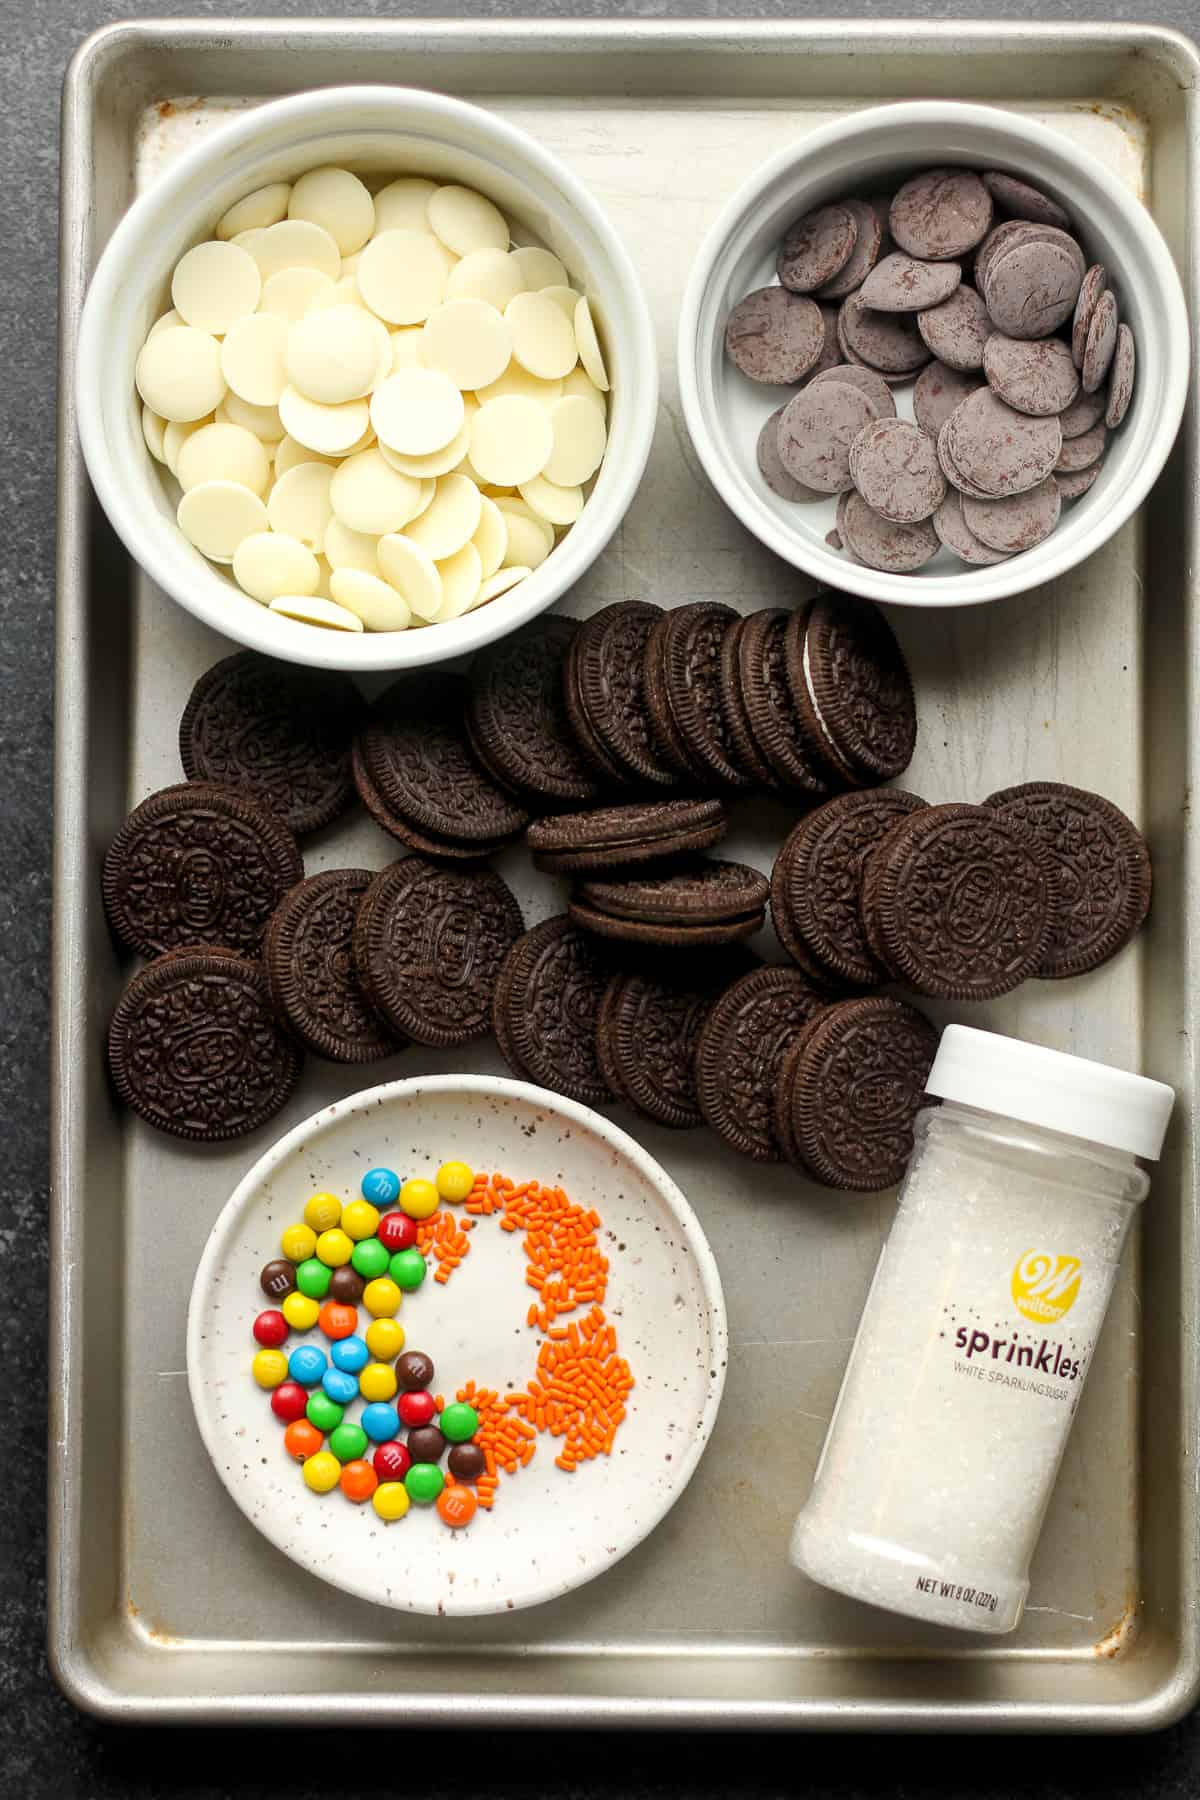
What You’ll Need:
All of these simple ingredients are easy to find at your local grocery store.
- Oreo Cookies – Regular stuffed Oreos are used for the base of the cookie and then mini Oreos are used for the base of the heat.
- White Chocolate – Melting wafers (or white candy melts) work great for coating the Oreo cookies. I don’t recommend using white chocolate chips.
- Dark Chocolate – You’ll also need dark chocolate melting wafers for the eyes, mouth, and for the headband (for earmuffs).
- Mini m&ms – You’ll need mini m&ms for the earmuffs.
- Orange Sprinkles – Just a few sprinkles will be used for the snowman nose.
- Sparkling sugar – A sprinkle of sparkling sugar gets added to the white chocolate coating.
How to make Snowman Oreos:
Step 1
Prep ingredients. Lay out all of the ingredients so you have exactly what you need on hand. Measure out the white melting chocolate and dark melting chocolate.
Step 2
Melt white chocolate. Using a small microwave-safe bowl, melt the white chocolate in your microwave at 50% power, stirring in increments of 30 seconds until fully melted.
Step 3
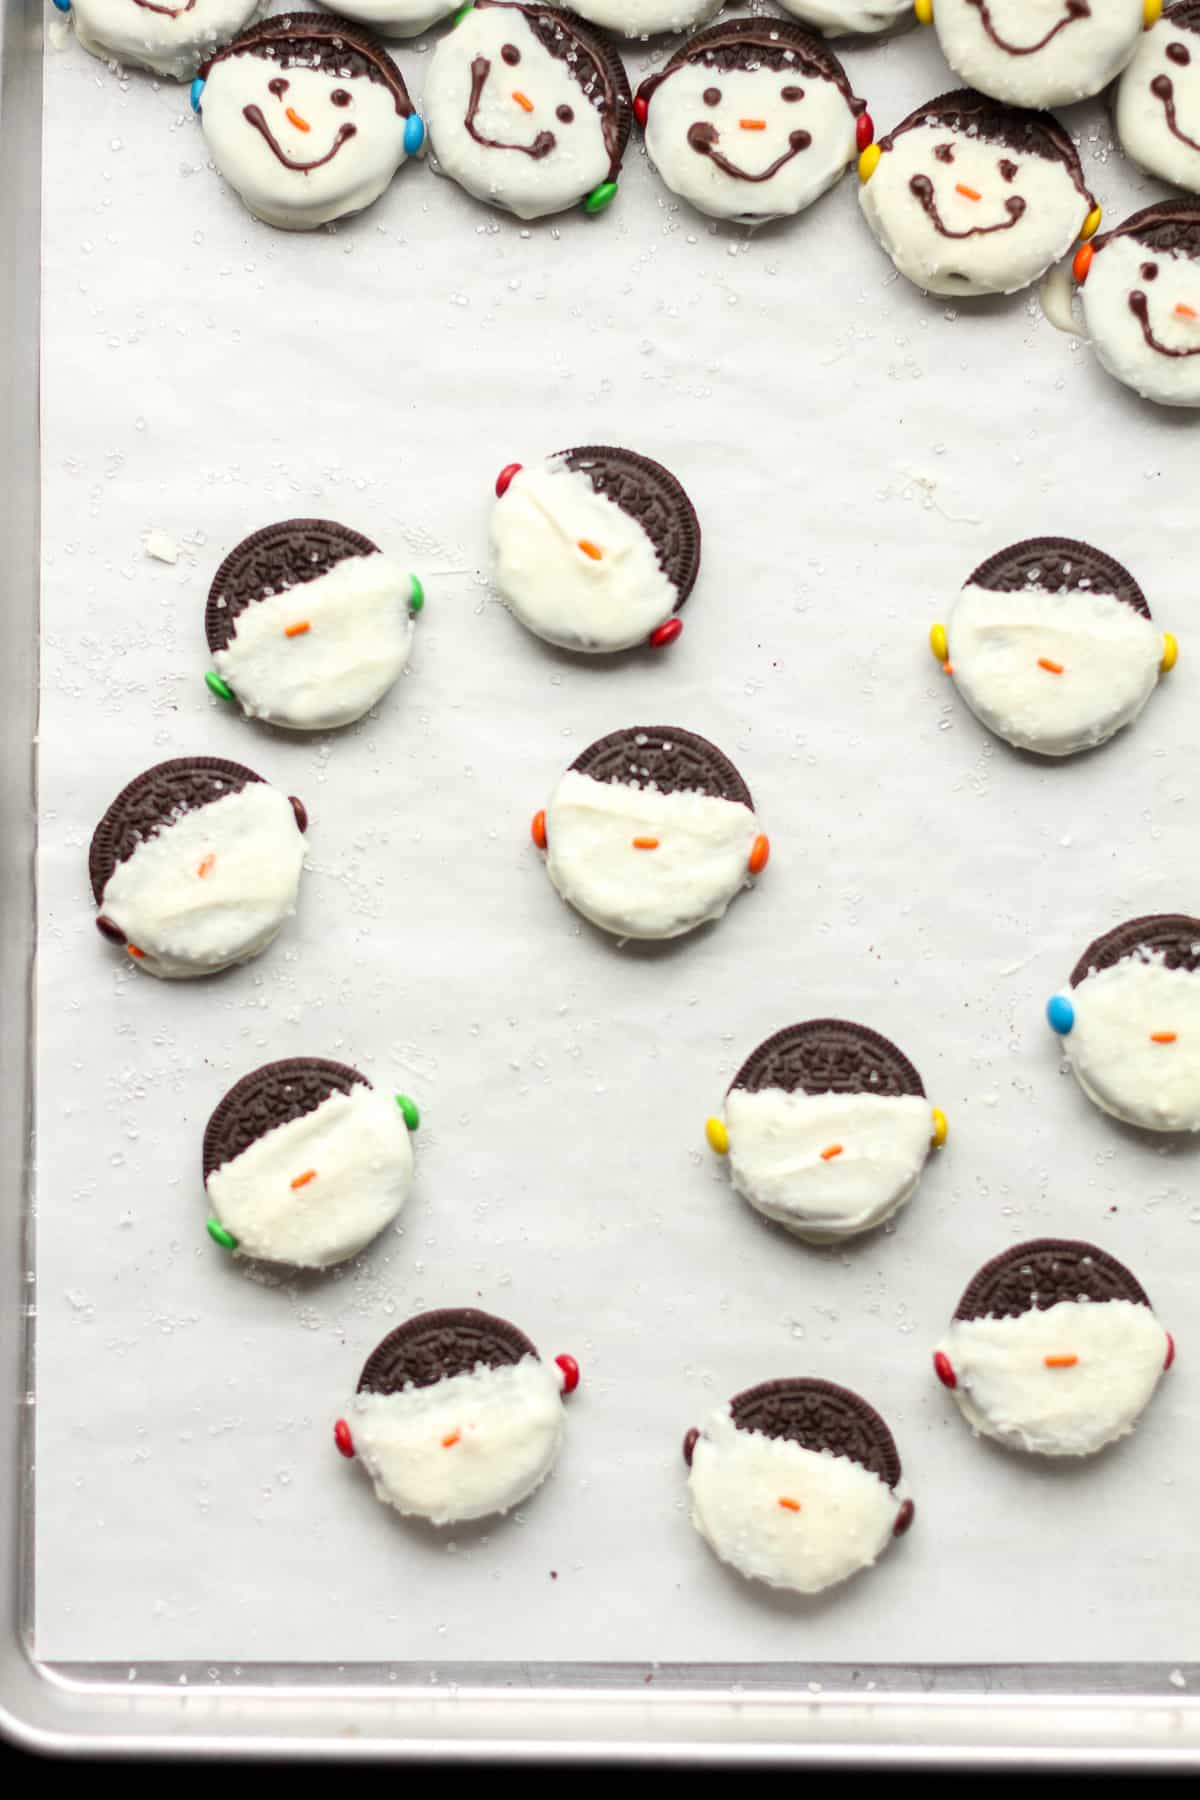
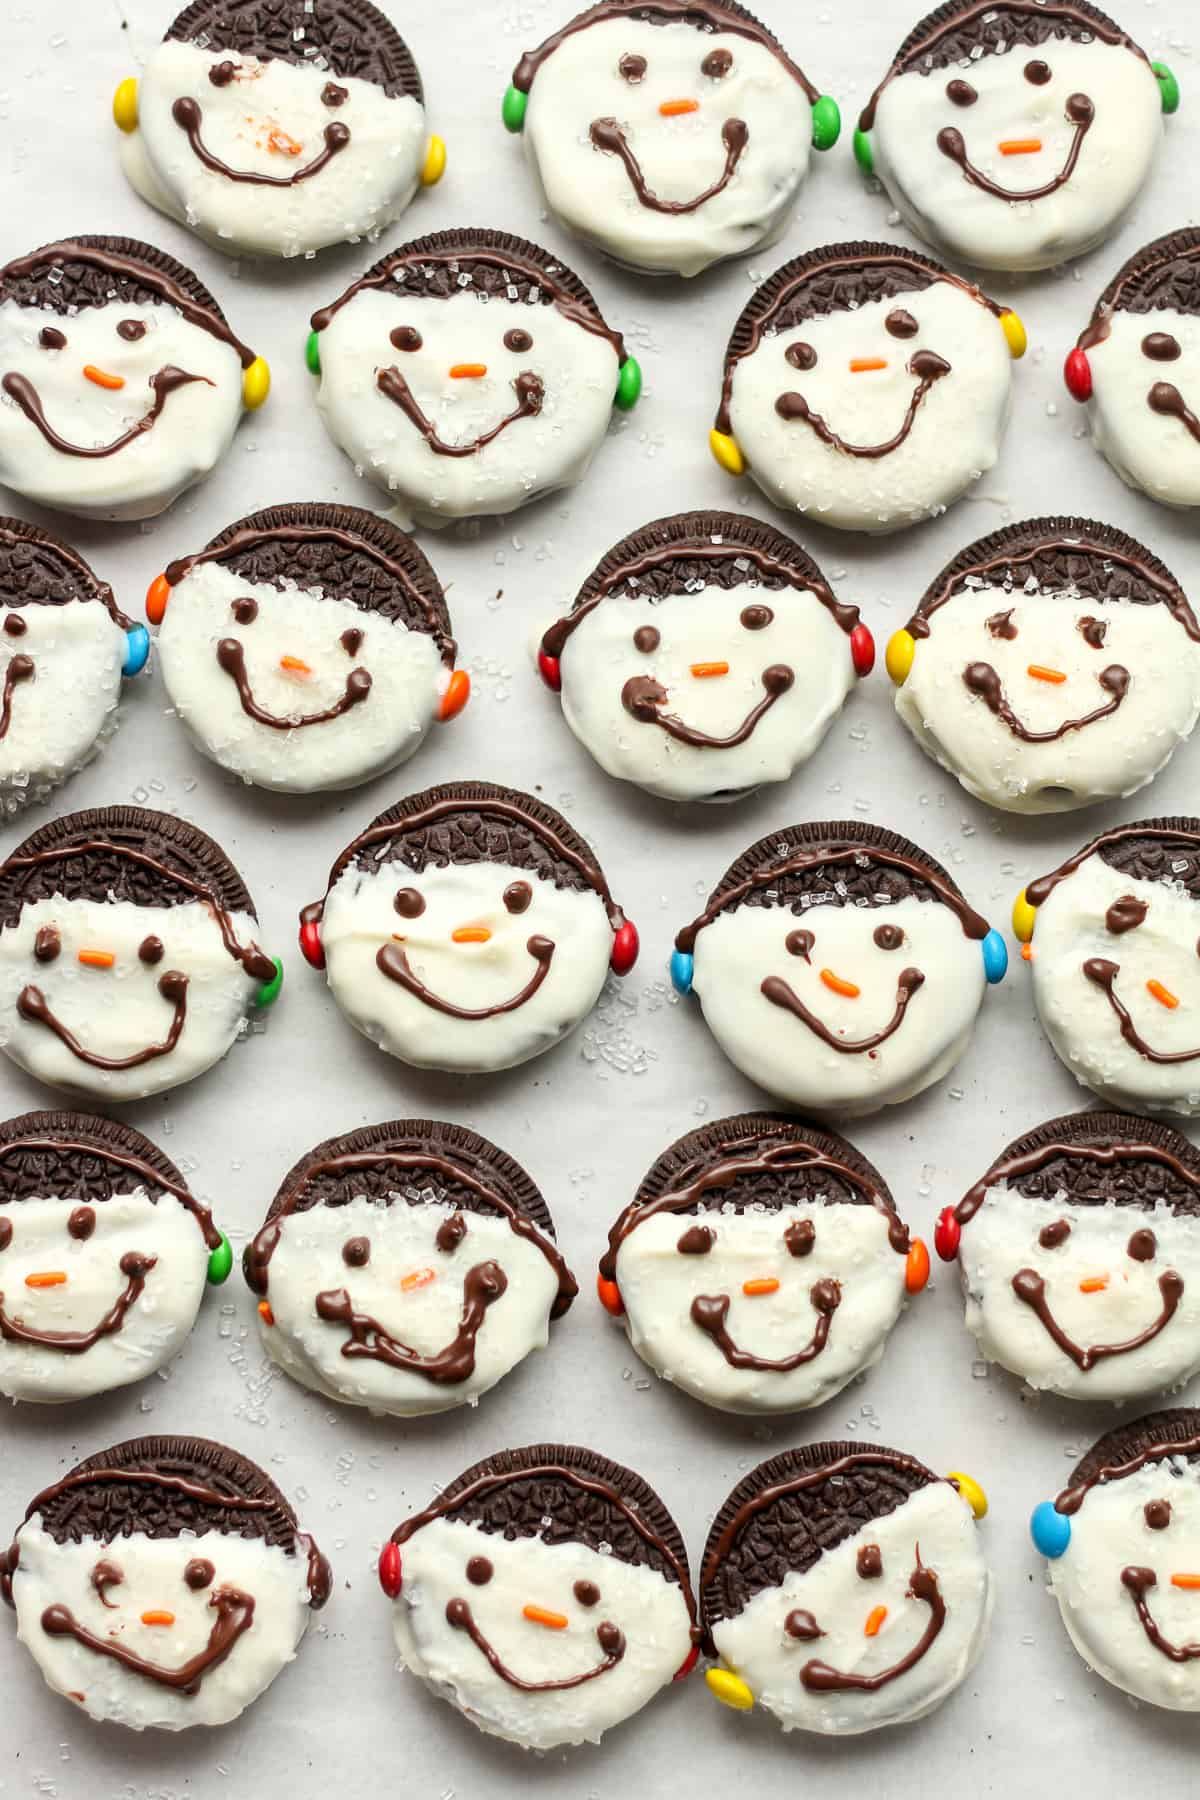
Dip cookies. Use your fingers to dip the Oreo cookie into the melted candy leaving the top of the cookie plain – while using a spoon to scrape the excess chocolate drip from the cookie. Then set it on a baking sheet lined with parchment paper, and add a sprinkle of sparkling sugar to each one.
Step 4
Add toppings – Immediately add the an orange sprinkle for the carrot nose and two m&ms for the ear muffs. Add the toppings as you go – before the white chocolate sets up on each cookie.
Step 5
Melt dark chocolate. Melt the dark chocolate in a microwave at 50% power, stirring in increments of 30 seconds until fully melted. Add to a small plastic sandwich bag and clip off a small bit of one corner.
Step 6
Draw eyes, mouth, and the headband. Carefully squeeze the bag to draw the snowman’s
eyes and mouth on each cookie. Then add the headband to the top of the cookie from one m&m to the other.
Step 7
Rest. Let the Oreo cookies sit in a single layer on the prepared baking sheet until the chocolate is completely set.
Move quickly after adding melted chocolate to these cookies. They set up quickly!
Storing and Freezing Snowmen Oreos
- STORE the cookies in an airtight container in the refrigerator for several weeks. These are also ok stored at room temperature in a cool house.
- FREEZE the Oreos in an airtight container for up to 3-4 months.
Recipe Tips:
- When melting chocolate in the microwave, make sure you heat at 50% power and stir frequently until creamy. Over-cooking it is food for your garbage can!
- Melting chocolate sits up extremely fast so add the snowman nose, and earmuffs quickly as you go. (Don’t dip all of the cookies and then add the candies. Dip one and add the candies immediately!
- Use a spoon to scrape some of the chocolate off the back of the cookies. No need to add too much to the underside!
- Use a steady hand when adding the melted chocolate for the eyes, mouth, and headband. It’s easy to mess up if you shake at all. Trust me!
- These are perfect for prepping ahead. Store them in the refrigerator or freezer.
Other Holiday Cookies
I’ve got lots of cookie choices for you to fill your platters this holiday season. Here are a few of my favorites.
Kitchen Tools Used: (affiliate links)
xoxo ~Sue
Snowman Oreos
Ingredients
- 20 Oreo cookies
- 8 oz. white chocolate
- 40 mini M&Ms
- 1 teaspoon orange sprinkles
- 1 oz. dark chocolate
- sparkling sugar
Instructions
- Prep ingredients. Lay out all of the ingredients so you have exactly what you need on hand. Measure out the white melting chocolate and dark melting chocolate.20 Oreo cookies
- Melt white chocolate. Melt the white chocolate in a microwave at 50% power, stirring in increments of 30 seconds until fully melted.8 oz. white chocolate
- Dip cookies. Use your fingers to dip the Oreo cookie into white chocolate leaving the top of the cookie plain – while using a spoon to scrape the excess chocolate from the cookie. Then set it on a parchment lined baking sheet and add a sprinkle of sparkling sugar to each one.sparkling sugar
- Add toppings – Immediately add the an orange sprinkle for the nose and two m&ms for the ear muffs. Add the toppings as you go – before the white chocolate sets up on each cookie.1 teaspoon orange sprinkles, 40 mini M&Ms
- Melt dark chocolate. Melt the dark chocolate in a microwave at 50% power, stirring in increments of 30 seconds until fully melted. Add to a small plastic bag and clip off a small bit of one corner.1 oz. dark chocolate
- Draw eyes, mouth, and the headband. Carefully squeeze the bag to draw the eyes and mouth on each cookie. Then add the headband to the top of the cookie from one m&m to the other.
- Rest. Let the Oreo cookies sit on the baking sheet until the chocolate is completely set.
Notes
- Melting chocolate sits up extremely fast so add the snowman nose, and earmuffs quickly as you go. (Don’t dip all of the cookies and then add the candies. Dip one and add the candies immediately!
These are so cute and delicious!! I made them for a family Christmas party and everyone loved them- especially the kids!
Yay! This makes me smile!
These are great! I made them for a party and they were a hit. So cute too!!
So happy to hear this, Allison! Thanks for entering my baking challenge!!
These are always fun to make and who does not love chocolate with chocolate?
Agreed! So glad you enjoyed these, Kincaid!
I love the creativity behind this recipe. So much fun!
They’re super fun to make!