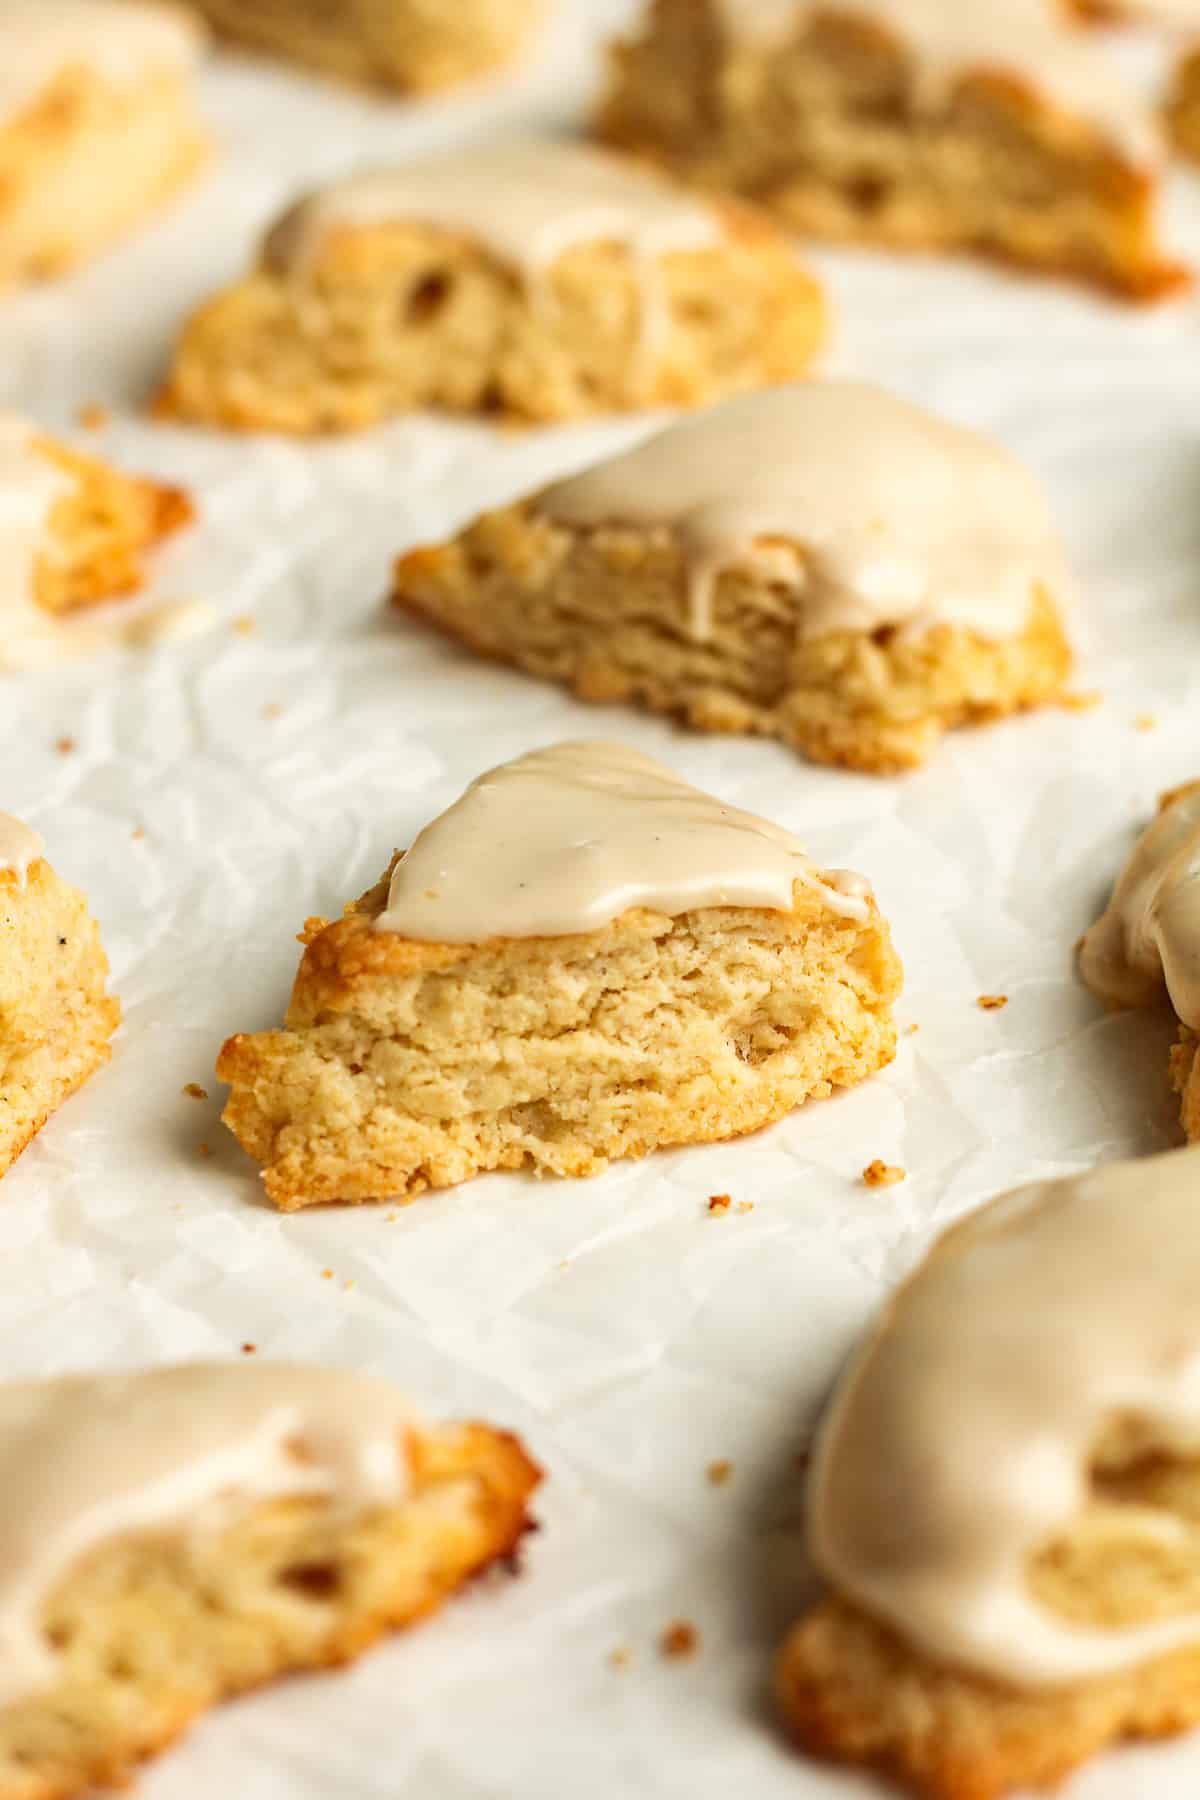
Petite Vanilla Bean Scones

Petite Vanilla Bean Scones are little melt-in-your-mouth treats that are both crumbly and soft. These delicious vanilla scones are topped with a vanilla bean glaze, and freeze well!
We LOVE our morning treats, especially scones. For variety, check out my Mini Chocolate Chip Scones or the Best Blueberry Lemon Scones.
Vanilla Bean Scones (Starbucks copycat)
Over here, constantly dreaming up new scone recipes. But who can blame me? I love them!
This recipe is actually based on the Starbucks version, that I happen to love. Just a few bites of these petite scones had me hooked. Pair them with a vanilla latte, and that is a perfect little breakfast for me.
Vanilla Bean is such a classic flavor, and easy to make using some simple vanilla bean paste. All those beautiful little specs of vanilla bean without using the actual beans is a great shortcut, but you could also use the beans.
Speaking of vanilla bean flavor, try my Homemade Vanilla Bean Ice Cream or the most delicious Vanilla Bean Shortbread Cookies!

TIP: Keep the butter and the wet ingredients COLD until incorporating into the dough. This will ensure a crumbly scone.
How to make these scones
Step 1
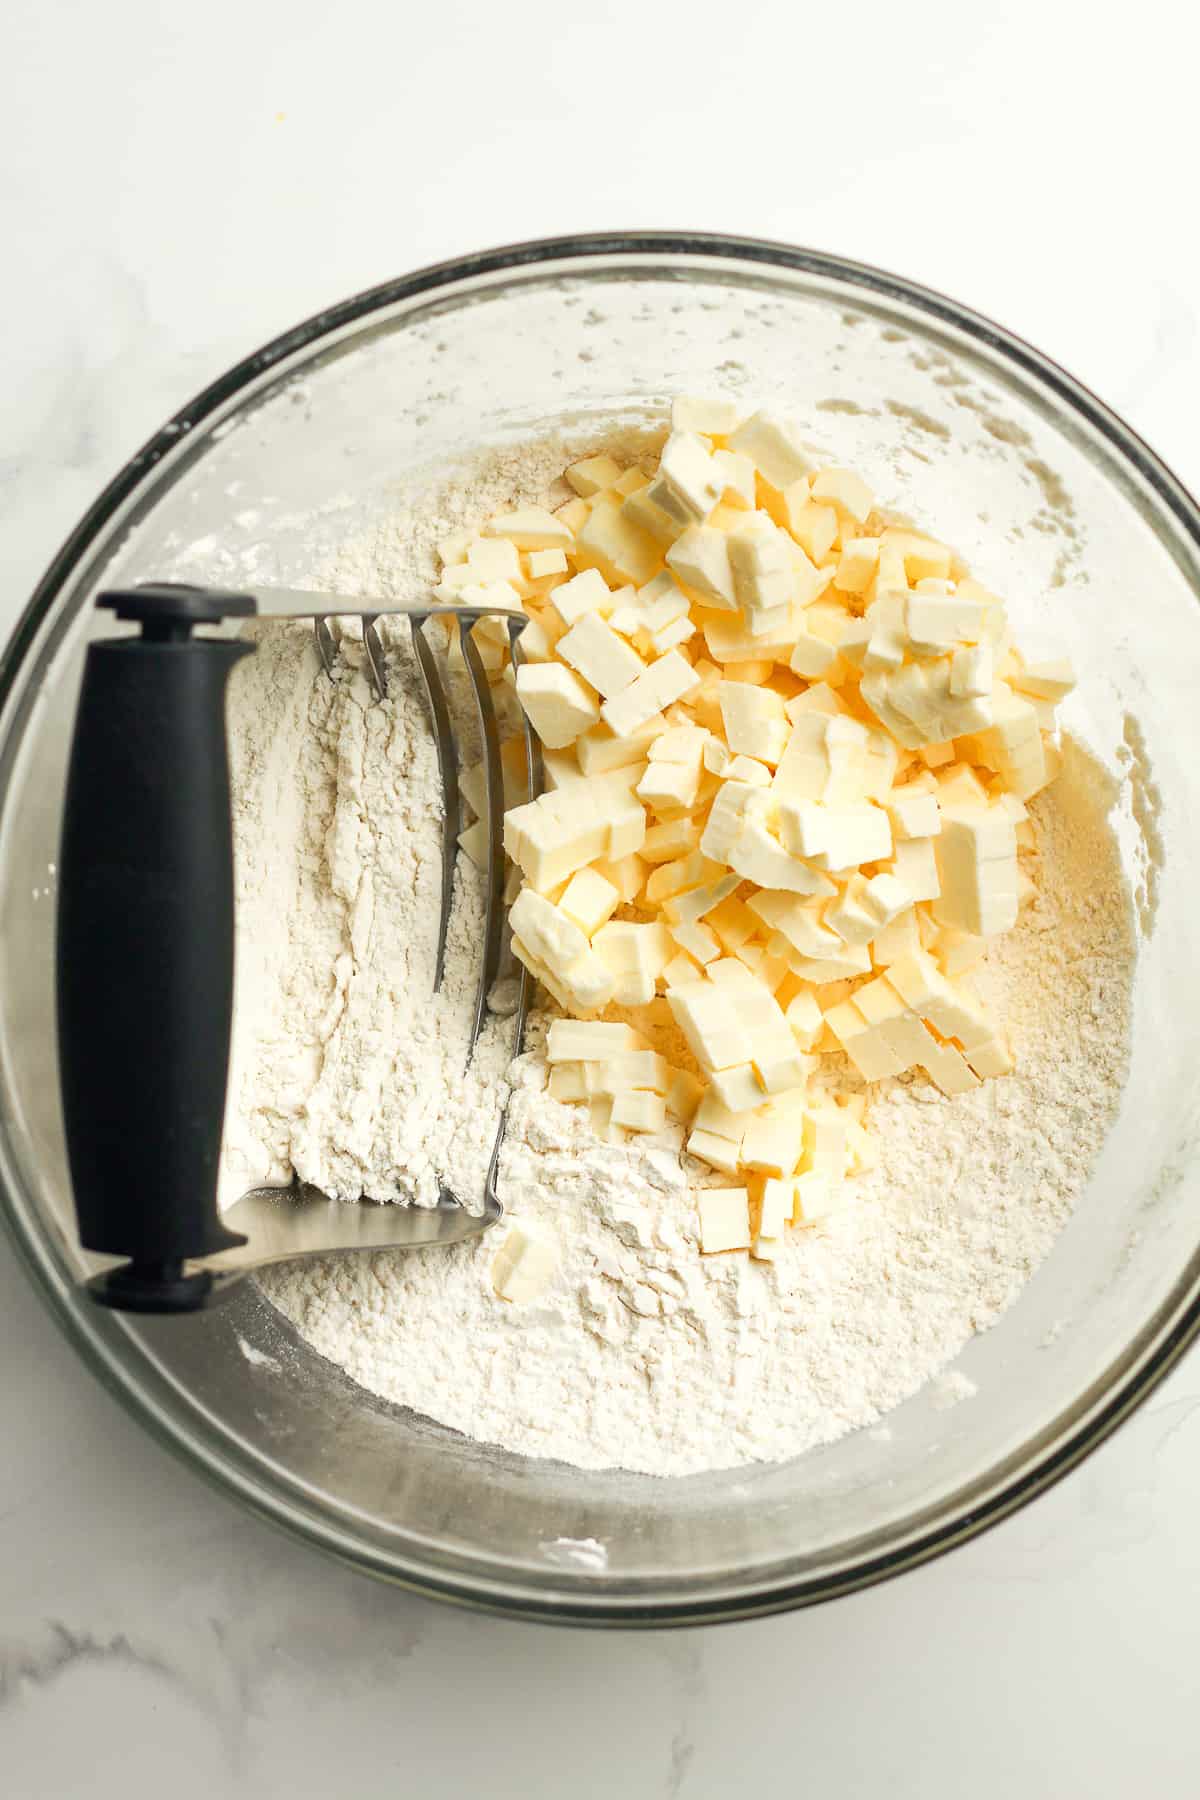
Prepare frozen butter. Dice the butter into small little cubes, and place in the freezer in advance of making these. I normally do this the day before I make scones, but you could prep it an hour beforehand as well.
Step 2
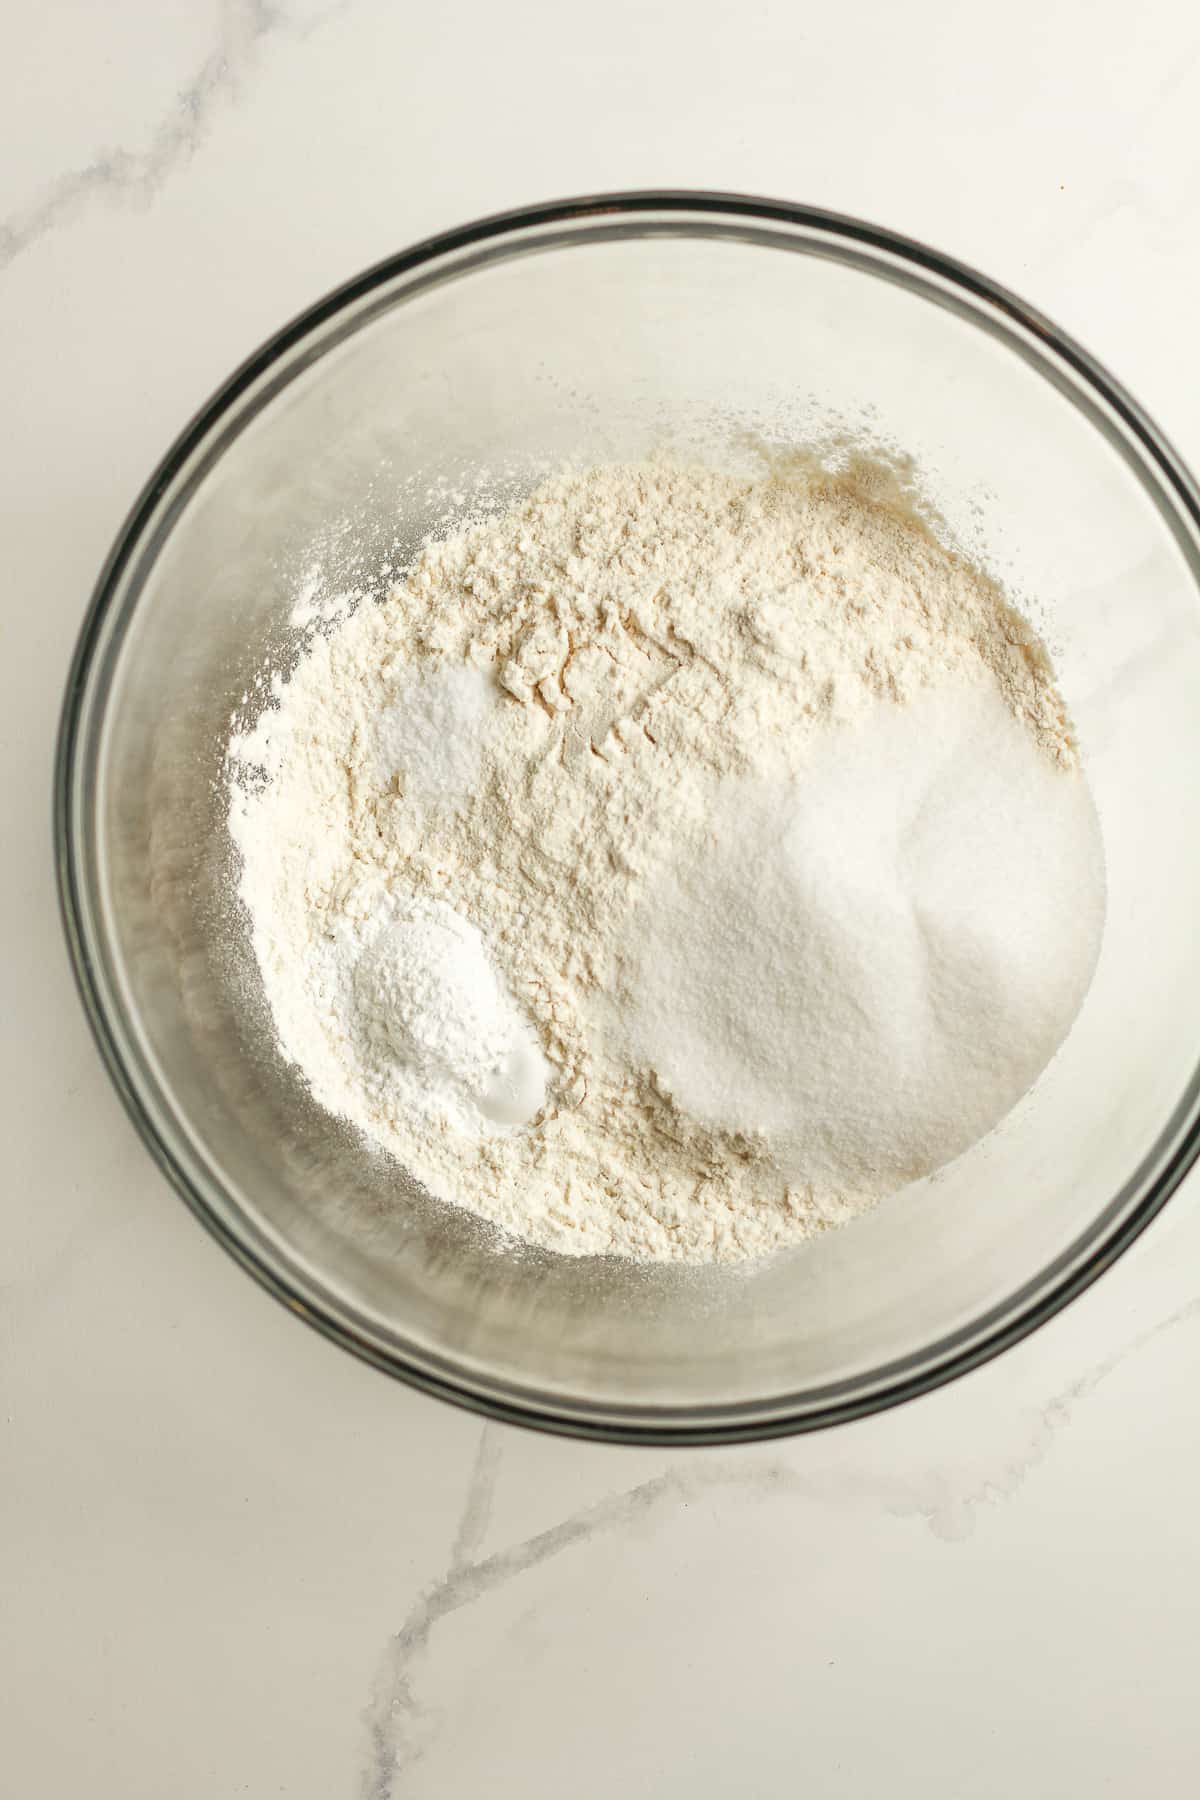
Combine the dry ingredients. In a mixing bowl, combine the dry ingredients – the flour, sugar, baking powder, and salt. Stir to combine.
Step 3
Combine the wet ingredients. In a measuring cup, combine the egg, heavy cream, and vanilla. Mix well and then store in the refrigerator to keep it cold until ready to use.

Step 4
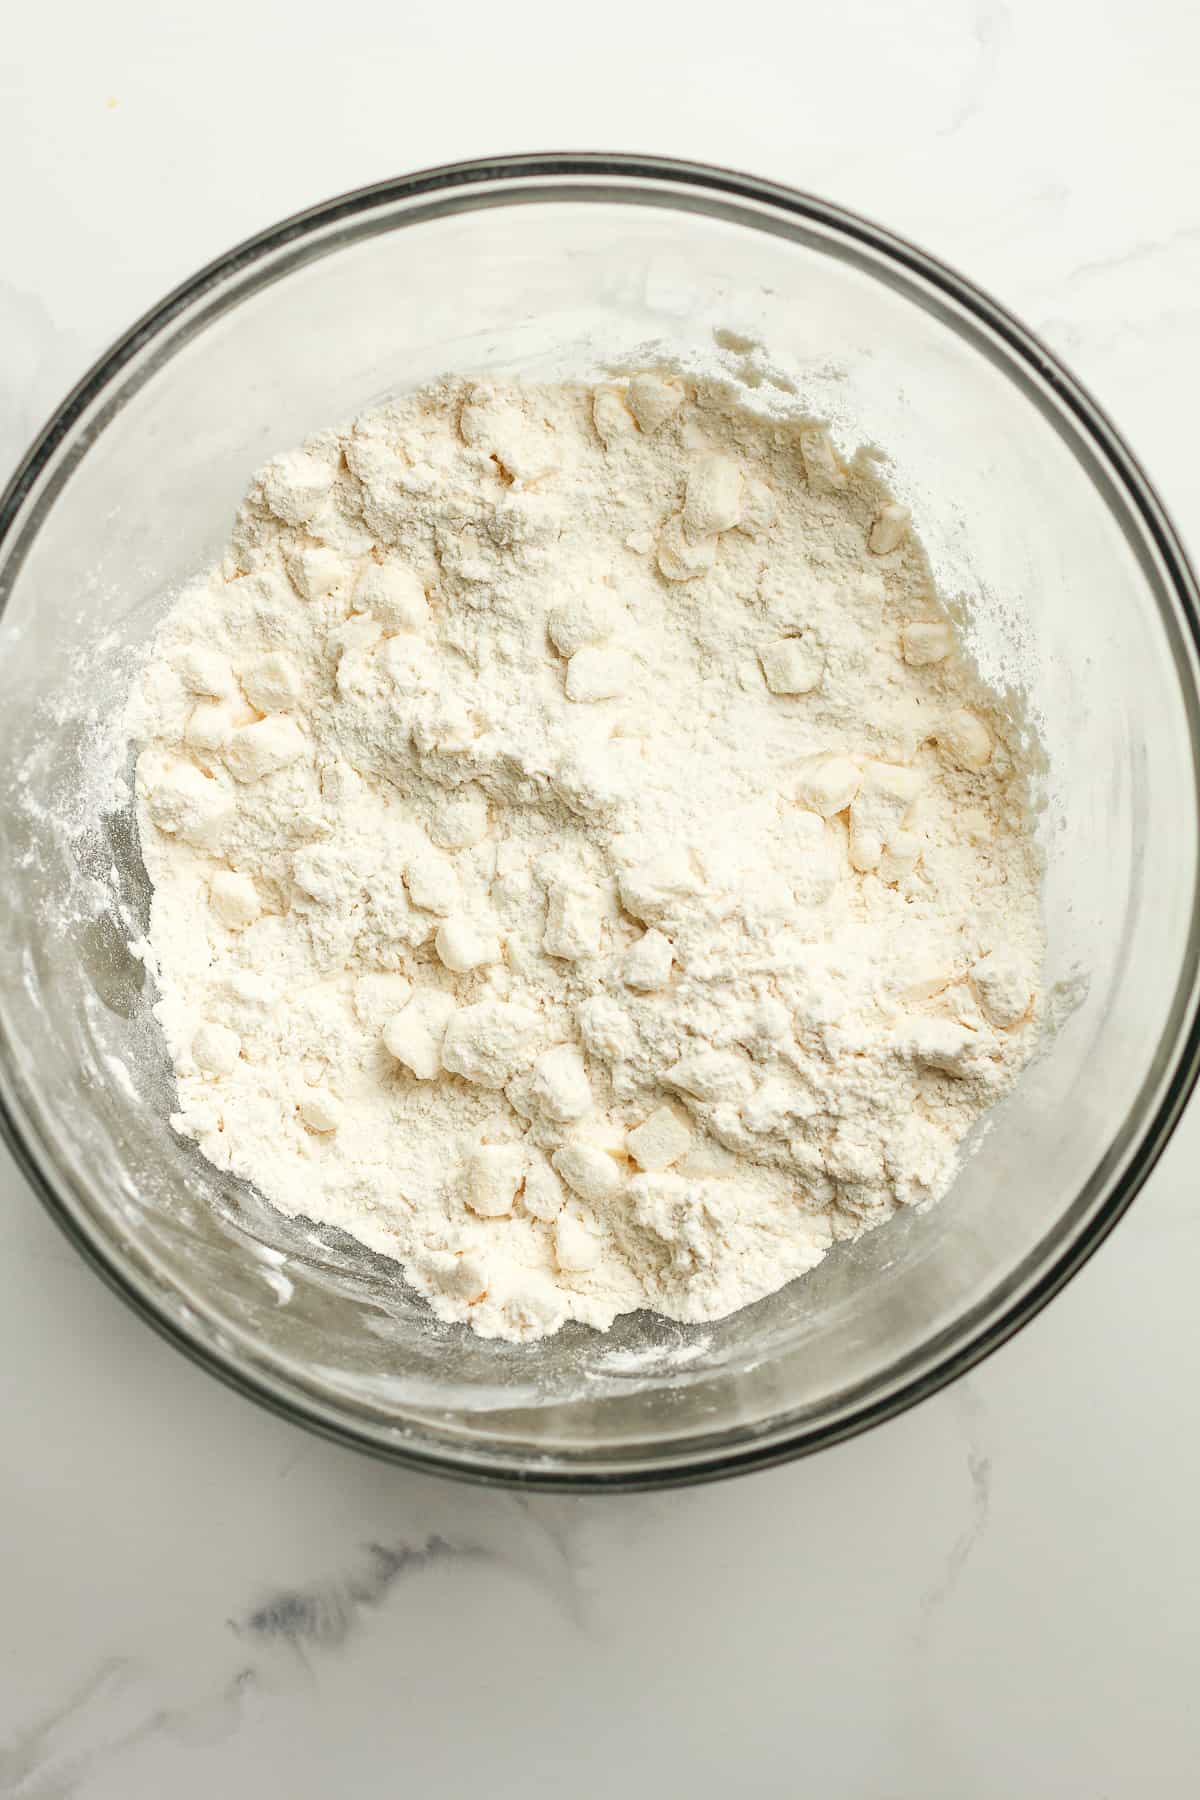
Add frozen butter to dry mixture. Add the frozen butter to the dry mixture and cut it in with a pastry cutter or your hands. Mix until it resembles course crumbs.
Step 5
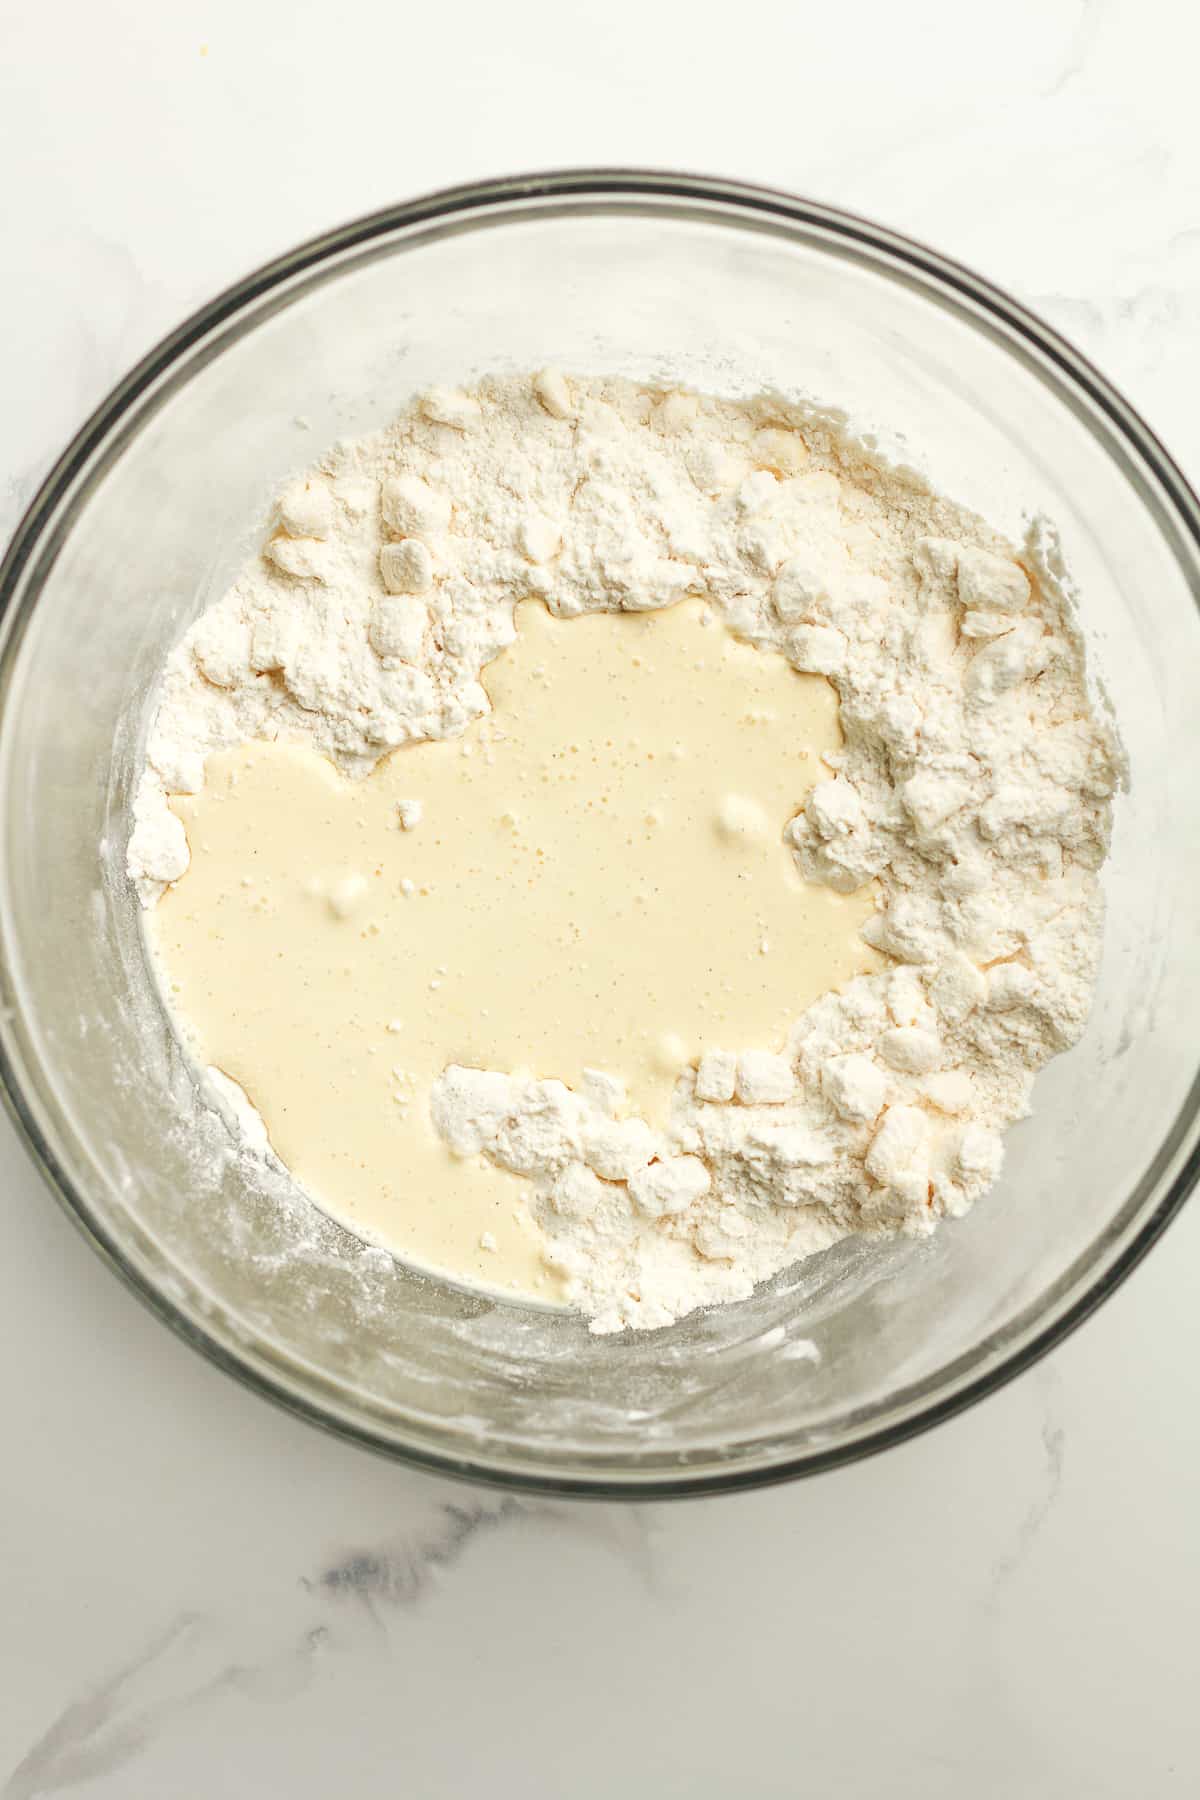
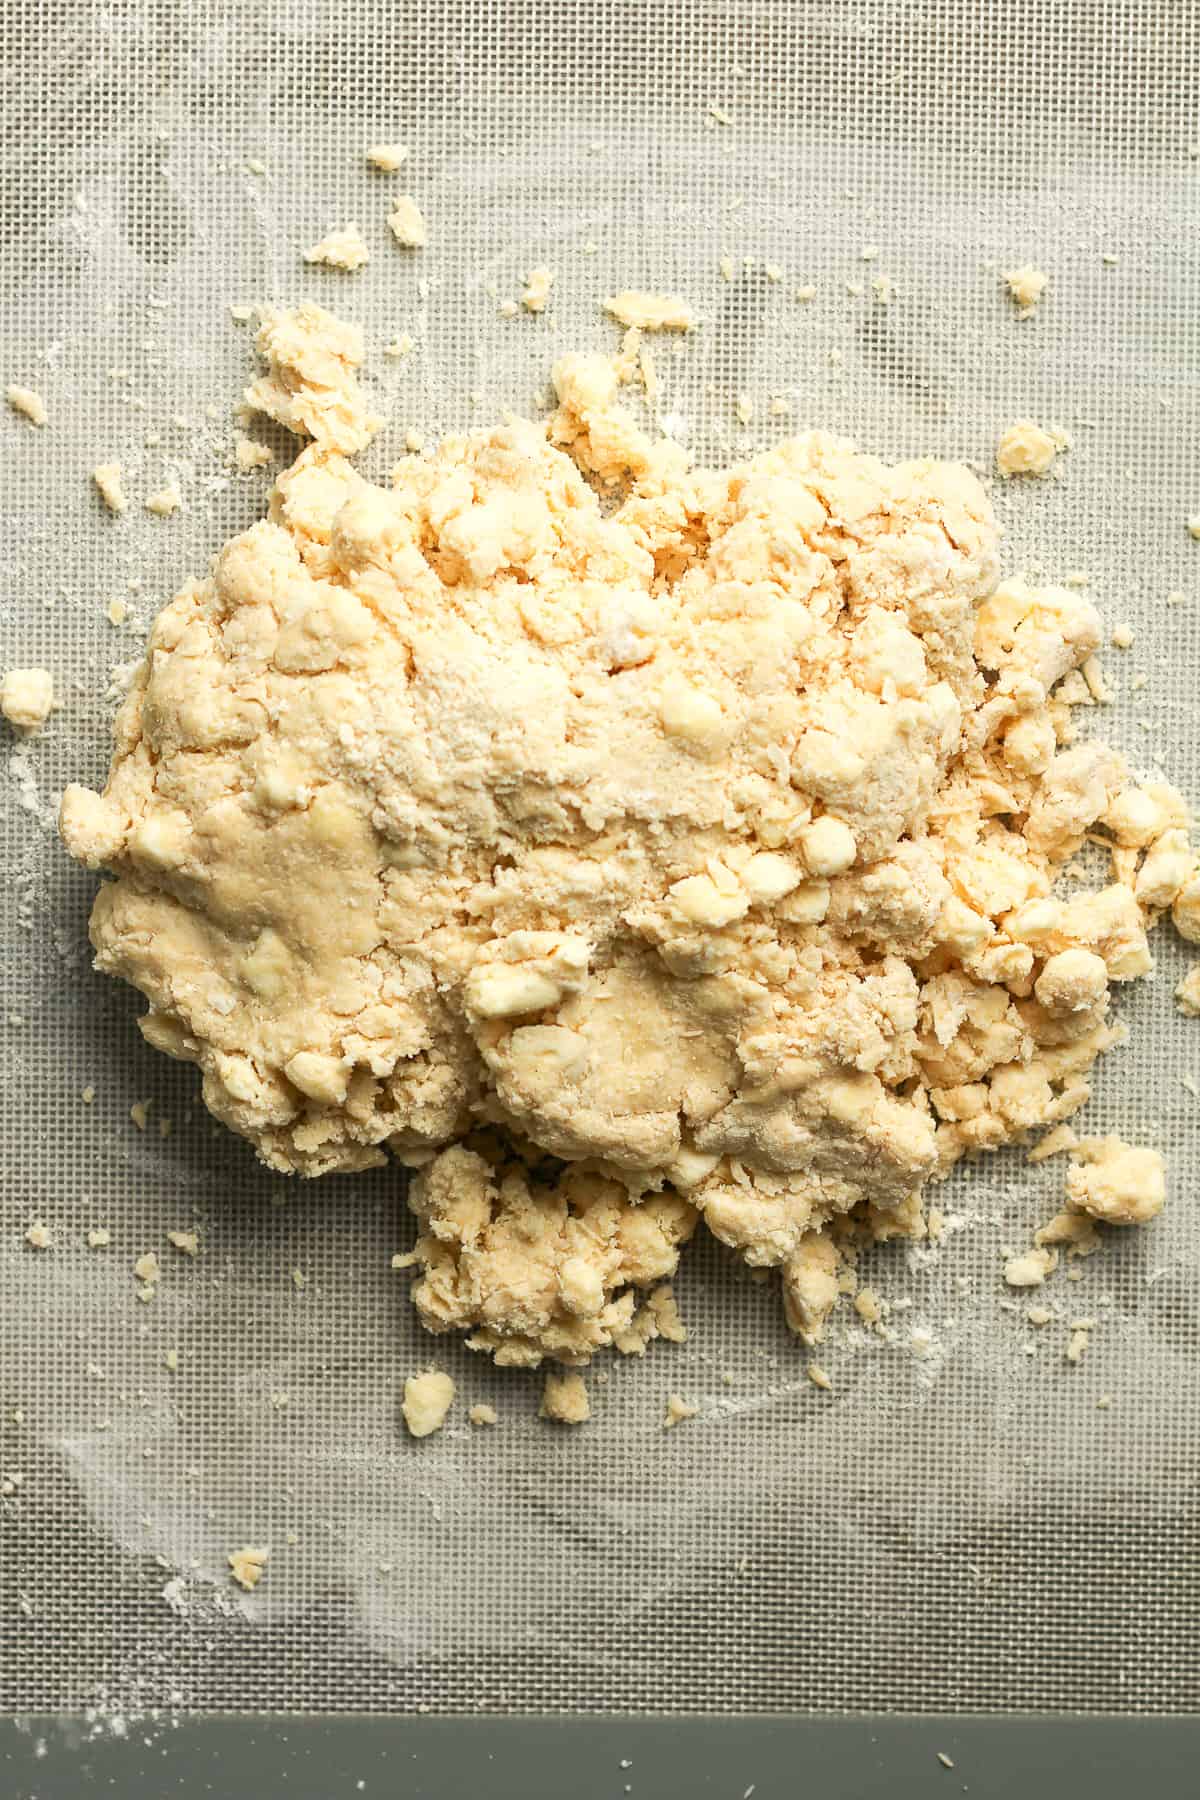
Add the wet ingredients to the dry ingredients. Add the wet ingredients, and stir with a spoon until it forms a shaggy ball. If the mixture is too dry, you may need to add in a few drops of heavy cream until it comes together.
Step 6
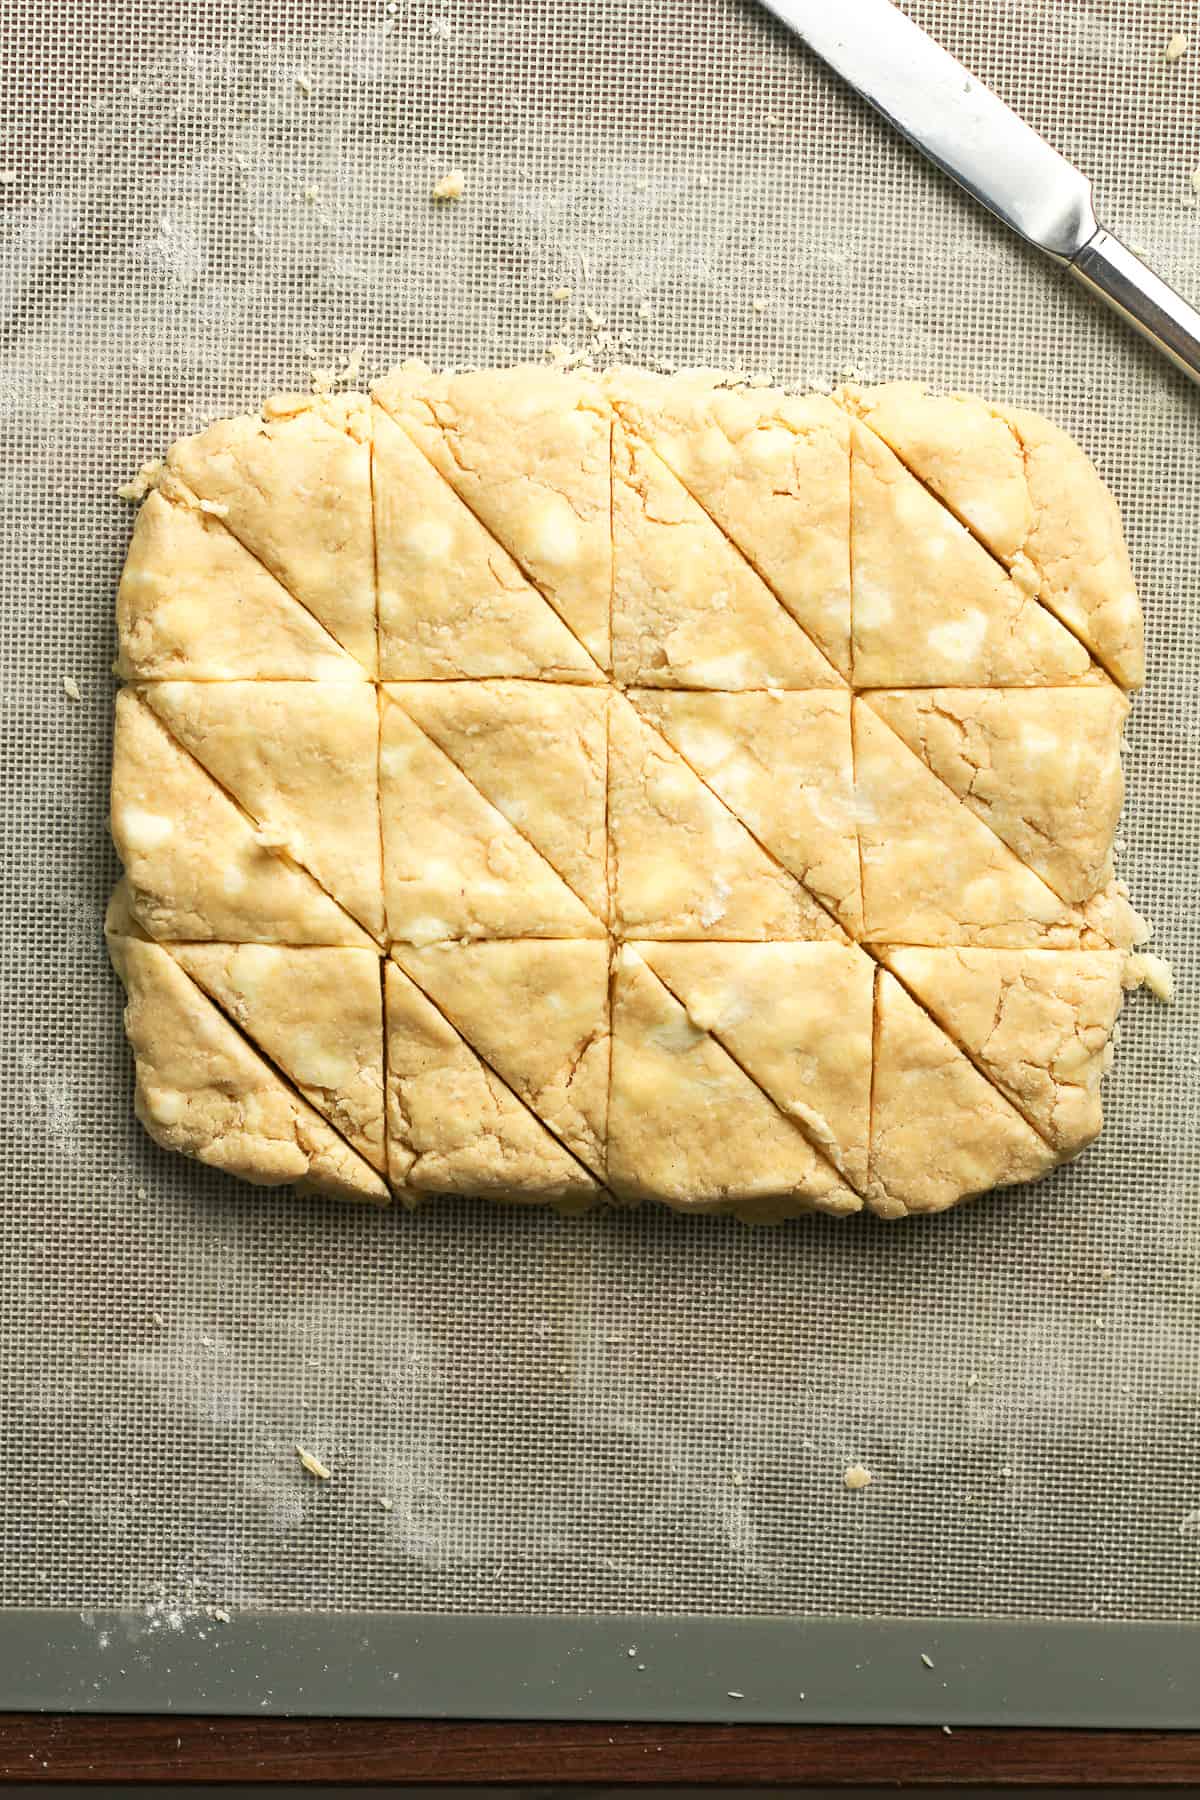
Shape the dough. Remove the scone mixture to a baking mat that’s been dusted with flour (to prevent sticking). Use your hands to form it into a rectangle, patting it into a rectangle. (Try not to over-handle the dough.)
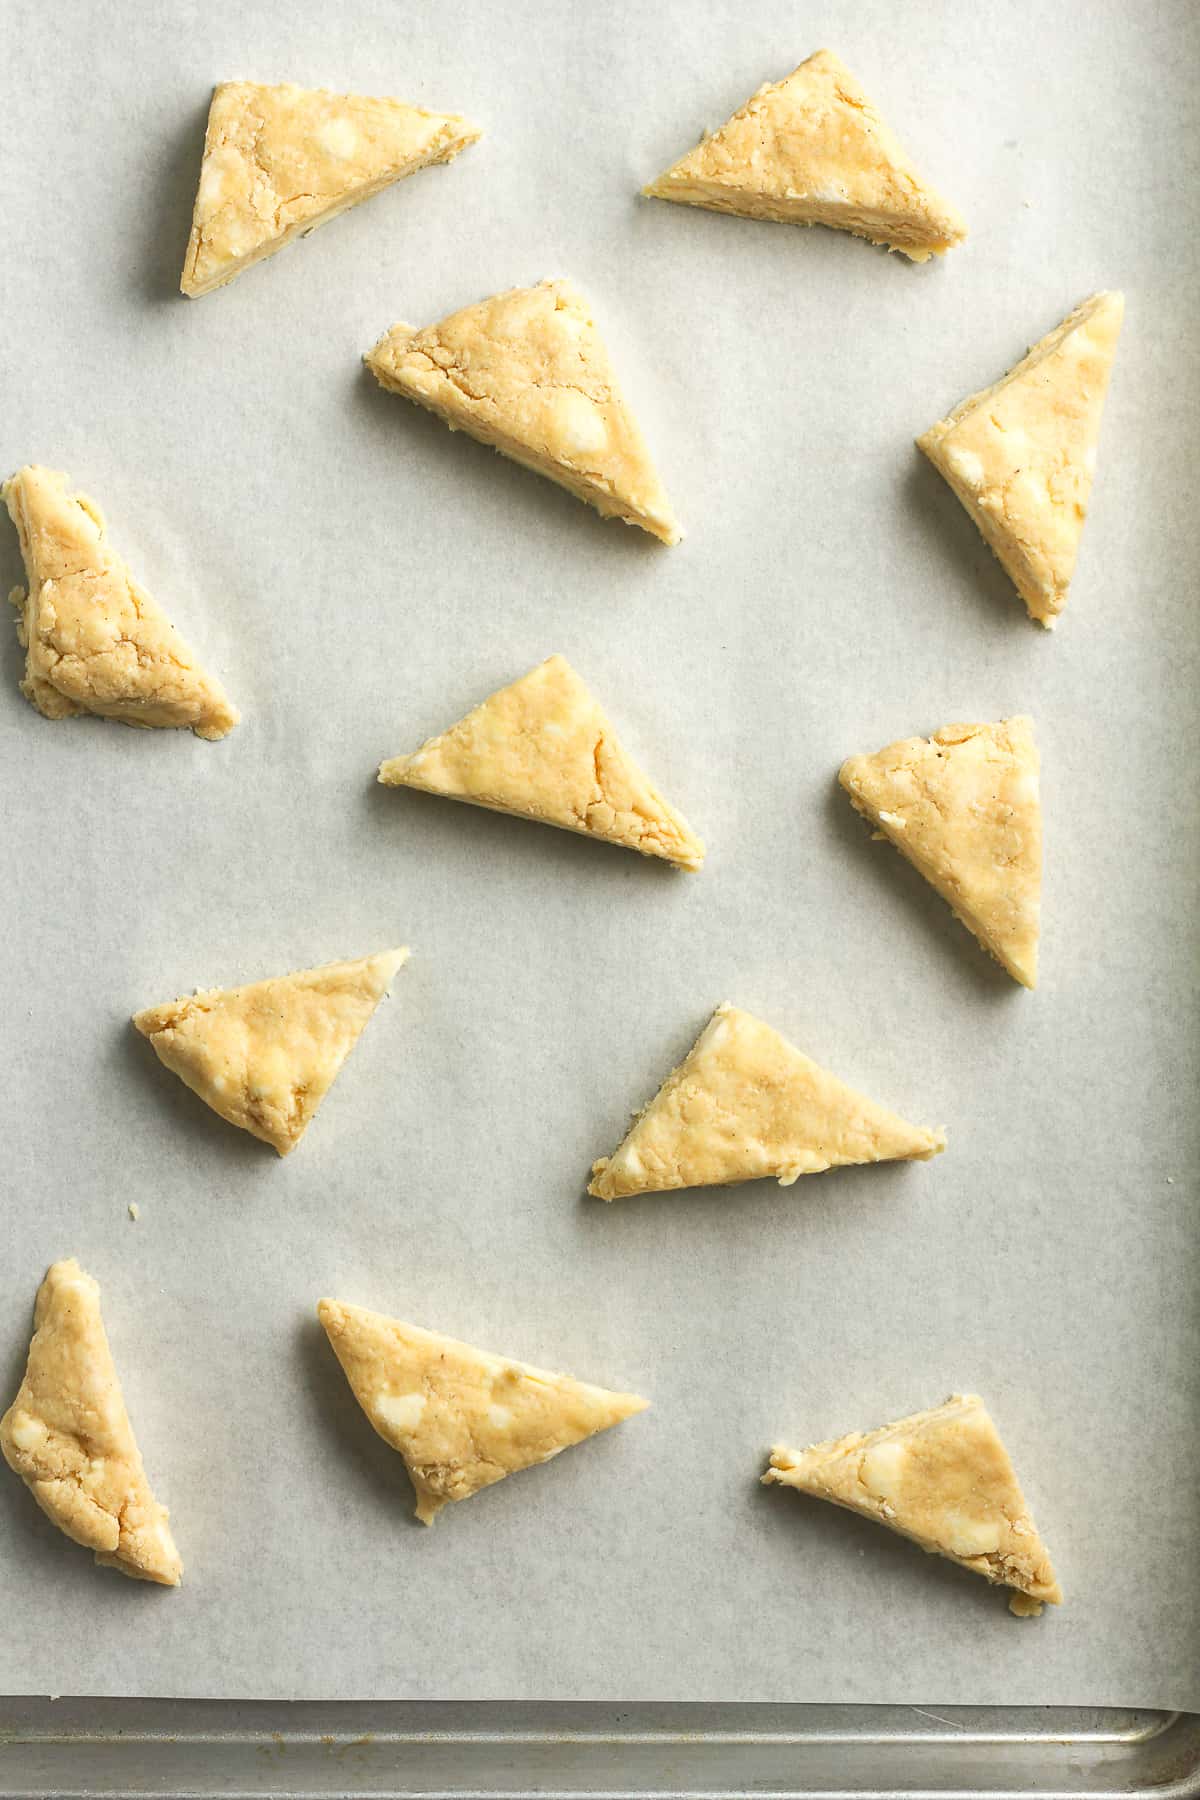
Slice the dough into 24 equal-sized triangles. See photo below. Transfer triangles to two baking sheets lined with parchment paper.
This is when I often chill the scone triangles in the refrigerator for a couple of hours to overnight. It’s important to keep the scone dough well chilled before baking.
Step 7
Prepare for baking. Preheat your oven(s) to 400 degrees.
Step 8
Bake. Bake the scones for 14-16 minutes, or until lightly browned on top. If using one oven, you’ll need to rotate the pans between shelves. Remove scones to cooling racks.

Step 9
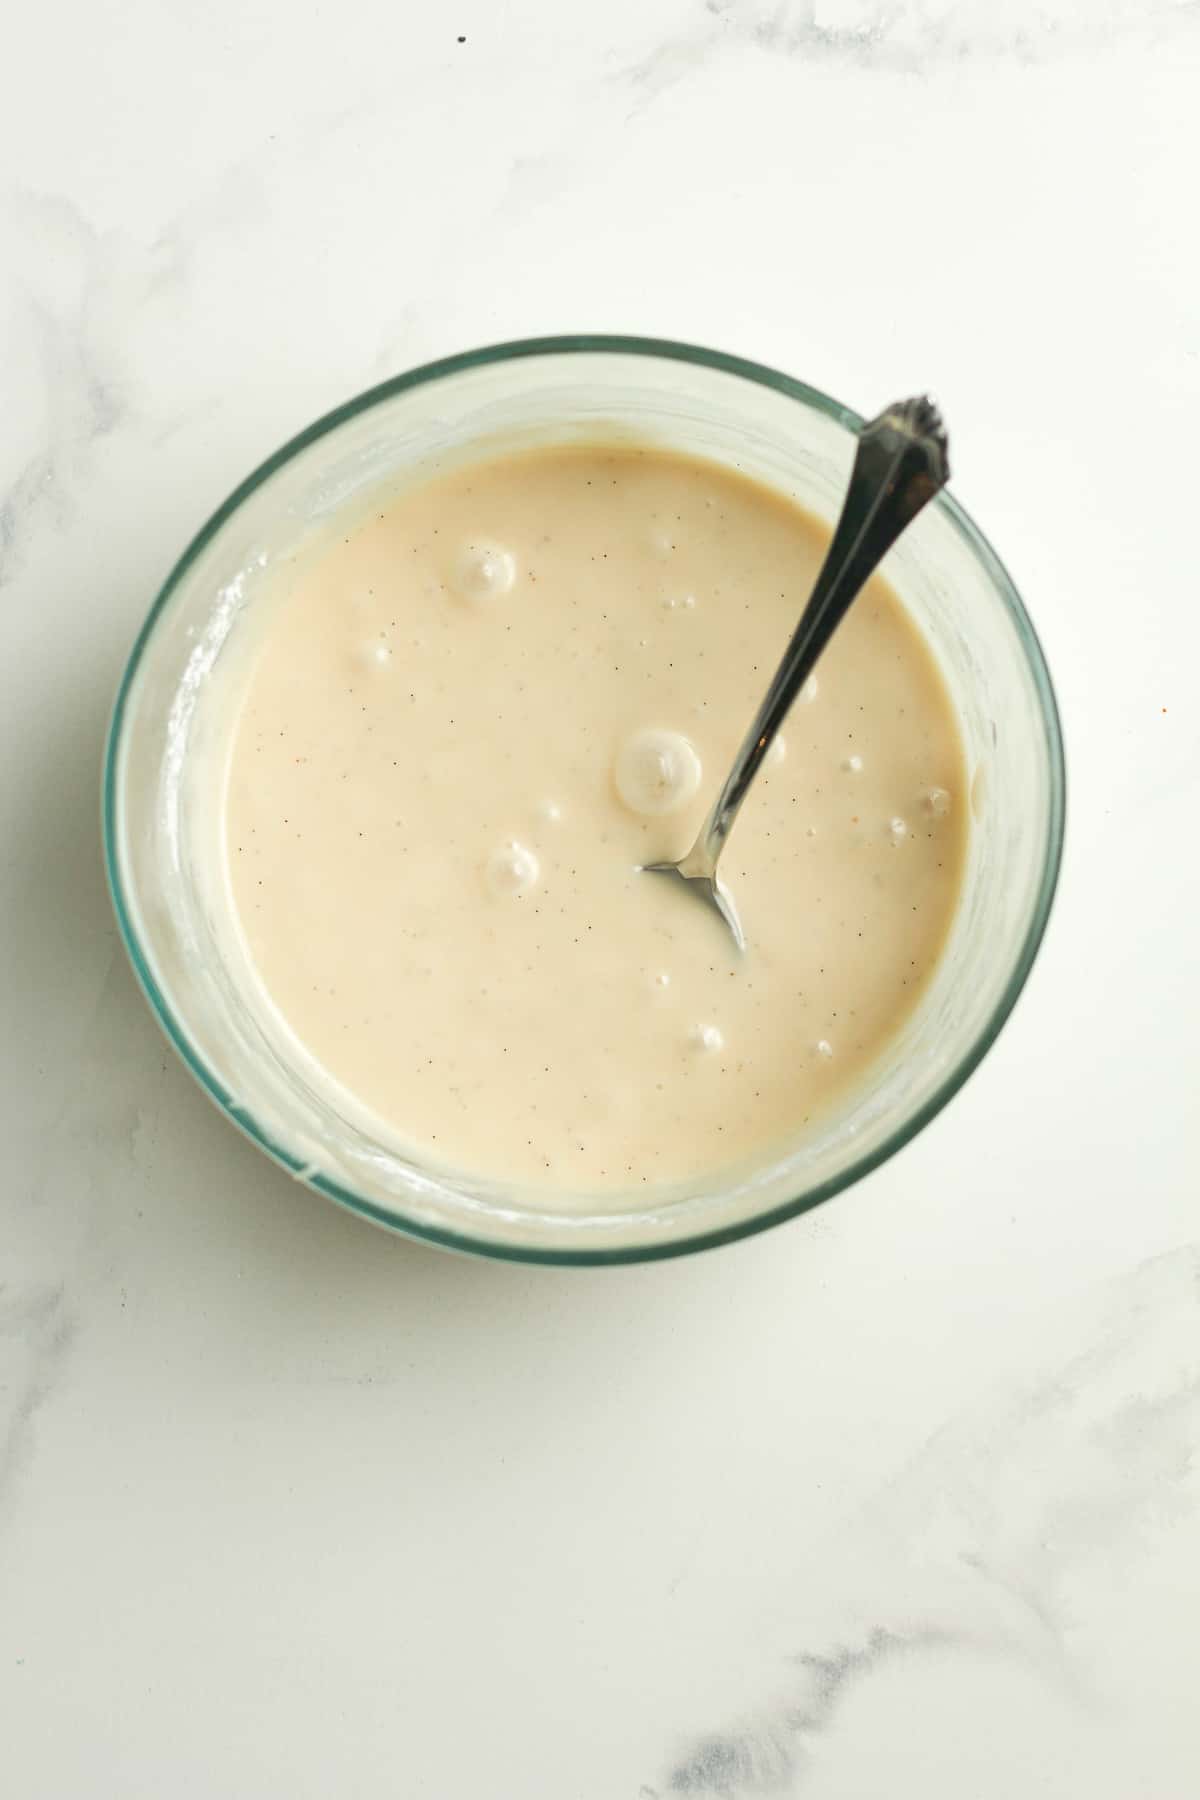
Make glaze. In a small bowl, combine the glaze ingredients – the melted butter, brewed coffee, vanilla bean paste, and sifted powdered sugar. Mix until well combined.
Step 10
Add glaze to scones. When scones are cooled, add the glaze and let it set.

Recipe Tips
- Frozen butter works best. I usually cube the butter and then stick it in the freezer the day before (or an hour before) I make these scones.
- When you mix the wet ingredients with the dry, be careful to add JUST enough so that the dough is not too wet. (If your dough is too wet, the scone will not be crumbly. It will be more like a muffin.)
- If the dough gets too wet, add more flour. If the dough is too dry and won’t stay together, add more cream VERY slowly (just a few drops at a time).
- Use flour on your baking mat to prevent the dough from sticking to it.
- Be careful to not over-bake.
Recipe FAQs
Yes, you can. Just scrape the beans with a knife and add to wet ingredients, mixing thoroughly. You may need to add a few extra drops of cream as well.

Kitchen Tools Used: (affiliate links)
xoxo ~Sue

Petite Vanilla Bean Scones with Vanilla Bean Glaze
Ingredients
For the scones:
- 2.5 cups all-purpose flour
- 1/3 cup sugar
- 1 1/2 Tablespoons baking powder
- 1/2 teaspoon salt
- 1 cup cold butter – cubed and frozen
- 1 large egg
- 1/2 cup heavy cream – you may need a few more drops
- 1 teaspoon pure vanilla bean paste – or use regular vanilla
For the glaze:
- 1 ½ Tablespoons heavy cream
- 1 Tablespoon brewed coffee
- 1 teaspoon pure vanilla bean paste – or use regular vanilla
- 2 cups powdered sugar
Instructions
- **Please read the blog post for more details!
- Prepare frozen butter. Dice the butter into small little cubes, and place in the freezer in advance of making these. I normally do this the day before I make scones, but you could prep it an hour beforehand as well.
- Combine the dry ingredients. In a mixing bowl, combine the dry ingredients – the flour, sugar, baking powder, and salt. Stir to combine.2.5 cups all-purpose flour, 1/3 cup sugar, 1 1/2 Tablespoons baking powder, 1/2 teaspoon salt
- Combine the wet ingredients. In a measuring cup, combine the egg, heavy cream, and vanilla paste. Mix well and then store in the refrigerator to keep it cold until ready to use.1 large egg, 1/2 cup heavy cream, 1 teaspoon pure vanilla bean paste
- Add frozen butter to dry mixture. Add the frozen butter to the dry mixture and cut it in with a pastry cutter or your hands. Mix until it resembles course crumbs.1 cup cold butter
- Add the wet ingredients to the dry ingredients. Add the wet ingredients, and stir with a spoon until it forms a shaggy ball. If the mixture is too dry, you may need to add in a few drops of heavy cream until it comes together.
- Shape the dough. Remove the scone mixture to a baking mat that’s been dusted with flour (to prevent sticking). Use your hands to form it into a rectangle, patting it into a rectangle about 1/2 inch thick. (Try not to over-handle the dough.)
- Slice the dough into 24 equal-sized triangles. Transfer triangles to two baking sheets lined with parchment paper. (This is when I often chill the scone triangles in the refrigerator for a couple of hours to overnight. It’s important to keep the scone dough well chilled before baking.)
- Prepare for baking. Preheat your oven(s) to 400 degrees.
- Bake. Bake the scones for 13-14 minutes, or until lightly browned on top. If using one oven, you’ll need to rotate the pans between shelves. Remove scones to cooling racks.
- Make glaze. In a small bowl, combine the glaze ingredients – the heavy cream, brewed coffee, vanilla bean paste, and sifted powdered sugar. Mix until well combined.1 ½ Tablespoons heavy cream, 1 Tablespoon brewed coffee, 1 teaspoon pure vanilla bean paste, 2 cups powdered sugar
- Add glaze to scones. When scones are cooled, add the glaze and let it set.
These are super delish!! Since they are mini I can easily eat 3 or more. 🙂
Thanks Shari! 🙂
These scones look so delicious and would be perfect for weekend brunch!
Thank you so much, Natalie! ?
I agree with Zach. The best scone ever! Enough said….